Thingiverse
Nano Pi2 UMPC by Pole_ergo
by Thingiverse
Last crawled date: 3 years ago
Update 24/04/18 : Thanks to Ddrl48 (check comments), the LCD cover file needs to be flip before lauching the print.
Update 12/11/2017 : Experimentation of the Zortrax Z-ESD technical filament.https://store.zortrax.com/zortrax-m200-z-esd
Thanks to Zortrax who sent me, for experimentaton, this filament to print with the Nano Pi2 case.
The interest of this Z-ESD filament is to have protective characteristics against electrostatic discharges.
It is therefore particularly suitable for the integration in plastic boxes of electronic assemblies.
As can be seen in the photo, its appearance is a little brighter than the ABS black proposed by Zortrax. The printing time is longer and it takes 1 hour more, at equivalent thickness, than with the Z-ABS.
With this Z-ESD filament, we find all the characteristics of the Nano Pi2 case in every detail. The surface finish is very finely granular and therefore slightly less smooth than with the Z-ABS.
All in all, a filament as simple to print as standard ABS, but offering superior strength and above all, real antistatic capabilities capable of protecting the electronics.
Update 09/11/2017 : Nano Pi2 docking station/Developpement kit : https://www.thingiverse.com/thing:2633698
Update 08/11/2017 : Nano Pi2 Webcam & solar charger LCD case : https://www.thingiverse.com/thing:2633551
Pursuing this exercise of integration and design of cases, here is the intermediate stage towards the development of a complete computer, in the UMPC size, running the Raspberry Pi version 2 board.
In this stage, it is the integration of a smaller screen but while keeping the same screen resolution of screen, which carries the work: the challenge consists here in not exceeding the size been imperative by the keyboard.
On the previous project Raspberry UMPC (https: // www.thingiverse.com / thing:2430252), the interface allowing to connect the screen mobilizes the GPIO port of Raspberry preventing the development of the other projects. That is why it showed itself simpler and more convenient to exploit the HDMI port but in a different format to authorize a big compactness but also an exploitation of the Raspberry port.
This miniaturization is interesting in terms of usesand mobility but more demanding regarding practical realization.
The stage is intermediate because the wireless connections is not integrated, the power is reduced compared with the third version of Pi, there is no sound and the battery allows a use, with WIFI and Bluetooth on, only for about twenty minutes.To finish, it is necessary to manage actively the strong heating of Raspberry Pi3.
Furthermore, this project is more complex and asks for an equipment (soldering for SMT component) and training to succeed in modifying electronic boards and in modifying the connector HDMI without destroying anything.
On this matter, several Raspberry Pi and screens were destroyed by my care to succeed in realizing this project ! That is why I propose, if you plan to realize Nano Pi2 and if you wish to contribute to the development of this project, please download files from Cults3D : https://cults3d.com/fr/gadget/nano-pi2-umpc. Thank you for your help !
Finally, the first Raspberry UMPC project provoked a big interest for this computer to the point that he could possibly become a commercial project under the shape of a DIY kit for example. If you are interested, you can answer the following questionnaire to help to determine if this idea is viable: https://goo.gl/forms/Gfs5fyGjNHq9FU3E3. Thank you for your opinion !
Poursuivant cet exercice d'intégration et de conception de boitiers, voici l'étape intermédiaire vers la mise au point d'un ordinateur complet, au format UMPC, exploitant la carte Raspberry Pi version 2.
Dans cette étape c'est sur l'intégration d'un écran plus petit mais conservant la même résolution d'écran, que porte le travail : le défi consiste ici à ne pas dépasser la taille imposée par le clavier.
Sur le précédent projet Raspberry UMPC (https://www.thingiverse.com/thing:2430252), l'interface permettant de connecter l'écran mobilise le port GPIO du Raspberry empêchant le développement d'autres projets. C'est pourquoi il s'est révélé plus simple et commode d'exploiter le port HDMI, mais dans un format différent, afin d'autoriser une grande compacité mais également l'exploitation du port du Raspberry.
Cette miniaturisation est intéressante en termes d'usages et de mobilité mais plus exigeante en matière de réalisation pratique.
L'étape est intermédiaire car la connexion sans fils n'est pas intégrée, la puissance est réduite par rapport à la version Pi3, il n'y a pas de son et la batterie ne permet un usage, avec WIFI et Bluetooth, que d'une vingtaine de minutes. Pour finir, il est nécessaire de gérer activement le fort échauffement du Raspberry Pi3.
De plus, ce projet est plus complexe et demande un équipement (soudage de composant CMS) et de l'entrainement pour parvenir à modifier les cartes électroniques et modifier le connecteur HDMI sans rien détruire.
A ce sujet, plusieurs Raspberry Pi et des écrans ont été détruits par mes soins pour parvenir à réaliser ce projet ! C'est pourquoi je propose, si vous planifiez de réaliser le Nano Pi2 et si vous désirez contribuer au développement de ce projet, merci de télécharger les fichiers disponibles sur Cults3D : https://cults3d.com/fr/gadget/nano-pi2-umpc. Merci pour votre aide !
Enfin, le premier projet Raspberry UMPC a provoqué un grand intérêt pour cet ordinateur au point qu'il pourrait éventuellement devenir un projet commercial sous la forme d'un kit par exemple. Si vous êtes intéressé, vous pouvez répondre au questionnaire suivant afin d'aider à déterminer si cette idée est viable : https://goo.gl/forms/Gfs5fyGjNHq9FU3E3. Merci pour votre avis !
Présentation du NANO Pi2 : https://youtu.be/Qcx_SnriwhU
Liste des composants (voir photo) :
Pour réaliser le NANO Pi2, ces composants seront nécessaires :
Raspberry Pi2,
Un micro clavier bluetooth RT-MWK518BT,
un module Powerboost 1000 de Adafruit,
Un écran LCD IPS HDMI 4' de Waveshare : http://www.waveshare.com/4inch-hdmi-lcd.htm
Une batterie 3,7V 1500 MAh format 752080,
2 connecteurs pour PCB FFC/FPC 20 broches : http://uk.farnell.com/c/connectors/ffc-fpc-board-connectors?DM_PersistentCookieCreated=true
1 cable FFC/FPC 20 broches inversé de 10cm : https://www.aliexpress.com/cheap/cheap-fpc-20-cable.html
Préparation du Raspberry :
A faire avant toute modification du Raspberry : Préparer la carte SD du Raspberry en suivant les instructions proposées par Waveshare pour l'utilisation de l'écran. Pairer le clavier bluetooth, paramétrer la connexion WIFI. Vérifier que tout fonctionne.
(Attention, cette intervention annule la garantie et peut détruire le Raspberry en cas d'erreurs)
Afin d'intégrer le Raspberry dans le boitier, il est nécessaire de le dépouiller de pratiquement tous les connecteurs dont il est pourvu sauf le port GPIO. Pour ce faire, il est possible de suivre les conseils proposés par Adafruit : https://learn.adafruit.com/diet-raspberry-pi/steps. Souder le connecteur FFC/FCP à la place du connecteur HDMI.
Preparation of Raspberry:
To make before any modification of Raspberry : Prepare the SD card of Raspberry by following the instructions proposed by Waveshare for the lcd panel. Paired the bluetooth keyboard, parametrize the WIFI connection. Verify that everything works.
( Watch out, this intervention cancels the guarantee and can destroy Raspberry in case of errors)
To integrate Raspberry into the case, it is necessary to deprive it of practically all the connectors with which it is provided except the GPIO port. To do it, it is possible to follow the advice proposed by Adafruit: https://learn.adafruit.com/diet-raspberry-pi/steps. Solder the FCP/FFP connector instead of the original HDMI one.
Clavier :
(Attention, cette intervention annule la garantie)
Démonter le clavier, décoller et dessouder la batterie (Attention danger de court circuit) de façon à dégager la platine électronique.
Câbler la platine pour l'alimentation en 3,7 volts pris Raspberry Pi aux point PP8 pour 3V3 et PP3 pour la masse.
Keyboard:
( Watch out, this intervention cancels the guarantee)
Tear down the keyboard, peel back and unsolder the battery (Warning danger of short circuit) so as to release the electronic deck.
Cable the deck for the supply in 3,7 volts taken by the Raspberry Pi board on Pad PP8 for 3V3 and PP3 for GND.
Ecran :
Préparer l'écran en décollant le paneau LCD (Attention très fragile : casse facilement...). Nettoyer les deux surfaces : platine et écran en ôtant le ruban adhésif. Supprimer tous les connecteurs, souder le connecteur FFC/FPC à la place du HDMI. Retailler la platine électronique de l'écran. Garder le petit interrupteur et câbler l'allumage du retro éclairage. Voir photos.
Screen:
Prepare the screen by unsticking the LCD panel (very fragile Warning : break very easily...). Clean both surfaces: board and LCD backward by removing the adhesive tape. Deprive all the connectors, solder the connector FFC / FPC instead of the HDMI. Recut the electroni board. Keep the micro switch and cable the ignition of the backlight. See photos.
Batterie :
(Attention : respecter les précautions d'usage et manipulation des batteries Li-Ion qui peuvent prendre feu et exploser en cas de mauvaise manipulations)
Supprimer le connecteur de batterie, souder les fils de la batterie à la place. Utiliser le petit interrupteur et le cabler pour commander la mise sous tension du powerboost. Câbler l'ensemble selon le mode d'emploi proposé par Adafruit pour son module.
Battery:
( Warning : respect usual precautions and manipulation of batteries Li-Ion which can catch fire and explode in case of bad manipulations)
Delete the connector of battery, solder the battery wires instead. Use the small switch and cable it to command the switched on of the powerboost. Cable the set according to the instructions for use proposed by Adafruit for his module.
Montage : suivre la vidéo sur le making of
Assembling : follow the making of video : https://youtu.be/8U7VZhNOIM4
Si vous n'avez pas d'imprimante 3D, les pièces peuvent être commandées sur Shapeways :
For those who have not a 3D printer, parts of this kit can be ordered on Shapeways : https://www.shapeways.com/product/K9XTBZFWC/?key=e4bc25d98178e318ddeb6fc5f7af49de
Similar models
thingiverse
free

Nano Pi2 docking station/Dev. kit by Pole_ergo
...de le coller.
ici encore, cette extension pour développement électronique est largement disponible sur les sites d'enchères.
cults
$2
CADIC Philippe
...cadic philippe
cults
boitier pour raspberry pi2 équipé d'un écran hdmi 5 pouces. pour protéger la machine.
thingiverse
free

Raspberry UMPC by Pole_ergo
... those who have not a 3d printer, parts of this kit can be ordered on shapeways : https://www.shapeways.com/shops/modular_designs
thingiverse
free

Connecteur de ventilateur pour Raspberry Pi / Fan connector by Aklain52
...ontact efficace.
les ventilateurs 12v tournent moins vite en 5v mais cela est largement suffisant pour refroidir le raspberry pi.
thingiverse
free
Support boitier de contrôle Tevo Tornado et déplacement de l'écran + MKS TFT 32 by MrCyrille
... écran mks tft 32 tactile.
il vous suffira juste de rallonger les 2 connecteurs de l'écran d'origine à la bonne longueur.
thingiverse
free
Android Nano Computer by Aganyte
...ine et la remplacer par un chargeur 5v - 2a.
le bouton de mise en route (format 12mm) est soudé en parallèle sur celui d’origine.
thingiverse
free
Boitier Raspberry Pi Zero W avec Pi Camera V2 by NCNETFR
...y a suffisament de place pour des broches sur le gpio.
quatre vis m3x10 tête cylindrique seront nécessaire pour l'assemblage.
thingiverse
free

Support Raspberry PI by Ocbsd
...des vis avec des entretoises de 2.5 mm.
l'espacement des trous est celui du raspberry pi 4, et est identique à la carte x857.
cults
$7

Nano Pi2 UMPC
...the small switch and switch it to the powerboost. cable the set according to the instructions for use by adafruit for his module.
thingiverse
free

Nano Pi2 Webcam & solar charger LCD case. by Pole_ergo
...;oubliez pas d'installer une diode antiretour afin d'éviter le passage du courant de la batterie dans le panneau solaire.
Umpc
thingiverse
free

zuk z2 UMPC linux by waterc
...inux deploy" app on android
2 m2 m2 screw
3d print part (must be edit to fit your phone this is for zuk z2+ silicon sofcase)
thingiverse
free
Raspberry UMPC by Pole_ergo
... those who have not a 3d printer, parts of this kit can be ordered on shapeways : https://www.shapeways.com/shops/modular_designs
thingiverse
free

Swivel Hinge UMPC
...rom the pi gpio)
leonardo pro micro arduino
trackball driver: (not made by me)https://github.com/lschyi/blackberry-mini-trackball
thingiverse
free

mutantC_v2- An open Raspberry Pi UMPC/Handheld by rahmanshaber
...irc where you can ask me about the project here.
here is offical youtube channel where i post videos here.
project website here.
thingiverse
free

Raspberry pi 3b with 4" Waveshare screen Laptop by Virgilius1995
...with the screw holes for the screen) for a umpc case for the raspberry pi 3b with a waveshare...
thingiverse
free
Nano Pi2 docking station/Dev. kit by Pole_ergo
...de la mise au point du projet nano pi2 umpc afin de l'exploiter au mieux, le support présenté ici...
grabcad
free

Padre UMPC for "S" Company
...padre umpc for "s" company
grabcad
2004 project
intel dothern cpu + windowxp
grabcad
free

UMPC integrated keyboard for "S" Company
...umpc integrated keyboard for "s" company
grabcad
2004 project
intel dothern cpu + windowsxp
cults
$7
Nano Pi2 UMPC
...the small switch and switch it to the powerboost. cable the set according to the instructions for use by adafruit for his module.
Pi2
thingiverse
free

Pi2-hanger by Noerdz
...pi2-hanger by noerdz
thingiverse
no case for the pi then hang it.
thingiverse
free

Pi2 top without gpio by dalefukami
...pi2 top without gpio by dalefukami
thingiverse
removed the gpio access
thingiverse
free

Raspberry pi2 case box custom external modules by cinidavide
...raspberry pi2 case box custom external modules by cinidavide
thingiverse
pi2 case.
used to install custom electronics board.
thingiverse
free

Kinect and Raspberry Pi2 with display mount by l_k3
...a proof of concept for a raspberry pi2 and ms kinect 1 based standalone 3d scanner.
https://www.youtube.com/watch?v=dmxkp98by-w
thingiverse
free

Raspberry Pi2 Kossel Mount by Simonwlchan
...o the kossel's rail. i remade the ethernet/ usb side because it broke from previous use.
parts snap on, no screws required.
thingiverse
free

Zumo Robot Base for Raspberry Pi B+, Pi2, Pi3 by shamrage
...zumo robot base for raspberry pi b+, pi2, pi3 by shamrage
thingiverse
zumo robot base for raspberry pi b+, pi2, pi3
thingiverse
free

Raspberry Pi2 Mount by PeterG79
...for my magic mirror project since i wanted to screw the mount to the frame.
it holds the pi, the mirror and the tft in the frame.
thingiverse
free

HiFiBerry DAC + Raspberry Pi2 case (RPi2, RPi B+) by Smuk3D
...hingiverse
case designed for a raspberry pi2 + hifiberry dac shield.
i run volumio.org on it
thanks ultiarjan your base work
thingiverse
free

Nano Raspicade V2 for B+ and Pi2 by ian57
...screen from banggood : http://www.banggood.com/3_2-inch-tft-lcd-display-module-touch-screen-for-raspberry-pi-b-b-a-p-1011516.html
thingiverse
free

CTC Dual Fix for Raspberry Pi2 by robomodell
...spberry pi2 by robomodell
thingiverse
to fix the box on ctc dual on original bolt
the boxhttp://www.thingiverse.com/thing:922740
Ergo
turbosquid
$30
ergo
... available on turbo squid, the world's leading provider of digital 3d models for visualization, films, television, and games.
3ddd
free

HOESCH - ergo
...hoesch - ergo
3ddd
hoesch , ванна
акриловая ванна hoesch-ergo размерами 2075х1075мм.
3ddd
$1
MP3 Ergo Zen Clip
...o , mp3 , плеер
модель mp3 плеера ergo zen clip
3ddd
$1
Ergo E32C20 LCD Tv
...ergo e32c20 lcd tv
3ddd
ergo , телевизор
материалы и текстуры присутствуют
turbosquid
$9

ERGO black coin
...id
royalty free 3d model ergo black coin for download as max on turbosquid: 3d models for games, architecture, videos. (1496182)
turbosquid
$9

ERGO gold coin
...uid
royalty free 3d model ergo gold coin for download as max on turbosquid: 3d models for games, architecture, videos. (1496179)
turbosquid
$20

Rattan furniture ERGO
... available on turbo squid, the world's leading provider of digital 3d models for visualization, films, television, and games.
turbosquid
$10

Ergo Suspended Light
... available on turbo squid, the world's leading provider of digital 3d models for visualization, films, television, and games.
turbosquid
free

Ergo Road Handlerbars
... available on turbo squid, the world's leading provider of digital 3d models for visualization, films, television, and games.
archive3d
free

Ergo Libs 3D Model
...ergo libs 3d model
archive3d
сabinet case
Nano
3d_export
$20

nano astronaut
...nano astronaut
3dexport
turbosquid
$29

robot nano
...bosquid
royalty free 3d model robot nano for download as 3ds on turbosquid: 3d models for games, architecture, videos. (1658714)
3ddd
free
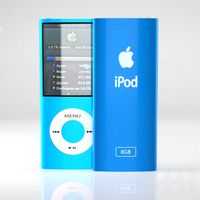
iPod nano 4G
... nano 4g
3ddd
ipod , apple , плеер
ipod nano 4g
3d_export
$6

Nano Katana
...nano katana
3dexport
3ddd
free
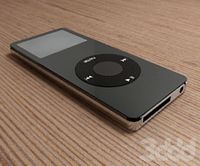
iPod Nano
...ipod nano
3ddd
apple , плеер
d
turbosquid
$80

NANO CAR
... available on turbo squid, the world's leading provider of digital 3d models for visualization, films, television, and games.
turbosquid
$20
nano house
... available on turbo squid, the world's leading provider of digital 3d models for visualization, films, television, and games.
turbosquid
$18

nano house
... available on turbo squid, the world's leading provider of digital 3d models for visualization, films, television, and games.
turbosquid
$5
Ipod nano
... available on turbo squid, the world's leading provider of digital 3d models for visualization, films, television, and games.
3ddd
$1
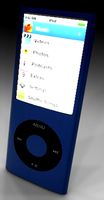
iPod nano 6
...ipod nano 6
3ddd
apple , плеер
модель ipod nano 6, моделировался по чертежу.
Pole
turbosquid
$3

Pole Vault - Pole Stand
... available on turbo squid, the world's leading provider of digital 3d models for visualization, films, television, and games.
turbosquid
$1

A Pole
...
turbosquid
royalty free 3d model a pole for download as fbx on turbosquid: 3d models for games, architecture, videos. (1687003)
3ddd
free

Poles salotti
... , капитоне , угловой
диван
poles salotti sofa
turbosquid
$10

pole A
...quid
royalty free 3d model pole a for download as ma and max on turbosquid: 3d models for games, architecture, videos. (1409150)
turbosquid
$1

pole
...
royalty free 3d model pole for download as max, obj, and fbx on turbosquid: 3d models for games, architecture, videos. (1437328)
turbosquid
$14
pole
... available on turbo squid, the world's leading provider of digital 3d models for visualization, films, television, and games.
turbosquid
$4

Pole
... available on turbo squid, the world's leading provider of digital 3d models for visualization, films, television, and games.
turbosquid
free

Pole
... available on turbo squid, the world's leading provider of digital 3d models for visualization, films, television, and games.
3d_ocean
$14

Telephone Pole
...s electricity pole road telephone telephone pole wire
model of a telephone pole made in cinema 4d. files included: .c4d .3ds .obj
3d_export
$5
Electric pole
...electric pole
3dexport
electric pole for street, electricity line