Thingiverse

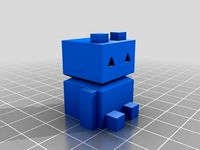
Mystic Turtle's Calibration Station
by Thingiverse
Last crawled date: 4 years, 3 months ago
THIS TEST IS FOR CALIBRATING YOUR EXTRUSION MULTIPLIER AND OR OFFSETS TO ACHIEVE ACCURATE DIMENSIONS ON A VARIETY OF PART FEATURES.
NOTE: The default units in most of these files is mm. if you try to open these documents with inches as your default unit it will end up being rather large.
For your convenience, i have added a version of each of these files with inches set as the default document unit.
NOTE: Please check out "PRO TIPS" and links to helpful youtube videos that show you everything i am talking about on this page.
Intro:
I work at a fairly large factory in the research and development department. We have an aluminum extrusion press for making our own materials and I check new die samples to ensure everything is within tolerance before we let it run through assembly. Short story is, I do lots of measuring and lots of fabrication/machining of prototypes in my line of work, and I am rather obsessed with precision.
This test is for those of you who are also obsessed with precision and accuracy in your work.
I tried to include most common measurements one would need to ensure accurate printing of a multitude of common parts/part features while making it easy to measure with a pair of dial calipers and a classic protractor.
Instructions:
To complete the full test you will need a pair of dial calipers. As well as a 1/4"-20 bolt and a nut. ( This is all in English Standard Units. Sorry to the rest of the world, if you need a metric version please let me know and I can make one.)
There are two versions of each file.
One is lower resolution, for much smaller g-code files. The drawback is that you will have facets on your filleted surfaces (for testing radius with a radius gauge).
The other is high resolution, but the g-code file will be a doozy and your printer may or may not like it depending on how fast it can process all those tiny fillets.
NOTE: There is also a Mini Calibration Center version without text on it. When I printed it with a .6mm nozzle the text is not legible and the edges on that side were skewed.
If you have a smaller nozzle you run, you may wish to text its small text capabilities.
You can print these files at whatever settings you are trying to use regularly for your parts, though make sure you have your cooling and temps figured out to prevent warping of the base on the full test. IF FULL TEST BASE IS WARPED DIMENSIONS WILL BE SKEWED!
The mini calibration center file is a 1"x1"x.25" print. This was designed to allow you to check all the main stuff quickly, both printing and measuring, while using very little of your time and filament. One could also use it for quick periodic checking of your printers accuracy after the tuning is completed. I printed this with a 600 micron nozzle and it used 6 grams of filament and took about 5 minutes to print. (est cost based on $20 roll of 1kg 1.75mm filament is 12 cents.)
After you think you about have it dialed in, go ahead and do the full test.
The big one will take much longer to print comparatively, and use more filament at 4"x4" with a few tall features. However, it will also allow you to spot check your printer on nearly any common part feature type across all of its axis/planes. This one on a 600 micron nozzle takes 79 grams of filament and about 2.5 hours. (est cost based on $20 roll of 1kg 1.75mm filament is $1.65.)
The full test does include a threaded feature, both male and female. One can test these features with commonly available (in the US anyways) and inexpensive hardware you may already have laying about your workshop. If you do not have it, go to your local hardware store and you can likely purchase a small 1/4"-20 COARSE THREAD bolt and nut for around 15-20 cents per item. This is so you can make sure your tolerances are tight enough to utilize pre-existing hardware and components in your designs.
This does not have an overhang feature simply because, if all of the features on the full test are placed/measure correctly, your printer will likely have no trouble printing an overhang correctly via a series of shapes shifting over the XY plane.
PLEASE SEE ATTACHED DRAWING IMAGES TO REFERENCE DIMENSIONS YOU NEED TO CHECK.
There is both a JPG screen shot and a much higher resolution PDF document you can view.
If you wish to have accurately scaled printed pages on the PDF. You need to turn off "adjust image to fit page size" or some similar setting you find. Then, set 1:1 scaling on your printer (1:1 scale is included on these drawings). Both of these drawings are sized for standard size A paper (8.5"x11").
Dimensions will be shown down to 0.0000" tolerance where necessary. (0.0625 is 1/16")
Quote:
"It is simple to design something that is quite complicated. Though it is quite complicated to design something that is simple."
Conclusion:
I sincerely hope this helps some of you on your journey to making accurate custom parts for your designs!
This is the first "Thing" I have made for ThingiVerse. As I generally keep my designs to myself since many of them are business related.
I tried to make it quite thorough and informative.
If you liked this and would like to see more/similar things, or have any suggestions, please up-vote it and let me know in the comments!
Similar models
thingiverse
free

Hexagon Calibration Block by Time4PlanB
...ial in dimensional tolerances of your printer.
block measures 0.75" hexagon, 0.5" tall, 0.25" hole through center.
thingiverse
free

Ender 3 Refined Bed Level Test & Calibration by cyron52
... ender 3 level test
maxwellhau5caffy - bed level ender 3 / ender 3 pro
adamsiem - ender 3 pro bed level test + calibration wizard
thingiverse
free

Calibration: Tolerance | Parametric by Duckle
...rametric by duckle
thingiverse
this is a calibration test for your printer. it's made to test the tolerance you can achieve.
thingiverse
free
Calibration bear by Automeow_3D
..._3d
thingiverse
this is a 20/20 mm calibration bear that i have designed so that you can test your 3d printer's calibration.
thingiverse
free
3D Printer Calibration Piece by JP1
...com/thing:4579156
the tighter tolerance clips will allow you to use designs with 0.1mm clearances between flat assembly surfaces.
thingiverse
free

CalPal printer calibration by Teljemo
...d! the bridge part only.. if you having problems with the bridge.. just tune that in and then move on to the full calpal again :)
thingiverse
free

Filament Clip by Alexis67
...tween the "fork" and the tolerance for your 3d printer :).
if you have any questions with the equations, i can help you
thingiverse
free

Tight Tolerance Calibration Clips by JP1
...clearances between flat assembly surfaces can be used with similar results to what these clips will give you. you...
thingiverse
free

Calibration cube box by HodgerTech by DemicDesigns
...0mm high and 40mm in the x and y coordinates.
i hope this helps! any way to improve on the method please let me know thank you!!!
thingiverse
free

Calibration Pyramid
...red by this article on matterhackers website : https://www.matterhackers.com/articles/top-ten-prints-to-calibrate-your-3d-printer
Mystic
3d_export
$15

Mystical portal
...mystical portal
3dexport
mystical portal
turbosquid
$10

Mystic Collection
...
royalty free 3d model mystic collection for download as obj on turbosquid: 3d models for games, architecture, videos. (1312772)
turbosquid
$10

Mystic Deer
...osquid
royalty free 3d model mystic deer for download as fbx on turbosquid: 3d models for games, architecture, videos. (1577083)
turbosquid
$20

Mystic Shell
... free 3d model mystic shell for download as obj, fbx, and dae on turbosquid: 3d models for games, architecture, videos. (1486395)
turbosquid
$45

Mystical Dagger
... available on turbo squid, the world's leading provider of digital 3d models for visualization, films, television, and games.
turbosquid
$19

lamp Mystic
... available on turbo squid, the world's leading provider of digital 3d models for visualization, films, television, and games.
turbosquid
$15

Mystic Pavillion.max
... available on turbo squid, the world's leading provider of digital 3d models for visualization, films, television, and games.
3ddd
$1

Mystic Reflections Art
...mystic reflections art
3ddd
mystic reflections art
.obj with 3dsmax 2010 version attacted here ...
3d_export
$8

Mystic Waters 3D Model
...mystic waters 3d model
3dexport
mystic waters 3d textures
mystic waters 3d model silver_fox_rival 8545 3dexport
3d_export
$8

Mystical pillar with faces
...ar with faces
3dexport
a mystical pillar with faces - this mysterious structure can be part of magical architecture or a temple.
Turtle
3d_ocean
$13

Sea turtle
...sea turtle
3docean
lowpoly sea turtle
3d model of sea turtle.
turbosquid
$5

Turtle
...tle
turbosquid
royalty free 3d model turtle for download as on turbosquid: 3d models for games, architecture, videos. (1589591)
turbosquid
$10

Turtle
...urbosquid
royalty free 3d model turtle for download as blend on turbosquid: 3d models for games, architecture, videos. (1228808)
turbosquid
$10

turtle
...
turbosquid
royalty free 3d model turtle for download as obj on turbosquid: 3d models for games, architecture, videos. (1560876)
turbosquid
$15

Turtle
...uid
royalty free 3d model turtle for download as max and fbx on turbosquid: 3d models for games, architecture, videos. (1707353)
turbosquid
$14

turtle
...uid
royalty free 3d model turtle for download as stl and obj on turbosquid: 3d models for games, architecture, videos. (1701199)
3d_ocean
$15

Comic Turtle
...comic turtle
3docean
boy comic funny green low model poly turtle
low poly model of turtle.
turbosquid
$29

Turtle
...royalty free 3d model turtle for download as ma, obj, and fbx on turbosquid: 3d models for games, architecture, videos. (1443824)
turbosquid
$5

Turtle
...oyalty free 3d model turtle for download as tga, max, and fbx on turbosquid: 3d models for games, architecture, videos. (1466275)
3d_ocean
$5

Toy Turtle
...toy turtle
3docean
animal children fur playing stuffed toy teddy teddy bear toy turtle
a little turtle
Calibration
turbosquid
$15
DEFIBRILLATOR CALIBRATORS
... available on turbo squid, the world's leading provider of digital 3d models for visualization, films, television, and games.
turbosquid
$3
Calibration Test Benches
...libration test benches for download as 3ds, obj, c4d, and fbx on turbosquid: 3d models for games, architecture, videos. (1355804)
turbosquid
$79
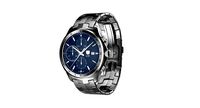
Tag Heuer Monaco Calibre 11
...free 3d model tag heuer monaco calibre 11 for download as max on turbosquid: 3d models for games, architecture, videos. (1634427)
turbosquid
$50

Smith & Wesson 50 Calibre Magnum
... available on turbo squid, the world's leading provider of digital 3d models for visualization, films, television, and games.
3d_export
$10
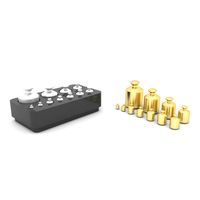
Laboratory Calibration Weight Set 1 3D Model
... 3d model
3dexport
laboratory lab science equipment weight set
laboratory calibration weight set 1 3d model bessoo 88084 3dexport
3d_export
$15
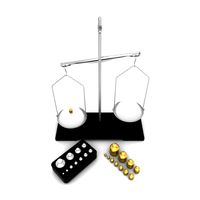
Laboratory Scale and Calibration Weight Set 3D Model
...port
laboratory lab science equipment weight set scale
laboratory scale and calibration weight set 3d model bessoo 88203 3dexport
3d_export
$5
3D printer filament calibration tool 3D Model
...ernier
3d printer filament calibration tool 3d model download .c4d .max .obj .fbx .ma .lwo .3ds .3dm .stl locoman 107942 3dexport
3d_export
$59
tag heuer link calibre 16 watch
...built to real-world scale. units used: centimeters. model is 18 centimeters tall.<br>scene objects are organized by groups.
3d_export
free
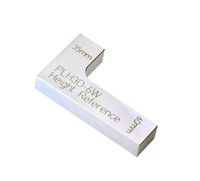
laser height reference calibration tool opt lasers
...ind out more about the engraving and cutting laser heads, this item was designed to work with, take a look at the following page:
3d_export
$99
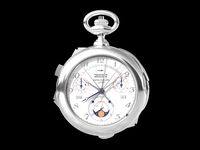
Patek Philippe White Gold Calibre 89
...br>please note: this 3d model like all my other models cannot be used as nft, as is or modified<br>thank you for reading
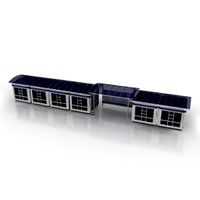
Station
3d_export
$5
station
...station
3dexport
station
archibase_planet
free
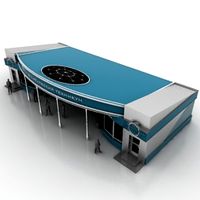
Station
...station
archibase planet
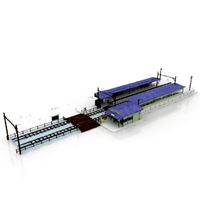
railroad station railway station bay
railway station n160707 - 3d model for interior 3d visualization.
archibase_planet
free
Station
...station
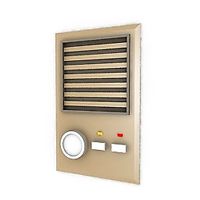
archibase planet
intercom station equipment
intercom station - 3d model for interior 3d visualization.
archibase_planet
free
Station
...station
archibase planet
station
station n260108 - 3d model (*.gsm+*.3ds) for interior 3d visualization.
3d_export
$5
Station
...station
3dexport
low poly bus station
archibase_planet
free
Station
...station
archibase planet
building station construction
station n170708 - 3d model(*.gsm+*.3ds) for interior 3d visualization.
archibase_planet
free

Station
...station
archibase planet
bus station bus stop
station 1 - 3d model (*.gsm+*.3ds) for interior 3d visualization.
archibase_planet
free
Station
...station
archibase planet
bus station bus stop
station 2 - 3d model (*.gsm+*.3ds) for interior 3d visualization.
archibase_planet
free

Station
...station
archibase planet
bus station bus stop
station 3 - 3d model (*.gsm+*.3ds) for interior 3d visualization.
3d_ocean
$19
Space station
...space station
3docean
space station
space station