Thingiverse
MTester Remix from DomesticHacks
by Thingiverse
Last crawled date: 4 years, 3 months ago
-- READ THE PRINTING TIPS BELOW FOR BEST RESULTS --
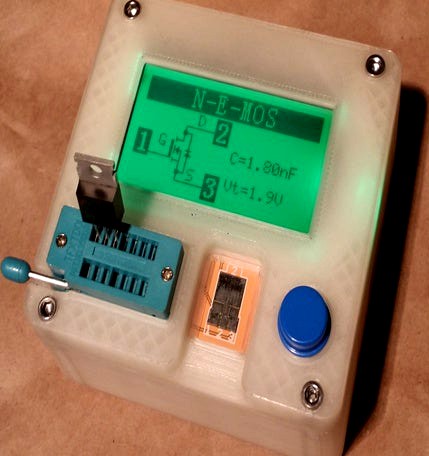
I love the design of this case from DomesticHacks, especially because it has a nice little cradle for the SMD test spot where the parts won't fall into the innards.
However, some of the part tolerances were very tight, and I wanted the top to be shallower, and the bottom to be square so it would rest nicely on the workbench. In addition, the 9v battery was a super tight fit, so I enlarged that space a bit.
I imported the DomesticHacks .STL files into F360 and re-sketched some of the parts to add 0.25mm clearance on the battery door. I also trimmed the height of the battery door by 0.25mm to account for the inevitable bridging droop when printing.
NOTE: I HAVE NOT YET PRINTED THE NEW SLIGHTLY-MORE-SNUG BATTERY DOOR. I printed mine with 0.30mm clearance and it's a little loose, so I brought it down to 0.25 and it should be perfect. Should being the operative word. YMMV. Mine is plenty good enough so no need to print another yet. If it is too snug for you, and you have Fusion360, you can adjust the clearances on the Fx Parameters page.
HUGE THANKS to Domestic Hacks for the starting point for this project!
PRINTING TIPS:
This is best printed at 0.25mm layer-height.
Print the back with the bottom on the print bed. Use supports for the battery compartment and the nut holes. I used 10% grid infill for this part, 5 top & bottom layers, and 4 perimeters. The 4 perimeters is important to prevent the nuts from camming out.
Print the faceplate/cover with the top on the print bed. (you'll need to flip it) Use supports for the SMD part "bridge" and also for the screw-holes. I used 15% infill for this part 5 top & bottom layers and 4 perimeters.
Print the battery cover with the bottom on the print bed. 5 top and bottom layers and 4 perimeters,. 15% infill.
IF YOU PRINT ONE, I'D LOVE TO SEE IT!
ASSEMBLY TIPS:
Rather than risk camming the nuts, I used a flat punch to gently tap the nuts into the tighter sections of the hexagonal holes.
Trim any "elephant's foot" sticking out around the battery cover and port.
A little CA glue holds the 8mm x 3mm magnets perfectly.
FUSION 360 NOTES:
I've documented most of the bodies and sketches. It's a hack in many ways, since F360 doesn't deal with interfaces between faceted mesh surfaces and it's own "perfectly-formed" surfaces, ...but it works.
If you do a remix, please post the source too!
Similar models
thingiverse
free

Desk Shelving (Ikea Hack) by JRodrigo
... or another supplier
ekby laiva - article number 301.787.04
dimensions: 59 cm (23¼") x 24 cm (9½") x 1,5 cm (5/8")
thingiverse
free

Nike Air max LED by Twinos
...you can drill a little hole on the back for the led strip wire.
glue with hot glue the pattern with cover, and... that's it !
thingiverse
free

Delta Wilde Hummel by wersy
...se no solid bottom/top layers
acces panel brackets: print width 0.5mm, layer height 0.2mm, spiral vase no solid bottom/top layers
thingiverse
free

Batman webcam cover by woffden
...layer
2 shells
4 bottom and top layers
0% infill (when printing 4 bottom and top layers) - otherwise, 100% infill
supports needed
thingiverse
free

Tesla Model 3 Trunk spring cover
...layer, 0.4mm nozzle and print the lasts mm in vase mode with a 0.5mm wall width, 0.25mm, 0.4mm nozzle layer for a better quality.
thingiverse
free

Voile strap keeper by Johnrandersen
...yers on a .4 nozzle
print with three perimeters and .16 layers.
if you print with these settings then you won't need infill.
thingiverse
free

Maker Mining Rig by bytestrome
...: 10
infill: 30%
t-slot nut w/ fan mount:
layer: 0.1 mm
filament: pla
perimeters: 10
top layers: 10
bottom layers: 10
infill: 30%
thingiverse
free

2017 Twisted Snowflake Ornament by Daefaroth
...
i printed with one perimeter, one top and bottom layer no infill. the center of the top drooped so you may want add some infill.
thingiverse
free

Daisy Flower Vase by Mazuir
...nfill, and your desired perimeters. i suggest going with 8 bottom layers and 4 perimeters. i did the print in 0.2mm layer height.
thingiverse
free

Balancer for Propellers and Spinners
...ter, 150mm long,
and it works :dhttps://www.youtube.com/watch?v=unz5frcxovi
as you can see, this propeller badly needs balance ;)
Mtester
thingiverse
free

Another LCR-T4 Mtester Case by sash0k
...nic case building.
you need 4 m3*15 bolts and nuts.
check your socket connection before print: 1231111/2223333 or 1231111/1231111
thingiverse
free

Case for 'MTester' Digital Combo Tester by grotto2
...case for 'mtester' digital combo tester by grotto2
thingiverse
three piece tester case also holds standard 9v battery.
thingiverse
free

Whaaaaatsit? Case (MTester Case) by SoundDoc
...d after printing 2 cases...)
if one of these doesn't fit, take at look at the others, you may find one that fits your device.
thingiverse
free

Case for MTester tester. steampunk by ItanHant
...e hole for the button will have to be made by ourselves ..
p.s.
site for smd purposely did not. because there was no need for it.
thingiverse
free

MTester LCR-T4 Component tester Enclosure Box
...vement allowed before gluing it all together.
three parts, i think the usage of each one should be easy to figure.
prints easily.
thingiverse
free

LCR-T4 Part Tester Case (MTester) by DomesticHacks
...boards-shields/pp_531727.html?lkid=13058651
i made a video about the tester and the case (in german):https://youtu.be/apbzw4rw1v4
thingiverse
free

Housing for LCR-T3-H Semiconductor-Tester by muci
...thingiverse case for amazn bought semiconductor test-unit w/o housing. mtester v2.07 asin:...
thingiverse
free

LCR Meter Case by jons_creations
...by jons_creations thingiverse a simple case for the lcr 'mtester#39; meter found everywhere. all screws are 6-32 in size,...
grabcad
free

LCR-T4 - MTester
...4 - mtester
grabcad
lcr-t4 mega328 - diode triode capacitance esr meter mos pnp transistor tester lcd display transistors diodes
Domestichacks
thingiverse
free

IKEA BESTÅ Vent by DomesticHacks
...ikea bestå vent by domestichacks
thingiverse
just print it out, cut a hole into the door and glue it in.
thingiverse
free

Cat Deterrent by DomesticHacks
...iverse
modular mat to keep your cats away from certain places.
you can glue the parts together or just snap them into eachother.
thingiverse
free

Game Boy Card Holder by DomesticHacks
...
holder for up to 10 game boy cards.
i prited it in pla with a 0.5mm nozzle, 0.3mm layer height and a honeycomb infill of 0,15.
thingiverse
free

X525 V3 Quadcopter LED strip mount by DomesticHacks
...x525 v3 quadcopter led strip mount by domestichacks
thingiverse
i created some parts to mount led strips to my quadcopter.
thingiverse
free

Spektrum DX6i Replacement Trim Tabs by DomesticHacks
...
replacement trim tabs for your spectrum dx6i transmitter.http://www.domestichacks.info/2014/05/espektrum-dx6i-ersatz-trimmhbel/
thingiverse
free

Creality CR-10 Cable Guide for Direct Conversion by DomesticHacks
...creality cr-10 cable guide for direct conversion by domestichacks
thingiverse
a cable guide for my creality cr-10
thingiverse
free

Prusa Mendel Y-Axis Cable Guide by DomesticHacks
...by domestichacks
thingiverse
a quick and dirty designed part for the prusa mendel to guide the cable from the heated print bed.
thingiverse
free

Quadrocopter Wall Mount / Hanger by DomesticHacks
...; geprc mark4 (clone) frame and a custom 3" frame inspired by the mark 4 (by https://www.thingiverse.com/skyline89/designs).
thingiverse
free

Atmel AVR Programmer Case for Perfboard USBasp by DomesticHacks
...y perfboard usbasp avr programmer.
i prited it in pla with a 0.35mm nozzle, 0.30mm layer height and a honeycomb infill of 0,15.
thingiverse
free

Game Boy Cartridge Shell by DomesticHacks
...ble without overhang.
the halfes print out very well, but my printer isn't calibrated well enough for them to fit together.
Remix
turbosquid
$5

MODA Collection Remix Chair
... available on turbo squid, the world's leading provider of digital 3d models for visualization, films, television, and games.
3d_export
$12

remix yamaha rm1x
...remix yamaha rm1x
3dexport
geometry triangles 15.2k vertices 7.6k pbr no textures 1 materials 1 uv layers yes
3d_ocean
$5

Vray fabric Kvadrat remix green - tileable
...th vray and 3dsmax. high-resolution texture images (2000×2000 px) file included: shader vray 2.40 texture image 3ds max 2011 file
turbosquid
$20

Gerrit Rietveld 1938 Zig Zag Chair Remix
... available on turbo squid, the world's leading provider of digital 3d models for visualization, films, television, and games.
3d_export
$10

multicolored remix parametric table furniture
... fbx, obj, mtl, archive with textures. the model has no glitches. render and materials - vray . without using plugins. good use!
3ddd
$1

Barovier&Toso / Manhattan Remix 7192
... 004293-142405
в коллекции есть люстры 7, 9, 12 рожковые. диаметр соответственный 1000, 1250, 1500 мм.
3ddd
$1

Muuto fiber chair
...grey/grey, dusty green/dusty green, nature/oak, natural white/oak upholstery options remix 183/black, remix 133/grey, remix 643/dusty red leather options black...
3ddd
$1

Barovier&Toso 7190-7195
...7190-7195 3ddd barovier&toso потолочнай люстра фабрики barovier&toso;, коллекция manhattan remix артикул 7190-7195. размеры в inches: 39"...
3d_export
$5

3D Locking Handle Weatherproof Storage Box Container
...handle weatherproof storage box container 3dexport new, improved and remixd! no screws required. print-in-place. weatherproof. parametric. 2 parts. easy...
cg_studio
$49

HTC One Mini 2 Amber Gold3d model
...cell phone mobile cellular super lcd touchscreen touch screen remix amber gold .max .obj .mb .lwo .fbx .c4d .3ds...