Thingiverse

MrCool BlueTooth LED Lithophane Parts by Karlhazen
by Thingiverse
Last crawled date: 3 years, 1 month ago
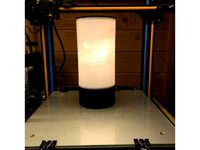
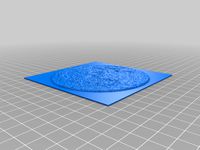
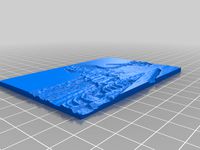
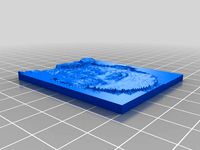
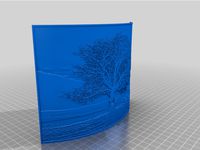
This was a lot of fun, I used this site to generate my lithophane, http://3dp.rocks/lithophane/ with the attached settings. CHANGE THE MAXIMUM SIZE TO 254mm.
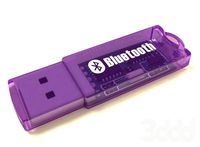
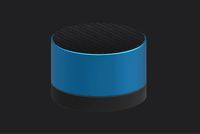
This is the BlueTooth LED... https://www.amazon.com/gp/product/B075RXN74D/ref=oh_aui_detailpage_o07_s00?ie=UTF8&psc=1
ASIN: B075RXN74D
Item Model Number: DT-42777
I used PhotoShop with the below settings, I made two strips that were 53.5mm high by 301.59mm wide with a 2mm gap separating them. After scaling, these sizes are a little different but they fit the BlueTooth perfectly.
Pixels
Width 14248
Height 2528
Size (mm)
Width 301.58
Height 53.50x2+2mm
1200 pixels/Inch
I printed the lithophane at 0.1mm, using Cura and a Creality CR-10s. I used AutoCAD 2015 to make the files.
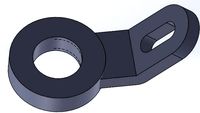
You'll have to file a couple of the holes for the inner top a little bit to make it fit perfectly.
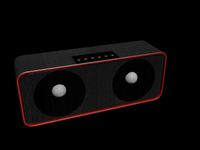
You'll have to heat up the top part of the speaker (where the silver ring is at) with a hot-air blower or hair-dryer then lift it up with a spuder tool or a guitar pick and maybe a small flat-head screwdriver. Then snip the connecting wire that goes to the capacitive touch ring, remove four screws then remove the diffuser.
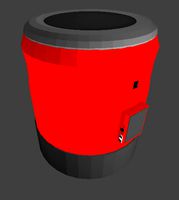
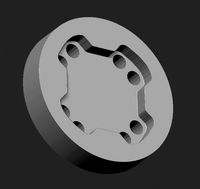
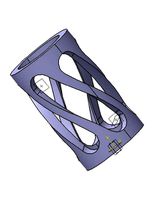
Print out your custom cylindrical lithophane, print out the three parts I made. Place the base part in the bottom (it has to be squeezed in a bit, but it fits and it is keyed at the back), insert your lithophane, then place the inner par near the speaker (with the long skinny part facing downward), place the outer part there with the alignment pegs fitting into the alignment holes. Once you know everything fits perfectly, glue the inner and outer top parts together, then glue them to the litho, then place a couple drops of glue on the printed bottom and insert a couple screws into the top. Let it set, then place a little more glue around the base and tighten everything (I used superglue, a 3d pen should work fine if your patient). I used some strong double-sided tape between each screw on the top and made the strips as wide as the bottom of the speaker grill and used a small amount of the tape to cover the screws (that way nothing vibrates). I soldered the wire to the touch ring and fit everything together. It takes a while but it's very rewarding. Other than print time (about 24 hours), the hardest part was drafting up the parts.
I hope someone has a chance to try this out! I love how it came out! I used PLA, I've tested some with PETG but I'm not good enough with it yet.
Edit:
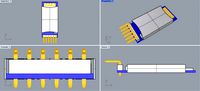
I added Bluetooth_Base_Holder, Bluetooth_Top_Holder and Support_Arms (print 3). Since the bluetooth was originally designed in a way that it could be held from the bottom, I thought that would look funny with a lithophane (everything would be upside down). So I designed the base/top/arms so that one could use a piece of 550 cord (slightly melt the end and press it down so that it flairs out a bit, then feed from the inside to the outside). Make sure that you flip all the parts to print properly, some are upside down. Also, I updated the litho maximum size to 254mm (I had the wrong settings from another Thingie previously).
This is the BlueTooth LED... https://www.amazon.com/gp/product/B075RXN74D/ref=oh_aui_detailpage_o07_s00?ie=UTF8&psc=1
ASIN: B075RXN74D
Item Model Number: DT-42777
I used PhotoShop with the below settings, I made two strips that were 53.5mm high by 301.59mm wide with a 2mm gap separating them. After scaling, these sizes are a little different but they fit the BlueTooth perfectly.
Pixels
Width 14248
Height 2528
Size (mm)
Width 301.58
Height 53.50x2+2mm
1200 pixels/Inch
I printed the lithophane at 0.1mm, using Cura and a Creality CR-10s. I used AutoCAD 2015 to make the files.
You'll have to file a couple of the holes for the inner top a little bit to make it fit perfectly.
You'll have to heat up the top part of the speaker (where the silver ring is at) with a hot-air blower or hair-dryer then lift it up with a spuder tool or a guitar pick and maybe a small flat-head screwdriver. Then snip the connecting wire that goes to the capacitive touch ring, remove four screws then remove the diffuser.
Print out your custom cylindrical lithophane, print out the three parts I made. Place the base part in the bottom (it has to be squeezed in a bit, but it fits and it is keyed at the back), insert your lithophane, then place the inner par near the speaker (with the long skinny part facing downward), place the outer part there with the alignment pegs fitting into the alignment holes. Once you know everything fits perfectly, glue the inner and outer top parts together, then glue them to the litho, then place a couple drops of glue on the printed bottom and insert a couple screws into the top. Let it set, then place a little more glue around the base and tighten everything (I used superglue, a 3d pen should work fine if your patient). I used some strong double-sided tape between each screw on the top and made the strips as wide as the bottom of the speaker grill and used a small amount of the tape to cover the screws (that way nothing vibrates). I soldered the wire to the touch ring and fit everything together. It takes a while but it's very rewarding. Other than print time (about 24 hours), the hardest part was drafting up the parts.
I hope someone has a chance to try this out! I love how it came out! I used PLA, I've tested some with PETG but I'm not good enough with it yet.
Edit:
I added Bluetooth_Base_Holder, Bluetooth_Top_Holder and Support_Arms (print 3). Since the bluetooth was originally designed in a way that it could be held from the bottom, I thought that would look funny with a lithophane (everything would be upside down). So I designed the base/top/arms so that one could use a piece of 550 cord (slightly melt the end and press it down so that it flairs out a bit, then feed from the inside to the outside). Make sure that you flip all the parts to print properly, some are upside down. Also, I updated the litho maximum size to 254mm (I had the wrong settings from another Thingie previously).
Similar models
thingiverse
free

Ironman Hemet Screws by lgnorant
...nicely over top during assembly.
you will need to print out 6 of the "slot" screw and 2 of the "round" screw.
thingiverse
free

Lego by HumuHumunukunukukua
...
thingiverse
my first printed lego. extend the inner part of the bottom a little bit so it could be perfectly clutch with other.
thingiverse
free

MG995 Servo Bottom Lid With An Axle by RolandThsive
... you can spare 20 cents on paypal for me that would be awesome.
my school is very expensive ahahha.
paypal.me/rolandthsive
rohit
thingiverse
free

Lithophane Box by Flash85
...amp in on the fifth lithophane at the top and hold it in place.
main print requires supports unless your bridging is exceptional
thingiverse
free

LoRa Microchip_RN2483_LoRa_Mote enclosure by DIY3D
...h surface and print without support
put 2 buttons in place and melt the top of the pins down with a nail
glue to top to bottom
thingiverse
free

Remixed -- LED Holder (from moonlight to arc litho)
...he following horizontal expansion numbers, that may or may not work for you:
key = +0.2mm
plug = 0
holder = -0.2mm
press = -0.3mm
thingiverse
free

Companion Cube Box by Makery3D
...ks perfectly.
original inner-box size is 31mmx31mm (made for those magneticballs of 6x6x6balls with 5mm)
hope you enjoy it
makery
thingiverse
free

Xiaomi Bluetooth 4.0 speaker feet / corners protector by MOSFET_burnt
...2 little grooves to save the original feet.
i glued four rubber pads recycled from a router or something to make it less slippy.
thingiverse
free

Jake the Dog (Adventure Time) bedside Shelf by jp000xyz
... a guide, reassemble a few times to get the feel for the construction steps, and then use super glue to hold everything in place.
thingiverse
free

TicTac Gun by 3DPatriot
...ize
there’s a couple ways to secure both half‘s you can glue on one half to another or use screws to clamp and secure both halves
Mrcool
thingiverse
free

MRCOOL Minisplit Remote Stand by tsylatac
...mrcool minisplit remote stand by tsylatac
thingiverse
a desk stand for mr cool minisplit remotes.
thingiverse
free

MRCOOL Minisplit Remote Stand by tsylatac
...mrcool minisplit remote stand by tsylatac
thingiverse
a desk stand for mr cool minisplit remote controls.
Karlhazen
thingiverse
free

Bibo Feet Buffers by Karlhazen
...ork as expected.
(oh, i always build things upside down in autocad 2015, so please make sure to rotate them all before printing.)
thingiverse
free

Modular Lithophane Lamp by Karlhazen
...ease enjoy and send pictures of any of the thingies that you print out! i'd love to see someone else use some of my designs.
thingiverse
free

Lithophane base for Aukey LED by Karlhazen
...you may want to enable "print thin walls," i didn't on mine, i think it could have come out a little more detailed.
Lithophane
3d_export
free

lithophane of elfen lied
...lithophane of elfen lied
3dexport
elfen lied lithophane free
turbosquid
$25
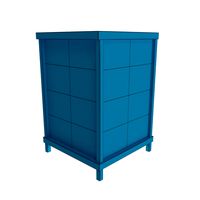
Table Lamp (Bamboo Motif Lithophane Accent - Model 015)
... available on turbo squid, the world's leading provider of digital 3d models for visualization, films, television, and games.
thingiverse
free

at at lithophane by philip3dprinter
...at at lithophane by philip3dprinter
thingiverse
at at lithophane
thingiverse
free
Lithophane universe
...lithophane universe
thingiverse
it is a lithophane if the universe
thingiverse
free
Lithophane Moon
...lithophane moon
thingiverse
lithophane moon
thingiverse
free
Lithophane Sphinx
...lithophane sphinx
thingiverse
lithophane sphinx
thingiverse
free

Lithophane NewYork
...lithophane newyork
thingiverse
lithophane newyork
thingiverse
free
Lithophane by sromanos
...lithophane by sromanos
thingiverse
experimenting with lithophanes
thingiverse
free
Tree Lithophane
...tree lithophane
thingiverse
a lithophane of a tree
thingiverse
free

Toyota Lithophane
...toyota lithophane
thingiverse
toyota lithophane logo print.
Bluetooth
3d_ocean
$16
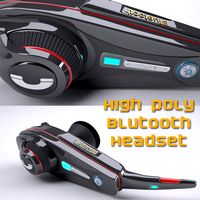
Bluetooth handset
...ooth handset
3docean
bluetooth bluetooth handset concept handset headphone high poly modern music new
high poly bluetooth handset
turbosquid
$35
Bluetooth
... available on turbo squid, the world's leading provider of digital 3d models for visualization, films, television, and games.
3ddd
free
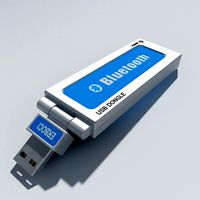
USB-Bluetooth
...luetooth
3ddd
bluetooth
usb-bluetooth с прозрачным корпусом. камера и освещение выставлены. камера проанимирована на презентацию.
3d_export
$5
bluetooth card
...bluetooth card
3dexport
this is a simplified bluetooth card with which you can create cases
turbosquid
$2
Bluetooth Speaker
...royalty free 3d model bluetooth speaker for download as blend on turbosquid: 3d models for games, architecture, videos. (1281743)
turbosquid
$5

Bluetooth Speaker
...y free 3d model bluetooth speaker for download as max and fbx on turbosquid: 3d models for games, architecture, videos. (1336601)
turbosquid
$5
Bluetooth Speaker
...y free 3d model bluetooth speaker for download as max and fbx on turbosquid: 3d models for games, architecture, videos. (1336600)
turbosquid
$5

Bluetooth Speaker
...y free 3d model bluetooth speaker for download as max and fbx on turbosquid: 3d models for games, architecture, videos. (1336599)
turbosquid
$3
Bluetooth speaker
...y free 3d model bluetooth speaker for download as obj and fbx on turbosquid: 3d models for games, architecture, videos. (1165662)
turbosquid
$19

Bluetooth Speaker
...odel bluetooth speaker for download as 3ds, obj, c4d, and fbx on turbosquid: 3d models for games, architecture, videos. (1432534)
Led
3d_export
$5

led
...led
3dexport
the led is cut with all the parts.
3ddd
$1

Monacor / PARL56DMX / LED-320RGBW / LED-345RGBW / LED-300RGB
... прожектор
http://www.monacor.dk/
parl56dmx
led-320rgbw
led-345rgbw
led-300rgb
turbosquid
$10

LED
...led
turbosquid
free 3d model led for download as blend on turbosquid: 3d models for games, architecture, videos. (1691856)
3d_export
$5

led lamp
...led lamp
3dexport
led lamp, brightness animation
3ddd
free

leds-c4
...leds-c4
3ddd
leds-c4
современный торшер
3ddd
free

leds-c4
...leds-c4
3ddd
leds-c4
настольный лампа
turbosquid
$19

LED
... available on turbo squid, the world's leading provider of digital 3d models for visualization, films, television, and games.
turbosquid
$12

Led
... available on turbo squid, the world's leading provider of digital 3d models for visualization, films, television, and games.
turbosquid
free

LED
... available on turbo squid, the world's leading provider of digital 3d models for visualization, films, television, and games.
turbosquid
free

LED
... available on turbo squid, the world's leading provider of digital 3d models for visualization, films, television, and games.
Parts
3d_export
$5
Parts
...parts
3dexport
parts
3d_export
$5
Part
...part
3dexport
part
3d_export
$5

Part
...part
3dexport
machine part
3d_export
$65

Part
...part
3dexport
simple rendering of the scene file
3d_export
$65

Part
...part
3dexport
simple rendering of the scene file
3d_export
$30

fan part
...fan part
3dexport
this is a part of fan of pedastal
3d_export
$10
machine parts
...machine parts
3dexport
3d part modeling work ,contact for 3d work
turbosquid
$59

Mechanical Part
...id
royalty free 3d model mechanical part for download as c4d on turbosquid: 3d models for games, architecture, videos. (1410833)
turbosquid
$17
Road parts
...bosquid
royalty free 3d model road parts for download as 3ds on turbosquid: 3d models for games, architecture, videos. (1192967)
turbosquid
$9

Cutter Parts
...squid
royalty free 3d model cutter parts for download as stl on turbosquid: 3d models for games, architecture, videos. (1220010)