Thingiverse
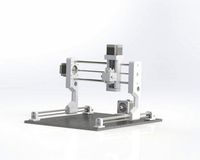
MPP CNC FC - CNC foam cutter by Kyrill
by Thingiverse
Last crawled date: 3 years ago
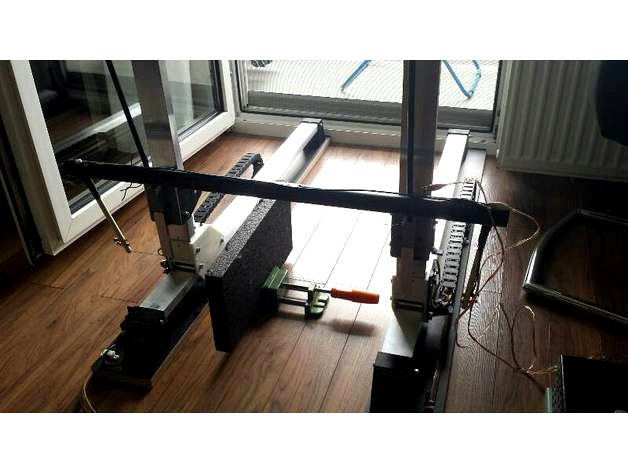
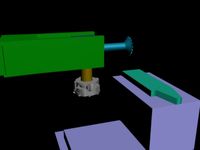
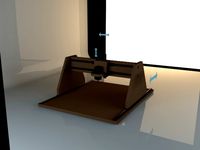
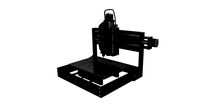
Most Printed Parts Computerized Numerical Controled Foam Cutter short: >MPP CNC FC<
Materials:
20x50x2 mm aluminiumtube . I use 1000 mm for x-axis and 500 mm for y-axis on both sides
Print all things in PLA, ABS or PETG two times and glue together the x and y wagon parts with CA-glue
Control board will be a Arduino Mega + ramps 1.4
4xNema 17 stepper
8 mm threaded rods (both ends of the rods must be finished to 5 mm diameter with lathe and one side in adition a 5 mm thread to build a fixed bearing with the parts: Halter_y and Kappe_z) other sides are flexible couplings to the Nema steppers.
30 pc. ballbearings f625zz are neaded
20 pc. 75mm M5 bolts, nuts and many washers. Use washers ever between screws, bearings and plastic!
Be careful while mounting the bearings! The spacerThe dimension of your machine may be different to mine so you have to customize the length of the threaded rods.
The hotwire got a bow. I use aluminiumtube and 8 mm glasfiber rods (old things from a tent) as arms to tighten the wire on both sides.
Later I'll post a picture of this part. It's under construction.
Software will be: DevCNC.foam and DevCNC.wing for cutting wingprojects in RC modelling.http://www.devcad.com/eng/devcncfoam.asp
(Any other Software which controls 4 axis cnc machines is possible. For example Mach3 or Linuxcnc together with Profili Pro wich is able to save 4-axis-gcode)
Updates:
03-28-2017 Add the file >Sockel< it is the baseplate for a sheet of aluminium which hold the hotwire and will be mounted at frontside of >wagen_z<. On top you find a 8 mm hole. Insert a stick there long enaugh for holding the hotwirebow at the upper end.
03-30-2017 Added pictures with threaded rods after assembling
04-02-2017 Added pictures showing Hotwire holders and bow holders made from aluminium and old black gfk tent rods...
publishing new files for wagen_y and wagen_y_2 and a leadscrewbase. So you are able to use a simple M8 nut as a leadscrew in y, too. Put the nut in and fasten it with two M3x16 screws. (Cutting a thread before is not necessary).
If my endswiches are shipped (from china) I will draw some holders for this switches. Solong stay tuned...
I think this thing is 99% ready now. Please mount it on one, or better two small wooden baseplates so you are able to adjust the space between the towers. While fixing it with clamps on a table. And maybe you spent some energy chains to manage the cables....
04-21-2017 ...still waiting for the arduino mega and ramps unit... Sorry but that is a chinese shipping problem...
04-26-2017 First run video - with arduino mega and ramps 1.4 and DevCnc foam (unregistered) as software: https://www.youtube.com/watch?v=lNyuF1vNXZ4
05-02-2017 add parts to fix the Arduino mega, power adapter and other device feets and cable clamps
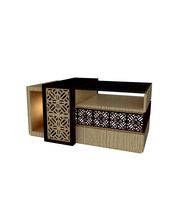
05-03-2017 add box for ampere and voltmeter and a knob. This things will be mounted on my power adapter for the hotwire.
05-05-2017 Power is nothing without control. Today I finished the hotwire power adapter. Up to 40 Volt and 4.5 Ampere... Enaugh power for a long bow.
05-10-2017 add left and right baseplate for mounting on the endstopp switches with M2 screws. The baseplates will be glued at the outersideside of the y-wagon. Where the energy chains take place. 4 rectangel parts will be glue or screw at motorhalter-y and x-wagon to trigger the switches in zero position.
05-13-2017 I finish the build. Last cables are in place. Little problems with software. The automatic calibration of origin failed. I am in discussion with the software designer to solve this problem. But the machine is ready now. Not longer a work in progress.
03-10-2019 If you had to change any parts of this thing you'll find the origin files, drawn by PTC-elements direct (free 3D software), here: https://www.rcgroups.com/forums/showthread.php?2858334-MPPCNCFC-3D-printed-4-axis-foam-cutter-hardware/page3 (links at #42)
or here: http://www.peterrausch.de/MPPCNCFC.zip
link to free version 3D software PTC Creo elements direct: https://www.ptc.com/en/products/cad/elements-direct/modeling/express
Feel free to build/print your own!
First test cut EPP: https://www.youtube.com/watch?v=Gn52ZY74V00
Materials:
20x50x2 mm aluminiumtube . I use 1000 mm for x-axis and 500 mm for y-axis on both sides
Print all things in PLA, ABS or PETG two times and glue together the x and y wagon parts with CA-glue
Control board will be a Arduino Mega + ramps 1.4
4xNema 17 stepper
8 mm threaded rods (both ends of the rods must be finished to 5 mm diameter with lathe and one side in adition a 5 mm thread to build a fixed bearing with the parts: Halter_y and Kappe_z) other sides are flexible couplings to the Nema steppers.
30 pc. ballbearings f625zz are neaded
20 pc. 75mm M5 bolts, nuts and many washers. Use washers ever between screws, bearings and plastic!
Be careful while mounting the bearings! The spacer
The hotwire got a bow. I use aluminiumtube and 8 mm glasfiber rods (old things from a tent) as arms to tighten the wire on both sides.
Later I'll post a picture of this part. It's under construction.
Software will be: DevCNC.foam and DevCNC.wing for cutting wingprojects in RC modelling.http://www.devcad.com/eng/devcncfoam.asp
(Any other Software which controls 4 axis cnc machines is possible. For example Mach3 or Linuxcnc together with Profili Pro wich is able to save 4-axis-gcode)
Updates:
03-28-2017 Add the file >Sockel< it is the baseplate for a sheet of aluminium which hold the hotwire and will be mounted at frontside of >wagen_z<. On top you find a 8 mm hole. Insert a stick there long enaugh for holding the hotwirebow at the upper end.
03-30-2017 Added pictures with threaded rods after assembling
04-02-2017 Added pictures showing Hotwire holders and bow holders made from aluminium and old black gfk tent rods...
publishing new files for wagen_y and wagen_y_2 and a leadscrewbase. So you are able to use a simple M8 nut as a leadscrew in y, too. Put the nut in and fasten it with two M3x16 screws. (Cutting a thread before is not necessary).
If my endswiches are shipped (from china) I will draw some holders for this switches. Solong stay tuned...
I think this thing is 99% ready now. Please mount it on one, or better two small wooden baseplates so you are able to adjust the space between the towers. While fixing it with clamps on a table. And maybe you spent some energy chains to manage the cables....
04-21-2017 ...still waiting for the arduino mega and ramps unit... Sorry but that is a chinese shipping problem...
04-26-2017 First run video - with arduino mega and ramps 1.4 and DevCnc foam (unregistered) as software: https://www.youtube.com/watch?v=lNyuF1vNXZ4
05-02-2017 add parts to fix the Arduino mega, power adapter and other device feets and cable clamps
05-03-2017 add box for ampere and voltmeter and a knob. This things will be mounted on my power adapter for the hotwire.
05-05-2017 Power is nothing without control. Today I finished the hotwire power adapter. Up to 40 Volt and 4.5 Ampere... Enaugh power for a long bow.
05-10-2017 add left and right baseplate for mounting on the endstopp switches with M2 screws. The baseplates will be glued at the outersideside of the y-wagon. Where the energy chains take place. 4 rectangel parts will be glue or screw at motorhalter-y and x-wagon to trigger the switches in zero position.
05-13-2017 I finish the build. Last cables are in place. Little problems with software. The automatic calibration of origin failed. I am in discussion with the software designer to solve this problem. But the machine is ready now. Not longer a work in progress.
03-10-2019 If you had to change any parts of this thing you'll find the origin files, drawn by PTC-elements direct (free 3D software), here: https://www.rcgroups.com/forums/showthread.php?2858334-MPPCNCFC-3D-printed-4-axis-foam-cutter-hardware/page3 (links at #42)
or here: http://www.peterrausch.de/MPPCNCFC.zip
link to free version 3D software PTC Creo elements direct: https://www.ptc.com/en/products/cad/elements-direct/modeling/express
Feel free to build/print your own!
First test cut EPP: https://www.youtube.com/watch?v=Gn52ZY74V00
Similar models
thingiverse
free

Anycubic i3 Mega - Y-Axis Rod Bearing Block with CoreHoles by Drei_D_Druck
...y-axis rod bearing block with threads), but here are no threads ... instead bevelled core-holes for m3 and m4
work in progress :)
thingiverse
free

4 axis CNC foam cutter by vivtronic
...4 axis cnc foam cutter by vivtronic
thingiverse
4 axis cnc foam cutter.
controlled by arduino mega + ramps
3dwarehouse
free

WALL MOUNTED DIY HOTWIRE CNC CUTTER
...wall mounted diy hotwire cnc cutter
3dwarehouse
foam cutter hotwire
thingiverse
free

CNC Machine Parts by jszewczyk
...earings mount for axis x and y
6800 zz bearings 10x19x5mm mount for axis z and 10mm rods
608 2rs bearings 8x22x7 dumper for a bed
thingiverse
free

P3 Steel Z-Axis Support by Paolohin
...gs are 15 mm for the difficulty of removing all of the support material.
i also added a top cap to hide threaded rod and nut bar.
thingiverse
free

CNC Hotwire Foam Cutter by irinajordan
...ng motor (stp-42d1066-05)
arduino uno r3 board
see more at:http://mekatronikgruppe6.wordpress.com/category/hotwire-foam-cutter/
grabcad
free

4 Axis Hotwire CNC
... improved.
the fusion 360 model can be downloaded from here : https://gallery.autodesk.com/fusion360/projects/4-axis-hotwire-cnc
thingiverse
free

Anycubic i3 Mega - Y-Axis Rod Bearing Block with Threads by Drei_D_Druck
...of the bearing block
this is not intentionally for printing, but as part of upgrading my anycubic i3 mega ... a work in progress
thingiverse
free

3018 DIY CNC: T8 Leadscrew / Anti Backlash / Spring-loaded nut Bearing Block for Y Axis
... please do it yourself with a tap, the necessary precision is usually not given with 3d printing, so i did not insert the thread.
thingiverse
free

Bearing mount by siderits
...eaded rod.
pack of 10 bearings (10x5x4 mm) from geek for 2$ us.https://geek.wish.com/search/bearings#cid=574d4d9df0bc7160a401c7f1
Kyrill
thingiverse
free

Butter cream spatula by Kyrill
...butter cream spatula by kyrill
thingiverse
have fun with this spatula. i use it for butter cream cake...
thingiverse
free

MIP T-handle by Kyrille
...mip t-handle by kyrille
thingiverse
this t-handle fits the mip 3.0mm, 2.5mm and 2.0mm handles.
thingiverse
free

Deo stand by Kyrill
...erse
this is a simple stand to hold a round deo roll on stick upside down for faster use without problems if it is almost empty.
thingiverse
free

Test of a wing rib by Kyrill
...test of a wing rib by kyrill
thingiverse
test for printing ribs of a wing. please scale up to 1000% when using your slicer.
thingiverse
free

PK plug (5mm) by Kyrille
...plug (5mm) by kyrille
thingiverse
it can be used for any pk plug (5mm) to avoid shortcut when playing with cables and batteries.
thingiverse
free

Spoolholder by Kyrill
...d m3 screw. print two pieces.
at least added a knop useing with m3 screws... please screw it in and fix it with a little ca glue.
thingiverse
free

Table leg coaster by Kyrill
...table leg coaster by kyrill
thingiverse
i print it with pla and 0,25 mm layer. outer diameter is 22 mm. the hole is 16 mm.
thingiverse
free

Tailwheel holder by Kyrill
...is scetched for epp planes. the part must be glue in the fusebottom. so you had to cut 2.5 mm slots in the epp before glue it in.
thingiverse
free

firewall - Motorspant für EPP Modelle by Kyrill
...modelle by kyrill
thingiverse
useful to screw on a little brushless engine on it. holes are 30x30 mm. glue it in the firewall...
thingiverse
free

Securitybox (dustcover) for Motorola rectifier MDA962-2 by Kyrill
...) for motorola rectifier mda962-2 by kyrill
thingiverse
securitybox for motorola mda962-2 rectifier. to prevent electical shock.
Mpp
thingiverse
free

Linhof Board Adapter for MPP Microtechnical cameras by inmt
...nhof board adapter for mpp microtechnical cameras by inmt
thingiverse
you can attach a linhof lens board to your mpp 4x5 camera.
thingiverse
free

MPP lens board by KingRoach
...m happy for people to use this to print their own. if you are printing for others, only do so my attributing me as maker, please.
thingiverse
free

Flat lens board for MPP Mk VIII 4x5 view camera by criede
...i 4x5 view camera.
i use it with a schneider super angulon 75mm 1:8.
the lens board must be removed when closing the camera.
thingiverse
free

Coned lens board for MPP Mk VIII 4x5 view camera by criede
... on fdm printers.
i use it with a schneider super angulon 90mm 1:6.8.
the lens board must be removed when closing the camera.
thingiverse
free

Vader's Lightsaber MPP Switch Box Tensioner
... bubble strip tensioner. i designed it and used it based on measurements for a korbanth mpp2.0. feel free to suggest edits etc.
thingiverse
free

Prusa MK2s MPP Tray by 3Dchill
...onding platform (v2 or old) to attach this tray to the prusa, which you can find here: https://www.thingiverse.com/thing:2647792
3dcadbrowser
free

MPP Shoe Sole 3D CAD Model
...3d object can be downloaded in .step, .iges, .max, .obj, .3ds, .fbx, .dxf, .lwo, .stl, .wrl, .ma, .dae, .x and .asc file formats.
thingiverse
free

Prusa MK2s MPP Paper Towel Holder by 3Dchill
... pla.
you will need the new version "v2" of the mpp which you can find here: https://www.thingiverse.com/thing:2647792
thingiverse
free

M.P.P. Mk.VII Lens Board for Shutter No.1 by mlkrbg
...for shutter no.1 by mlkrbg thingiverse lens board for mpp mk.vii 4x5" large format camera. the stl file is...
Fc
3d_export
$15

Burnley Fc
...burnley fc
3dexport
burnley fc
3d_export
$5

Box fc barcelona
...box fc barcelona
3dexport
box fc barcelona
3d_export
$5

Escudo barcelona fc
...escudo barcelona fc
3dexport
escudo barcelona fc
turbosquid
$45

fcs-tank_max.max
... available on turbo squid, the world's leading provider of digital 3d models for visualization, films, television, and games.
3d_export
$9

AS Roma FC
...as roma fc
3dexport
ready to print in 3d printer
turbosquid
$28

fcs-tank2.max
... available on turbo squid, the world's leading provider of digital 3d models for visualization, films, television, and games.
turbosquid
$19

Canik 55 Shark FC
...odel canik 55 shark fc for download as 3ds, max, obj, and fbx on turbosquid: 3d models for games, architecture, videos. (1349202)
3d_export
$10

Brighton Hove Albion Fc
...brighton hove albion fc
3dexport
ready to print in 3d printer
turbosquid
$25

jeep fc 150 classic vehicle
...odel jeep fc 150 classic vehicle 3d model for download as max on turbosquid: 3d models for games, architecture, videos. (1696732)
turbosquid
$14

Barcelona FC 3d Logo or Shield
...celona fc 3d logo or shield for download as 3ds, max, and obj on turbosquid: 3d models for games, architecture, videos. (1362144)
Foam
3d_export
$5

cylinder foam does not fall stand polyurethane foam
...cylinder foam does not fall stand polyurethane foam
3dexport
cylinder foam does not fall stand.<br>polyurethane foam
turbosquid
$1

Foam Gun
...urbosquid
royalty free 3d model foam gun for download as fbx on turbosquid: 3d models for games, architecture, videos. (1659619)
turbosquid
$39

Foam Hand
... available on turbo squid, the world's leading provider of digital 3d models for visualization, films, television, and games.
turbosquid
$14

Shaving Foam
... available on turbo squid, the world's leading provider of digital 3d models for visualization, films, television, and games.
turbosquid
$10

Foam Glider
... available on turbo squid, the world's leading provider of digital 3d models for visualization, films, television, and games.
turbosquid
$2

Foam Brush
... available on turbo squid, the world's leading provider of digital 3d models for visualization, films, television, and games.
turbosquid
$10

Foam fire extinguisher
...alty free 3d model foam fire extinguisher for download as max on turbosquid: 3d models for games, architecture, videos. (1700116)
design_connected
$7

TORK Foam Soap Dispenser
...tork foam soap dispenser
designconnected
tork foam soap dispenser computer generated 3d model.
turbosquid
$29
Sierra Foam Sofa
...e 3d model sierra foam sofa for download as max, fbx, and obj on turbosquid: 3d models for games, architecture, videos. (1575076)
turbosquid
$1

Sound Proofing Foam
... sound proofing foam for download as ige, obj, stl, and sldpr on turbosquid: 3d models for games, architecture, videos. (1289027)
Cutter
archibase_planet
free
Cutter
...cutter
archibase planet
cutter mill milling cutter
cutter 2 n050712 - 3d model (*.gsm+*.3ds) for interior 3d visualization.
3d_export
$10
pipe cutter
...pipe cutter
3dexport
pipe cutter
3d_export
$8

Grass Cutter
...grass cutter
3dexport
grass cutter
turbosquid
$5

Cutter
...alty free 3d model cutter for download as ige, stl, and sldpr on turbosquid: 3d models for games, architecture, videos. (1505202)
turbosquid
$29
Cutter
... available on turbo squid, the world's leading provider of digital 3d models for visualization, films, television, and games.
turbosquid
$9

Cutter
... available on turbo squid, the world's leading provider of digital 3d models for visualization, films, television, and games.
turbosquid
$3
cutter
... available on turbo squid, the world's leading provider of digital 3d models for visualization, films, television, and games.
turbosquid
$1

cutter
... available on turbo squid, the world's leading provider of digital 3d models for visualization, films, television, and games.
turbosquid
free

Cutter
... available on turbo squid, the world's leading provider of digital 3d models for visualization, films, television, and games.
3d_export
free
unicorn cookie cutter
...unicorn cookie cutter
3dexport
unicorn cookie cutter, more cookie cutters here:
Cnc
3d_export
$35

Cnc
...cnc
3dexport
the cnc machine is unfinished
3d_export
$10
cnc router
...cnc router
3dexport
prototipe cnc router
3d_export
$10

cnc machine
...cnc machine
3dexport
cnc machine model with individual model files with assembly
3d_export
$5
Cnc 3D Model
...cnc 3d model
3dexport
cnc
cnc 3d model csiszar 61289 3dexport
turbosquid
$10

cnc bedroom
...osquid
royalty free 3d model cnc bedroom for download as max on turbosquid: 3d models for games, architecture, videos. (1494981)
turbosquid
$9
cnc(wood)
...rbosquid
royalty free 3d model cnc(wood) for download as max on turbosquid: 3d models for games, architecture, videos. (1189189)
turbosquid
$1

CNC Frame
...rbosquid
royalty free 3d model cnc frame for download as stl on turbosquid: 3d models for games, architecture, videos. (1371706)
turbosquid
free
cnc table
...rbosquid
royalty free 3d model cnc table for download as max on turbosquid: 3d models for games, architecture, videos. (1500926)
turbosquid
$30

CNC Lathe
...
royalty free 3d model cnc lathe for download as max and obj on turbosquid: 3d models for games, architecture, videos. (1284634)
turbosquid
$25
CNC Machine
...
royalty free 3d model cnc machine for download as ma and fbx on turbosquid: 3d models for games, architecture, videos. (1307199)