Thingiverse
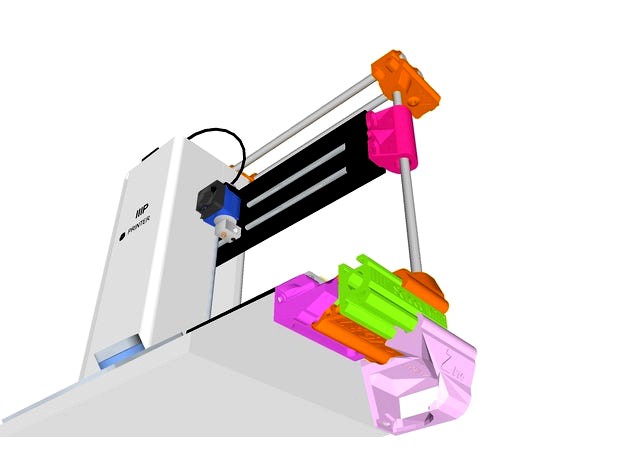
MP Select Mini X-Support 8mm-Shaft_Triangulated_Tested by 77-17
by Thingiverse
Last crawled date: 3 years ago
IMPROVE YOUR MONOPRICE SELECT MINIS Z ACTION WITH Z-Pro!
Do you want carefully fitted prints sized just right for your IIIP Minis Bed Plate?
Do you want rigid added security and faster 3D action?
Do you want tool storage cameras lights lazors and precision ground rails on your unit?
YOU NEED THE Z-Pro! by Legacy 77-17!
SMOOTH Z ACTION IN 5 EASY STEPS!
1)- PRINT NEAT STUFF:
a) Print all Z Pro Components as Palletized.
b) Print Tool Holder parts of your selection.
-Open our page and find selection and printing instructions,https://www.thingiverse.com/77-17/designs
-Download your selection:
Mini Pro tool holder and E-Pro filament guide:https://www.thingiverse.com/thing:2757299/zip
Basic tool holder extended:https://www.thingiverse.com/thing:2752038/zip
Basic tool holder and filament guide:https://www.thingiverse.com/thing:2749943/zip
c) Print Z-Pro XSE for Dual LM8UU Camera Mount / LED Mount / SD Card Reader Mount:https://www.thingiverse.com/thing:2797894/zip
2)-GET NEAT STUFF:
1 of LM8UU 8mm linear bearing:https://www.banggood.com/LM8UU-8mm-Linear-Ball-Bearing-Bush-Steel-for-CNC-Router-Mill-Machine-p-906777.html?rmmds=detail-top-buytogether-auto__4&cur_warehouse=CN
3 of 300 mm x 8mm linear rail shaft:https://www.banggood.com/Outer-Diameter-8mm-x-300380400500mm-Cylinder-Liner-Rail-Linear-Shaft-Optical-Axis-p-993100.html?rmmds=search&cur_warehouse=CN
Mixed Hardware
-1 of 1/2" spring
-1 of 1/16" cotter pin
(alternately 1 M6x80mm bolt and nut)
-Applicable screws.
-Crazy Glue
Find everything you need @ :https://www.amazon.cahttps://www.banggood.com/
3)-MEASURE YOUR STUFF:
-Find depth of 8mm holes in parts 5 and save to add to later measurement of distance between opposing faces of part 5 and 7 to give you length to cut shaft.
4)-DRILL NICE HOLES IN YOUR PILOTS, AND CUT YOUR SHAFT:
-Using cut off wheel on grinder Cut one shaft to found length less one sixteenth.
-Drill out all pilot holes for your selection of set screws. Tap holes if necessary.
If you don't already have a drill this is a nice one!https://www.amazon.ca/Bosch-1191VSRK-120-Volt-2-Inch-Variable/dp/B000VZJGAO/ref=sr_1_18?s=hi&ie=UTF8&qid=1518929533&sr=1-18&keywords=1%2F2%22+drill
Cut off disk to size your New Z shafthttps://www.amazon.ca/DEWALT-DWA8957F-Cut-Off-Wheel-0-045/dp/B01GLGEP3Y/ref=sr_1_6?s=electronics&ie=UTF8&qid=1518929329&sr=8-6&keywords=4.5%22+cut+off+wheel
Grinder for your cut off disk,https://www.amazon.ca/PORTER-CABLE-PCE810-Small-Angle-Grinder/dp/B01L0JWDD6/ref=sr_1_cc_5?s=aps&ie=UTF8&qid=1518929470&sr=1-5-catcorr&keywords=4.5%22+grinder
5-ASSEMBLE YOUR AMAZING Z-Pro! by LEGACY 77-17:
A) -Assemble parts 1 2 and 3.
-Slide them into 4 sizing the assembly to the hole locations
on the side of the machine.
-Screw in place. (may need to use longer similar threaded same diameter screws).
B)-Push two of the 8mm x 300 mm shafts into your Z-pro Tool Holder.
-Remove the two screws on the top back of your printer to facilitate mounting the tool.
holder dual shaft assembly with the hole locations.
-Position and screw Tool holder shaft assembly into place using longer screws if
necessary.
C)-Slide [dual lm88 camera arm index bracket] onto Z-Pro Tool Holder Shaft assembly
if you choose.
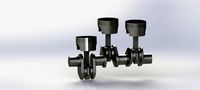
D)-Slide part seven long end facing to the back dovetail down.
-Press LM8UU bearing into part [6 X-SECURE].
-Slide bearing assembly onto sized shaft (77-77 Embossment facing forward).
-With LM8UU/Part 6 assembly still on shaft Press / Crazy Glue shaft into part five and
seven with their long ends facing out opposite each other.
-Slide assembly into Part 3 and 8.
E)-Complete custom options.
G)-Using Z control run x gantry to top and find sweet spot for part 8.
-Using Z control run x gantry to bottom and find sweet spot for part 5.
G)-Tighten down all set screws.
H) Hook Up your Camera to USB and Light To 12V Power Supply.
I) Test your new Rig!
J) Comment
Do you want carefully fitted prints sized just right for your IIIP Minis Bed Plate?
Do you want rigid added security and faster 3D action?
Do you want tool storage cameras lights lazors and precision ground rails on your unit?
YOU NEED THE Z-Pro! by Legacy 77-17!
SMOOTH Z ACTION IN 5 EASY STEPS!
1)- PRINT NEAT STUFF:
a) Print all Z Pro Components as Palletized.
b) Print Tool Holder parts of your selection.
-Open our page and find selection and printing instructions,https://www.thingiverse.com/77-17/designs
-Download your selection:
Mini Pro tool holder and E-Pro filament guide:https://www.thingiverse.com/thing:2757299/zip
Basic tool holder extended:https://www.thingiverse.com/thing:2752038/zip
Basic tool holder and filament guide:https://www.thingiverse.com/thing:2749943/zip
c) Print Z-Pro XSE for Dual LM8UU Camera Mount / LED Mount / SD Card Reader Mount:https://www.thingiverse.com/thing:2797894/zip
2)-GET NEAT STUFF:
1 of LM8UU 8mm linear bearing:https://www.banggood.com/LM8UU-8mm-Linear-Ball-Bearing-Bush-Steel-for-CNC-Router-Mill-Machine-p-906777.html?rmmds=detail-top-buytogether-auto__4&cur_warehouse=CN
3 of 300 mm x 8mm linear rail shaft:https://www.banggood.com/Outer-Diameter-8mm-x-300380400500mm-Cylinder-Liner-Rail-Linear-Shaft-Optical-Axis-p-993100.html?rmmds=search&cur_warehouse=CN
Mixed Hardware
-1 of 1/2" spring
-1 of 1/16" cotter pin
(alternately 1 M6x80mm bolt and nut)
-Applicable screws.
-Crazy Glue
Find everything you need @ :https://www.amazon.cahttps://www.banggood.com/
3)-MEASURE YOUR STUFF:
-Find depth of 8mm holes in parts 5 and save to add to later measurement of distance between opposing faces of part 5 and 7 to give you length to cut shaft.
4)-DRILL NICE HOLES IN YOUR PILOTS, AND CUT YOUR SHAFT:
-Using cut off wheel on grinder Cut one shaft to found length less one sixteenth.
-Drill out all pilot holes for your selection of set screws. Tap holes if necessary.
If you don't already have a drill this is a nice one!https://www.amazon.ca/Bosch-1191VSRK-120-Volt-2-Inch-Variable/dp/B000VZJGAO/ref=sr_1_18?s=hi&ie=UTF8&qid=1518929533&sr=1-18&keywords=1%2F2%22+drill
Cut off disk to size your New Z shafthttps://www.amazon.ca/DEWALT-DWA8957F-Cut-Off-Wheel-0-045/dp/B01GLGEP3Y/ref=sr_1_6?s=electronics&ie=UTF8&qid=1518929329&sr=8-6&keywords=4.5%22+cut+off+wheel
Grinder for your cut off disk,https://www.amazon.ca/PORTER-CABLE-PCE810-Small-Angle-Grinder/dp/B01L0JWDD6/ref=sr_1_cc_5?s=aps&ie=UTF8&qid=1518929470&sr=1-5-catcorr&keywords=4.5%22+grinder
5-ASSEMBLE YOUR AMAZING Z-Pro! by LEGACY 77-17:
A) -Assemble parts 1 2 and 3.
-Slide them into 4 sizing the assembly to the hole locations
on the side of the machine.
-Screw in place. (may need to use longer similar threaded same diameter screws).
B)-Push two of the 8mm x 300 mm shafts into your Z-pro Tool Holder.
-Remove the two screws on the top back of your printer to facilitate mounting the tool.
holder dual shaft assembly with the hole locations.
-Position and screw Tool holder shaft assembly into place using longer screws if
necessary.
C)-Slide [dual lm88 camera arm index bracket] onto Z-Pro Tool Holder Shaft assembly
if you choose.
D)-Slide part seven long end facing to the back dovetail down.
-Press LM8UU bearing into part [6 X-SECURE].
-Slide bearing assembly onto sized shaft (77-77 Embossment facing forward).
-With LM8UU/Part 6 assembly still on shaft Press / Crazy Glue shaft into part five and
seven with their long ends facing out opposite each other.
-Slide assembly into Part 3 and 8.
E)-Complete custom options.
G)-Using Z control run x gantry to top and find sweet spot for part 8.
-Using Z control run x gantry to bottom and find sweet spot for part 5.
G)-Tighten down all set screws.
H) Hook Up your Camera to USB and Light To 12V Power Supply.
I) Test your new Rig!
J) Comment
Similar models
thingiverse
free

MP Select Mini Z-Pro_ACCESSORY_KIT by 77-17
...index arm does require supports.
-print with 1.2mm or thicker wall. 70 to 100% infill
-please shoot me a text with any questions.
thingiverse
free

Z-axis by Jager-f
... 200 mm 8mm + kfl08 bearing bracket
linear ball bearing lm8uu 8x15x24mm
800w water cooled spindle motor 65x195mmhttp://modkam.ru
grabcad
free

LM8uu holder
...lm8uu holder
grabcad
holder for lm8uu linear bearing 8mm
grabcad
free

Linear Bearing 8mm
...linear bearing 8mm
grabcad
8mm linear ball bearing bush bushing
model: lm8uu
shaft id:8mm
thingiverse
free

corexy parts (8mm Shaft Holder, z axis guid) by Qumsss
...corexy parts (8mm shaft holder, z axis guid) by qumsss
thingiverse
8mm shaft holder, z axis guid
grabcad
free

LM8UU
...lm8uu
grabcad
dummy for a linear bearing lm8uu.
24mm long, runs on an 8mm shaft and has an outer diameter of 15mm.
thingiverse
free

Spool Holder by Andre_Action
...spool holder by andre_action
thingiverse
for assembly, you need 608 bearings and an 8mm linear shaft.
thingiverse
free

X axis motor holder for linear stepping motor. by jspark
...art thread and 8 mm lead.
this holder assembled with two of lm8uu holder as following link.http://www.thingiverse.com/thing:86191
thingiverse
free

Anti-Backlash platform for Linear slide XY by squareoctopus
...linear bearing version (lm8uu), not the bushing version.
to assemble, you need two m8 nuts and a spring, and of course 4 x lm8uu.
cg_trader
$2

Linear slide assembly
...linear slide assembly
cg trader
this is linear slide assembly with servo motor,lm-rail & ball screw.
Mp
turbosquid
$19
MP-5
...-5
turbosquid
royalty free 3d model mp-5 for download as fbx on turbosquid: 3d models for games, architecture, videos. (1537795)
turbosquid
$3

MP-18
...turbosquid
royalty free 3d model mp-18 for download as blend on turbosquid: 3d models for games, architecture, videos. (1506436)
turbosquid
$5

Mp-28
...quid
royalty free 3d model mp-28 for download as fbx and obj on turbosquid: 3d models for games, architecture, videos. (1613220)
turbosquid
$5

Nightstand MP
...yalty free 3d model nightstand mp for download as max and fbx on turbosquid: 3d models for games, architecture, videos. (1655571)
turbosquid
$25

MP 3008
... available on turbo squid, the world's leading provider of digital 3d models for visualization, films, television, and games.
turbosquid
$25

MP 28
... available on turbo squid, the world's leading provider of digital 3d models for visualization, films, television, and games.
turbosquid
$20

MP-44
... available on turbo squid, the world's leading provider of digital 3d models for visualization, films, television, and games.
turbosquid
$20

MP-153
... available on turbo squid, the world's leading provider of digital 3d models for visualization, films, television, and games.
turbosquid
$2

Mp 41
... available on turbo squid, the world's leading provider of digital 3d models for visualization, films, television, and games.
turbosquid
free
MP-44.3ds
... available on turbo squid, the world's leading provider of digital 3d models for visualization, films, television, and games.
77
turbosquid
$30
Necklace 77
...osquid
royalty free 3d model necklace 77 for download as 3dm on turbosquid: 3d models for games, architecture, videos. (1547950)
turbosquid
$15

Curtai 77
...lty free 3d model curtai 77 for download as max, obj, and fbx on turbosquid: 3d models for games, architecture, videos. (1435989)
turbosquid
$15

Chair 77
...alty free 3d model chair 77 for download as max, obj, and fbx on turbosquid: 3d models for games, architecture, videos. (1497559)
turbosquid
$6

Table 77
...alty free 3d model table 77 for download as max, obj, and fbx on turbosquid: 3d models for games, architecture, videos. (1503905)
turbosquid
$6

Lamp 77
...yalty free 3d model lamp 77 for download as max, obj, and fbx on turbosquid: 3d models for games, architecture, videos. (1500805)
turbosquid
$6

Bedcloth 77
...y free 3d model bedcloth 77 for download as max, fbx, and obj on turbosquid: 3d models for games, architecture, videos. (1531155)
turbosquid
$20

Bath 77
... free 3d model bath 77 for download as max, dxf, fbx, and dwg on turbosquid: 3d models for games, architecture, videos. (1277142)
turbosquid
$100

TAB-77
... available on turbo squid, the world's leading provider of digital 3d models for visualization, films, television, and games.
turbosquid
$39

Decor 77
... available on turbo squid, the world's leading provider of digital 3d models for visualization, films, television, and games.
turbosquid
$35

Earrings 77
... available on turbo squid, the world's leading provider of digital 3d models for visualization, films, television, and games.
Triangulated
3ddd
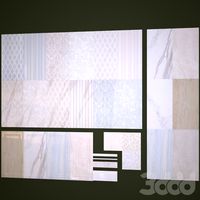
$1

trianguler 3d wall
...trianguler 3d wall
3ddd
панель
trianguler 3d wall
turbosquid
$1

Klein bottle triangulated textured
... available on turbo squid, the world's leading provider of digital 3d models for visualization, films, television, and games.
turbosquid
$1

Moebius strip triangulated textured
... available on turbo squid, the world's leading provider of digital 3d models for visualization, films, television, and games.
3d_export
$16

Polyce Man triangulate with rigg and skin
...gons, for better animation the third figure triangular polygons and skin next i'm going to post animated models of this model
3d_export
$12

handgun
...mesh comes with 4k pbr textures and is already triangulated and...
3d_export
$10

anvil and sledgehammer
...anvil and sledgehammer 3dexport anvil -triangulated model. -one uv map 4096x4096 (2048x2048) -verts 192 -edges...
3d_export
$28

saint george
...great detail inlcudes 2 file variants in zip:<br>1 obj triangulated mesh<br>1 stl triangulated mesh<br>nominal size (easily adjustable in any...
3d_export
$23

ram carved
...great detail inlcudes 2 file variants in zip:<br>1 obj triangulated mesh<br>1 stl triangulated mesh<br>nominal size (easily adjustable in any...
3d_export
$12

architectural decorative
...great detail inlcudes 2 file variants in zip:<br>1 obj triangulated mesh<br>1 stl triangulated mesh<br>nominal size (easily adjustable in any...
3d_export
free

character love
...great detail inlcudes 2 file variants in zip:<br>1 obj triangulated mesh<br>1 stl triangulated mesh<br>nominal size (easily adjustable in any...
8Mm
turbosquid
$50
8MM CAMERA.max
... available on turbo squid, the world's leading provider of digital 3d models for visualization, films, television, and games.
turbosquid
$19
kodak 8mm
... available on turbo squid, the world's leading provider of digital 3d models for visualization, films, television, and games.
turbosquid
$1

Brass Bush Bearing 8mm ID
... available on turbo squid, the world's leading provider of digital 3d models for visualization, films, television, and games.
turbosquid
$20
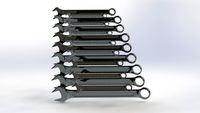
wrench big collection from 8mm to 32mm
...llection from 8mm to 32mm for download as obj, fbx, and sldas on turbosquid: 3d models for games, architecture, videos. (1438111)
turbosquid
$1
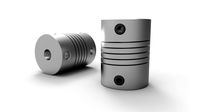
Flexible Shaft Coupling 6mm x 8mm
... available on turbo squid, the world's leading provider of digital 3d models for visualization, films, television, and games.
turbosquid
$1
Flexible shaft coupling 5mm x 8mm
... available on turbo squid, the world's leading provider of digital 3d models for visualization, films, television, and games.
turbosquid
$15

German WWII Breda MG-8mm Ammo Box (Low Poly)
...g-8mm ammo box (low poly) for download as obj, fbx, and blend on turbosquid: 3d models for games, architecture, videos. (1395526)
3ddd
free

Treasures of the Sea
...treasures of the sea 3ddd бижутерия d=8mm ...
3d_export
$5
double thread screw
...thread length: 10 mm total length: 41 mm diameter: 8mm ...
3d_export
$5
large double thread screw
...thread length: 10 mm total length: 115 mm diameter: 8mm ...
Shaft
3d_export
$5
shaft handle
...shaft handle
3dexport
shaft handle
3d_export
$5

shaft bracket
...shaft bracket
3dexport
shaft bracket
turbosquid
$3

Shaft
... available on turbo squid, the world's leading provider of digital 3d models for visualization, films, television, and games.
turbosquid
$2

shaft
... available on turbo squid, the world's leading provider of digital 3d models for visualization, films, television, and games.
3d_export
free
crank shaft
...crank shaft
3dexport
crank shaft with piston with different materials
3d_export
$8
shaft bearing
...shaft bearing
3dexport
shaft bearing m10, m12,m16, m20 and m27
3d_export
$5
hexagonal shaft knob
...hexagonal shaft knob
3dexport
hexagonal shaft knob
3d_export
$5
shaft hand wheel
...shaft hand wheel
3dexport
shaft hand wheel
3d_export
$5
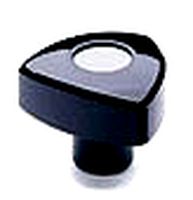
triangular shaft knob
...triangular shaft knob
3dexport
triangular shaft knob
3d_export
$5
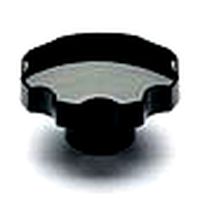
octagonal shaft knob
...octagonal shaft knob
3dexport
octagonal shaft knob
Select
3ddd
$1

TUBADZIN SELECT
...max 2014, 2011.
fbx 2014, 2013, 2011,
obj
_____________________________________http://www.tubadzin.pl/en/collection/324
3ddd
$1
Плитка Selection
... supergres , плитка
плитка selection - supergres ceramiche
turbosquid
$15
Christmas Selection
...royalty free 3d model christmas selection for download as fbx on turbosquid: 3d models for games, architecture, videos. (1696333)
turbosquid
$39

Vases selection
... available on turbo squid, the world's leading provider of digital 3d models for visualization, films, television, and games.
turbosquid
free

SELECTIVE RACKING SYSTEM
...yalty free 3d model selective racking system for download as on turbosquid: 3d models for games, architecture, videos. (1282512)
turbosquid
$10

Hansgrohe ShowerTablet Select
...ee 3d model hansgrohe showertablet select for download as max on turbosquid: 3d models for games, architecture, videos. (1336955)
turbosquid
$29

Chill selectional sofa
...odel chill selectional sofa for download as max, obj, and fbx on turbosquid: 3d models for games, architecture, videos. (1465691)
3ddd
free

Lunaria - Nova, ASA Selection
... asa selection , dried flowers
ветка лунарии в вазе nova, asa selection
3ddd
$1
inno SELECT SLIM chair
...inno select slim chair
3ddd
inno
high detailed inno select slim chair
turbosquid
$29

Select Chaise Lounge
... available on turbo squid, the world's leading provider of digital 3d models for visualization, films, television, and games.
17
3d_export
$6

rocks 17
...rocks 17
3dexport
rocks 3d model 17
3ddd
$1

PLANTS 17
...plants 17
3ddd
цветок , горшок
plants 17,, pots in diameter 100,80,60,40cm,,, enjoy
3d_export
$6
tap-17
...tap-17
3dexport
3d_export
$6

set-17
...set-17
3dexport
3d_export
$27

C-17 Globemaster
...c-17 globemaster
3dexport
c-17 globemaster
3ddd
free

Renault FT-17
...renault ft-17
3ddd
ft-17 , renault , танк
turbosquid
$40

cottage 17
...bosquid
royalty free 3d model cottage 17 for download as max on turbosquid: 3d models for games, architecture, videos. (1377003)
turbosquid
$30

Apartment 17
...squid
royalty free 3d model apartment 17 for download as max on turbosquid: 3d models for games, architecture, videos. (1432680)
turbosquid
$10

Surfboard 17
...squid
royalty free 3d model surfboard 17 for download as max on turbosquid: 3d models for games, architecture, videos. (1375686)
turbosquid
$7
Rock 17
...turbosquid
royalty free 3d model rock 17 for download as obj on turbosquid: 3d models for games, architecture, videos. (1486522)
Mini
turbosquid
$10

Mini Mini Luceplan
...
royalty free 3d model mini mini luceplan for download as max on turbosquid: 3d models for games, architecture, videos. (1227359)
3d_ocean
$39

Mini Cooper
...mini cooper
3docean
cabrioler cooper mini
mini cooper cabrioler
3d_export
$30

Mini lathe
...mini lathe
3dexport
mini lathe
3d_export
$5

mini mouse
...mini mouse
3dexport
mini mouse
3d_export
$5

mini house
...mini house
3dexport
mini house
3d_export
free

Mini Mecha
...mini mecha
3dexport
concept of mini mecha
3d_ocean
$20

Mini Gun
...mini gun
3docean
gatling gun gun machine gun mini gun weapon
model of a mini gatling gun.
3ddd
free

Herve mini
... кофейный , herve
http://www.mobiliavenanti.it/ru/products/hervè-mini
3d_export
$5

mini wall
...mini wall
3dexport
mini wall for living room
3d_export
$5

mini bank
...mini bank
3dexport
mini bank 3d model
Tested
turbosquid
$99

test
...st
turbosquid
royalty free 3d model test for download as max on turbosquid: 3d models for games, architecture, videos. (1251637)
turbosquid
$63
TEST
...st
turbosquid
royalty free 3d model test for download as max on turbosquid: 3d models for games, architecture, videos. (1446233)
turbosquid
$1
test
...st
turbosquid
royalty free 3d model test for download as fbx on turbosquid: 3d models for games, architecture, videos. (1360941)
3d_export
free

johnny test
...johnny test
3dexport
johnny test 3d
turbosquid
$15

Test
... available on turbo squid, the world's leading provider of digital 3d models for visualization, films, television, and games.
turbosquid
$2

test
... available on turbo squid, the world's leading provider of digital 3d models for visualization, films, television, and games.
turbosquid
free

Test
... available on turbo squid, the world's leading provider of digital 3d models for visualization, films, television, and games.
turbosquid
free

test
... available on turbo squid, the world's leading provider of digital 3d models for visualization, films, television, and games.
turbosquid
free

Test
... available on turbo squid, the world's leading provider of digital 3d models for visualization, films, television, and games.
3d_export
$5
gripper test
...gripper test
3dexport
robot gripper test model
Support
turbosquid
$5

Support
... available on turbo squid, the world's leading provider of digital 3d models for visualization, films, television, and games.
3d_export
$8

Support 3D Model
...support 3d model
3dexport
support cantilever console
support 3d model tasal 73900 3dexport
3d_export
$5
phone support
...phone support
3dexport
phone
turbosquid
$12
Support bars
...squid
royalty free 3d model support bars for download as max on turbosquid: 3d models for games, architecture, videos. (1411542)
turbosquid
$8

support weights
...id
royalty free 3d model support weights for download as max on turbosquid: 3d models for games, architecture, videos. (1411538)
turbosquid
$2

headphone support
...royalty free 3d model headphone support for download as sldpr on turbosquid: 3d models for games, architecture, videos. (1357583)
turbosquid
$2

Support for flowers
...royalty free 3d model support for flowers for download as max on turbosquid: 3d models for games, architecture, videos. (1463543)
turbosquid
$14

Flower Support
...alty free 3d model flower support for download as max and obj on turbosquid: 3d models for games, architecture, videos. (1497066)
turbosquid
$5

serum support
...yalty free 3d model serum support for download as c4d and obj on turbosquid: 3d models for games, architecture, videos. (1551267)
3d_export
$10
spyro joystick support
...spyro joystick support
3dexport
joystick support of spyro dragon