Thingiverse
Mount Brick: LEGO® Compatible Brick Wall Mounts by lvlobius
by Thingiverse
Last crawled date: 3 years, 3 months ago
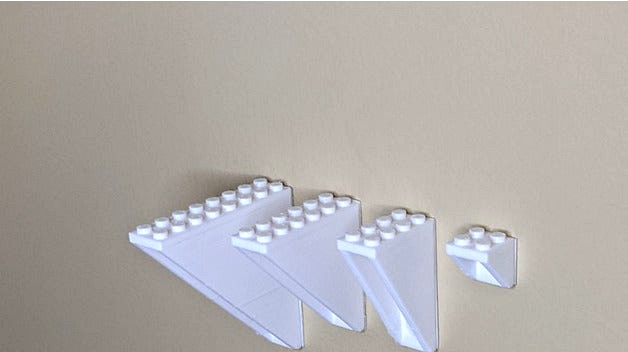
Mount Brick is a system designed to bring your LEGO® collection into view as wall art around your home.
Description: This collection contains designs compatible with LEGO® bricks. I have grouped the Mount Brick design by function. Please see my designs page for other LEGO® compatible wall mount options.
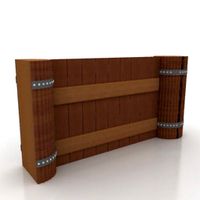
Installation: There are two design options for installation, Command™ Strips or Wall Dog™ drywall screws. First select the surface you will be using. The Command™ Strip version is designed to use a medium refill strip and work like a Command™ hook. They are useful on any surface without the need to drill a hole. A single Command™ strip is rated to support up to 3 lbs or 1000 pieces when installed correctly. I suggest using 1 mount per 500 pieces for stability and redundancy. The other version is designed with work with Hillman™ Wall Dog™ drywall screws. This is a much more permanent display option as in theory each mount can support 20 lbs or the weight of 6000 pieces (note: this has not been tested at length). Ideal in drywall, it can also be used with wood and masonry by following the instructions on screw's packaging. To install using screws you will need: 2 drywall screws, level, pencil, drill, a small drill bit, and a phillips head screwdriver. See image 4 for a visual on the installation process. All measurements were designed using the length of LEGO® bricks. The mounting holes are either 4 studs or 6 studs apart depending on the size of the mount being used. Ensure your measurement brick is vertical by using a level before marking its position. Drill a pilot hole for your screws where the corner of the brick sat on the wall. this will be very slightly to the inside of where your pencil marks are located. The screws can then be aligned with the pilot holes to finish installation.
Notes:
-Print these mounts vertically as shown to prevent the studs from flaring beyond usable tolerances.
-The 2x8 and 2x6 mounts should be attached using screws if the model is over 500 pieces. Otherwise it may lever itself away from the wall over time.
-The 2x2 stud is only suited to light applications or use with multiple mounts.
-Use a template to easily align multiple wall mounts. Build one that matches the pin alignment on the set you intend to display.
-There is a small amount of wiggle room if your drywall screw mount doesn't align quite right. Loosen the screws a quarter turn and shift it into position before tightening them back down.
-3D printed parts do not match the precision of LEGO® parts. These parts are designed with tolerances for FDM printers. SLA prints have shown issues with brittleness when printing these designs.
-If you require the precision of LEGO® bricks, use an appropriate glue to attach a sacrificial brick to the top of your wall mount.
Disclaimer: I am not associated with any of the following legal entities.They are mentioned only as their products are compatible with this design. LEGO®, Hillman™ Wall Dog™, Command™ Strips, Star Wars®. There is no intention to infringe on any of their intellectual property.
Description: This collection contains designs compatible with LEGO® bricks. I have grouped the Mount Brick design by function. Please see my designs page for other LEGO® compatible wall mount options.
Installation: There are two design options for installation, Command™ Strips or Wall Dog™ drywall screws. First select the surface you will be using. The Command™ Strip version is designed to use a medium refill strip and work like a Command™ hook. They are useful on any surface without the need to drill a hole. A single Command™ strip is rated to support up to 3 lbs or 1000 pieces when installed correctly. I suggest using 1 mount per 500 pieces for stability and redundancy. The other version is designed with work with Hillman™ Wall Dog™ drywall screws. This is a much more permanent display option as in theory each mount can support 20 lbs or the weight of 6000 pieces (note: this has not been tested at length). Ideal in drywall, it can also be used with wood and masonry by following the instructions on screw's packaging. To install using screws you will need: 2 drywall screws, level, pencil, drill, a small drill bit, and a phillips head screwdriver. See image 4 for a visual on the installation process. All measurements were designed using the length of LEGO® bricks. The mounting holes are either 4 studs or 6 studs apart depending on the size of the mount being used. Ensure your measurement brick is vertical by using a level before marking its position. Drill a pilot hole for your screws where the corner of the brick sat on the wall. this will be very slightly to the inside of where your pencil marks are located. The screws can then be aligned with the pilot holes to finish installation.
Notes:
-Print these mounts vertically as shown to prevent the studs from flaring beyond usable tolerances.
-The 2x8 and 2x6 mounts should be attached using screws if the model is over 500 pieces. Otherwise it may lever itself away from the wall over time.
-The 2x2 stud is only suited to light applications or use with multiple mounts.
-Use a template to easily align multiple wall mounts. Build one that matches the pin alignment on the set you intend to display.
-There is a small amount of wiggle room if your drywall screw mount doesn't align quite right. Loosen the screws a quarter turn and shift it into position before tightening them back down.
-3D printed parts do not match the precision of LEGO® parts. These parts are designed with tolerances for FDM printers. SLA prints have shown issues with brittleness when printing these designs.
-If you require the precision of LEGO® bricks, use an appropriate glue to attach a sacrificial brick to the top of your wall mount.
Disclaimer: I am not associated with any of the following legal entities.They are mentioned only as their products are compatible with this design. LEGO®, Hillman™ Wall Dog™, Command™ Strips, Star Wars®. There is no intention to infringe on any of their intellectual property.
Similar models
thingiverse
free

Mount Brick: LEGO® Minifig Compatible Wall Mounts by lvlobius
..., lego minifigure®, hillman™ wall dog™, command™ strips. there is no intention to infringe on any of their intellectual property.
thingiverse
free

Mount Brick: LEGO® Compatible Pin Wall Mounts by lvlobius
...nic®, hillman™ wall dog™, command™ strips, star wars™. there is no intention to infringe on any of their intellectual property.
thingiverse
free

Mount Brick: LEGO® Technic Compatible Wall Mounts by lvlobius
...hnic®, hillman™ wall dog™, command™ strips, star wars™. there is no intention to infringe on any of their intellectual property.
thingiverse
free

(Experimental) Mount Brick: LEGO® Compatable Train Corner by lvlobius
...he following legal entities.they are mentioned only as their products are compatible with this design. lego®, hillman™ wall dog™.
thingiverse
free

(Experimental) Mount Brick: LEGO® Compatable 2x10 Brick Mount by lvlobius
... lego®, hillman™ wall dog™, command™ strips, star wars®. there is no intention to infringe on any of their intellectual property.
thingiverse
free

Oculus Sensor Mount by 123one
...s://www.thingiverse.com/thing:1772848 to be printed with a .5mm nozzle, improve tension and include a hole for hardware mounting.
thingiverse
free

Vacuum Stick Holder by DESSCH
...his for wall mounting your dyson v6.
no drilling required!
you will need 4 pieces of 3m command strips to mount this on the wall.
thingiverse
free

LEGO Brick Wall coat hangers
... wall mount m4 screw holes.stl" which you may print only once and will help you drawing the holes on the wall with a pencil.
thingiverse
free

No-Screws Curtain Hook by lavamind
... use with 3m command strips (large size, 19mm). very easy to install without the need to worry about making holes in the drywall.
thingiverse
free

Video Doorbell Universal Mount and Security Cover by theprovost
...e bracket and connect your doorbell wires then snap in your doorbell.
very universal. remix to put holes in if yours are uniform.
Lvlobius
thingiverse
free
(Experimental) Mount Brick: LEGO® Compatable 2x10 Brick Mount by lvlobius
... lego®, hillman™ wall dog™, command™ strips, star wars®. there is no intention to infringe on any of their intellectual property.
thingiverse
free
(Experimental) Mount Brick: LEGO® Compatable Train Corner by lvlobius
...he following legal entities.they are mentioned only as their products are compatible with this design. lego®, hillman™ wall dog™.
thingiverse
free
Mount Brick: LEGO® Technic Compatible Wall Mounts by lvlobius
...hnic®, hillman™ wall dog™, command™ strips, star wars™. there is no intention to infringe on any of their intellectual property.
thingiverse
free
Mount Brick: LEGO® Minifig Compatible Wall Mounts by lvlobius
..., lego minifigure®, hillman™ wall dog™, command™ strips. there is no intention to infringe on any of their intellectual property.
thingiverse
free
Mount Brick: LEGO® Compatible Pin Wall Mounts by lvlobius
...nic®, hillman™ wall dog™, command™ strips, star wars™. there is no intention to infringe on any of their intellectual property.
Lego
3ddd
$1

Lego
...lego
3ddd
lego , конструктор
lego
3ddd
$1

Lego
...lego
3ddd
lego , конструктор , машина
lego
3ddd
$1

Lego
...lego
3ddd
lego , конструктор , машина
lego
3ddd
free
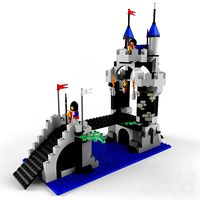
Lego
...lego
3ddd
конструктор , lego , замок
lego
3ddd
$1
Lego
...lego
3ddd
lego , конструктор
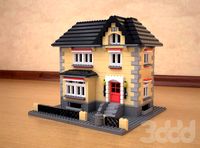
домик из lego
3d_export
$5

lego
...lego
3dexport
lego man
3d_ocean
$5

Lego
...lego
3docean
basic children cube games lego low poly toy
basic lego tile.
3ddd
$1

Lego человески
...lego человески
3ddd
lego
человечки lego
3ddd
$1

Lego полицейский
...lego полицейский
3ddd
lego
lego полицейский
3ddd
$1
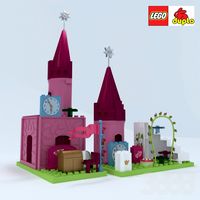
LEGO Duplo
...lego duplo
3ddd
lego , конструктор
lego duplo
Brick
turbosquid
$1

Brick-a-Brick
... available on turbo squid, the world's leading provider of digital 3d models for visualization, films, television, and games.
3d_export
$5
brick
...brick
3dexport
brick
turbosquid
$20

Stone Brick Brick
... available on turbo squid, the world's leading provider of digital 3d models for visualization, films, television, and games.
3d_export
$5

brick
...brick
3dexport
photo-scanned brick wall
3d_export
$5

brick
...brick
3dexport
photo-scanned brick wall
3ddd
$1
brick
...brick
3ddd
панель
mosque brick pattern
3ddd
free
brick
...brick
3ddd
кирпич , кладка
model brick vray 2014
design_connected
$11

Brick
...brick
designconnected
way design brick computer generated 3d model. designed by lattoog.
3d_export
$5

Brick
...brick
3dexport
brick 4k low poly model. tested in unreal engine 4.27.1 .
3d_ocean
$4
Red brick
...red brick
3docean
brick low poly red
red brick
Compatible
turbosquid
$3

Genesis 8 Clothing 1 dForce Compatible
... available on turbo squid, the world's leading provider of digital 3d models for visualization, films, television, and games.
turbosquid
free

Genesis 8 Clothing Top 1 dForce Compatible
...nesis 8 clothing top 1 dforce compatible (2) for download as on turbosquid: 3d models for games, architecture, videos. (1217671)
turbosquid
$50
Screwdriver Latch Type CSC Torx compatible with Straumann
...sc torx compatible with straumann for download as obj and stl on turbosquid: 3d models for games, architecture, videos. (1370064)
3d_export
$9

cad compatible casual woman hand model f1p3d1v1hand
...s: stl, obj, fbx<br>models with quad-topology (1100 quads) are also included (f1p3d1v1hand_quad.obj, f1p3d1v1hand_quad.fbx)
3d_export
$38

uzaki rigify
...uzaki rigify 3dexport compatible-blender ...
3d_export
$5

cloud lowpoly 3d
...cloud lowpoly 3d 3dexport lowpoly 3d format fbx compatible with unreal and...
3d_export
$5

flower lowpoly 3d
...flower lowpoly 3d 3dexport lowpoly 3d format fbx compatible with unreal and...
3d_export
$5

rocks lowpoly 3d
...rocks lowpoly 3d 3dexport lowpoly 3d format fbx compatible with unreal and...
3d_export
$10
pots
...pots
3dexport
pots<br>modeled in blender<br>compatable with evee and cycels
3d_ocean
$95

Mr Techny
...for 3ds max 2010 and later – biped (2010 compatible and cat (2011 compatible) versions incluided. for maya 2012...
Wall
turbosquid
$5
Wall and UDK Wall
... available on turbo squid, the world's leading provider of digital 3d models for visualization, films, television, and games.
archibase_planet
free
Wall
...wall
archibase planet
batten wall plywood partition
batten wall - 3d model for interior 3d visualization.
3d_ocean
$5
Wall
...wall
3docean
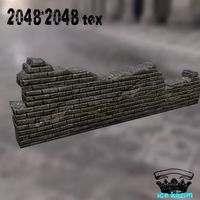
low polgon wall low stone old wall stone wall
2048*2048 tex obj,fbx,blend format. low polygon. game ready.
3ddd
$1
wall
...wall
3ddd
камень , кладка
damaged stone wall
3d_export
$5

wall
...wall
3dexport
room with a wall with doors made of wood and leather
3ddd
$1
WALL FREAMS
...wall freams
3ddd
wall freams
wall freams
3ddd
$1

WALL-E
...wall-e
3ddd
wall-e , робот
wall-e
3ddd
$1
WALL PANNEL
...wall pannel
3ddd
панель
wall pannel for enterance wall.
3d_export
$18
great wall-city wall-dianjiangtai
...great wall-city wall-dianjiangtai
3dexport
great wall-city wall-dianjiangtai<br>3ds max 2015
turbosquid
$5

Wall
...wall
turbosquid
royalty free 3d model wall for download as on turbosquid: 3d models for games, architecture, videos. (1522889)
Mounts
3d_export
free

mounting bracket
...the part of a hinge, handle or latch that mounts the hardware to a cabinet. mounting plates make it...
turbosquid
$2

MOUNTING
... available on turbo squid, the world's leading provider of digital 3d models for visualization, films, television, and games.
turbosquid
free

Mounts
... available on turbo squid, the world's leading provider of digital 3d models for visualization, films, television, and games.
turbosquid
free

Mount Fuji
...fuji
turbosquid
free 3d model mount fuji for download as obj on turbosquid: 3d models for games, architecture, videos. (1579977)
3d_export
$5

Headphone mount LR
...headphone mount lr
3dexport
headphone mount l+r
turbosquid
$39

Mount rainier
...quid
royalty free 3d model mount rainier for download as fbx on turbosquid: 3d models for games, architecture, videos. (1492586)
turbosquid
$5

pipe mounting
...quid
royalty free 3d model pipe mounting for download as obj on turbosquid: 3d models for games, architecture, videos. (1293744)
turbosquid
$3

Mounting Tires
...uid
royalty free 3d model mounting tires for download as fbx on turbosquid: 3d models for games, architecture, videos. (1708511)
3d_export
$5

Magnetic GoPro Mount
...pro mount
3dexport
cool magnetic mount for gopro. allows you to mount the camera on flat metal surfaces and get exclusive shots.
turbosquid
$5

Stone Mount
...ty free 3d model stone mount for download as ma, obj, and fbx on turbosquid: 3d models for games, architecture, videos. (1370306)
Mount
3d_export
free
mounting bracket
...mounting plate is the portion of a hinge that attaches to the wood. mounting plates can be used indoors, cabinetry and furniture.
turbosquid
$2
MOUNTING
... available on turbo squid, the world's leading provider of digital 3d models for visualization, films, television, and games.
turbosquid
free
Mounts
... available on turbo squid, the world's leading provider of digital 3d models for visualization, films, television, and games.
turbosquid
free
Mount Fuji
...fuji
turbosquid
free 3d model mount fuji for download as obj on turbosquid: 3d models for games, architecture, videos. (1579977)
3d_export
$5
Headphone mount LR
...headphone mount lr
3dexport
headphone mount l+r
turbosquid
$39
Mount rainier
...quid
royalty free 3d model mount rainier for download as fbx on turbosquid: 3d models for games, architecture, videos. (1492586)
turbosquid
$5
pipe mounting
...quid
royalty free 3d model pipe mounting for download as obj on turbosquid: 3d models for games, architecture, videos. (1293744)
turbosquid
$3
Mounting Tires
...uid
royalty free 3d model mounting tires for download as fbx on turbosquid: 3d models for games, architecture, videos. (1708511)
3d_export
$5
Magnetic GoPro Mount
...pro mount
3dexport
cool magnetic mount for gopro. allows you to mount the camera on flat metal surfaces and get exclusive shots.
turbosquid
$5
Stone Mount
...ty free 3d model stone mount for download as ma, obj, and fbx on turbosquid: 3d models for games, architecture, videos. (1370306)