Thingiverse
Motor on a roller blind by pgote
by Thingiverse
Last crawled date: 3 years ago
Note from the designer
The "thing" is a few years old and so is the repo (archived state). Some Arduino libraries used in the original code is out-of-date. I'd check the timestamp of the repo and use the version for each library that is relevant. E.g. my last commit was "9 Mar 2018" and that means that ArduinoJson 5.13.1 was used - check timestamp of releases in respective library repo.
If you have coding/connectivity/flashing the device, use the comment section and the community for help.
Yes, there are some bugs such as when power is disconnected and it is loosing the position. Check the comments and forks of the repo as I know that this has been corrected elsewhere.
So there are no plans to add hardwired buttons or anything like that (it was actually the initial intent with a decouple design using MQTT messaging to steer the roller blind).
What is it?
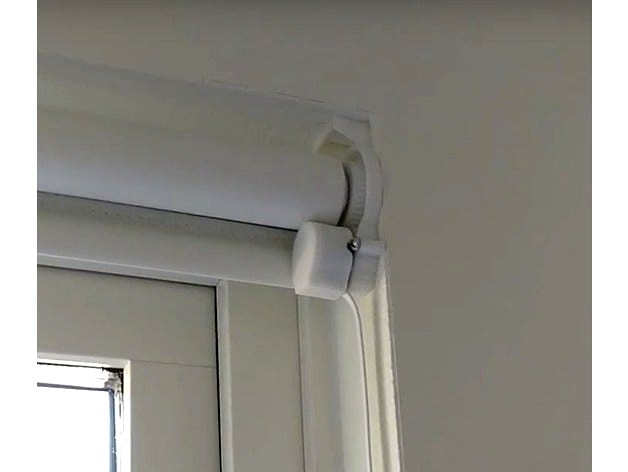
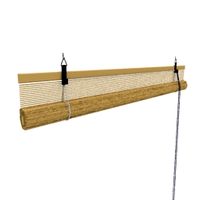
I've put a motor on my roller blinds and made them controllable via MQTT messages or via a web client (two different ways to control the roller blind) that interacts with an on device embedded webserver. I've used the same sized prints for multiple different brands of blinds.
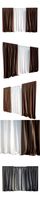
Look at the pictures and animations that will show how it is all fitted together.
I used to have two code bases for an MQTT version and Web client version but I've merged those together into one code base and the use of MQTT is optional. It is set upon WIFI configuration - simply leave the MQTT server field blank.
The current version is for a ceiling mounted roller blind as shown here: https://youtu.be/Dka4of30YOY
How the pieces are assembled: https://youtu.be/3odwHns21Ik
There is a remix made for wall mounted roller blinds made by bmscott. It can be found here https://www.thingiverse.com/thing:2530155
Additional components
DISCLAIMER: The below description is the parts that I used and how I've assembled it. If you want to use other ESP8266 boards or components it is up to you to test it :-)
1pc. 608ZZ bearing (8x22x7mm)
1pc. tiny screw for center pin fastening the center pin
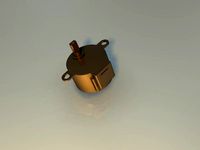
1pc. 28BYJ-48 stepper motor + ULN2003 driver board. I'm using the 5V version of the motor (but the 12V should give better torque - see my comment below)
1pc. 9v power adapter
1pc. NodeMCU v3 Dev board
2pc. short M4 screws for mounting the stepper motor
Here are examples (including 2 versions of the stepper motor) of items for purchase https://goo.gl/gbb8xT
Hook it up
Connect 9v directly to Vin on NodeMCU board (validate first that your version has a built in regulator for 9V) and to the ULN2003 board. 5V is simply not enough to be able to control the blinds, even with the higher gear ratio, so ULN2003 requires 9V. I'm using the 5V version of the stepper motor and it has worked well for me so far - there's an 12v version though that should be able to give a higher torque than the 5v running on 9v. My roller blind is just 100cm wide and if you have a really wide roller blind I would probably go for the 12V version of the stepper motor. NOTE: A battery will not last long so get a 9V power adapter.
D1 = IN1, D2 = IN3, D3 = IN2, D4 = IN4
Flash the ESP8266-12E
Flash your NodeMCU board with code from the following repository: https://github.com/nidayand/motor-on-roller-blind-ws
Follow the instructions as described in the Github repository on how to control the device.
If you don't have an MQTT server you can use a public one during a testing (!) phase. E.g. iot.eclipse.org:1883 as described here https://iot.eclipse.org/getting-started or simply just just the web client
Below are examples of the responsive page served from the device - Android and iPhone UI
You will be notified if and when new updates of the code have been released.
Access the web page
Post flashing the device:
Connect to the WIFI Access Point BlindsConnectAP and use nidayand as the password
Enter your WIFI credentials, a unique name for the device (to be used for mDNS) and, optionally, MQTT server details (leave blank if you don't want to use it)
The device will reboot and connect to your WIFI upon save
Use a web browser to connect to the device on port 80. E.g. http://192.168.2.226 or http://{configured_name}.local if you are using an mDNS supported device/client such as iOS or OSX
You want to customize it?
I've thought of doing a wall-mounted version but I don't have that need myself so instead I can share the source code. I've used Autodesk Fusion 360 in the design and you are welcome to download and modify it further as long as you give credits to the original. Download: https://drive.google.com/file/d/1fZxdVtPUIlZnW_kDdFC23oF6Y-pgNVyj/view?usp=sharing
Credits
Ideation from http://www.instructables.com/id/Motorized-WiFi-IKEA-Roller-Blind/ . I wanted a different mount and to get it to work better an increased gear ratio is required and an higher powering voltage to be able to pull the blinds up
24BYJ-48 stepper CAD component. I've done some changes to the original as some distances where off -https://gallery.autodesk.com/fusion360/projects/86268/stepper-motor-28byj-48?searched=
@Lars Christensen - it is my first Fusion360 design and I used his YouTube channel to learn the basics https://www.youtube.com/user/cadcamstuff/featured
Power options for NodeMCU boards - http://henrysbench.capnfatz.com/henrys-bench/arduino-projects-tips-and-more/powering-the-esp-12e-nodemcu-development-board/
The "thing" is a few years old and so is the repo (archived state). Some Arduino libraries used in the original code is out-of-date. I'd check the timestamp of the repo and use the version for each library that is relevant. E.g. my last commit was "9 Mar 2018" and that means that ArduinoJson 5.13.1 was used - check timestamp of releases in respective library repo.
If you have coding/connectivity/flashing the device, use the comment section and the community for help.
Yes, there are some bugs such as when power is disconnected and it is loosing the position. Check the comments and forks of the repo as I know that this has been corrected elsewhere.
So there are no plans to add hardwired buttons or anything like that (it was actually the initial intent with a decouple design using MQTT messaging to steer the roller blind).
What is it?
I've put a motor on my roller blinds and made them controllable via MQTT messages or via a web client (two different ways to control the roller blind) that interacts with an on device embedded webserver. I've used the same sized prints for multiple different brands of blinds.
Look at the pictures and animations that will show how it is all fitted together.
I used to have two code bases for an MQTT version and Web client version but I've merged those together into one code base and the use of MQTT is optional. It is set upon WIFI configuration - simply leave the MQTT server field blank.
The current version is for a ceiling mounted roller blind as shown here: https://youtu.be/Dka4of30YOY
How the pieces are assembled: https://youtu.be/3odwHns21Ik
There is a remix made for wall mounted roller blinds made by bmscott. It can be found here https://www.thingiverse.com/thing:2530155
Additional components
DISCLAIMER: The below description is the parts that I used and how I've assembled it. If you want to use other ESP8266 boards or components it is up to you to test it :-)
1pc. 608ZZ bearing (8x22x7mm)
1pc. tiny screw for center pin fastening the center pin
1pc. 28BYJ-48 stepper motor + ULN2003 driver board. I'm using the 5V version of the motor (but the 12V should give better torque - see my comment below)
1pc. 9v power adapter
1pc. NodeMCU v3 Dev board
2pc. short M4 screws for mounting the stepper motor
Here are examples (including 2 versions of the stepper motor) of items for purchase https://goo.gl/gbb8xT
Hook it up
Connect 9v directly to Vin on NodeMCU board (validate first that your version has a built in regulator for 9V) and to the ULN2003 board. 5V is simply not enough to be able to control the blinds, even with the higher gear ratio, so ULN2003 requires 9V. I'm using the 5V version of the stepper motor and it has worked well for me so far - there's an 12v version though that should be able to give a higher torque than the 5v running on 9v. My roller blind is just 100cm wide and if you have a really wide roller blind I would probably go for the 12V version of the stepper motor. NOTE: A battery will not last long so get a 9V power adapter.
D1 = IN1, D2 = IN3, D3 = IN2, D4 = IN4
Flash the ESP8266-12E
Flash your NodeMCU board with code from the following repository: https://github.com/nidayand/motor-on-roller-blind-ws
Follow the instructions as described in the Github repository on how to control the device.
If you don't have an MQTT server you can use a public one during a testing (!) phase. E.g. iot.eclipse.org:1883 as described here https://iot.eclipse.org/getting-started or simply just just the web client
Below are examples of the responsive page served from the device - Android and iPhone UI
You will be notified if and when new updates of the code have been released.
Access the web page
Post flashing the device:
Connect to the WIFI Access Point BlindsConnectAP and use nidayand as the password
Enter your WIFI credentials, a unique name for the device (to be used for mDNS) and, optionally, MQTT server details (leave blank if you don't want to use it)
The device will reboot and connect to your WIFI upon save
Use a web browser to connect to the device on port 80. E.g. http://192.168.2.226 or http://{configured_name}.local if you are using an mDNS supported device/client such as iOS or OSX
You want to customize it?
I've thought of doing a wall-mounted version but I don't have that need myself so instead I can share the source code. I've used Autodesk Fusion 360 in the design and you are welcome to download and modify it further as long as you give credits to the original. Download: https://drive.google.com/file/d/1fZxdVtPUIlZnW_kDdFC23oF6Y-pgNVyj/view?usp=sharing
Credits
Ideation from http://www.instructables.com/id/Motorized-WiFi-IKEA-Roller-Blind/ . I wanted a different mount and to get it to work better an increased gear ratio is required and an higher powering voltage to be able to pull the blinds up
24BYJ-48 stepper CAD component. I've done some changes to the original as some distances where off -https://gallery.autodesk.com/fusion360/projects/86268/stepper-motor-28byj-48?searched=
@Lars Christensen - it is my first Fusion360 design and I used his YouTube channel to learn the basics https://www.youtube.com/user/cadcamstuff/featured
Power options for NodeMCU boards - http://henrysbench.capnfatz.com/henrys-bench/arduino-projects-tips-and-more/powering-the-esp-12e-nodemcu-development-board/
Similar models
thingiverse
free

Stepper Motor Mount / Holder by OT12345
...pper-motor-5v-4-phase-5-line-driver-board-uln2003-for-arduino-perfect-/131469911265?pt=lh_defaultdomain_0&hash=item1e9c37a4e1
thingiverse
free

Fish Feeder by NJWoodburn
...lm canister to hold fish food
fusion 360 files available here
full code available here
more info and instructions avaliable here.
thingiverse
free

Motorized roller blinds (Leroy Merlin version)
...g the adapted fork to control 3 motors from single esp board (mqtt and web ui): https://github.com/eg321/motor-on-roller-blind-ws
thingiverse
free

wifi turntable
...x 12v male jack
1x 28byj stepper
1x uln2003
1x 12v to 5v board
1x 12v jack power source
4x m3 screws and nuts
spare dupont cables
thingiverse
free

BIG roller blinds
...v8825 - https://lastminuteengineers.com/drv8825-stepper-motor-driver-arduino-tutorial/
tmc2208 - https://wiki.fysetc.com/tmc2208/
thingiverse
free

An ESP8266-based peristaltic dosing pump by coogle
...per library to provide control of the doser over mqtt available for download here:
https://github.com/thissmarthouse/coogle-doser
thingiverse
free

Portable GoPro 360 photo device by Tiwill345
...yny
this project was inspired from : https://www.thingiverse.com/thing:1728791
ps: you must reoriente the parts before printing !
grabcad
free

UNL2003
...unl2003
grabcad
stepper motor driver board module uln2003 for 5v 4-phase 5 line 28byj-48
thingiverse
free
Model stepper 28BYJ-48 by siderits
...r with uln2003 driver board (without driver board.
used in modeling enclosures.
included an indicator for this stepper motor.
thingiverse
free

Smart motorised roller blinds by Luc3as
...s://youtu.be/beouhchuzww
all other details are on my github
if you liked my work, you can buy me a coffee :)
or send some crypto
Pgote
thingiverse
free

OrangePI2 case by pgote
...the case.
inspired by: http://www.thingiverse.com/thing:922740
i've also included the sketchup file if you want to modify it.
thingiverse
free

Nexus7 (Gen1) tablet CD holder by pgote
...der by pgote
thingiverse
nexus7 generation 1 tablet holder to be fitted in the car cd. fits my old samsung galaxy tab2 as well..
thingiverse
free

CZ 75 Magazine Base Pad by pgote
...ad for cz 75 magazines. the stl contains print support for the overhangs. i'm printing it in pla with a high degree of infill
thingiverse
free

Car back seat tablet mount by pgote
...to the left and right module.
i have also extended the bar length to 160mm (from 140mm) and created an additional 180mm wide bar.
thingiverse
free

BLTOUCH mount for Velleman K8200 (Auto Bed Leveling) by pgote
... {h2}. this is the offset value. e.g. -0.85
m851 z-0.85 - define the offset in eeprom
m500 - save
verify... (g28, g1 z0, measure)
thingiverse
free

Motor on a roller blind enclosure by jampez77
...enclosure for the motor on a roller blind by pgote it allows for all project components to be in...
thingiverse
free

Motor on roller blinds JYSK Bolga with Bearing 608ZZ
...roller blinds jysk bolga", which is a remix of pgote#39;s "motor on a roller blind". note: i have to...
thingiverse
free

Window Blinds Controller Case by wwebers
...by wwebers thingiverse i redesigned the original case of pgote so that it's capable to: 1) keep the pcbs...
thingiverse
free

Roller blinder motor holder for windows
...driven by a stepper (i used the 28byj-48 from pgote build). the stepper is attached with two small 3mm...
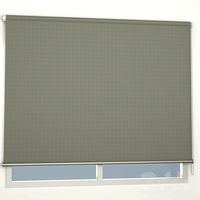
Blind
archibase_planet
free
Blind
...blind
archibase planet
blind venetian blind jalousie
blind - 3d model for interior 3d visualization.
archibase_planet
free
Blinds
...blinds
archibase planet
blinds blind jalousie
blinds n270313 - 3d model (*.gsm+*.3ds) for interior 3d visualization.
archibase_planet
free

Blind
...blind
archibase planet
blind venetian blind jalousie
blind n031007 - 3d model (*.gsm+*.3ds) for interior 3d visualization.
archibase_planet
free
Blind
...blind
archibase planet
blind jalousie
blind - 3d model for interior 3d visualization.
archibase_planet
free
Blind
...blind
archibase planet
blind sunblind jalousie
blind - 3d model for interior 3d visualization.
archibase_planet
free

Blind
...blind
archibase planet
blind curtain
blind - 3d model (*.gsm+*.3ds) for interior 3d visualization.
archibase_planet
free
Blind
...blind
archibase planet
blind jalousie
venetian blind 1- 3d model for interior 3d visualization.
archibase_planet
free
Blind
...blind
archibase planet
venetian blind jalousie
venetian blind 2 - 3d model for interior 3d visualization.
3d_ocean
$9
Blinds
...blinds
3docean
blinds curtain decor decoration drapes flat furniture home house interior jalousie
?urtains and blinds
archibase_planet
free
Blind
...blind
archibase planet
venetian blind jalousie
so blinds - 3d model (*.gsm+*.3ds) for interior 3d visualization.
Roller
turbosquid
$26
Roller A
...urbosquid
royalty free 3d model roller a for download as fbx on turbosquid: 3d models for games, architecture, videos. (1350603)
turbosquid
$3

Roller
...oyalty free 3d model roller for download as 3ds, max, and obj on turbosquid: 3d models for games, architecture, videos. (1460818)
3ddd
$1
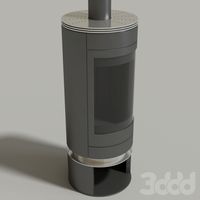
edilkamin roller
...edilkamin roller
3ddd
камин
edilkamin roller 360
3ddd
$1
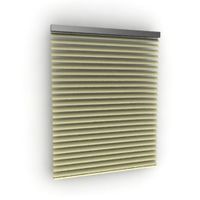
Roller Blinds
...roller blinds
3ddd
рулонная
roller blinds black out finish
turbosquid
$50

Roller
... roller for download as max, max, c4d, max, max, fbx, and obj on turbosquid: 3d models for games, architecture, videos. (1700762)
3d_export
$10
rollers
...lers
3dexport
this is low-poly model of rollers.<br>model:<br>- low-poly<br>- textured<br>- uv unwrapped
3d_export
$28
Roller 3D Model
...roller 3d model
3dexport
roller construction boss evil
roller 3d model adagio15740837 50561 3dexport
3d_export
$6
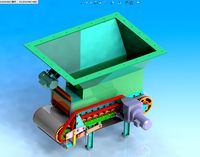
hopper roller conveyor
...hopper roller conveyor
3dexport
hopper roller conveyor
3d_export
$12

roller skates
...roller skates
3dexport
3d_ocean
$19

roller skate
...can scanned skates skating sport
3d scan of roller skate. the model has been retopologized and made fully compatible with zbrush.
Motor
archibase_planet
free

Motor
...base planet
motor motor engine engine electric motor
motor wagner n250213 - 3d model (*.gsm+*.3ds) for interior 3d visualization.
archibase_planet
free

Motor
...motor
archibase planet
motor motor engine engine
motor n151112 - 3d model (*.gsm+*.3ds) for interior 3d visualization.
archibase_planet
free

Motor
...motor
archibase planet
motor motor engine engine
motor n150615 - 3d model (*.gsm+*.3ds+*.max) for interior 3d visualization.
turbosquid
$15

Motor
...otor
turbosquid
royalty free 3d model motor for download as on turbosquid: 3d models for games, architecture, videos. (1639404)
3d_ocean
$5

Electric motor
...electric motor
3docean
car electric engine industry motor phase train vehicle
an electric motor enjoy!
3d_ocean
$18

Electric Motor
...electric motor
3docean
electric motor engine machine mover parts
3d model electric motor for hoist crane
turbosquid
$29

Motor
... available on turbo squid, the world's leading provider of digital 3d models for visualization, films, television, and games.
turbosquid
$5

Motor
... available on turbo squid, the world's leading provider of digital 3d models for visualization, films, television, and games.
3d_export
$5

electric motor
...electric motor
3dexport
electric motor use for industrial purposes
3d_export
$5

servo motor
...tor
3dexport
it's a simple part of servo motor 0.75kw for used in machines assembly to show specified motor in own project.