Thingiverse
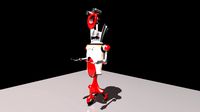
Mortar Bot v.2 CoreXY 3D Printer by MortarArt
by Thingiverse
Last crawled date: 3 years ago
Deprecated; see here:
M-bot v.1; https://www.thingiverse.com/thing:2386365/
M-bot v.3; https://www.thingiverse.com/thing:3134348
M-bot v.3.5; https://www.thingiverse.com/thing:3889891
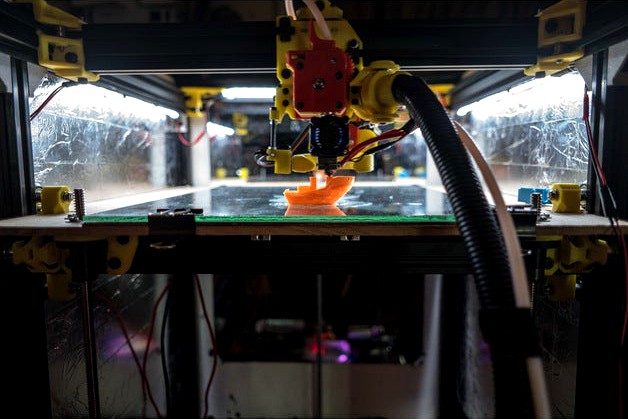
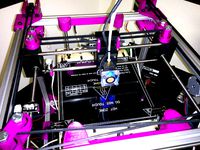
THIS IS A WORKING PRINTER
Current Status:
BOM lists all required hardware, though it hasn't been double checked, and I haven't found good sources for everything yet.
The printer is functioning, within an enclosure, and printing both ABS and PLA at a high standard.
I'm still to confirm whether or not this design will be compatible with the e3d toolchanger, but that is the intent.
List of key design changes implemented from the M-Bot v1 (itself a D-Bot remix) - https://www.thingiverse.com/thing:2386365
Wider implementation of aluminium brackets, including the full replacement of some printed corners.
Mirror of the 3 leadscrew design to improve space efficiency
Additional of MGN-9 rails for Y axis.
Lengthening of Y axis, shortening of X axis to reduce weight of moving components.
Reduction of extrusion usage, increase of structural use of enclosure.
Usage of full sized delrin wheels on Z axis.
Bed base to act as enclosure floor.
Use of precut lengths from RobotDigg for almost all extrusions
Features as designed:
400x300mm heatbed.
400mm build height.
Tight enclosure for heat retension.
Compatibility with e3d extruder and hot end options (v6, Volcano, Titan, Aero, Pitan)
Space for user's choice of electronics.
Rigid frame.
Light moving components.
Reduction in sources required for suppliers
Printed Part descriptions (assumes D-bot knowledge):
Recommended to print all in solid ABS, in an enclosure. PET-G would work as a substitute, but some tolerances may be off.
Z Axis:
Two-wheel-carriage-portion-x2 - Part to be bolted to side of 2040 main Z extrusion
One-wheel-carriage-part-x2 - Part to be bolted to opposite side of 2040 main Z extrusion
Z-leadscrew-front-mount-x2 - Mounted next to One-wheel-carriage
Z-leadscrew-rear-mount - Mounted at end of 2040 T-bar
! Z-leadscrew parts available with either 4 bolts or 3 bolts for leadscrew nuts.
XY Frame corners:
back-right-bearing-mount & back-left-bearing-mount - 2020 X extrusion at rear mounted on top.
Right-motor-bracket & Left-motor-bracket - 2020 X extrusion mounted directly under 2040 Y extrusions
Base pieces:
z-motor-mount - Raised motor, to make space for electronics
Rubber-foot-m5 (x4) - Printed feet, to save buying them. Use TPU. Print close to solid.
Rail carriages:
linear-rail-carriage - Mounted on two linear rail blocks, supports incorporated into STL.
Effector carriage:
v-wheel-top-clamp - mounts a full sized delrin V wheel, clamps with 4x M3 bolts to the carriage body
Carriage_Front_bdige_rotated & Carriage_Rear_for_Longer_Stepper - mount two mini v wheels, and the motor for either a Titan or Aero extruder
e3d-v6-cooling-fan-extension - lowers the cooling fan for a full V6 heatbreak.
AC-Bot-fan-shroud-improved-placement - is for a left hand side titan / aero
IR-guide & ir-cover for mounting DC42 ir probe. Requires M3x40mm bolts for regular Titan, and M3x50mm bolts for Volcano. Much shorter for Titan Aero.
Extruder:
Pitan parts adjusted to fit 5x14x5mm bearings for the hob, and a 4x13x4 grooved bearing on the lever, plus a new 5x14x5mm bearing on the motor shaft for the lever.
Optional Pitan body parts with holes for airflow. Suggested to mount with a 40mm fan for use in the enclosure.
Electronics enclosures:
Duet Wifi enclosure, with one major cable hole, and holes for screw down terminals, USB, wifi antenna etc. Requires 12mm M3 stand offs, and stand offs of any length for mounting to aluminium sheet, as well as 5 M3 bolts, and a 40mm blower fan for cooling.
PSU cable cover, to protect from accidental exposure to live lines.
Enclosure instructions / suggestions:
Cut MDF panels to size
Paint exterior
Line interior with aluminium tape
Drill holes for mounting on extrusions
Front panel requires cut corners to fit front motor mounts
Bed panel requires cuts for Z axis wheel carriage and extrusions
Roof panel requires gasket sealant such as silicone along contact points
Suggest installing a handle on the roof panel
Back enclosure corner should be installed over rear panel's top screw mounts as a guide for the roof panel
Consider mounting mirror on rear panel
M-bot v.1; https://www.thingiverse.com/thing:2386365/
M-bot v.3; https://www.thingiverse.com/thing:3134348
M-bot v.3.5; https://www.thingiverse.com/thing:3889891
THIS IS A WORKING PRINTER
Current Status:
BOM lists all required hardware, though it hasn't been double checked, and I haven't found good sources for everything yet.
The printer is functioning, within an enclosure, and printing both ABS and PLA at a high standard.
I'm still to confirm whether or not this design will be compatible with the e3d toolchanger, but that is the intent.
List of key design changes implemented from the M-Bot v1 (itself a D-Bot remix) - https://www.thingiverse.com/thing:2386365
Wider implementation of aluminium brackets, including the full replacement of some printed corners.
Mirror of the 3 leadscrew design to improve space efficiency
Additional of MGN-9 rails for Y axis.
Lengthening of Y axis, shortening of X axis to reduce weight of moving components.
Reduction of extrusion usage, increase of structural use of enclosure.
Usage of full sized delrin wheels on Z axis.
Bed base to act as enclosure floor.
Use of precut lengths from RobotDigg for almost all extrusions
Features as designed:
400x300mm heatbed.
400mm build height.
Tight enclosure for heat retension.
Compatibility with e3d extruder and hot end options (v6, Volcano, Titan, Aero, Pitan)
Space for user's choice of electronics.
Rigid frame.
Light moving components.
Reduction in sources required for suppliers
Printed Part descriptions (assumes D-bot knowledge):
Recommended to print all in solid ABS, in an enclosure. PET-G would work as a substitute, but some tolerances may be off.
Z Axis:
Two-wheel-carriage-portion-x2 - Part to be bolted to side of 2040 main Z extrusion
One-wheel-carriage-part-x2 - Part to be bolted to opposite side of 2040 main Z extrusion
Z-leadscrew-front-mount-x2 - Mounted next to One-wheel-carriage
Z-leadscrew-rear-mount - Mounted at end of 2040 T-bar
! Z-leadscrew parts available with either 4 bolts or 3 bolts for leadscrew nuts.
XY Frame corners:
back-right-bearing-mount & back-left-bearing-mount - 2020 X extrusion at rear mounted on top.
Right-motor-bracket & Left-motor-bracket - 2020 X extrusion mounted directly under 2040 Y extrusions
Base pieces:
z-motor-mount - Raised motor, to make space for electronics
Rubber-foot-m5 (x4) - Printed feet, to save buying them. Use TPU. Print close to solid.
Rail carriages:
linear-rail-carriage - Mounted on two linear rail blocks, supports incorporated into STL.
Effector carriage:
v-wheel-top-clamp - mounts a full sized delrin V wheel, clamps with 4x M3 bolts to the carriage body
Carriage_Front_bdige_rotated & Carriage_Rear_for_Longer_Stepper - mount two mini v wheels, and the motor for either a Titan or Aero extruder
e3d-v6-cooling-fan-extension - lowers the cooling fan for a full V6 heatbreak.
AC-Bot-fan-shroud-improved-placement - is for a left hand side titan / aero
IR-guide & ir-cover for mounting DC42 ir probe. Requires M3x40mm bolts for regular Titan, and M3x50mm bolts for Volcano. Much shorter for Titan Aero.
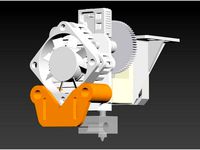
Extruder:
Pitan parts adjusted to fit 5x14x5mm bearings for the hob, and a 4x13x4 grooved bearing on the lever, plus a new 5x14x5mm bearing on the motor shaft for the lever.
Optional Pitan body parts with holes for airflow. Suggested to mount with a 40mm fan for use in the enclosure.
Electronics enclosures:
Duet Wifi enclosure, with one major cable hole, and holes for screw down terminals, USB, wifi antenna etc. Requires 12mm M3 stand offs, and stand offs of any length for mounting to aluminium sheet, as well as 5 M3 bolts, and a 40mm blower fan for cooling.
PSU cable cover, to protect from accidental exposure to live lines.
Enclosure instructions / suggestions:
Cut MDF panels to size
Paint exterior
Line interior with aluminium tape
Drill holes for mounting on extrusions
Front panel requires cut corners to fit front motor mounts
Bed panel requires cuts for Z axis wheel carriage and extrusions
Roof panel requires gasket sealant such as silicone along contact points
Suggest installing a handle on the roof panel
Back enclosure corner should be installed over rear panel's top screw mounts as a guide for the roof panel
Consider mounting mirror on rear panel
Similar models
thingiverse
free

MGN12H Hermera Carriage for 2040 extrusion with V slot Wheel Stabiliser
...2h carriage on a 20* profile extrusion..
you can mount a stabilising v slot wheel to the bottom if you mount on a 2040 extrusion.
thingiverse
free

2040 Extrusion Mount for 37mm Anti Backlash Nut by kwirky
...axis leadscrew nut for my dbot. the original d-bot part doesn't work for the 37mm version so i designed this using openscad.
thingiverse
free

Titan Aero bracket for D-Bot by muz64
...int carriage.
i don't think you can get the titan aero any closer to the rail. it's a nice compact and very rigid mount.
thingiverse
free

Tevo Tarantula Z axis inverted leadscrew holder by SuperSushi3000
...for the connection to the motor axis, those worked very well:https://www.thingiverse.com/thing:602481
fusion files are included.
thingiverse
free

MGN12 Carriage Reverse Mount by ChrisT88
...he front side z axis on a c/d-bot. mounts to 20mm extrusion via two 5mm bolt holes and the four carriage holes are of course 3mm.
thingiverse
free

Eryone Thinker S - Dual Extruder Stepper Mount
... 5mm bolts for the right-hand side z-axis wheels and 5mm nuts and washers on the rear to hold the new mount down to the carriage.
thingiverse
free
Titan Aero IR mount by MortarArt
...ount by mortarart
thingiverse
a fitting for mounting an ir sensor to a titan aero.
the updated mount is for the duet3d ir mount.
thingiverse
free

Aus3D IR Z Probe mount for E3D Titan Aero by ChrisBarr
... aero extruder.
this will hold the ir probe at the correct height from the titan aero's nozzle for use as a bed sensor/probe.
thingiverse
free

ANET A8 2020 X Axis with Titan Aero BLTouch by markalunwinn
...s tight, file it down a bit. if it's loose, you can put a piece of paper between the joints to secure it.
bltouch offsets
tbd
thingiverse
free

Titan direct drive carriage front plate for C-Bot by ian_in_the_midlands
...owden option\c-bot bowden carriage rear plate (x1) ).
for the cooling fan ducts and bracket to mount the fans, see thing 2830838.
Mortarart
thingiverse
free
Until we all belong. by MortarArt
...until we all belong. by mortarart
thingiverse
https://untilweallbelong.com/
thingiverse
free
Titan Aero IR mount by MortarArt
...ount by mortarart
thingiverse
a fitting for mounting an ir sensor to a titan aero.
the updated mount is for the duet3d ir mount.
thingiverse
free
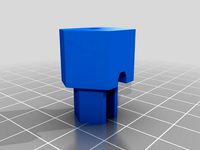
Leg for Logitech y-r0015 keyboard by MortarArt
...15 keyboard by mortarart
thingiverse
printed in petg. needed a little post-processing to get the nodules to fit in the recesses.
thingiverse
free
E3d Titan Idler Arm redesign by MortarArt
...edesign by mortarart
thingiverse
basically provides space for a bearing on the motor arm, and a grooved bearing against the hob.
thingiverse
free
Hex Adapter for screwdriver by MortarArt
...r
m3 nut
adapts a 1/4" hex on a screwdriver to 3, 4 & 5mm hex keys.
printed in solid abs, supportless. heated enclosure.
thingiverse
free
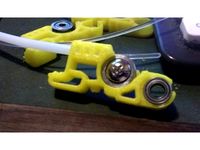
RS Components USB fan rebuild by MortarArt
...erse
a bracket to install a motor recovered from a cd/dvd drive to replace a broken motor in a usb powered fan by rs components.
thingiverse
free
Charlotte Valve with minimal manual support by MortarArt
...r more rapid production. thicker walls where the part joins the mask, and manual support for the remaining parts that require it.
thingiverse
free

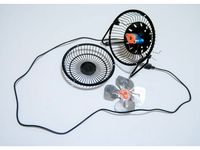
Near-supportless Bladless Fan by MortarArt
...required, but only in internal areas. printing now ... hopefully it won't fail as it's a 24 hour print on a replicator 2.
thingiverse
free
Micro Lift by MortarArt
...ls, so that it can easily be moved along the formwork.
components could be a mix of aluminium or steel plates, and printed parts.
thingiverse
free

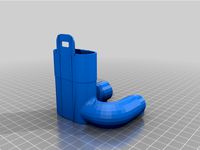
Greenhouse sprinkler (pour from outside) by MortarArt
...oviding a funnel on one end, and an outlet on the other, so that watering can be done without opening or entering the greenhouse.
Corexy
thingiverse
free

CoreXY by Kaz_tech
...corexy by kaz_tech
thingiverse
this is the model of corexy platform. i separately put the parts on this place.
thingiverse
free

corexy plotter by tjwan
...corexy plotter by tjwan
thingiverse
parts for corexy mill inspired by http://der-frickler.net/technik/corexyportal
thingiverse
free
ScribbleJ CoreXY Beta by ScribbleJ
...j/corexy-v1https://github.com/scribblej/corexy-v1#corexy-beta
full gallery of development photos here: http://imgur.com/a/donun
thingiverse
free
CoreXY Emblem by emkajot
...by emkajot
thingiverse
an emblem for your corexy printer.
size: 100mm x 38mm x 2mm.
update: added a version with a proper mount.
thingiverse
free

SolidCore CoreXY Carriage by shanehooper
...olidcore 3d printer. this design could be used in other corexy 3d printers.
also see:https://3ddistributed.com/corexy-3d-printer/
thingiverse
free
CoreXY 3D Printer Model by ReginaFabricam
...bricam
thingiverse
this is an original design of a corexy printer.https://www.tinkercad.com/things/jggr9qk4s4p-3d-printer-corexy
thingiverse
free

coreXY Upper structure Left
...corexy upper structure left
thingiverse
my customized corexy 3d printer upper left parts
thingiverse
free
CoreXY by frankie
...ing machines, etc. the design is described in greater detail at http://www.corexy.com . a video is at http://vimeo.com/40914530 .
thingiverse
free

Endstop block for CoreXY carriage by svkeulen
...endstop block for corexy carriage by svkeulen
thingiverse
endstop for corexy carriage
thingiverse
free
X carriage for the CoreXY MGN12 by hackerbijay
...x carriage for the corexy mgn12 by hackerbijay
thingiverse
x carriage for the corexy frame
Mortar
turbosquid
$19

Mortar
...uid
royalty free 3d model mortar for download as max and obj on turbosquid: 3d models for games, architecture, videos. (1197208)
3d_ocean
$5

Mortar and Pestle
...mortar and pestle
3docean
brass brazen kitchen medicine mortar pestle
a brazen mortar and a pestle with some scratches
3d_export
$5

mortar
...mortar
3dexport
3d_ocean
$5

Mortar and Pestle
...mortar and pestle
3docean
alchemist cooking crush kitchen mortar pestle silver witch
a silver mortar and pestle set
turbosquid
$48

Mortar
...oyalty free 3d model mortar for download as max, max, and 3ds on turbosquid: 3d models for games, architecture, videos. (1589238)
3d_export
$15

mortar 80mm
...mortar 80mm
3dexport
mortar 4k textures uvw
turbosquid
$50

Mortar
... available on turbo squid, the world's leading provider of digital 3d models for visualization, films, television, and games.
turbosquid
$20

Mortar
... available on turbo squid, the world's leading provider of digital 3d models for visualization, films, television, and games.
turbosquid
$16

Mortar
... available on turbo squid, the world's leading provider of digital 3d models for visualization, films, television, and games.
turbosquid
$16

Mortar
... available on turbo squid, the world's leading provider of digital 3d models for visualization, films, television, and games.
Bot
turbosquid
$19

Bot
... available on turbo squid, the world's leading provider of digital 3d models for visualization, films, television, and games.
turbosquid
free

Bot
... available on turbo squid, the world's leading provider of digital 3d models for visualization, films, television, and games.
3d_export
$10

scanner bot
...scanner bot
3dexport
cool scanner bot who scans for fixing things...
3d_ocean
$9

Apc Bot
...n bot games toys
an all-purpose-constructo-bot. for cartoon purposes. the model is not rigged. please use vray adv for rendering.
3d_export
$75
Bot 3D Model
...bot 3d model
3dexport
robot bot man kiborg character
bot 3d model evgen 19504 3dexport
turbosquid
free

Eye Bot
...eye bot
turbosquid
free 3d model eye bot for download as fbx on turbosquid: 3d models for games, architecture, videos. (1514059)
turbosquid
$29

Gorill-bot
...bosquid
royalty free 3d model gorill-bot for download as fbx on turbosquid: 3d models for games, architecture, videos. (1239456)
turbosquid
$25

Lamp Bot
...bosquid
royalty free 3d model lamp bot for download as blend on turbosquid: 3d models for games, architecture, videos. (1230121)
turbosquid
$10
Spectre Bot
...osquid
royalty free 3d model spectre bot for download as fbx on turbosquid: 3d models for games, architecture, videos. (1616378)
turbosquid
$8
Ultra Bot
...urbosquid
royalty free 3d model ultra bot for download as ma on turbosquid: 3d models for games, architecture, videos. (1330752)
Printer
archibase_planet
free

Printer
...inter
archibase planet
printer laser printer pc equipment
printer n120614 - 3d model (*.gsm+*.3ds) for interior 3d visualization.
archibase_planet
free

Printer
...rchibase planet
laser printer office equipment computer equipment
printer - 3d model (*.gsm+*.3ds) for interior 3d visualization.
turbosquid
$100

Printer
...er
turbosquid
royalty free 3d model printer for download as on turbosquid: 3d models for games, architecture, videos. (1487819)
turbosquid
$3

Printer
...turbosquid
royalty free 3d model printer for download as max on turbosquid: 3d models for games, architecture, videos. (1670230)
turbosquid
$1

printer
...turbosquid
royalty free 3d model printer for download as max on turbosquid: 3d models for games, architecture, videos. (1595546)
turbosquid
$1

printer
...turbosquid
royalty free 3d model printer for download as max on turbosquid: 3d models for games, architecture, videos. (1595105)
turbosquid
$10

Printer
...id
royalty free 3d model printer for download as max and 3dm on turbosquid: 3d models for games, architecture, videos. (1607146)
turbosquid
$7

Printer
...royalty free 3d model printer for download as ma, ma, and obj on turbosquid: 3d models for games, architecture, videos. (1644580)
turbosquid
$30

Printer
... available on turbo squid, the world's leading provider of digital 3d models for visualization, films, television, and games.
turbosquid
$20

Printer
... available on turbo squid, the world's leading provider of digital 3d models for visualization, films, television, and games.
V
design_connected
$16
V Chair
...v chair
designconnected
v chair computer generated 3d model.
design_connected
$11
V Hanglamp
...v hanglamp
designconnected
arturo alvarez v hanglamp computer generated 3d model. designed by alvarez, arturo .
turbosquid
$25

Borbet V
...v
turbosquid
royalty free 3d model borbet v for download as on turbosquid: 3d models for games, architecture, videos. (1381618)
turbosquid
free
Saturn V
...rn v
turbosquid
free 3d model saturn v for download as blend on turbosquid: 3d models for games, architecture, videos. (1651098)
turbosquid
$40

V motor
...turbosquid
royalty free 3d model v motor for download as max on turbosquid: 3d models for games, architecture, videos. (1379483)
turbosquid
$7

V for Van
...rbosquid
royalty free 3d model v for van for download as max on turbosquid: 3d models for games, architecture, videos. (1695889)
turbosquid
$5

Letter v
...urbosquid
royalty free 3d model letter v for download as max on turbosquid: 3d models for games, architecture, videos. (1408535)
turbosquid
$5

Letter v
...urbosquid
royalty free 3d model letter v for download as max on turbosquid: 3d models for games, architecture, videos. (1408534)
turbosquid
$15

BonePile V
...oyalty free 3d model bonepile v for download as blend and obj on turbosquid: 3d models for games, architecture, videos. (1546310)
turbosquid
$2

FONT V
...quid
royalty free 3d model font v for download as ma and obj on turbosquid: 3d models for games, architecture, videos. (1549450)
2
design_connected
$11

No 2
...no 2
designconnected
sibast no 2 computer generated 3d model. designed by sibast, helge.
turbosquid
$6

Cliff Rock 2-2
...uid
royalty free 3d model cliff rock 2-2 for download as obj on turbosquid: 3d models for games, architecture, videos. (1619161)
turbosquid
$22

Classic baluster (2) (2)
...assic baluster (2) (2) for download as max, obj, fbx, and stl on turbosquid: 3d models for games, architecture, videos. (1483789)
turbosquid
$99

Smilodon 2 Pose 2
... available on turbo squid, the world's leading provider of digital 3d models for visualization, films, television, and games.
turbosquid
$20

Barrel Barricade 2-2
... available on turbo squid, the world's leading provider of digital 3d models for visualization, films, television, and games.
turbosquid
$6

Wall Trophy (2) (2)
... available on turbo squid, the world's leading provider of digital 3d models for visualization, films, television, and games.
turbosquid
free

Tire label 2 of 2
... available on turbo squid, the world's leading provider of digital 3d models for visualization, films, television, and games.
3ddd
$1

Кровать, 2 тумбочки, 2 светильника
...кровать, 2 тумбочки, 2 светильника
3ddd
кровать, 2 тумбочки, 2 светильника
нормальное качество
формат 3ds max
без текстур
3ddd
free

Кровать, 2 тумбочки, 2 светильника
...кровать, 2 тумбочки, 2 светильника
3ddd
кровать, 2 тумбочки, 2 светильника
нормальное качество
формат 3ds max
без текстур
turbosquid
$19
Loft wooden square box chandelier (2) (2) (2)
... available on turbo squid, the world's leading provider of digital 3d models for visualization, films, television, and games.