Thingiverse

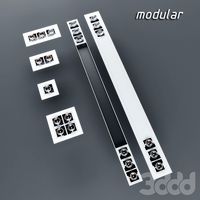
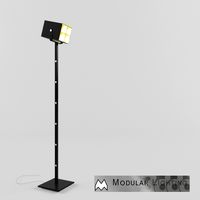
Modular Shelves with 8 mm Aluminum Round Tube by yoghi85
by Thingiverse
Last crawled date: 3 years, 1 month ago
Hi!
I designed from scratch these modular shelves which use 8 mm aluminum round tubes as structure. These tubes are very cheap and can be found everywhere, the price is about 1.5 € per meter, so it is unexpensive (you won't need more than two meters unless you make very very large shelves :D).
I included straight and corners variants so you can virtually made any design. I designed it to be screwless wall mounted, since I used it in bathroom and I didn't want to damage tiles. You can use any powerful double side tape. You can also use command strips which have proven strength (there are waterproof command strips to even mount it in shower). I also added brackets for corner and end sides to increase the wall fixation if needed, they are mounted below every part, although I didn't need them.
All you need to do is to print desired bases (printing orientation is shown in images, supports are not needed for any part), ends and corner (this last one if you want to mount the shelve in a corner as the main picture, but you can make it only straight). I included the tube lenght inserted into every part in three pictures. When prints are finished, you only have to cut the total tube length adding these distances to the tube (they don't need to be exact at all, it is better to have shorter distances to avoid any separation in bases).
Parts named as hollowed have a little cut-out to allow any wire to be inserted. Note that I've enlarged this cut since I notice they were too short, now it should be working properly.
I highly recommend a tube cutter like the one shown in picture because it makes clean cuts (8 bucks or cheaper in any hardware store), but you can use whatever you have (dremel, hacksaw, etc...).
Finally, you have to assemble the structure as seen in photos (in case tubes are too loosed, you can use a hot glue drop to fix it) and then press the bases until they are introduced in rails.
There are several parts with different dimensions and orientations, but you can also scale the bases only in the same direction as staples to virtually make any needed dimension (if you scale other directions you will deform the staple which is inserted in tubes).
It is a very easy project, hope this is useful for you guys!
Feel free to leave any comment or doubt!
Bye!
Similar models
thingiverse
free

Cable wire tie bases for use with Command strips by allen476
...is a combination horizontal and vertical base with a screw hole for mounting. i am not fond of the combo base as it seems clunky.
thingiverse
free

(Greg's Accessible) Wade's Extruder Bowden Adapter by summetj
...3 )
i have included stl files for using an m4 nut, or a commercial push to connect tube adapter. the scad file can make either.
thingiverse
free

insulation box corner by lovan
...f the insulation to make it a perfect fit, otherwise the corners could not be printed like this, but it works great !
have fun !
thingiverse
free

Atom's Parametric Shelf Bracket by atom_bomb
...c pipe.
this parametric design can be customized for whatever tubing you have on hand and to be as strong as you care to make it.
thingiverse
free

Laser Cut Spool Holder with bearings by Mati_DIY
...wood rod to aproximately 8 cm and insert two 608 bearings, then placing the rod on top by inserting the 2 bearing in their slots.
thingiverse
free

Wanhao Duplicator i3 upward filament tube holder by keaganbester
... for a slight alleviation in the direction change.
edit: mk2 contains no screw hold ups, allowing for a shorter screw to be used.
thingiverse
free

CR10s Pro direct drive conversion using stock extruder. by SilverPaul
...y attached to the carriage.)
i've yet to download an stl that didn't need tweaking so expect to have to do a little work!
thingiverse
free

LED RGB Light Gaming Cube by CH-Makers
...ed/rgb lights inside the cube with a sound sensor controller. i can control the lights with my cell phone app or remote control.
thingiverse
free

Small Shelf by MarcMan
... the shelves are holding up well without failure. much of the success will be based on the mounting tape used to mount the shelf.
thingiverse
free

Customizable square tube corner bracket by johanb
...ingle layer extends into all the tubes, which strengthens the part. it prints without support on my very, very homebuilt printer.
Yoghi85
thingiverse
free

Door shelf for spices by yoghi85
...ght. better results in curved areas can be obtained reducing the layer height, however it is fully functional.
hope you enjoy it!
thingiverse
free

Necklace hanger by yoghi85
...highly recommended to improve print quality, as always.
in case you have any doubt or suggestion, please comment!
hope you enjoy!
thingiverse
free

Slim Wallet with Money Clip by yoghi85
...ed supports
raft(optional)
printed vertically
hope this is useful for you guys! feel free to leave any comment about it.
regards!
thingiverse
free

Dolce Gusto Wall Capsule Dispenser by yoghi85
...#39;t change the printing speed a lot since it only affects the main column and the bottom plate).
hope you enjoy guys!
regards.
thingiverse
free

Anet A6 Power Supply Cover and Switch Holder by yoghi85
...n't hesitate to comment in case you need help about electrical connections or you want to leave any feedback.
hope you enjoy!
thingiverse
free

Anet A6 Back Frame, Stabilizer and Motor Fixation by yoghi85
... in a future version i will move the vertical reinforcements to ease the assembly, although it is very simple.
hope you enjoy it!
thingiverse
free

Anet A6 Motor Bracket and Frame Stabilizer by yoghi85
... que he medido, ajustar según calibración)
no dudes en comentar si tienes cualquier duda o sugerencia.
¡espero que lo disfrutes!
Shelves
archibase_planet
free

Shelves
...shelves
archibase planet
rack shelves shelving
shelves - 3d model (*.gsm+*.3ds) for interior 3d visualization.
archibase_planet
free

Shelves
...shelves
archibase planet
stand shelves shelving
shelves - 3d model (*.gsm+*.3ds) for interior 3d visualization.
archibase_planet
free

Shelving
...shelving archibase planet shelving shelves kitchen furniture shelving - 3d model (*.gsm+*.3ds) for interior...
archibase_planet
free

Shelves
...shelves
archibase planet
shelving shelves kitchen cabinet
shelves - 3d model (*.gsm+*.3ds) for interior 3d visualization.
archibase_planet
free

Shelves
...shelves
archibase planet
shelving rack shelves
shelves 1 - 3d model (*.gsm+*.3ds) for interior 3d visualization.
archibase_planet
free

Shelves
...shelves
archibase planet
rack shelving shelves
shelves 2 - 3d model (*.gsm+*.3ds) for interior 3d visualization.
archibase_planet
free

Shelving
...shelving archibase planet shelving shelves kitchen furniture shelving - 3d model (*.gsm+*.3ds) for interior...
archibase_planet
free

Shelving
...shelving archibase planet shelf shelving shelves shelving 3 - 3d model (*.gsm+*.3ds) for interior 3d...
archibase_planet
free

Shelves
...shelves
archibase planet
shelves shelving bookcase
shelves n060214 - 3d model (*.gsm+*.3ds+*.max) for interior 3d visualization.
archibase_planet
free

Shelving
...shelving archibase planet shelving shelves kitchen furniture shelving 1 - 3d model (*.gsm+*.3ds) for...
Aluminum
3d_export
$5

aluminum crutch
...aluminum crutch
3dexport
aluminum crutch
3d_export
free

aluminum cane
...aluminum cane
3dexport
aluminum cane
3d_export
$5

the aluminum canister
...
3dexport
the aluminum canister is designed for storing and transporting liquids( water), fuels and lubricants (gasoline, oils).
turbosquid
$2
Aluminum Wheel
...uid
royalty free 3d model aluminum wheel for download as fbx on turbosquid: 3d models for games, architecture, videos. (1371918)
turbosquid
$2
aluminum pulley
...
royalty free 3d model aluminum pulley for download as sldpr on turbosquid: 3d models for games, architecture, videos. (1671716)
turbosquid
$40

Aluminum Can
... free 3d model aluminum can for download as 3ds, max, and obj on turbosquid: 3d models for games, architecture, videos. (1301606)
turbosquid
$15

Curved aluminum
...ee 3d model curved aluminum for download as max, obj, and fbx on turbosquid: 3d models for games, architecture, videos. (1260293)
turbosquid
$12

Aluminum pot
... free 3d model aluminum pot for download as max, fbx, and obj on turbosquid: 3d models for games, architecture, videos. (1653492)
3d_export
$5
Aluminum Bottle
... for shampoo, conditioner or any liquids (500ml 17floz) separated all parts, able to customize any color, material and finishing.
turbosquid
$19

Aluminum windows
...model aluminum windows for download as max, max, fbx, and obj on turbosquid: 3d models for games, architecture, videos. (1646740)
Modular
3ddd
$1
MODULAR
...modular
3ddd
modular , врезной свет
modular потолочные светильники
3ddd
$1
Modular Spock
...modular spock
3ddd
modular
modular spock
3ddd
$1
MODULAR / Spock
...modular / spock
3ddd
modular
modular/spock
design_connected
$7
Modular
...modular
designconnected
emmemobili modular shelves and storage computer generated 3d model. designed by ferruccio laviani.
3ddd
$1
Modular spock
...modular spock
3ddd
modular
spock wall led
turbosquid
$25
Modular sofa Angelo Cappellini Modular
...a angelo cappellini modular for download as max, fbx, and obj on turbosquid: 3d models for games, architecture, videos. (1570923)
turbosquid
$15
Modular sofa Angelo Cappellini Modular
...a angelo cappellini modular for download as max, fbx, and obj on turbosquid: 3d models for games, architecture, videos. (1570304)
3ddd
$1
Modular 2FLAT2C
...modular 2flat2c
3ddd
modular
modularhttp://www.supermodular.com/
3d_export
free
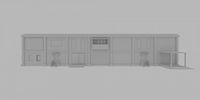
Modular walls
...modular walls
3dexport
modular walls for playing without materials and textures
3ddd
$1
Modular / Lighting Juliette
...modular / lighting juliette
3ddd
modular
modular lighting juliette
Tube
archibase_planet
free

Tube
...tube
archibase planet
paint tube stationery
tube - 3d model (*.gsm+*.3ds) for interior 3d visualization.
turbosquid
free
tube
...tube
turbosquid
free 3d model tube for download as c4d on turbosquid: 3d models for games, architecture, videos. (1378271)
archibase_planet
free
Tube
...tube
archibase planet
mascara cosmetics make-up
tube 1 - 3d model (*.gsm+*.3ds) for interior 3d visualization.
3d_export
$5
Tube pants
...tube pants
3dexport
tube pants
3d_export
free
Tube
...tube
3dexport
turbosquid
free
TUBE
...
free 3d model tube for download as blend, dae, fbx, and obj on turbosquid: 3d models for games, architecture, videos. (1672199)
turbosquid
$29

tube
...lty free 3d model tube for download as 3ds, obj, c4d, and fbx on turbosquid: 3d models for games, architecture, videos. (1442047)
3ddd
$1

perfume tube
...perfume tube
3ddd
тюбик
perfume tube, тюбик
3ddd
$1
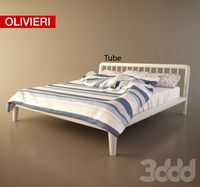
Olivieri Tube
...olivieri tube
3ddd
olivieri
кровать olivieri tube
turbosquid
$22

Tube
... available on turbo squid, the world's leading provider of digital 3d models for visualization, films, television, and games.
Round
turbosquid
$18
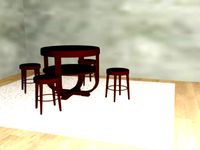
round chairs with round table
...und chairs with round table for download as max, obj, and fbx on turbosquid: 3d models for games, architecture, videos. (1454090)
3d_export
$5
round knob
...round knob
3dexport
round knob
3d_export
$5
Italian round table Millennium Round
...italian round table millennium round
3dexport
3ddd
$1
Round Ottoman
...round ottoman
3ddd
пуф
round ottoman
3ddd
$1

Round pillow
...round pillow
3ddd
подушка
round pillow
3ddd
free
Round bed
...round bed
3ddd
круглая
round bed
3ddd
$1
round table
...round table
3ddd
круглый
round table, стол
3ddd
free
ROUND TABLE
...round table
3ddd
журнальный , круглый
round table
3ddd
$1
Round Table
...round table
3ddd
круглый , кофейный
rounded coffee table
3ddd
$1
Round Rug
...round rug
3ddd
ковер , круглый
useful rounded rug
8
turbosquid
$6

Rock 8-8
...urbosquid
royalty free 3d model rock 8-8 for download as obj on turbosquid: 3d models for games, architecture, videos. (1659393)
3ddd
$1
Italamp 387/8+8
...italamp 387/8+8
3ddd
italamp
люстра italamp 387/8+8
размеры 92x71h
3ddd
$1
8 марта
...8 марта
3ddd
8 марта
кресло 8 марта
design_connected
$16
No 8
...nected
photo-realistic 3d models of the sibast no 8 armchair from sibast for 3d architectural and interior design presentations.
3d_export
$5
hinge 8
...hinge 8
3dexport
hinge 8
3d_export
$5

iphone 8
...iphone 8
3dexport
iphone 8
turbosquid
$69

iPhone 8 and iPhone 8 Plus
... free 3d model iphone 8 and iphone 8 plus for download as max on turbosquid: 3d models for games, architecture, videos. (1202442)
turbosquid
$12

Calligraphic Digit 8 Number 8
...hic digit 8 number 8 for download as max, obj, fbx, and blend on turbosquid: 3d models for games, architecture, videos. (1389341)
3ddd
free
PLANTS 8
...plants 8
3ddd
цветок , горшок
plant 8,,, hope u all like it
3ddd
$1
8 Марта / Amadey
...8 марта / amadey
3ddd
8 марта
8 marta amadey
Mm
3ddd
$1

MM Lampadari
...mm lampadari
3ddd
mm lampadari
mm lampadari
бра
люстра
3ddd
$1

MM lampadari
...mm lampadari
3ddd
mm lampadari
lampa mm lampadari,art.
3ddd
$1

MM lampadari
...mm lampadari
3ddd
mm lampadari
lustra mm lampadari,art.
3ddd
free

MM lampadari
...mm lampadari
3ddd
mm lampadari
bra mm lampadari,art.
3ddd
$1

MM Lampadari
...mm lampadari
3ddd
mm lampadari
люстра от фабрики mm lamparadi.арт:7032/8 размеры:а (d 72 x h37 см)
3ddd
$1

MM Lampadari
...mm lampadari
3ddd
lampadari
mm lampadari, 5972/12+6 1700x1800h
3ddd
$1

MM Lampadari
...mm lampadari
3ddd
mm lampadari
настольная лампа (высота - 52 см)
3ddd
$1

MM Lampadari
...mm lampadari
3ddd
mm lampadari
бра от фабрики mm lamparadi.арт:. 7032/a1 размеры:(l 16 x h 27 x sp 27 см)
3ddd
$1

MM Lampadari
...mm lampadari
3ddd
mm lampadari
люстра с рассеивателем из стекла
и позолоты и металлической арматурой
3ddd
$1

MM LAMPADARI 6578
...mm lampadari 6578
3ddd
mm lampadari
торшер mm lampadari 6578/lt3+1 v2172