Thingiverse

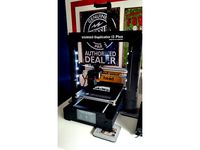
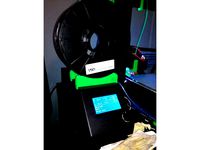
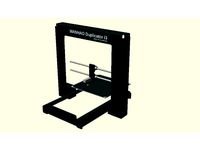
MJW Octopi Mount for Raspberry Pi Zero W with Camera - Wanhao Duplicator i3 / i3 v2 / i3 v2.1 / i3+ by MJWMakes
by Thingiverse
Last crawled date: 3 years ago
*UPDATED* Altered the pins to improve fitment, added a channel for the pi ribbon cable.
Description
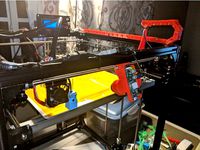
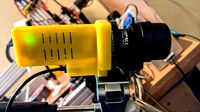
Do you have a Wanhao i3, i3 v2/2.1 or i3+?
Do you have a Raspberry Pi Zero W and Pi Camera?
Do you want to tie it all together in a sleek, compact system for remote monitoring and control?
Well here's the project for you!
What you'll need:
3 x M6x5mm Bolts (I use Button Head)
3 x M6 Nuts (Regular or Nyloc)
2 x M3x10mm Bolts (I use Socket Head)
2 x M3 Nuts (Regular or Nyloc)
2 x M3 Washers (7mm Max OD)
Printed Parts:
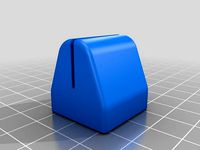
1 x Arm_Piece_Bolt
1 x Arm_Piece_Nut
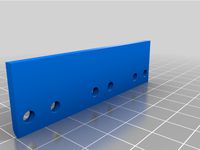
1 x i3_Frame_Bracket
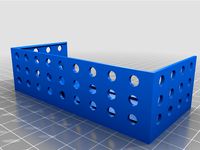
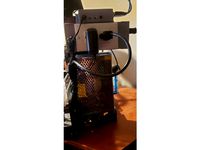
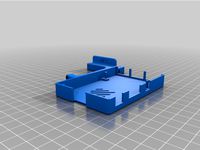
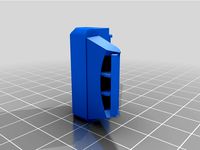
1 x Octopi_With_Pi_Cam_Body
1 x Octopi_With_Pi_Cam_Lid
1 x Pi_Zero_W_Case_Holder
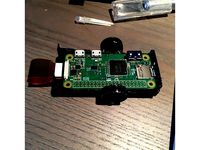
1 x Raspberry Pi Zero W + microSD card (With OctoPi installed)
1 x Camera Module for Raspberry Pi Zero W
Optional Extras:
1 x DS18B20+ Temperature Sensor
1 x 4.7k Resistor
3 x Small Pieces of Heatshrink
Instructions:
Print all parts.
Gather needed parts.
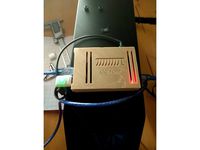
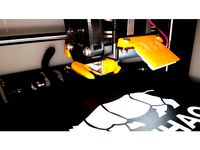
Install your Raspberry Pi Zero W into the case ("Octopi_With_Pi_Cam_Body" + "Octopi_With_Pi_Cam_Lid"). The Camera Module ribbon cable should fold under the board, and sit nicely in the square cutout on the underside of "Octopi_With_Pi_Cam_Body".
*Optional Step Here - See end*
Slide the Pi-Cam-Case assembly into "Pi_Zero_W_Case_Holder" - The orientation depends on your bed height, there's a few mm up and down for adjustment here.
Using 2 x M3x10 Bolts, Washers and Nuts, attatch "i3_Frame_Bracket" to the spare mounting locations for Z-Stop switches (On the opposite side to your actual Z-stop). Again, there is a few holes to choose from here for adjusting the height of your camera.
Using 1 x M6x5 Bolt and Nut, attach "Arm_Piece_Bolt" to "i3_Frame_Bracket".
Using 1 x M6x5 Bolt and Nut, attach "Arm_Piece_Nut" to "Arm_Piece_Bolt".
Using 1 x M6x5 Bolt and Nut, attach "Arm_Piece_Bolt" to the Pi-Cam-Case-Holder assembly you completed in Step 5.
Sit back and admire your smart new setup!
The mount is adjustable by loosening/tightening the M6 Bolts, the nuts should be retained in the arms. You can also adjust it in the Z direction by using either of the 4 spare Z-Stop locations, and by sliding the Pi Case up and down inside the Holder.
If you need extra length to your arm, simply print off one more of each "Arm_Piece_Bolt" and "Arm_Piece_Nut". You will need an extra 2 x M6x5 Bolts and 2 x M6 Nuts .
*Optional Step to Monitor Enclosure/Room Temperature*:
Solder Pin 1 of the DS18B20+ to a piece of wire. Heatshrink over the connection for added strength.
Connect this Wire to the Ground GPIO Pad/Pin on your Pi Zero W.
Solder the 4.7k resistor between Pins 2 and 3 on the DS18B20+, Heatshrinking over the connections if desired.
Connect a length of wire to Pin 2 of the DS18B20+. Heatshrink over the connection for added strength.
Connect this wire to the GPIO4(GPCLK0) Pad/Pin on your Pi Zero W.
Connect a length of wire to Pin 3 of the DS18B20+. Heatshrink over the connection for added strength.
Connect this wire to the 3V3 Power Pad/Pin on your Pi Zero W.
Install the "Room Temperature" Plugin by Frederic Moutin, detailed here: (https://github.com/l00ma/OctoPrint-roomTemp).
Run the three wires through the three channels in the Pi Zero W case, and install your sensor in a location of your choosing.
Don't Forget:
You may need to flip your PiCam Stream. Do this from inside the OctoPrint Web UI.
Links:
https://github.com/l00ma/OctoPrint-roomTemp - OctoPrint Room Temperature Plugin by Frederic Moutin.
https://github.com/guysoft/OctoPi - OctoPi Build by Guy Sheffer and the community.
https://shop.pimoroni.com/products/raspberry-pi-zero-camera-module - Camera Module for the Raspberry Pi Zero W.
Description
Do you have a Wanhao i3, i3 v2/2.1 or i3+?
Do you have a Raspberry Pi Zero W and Pi Camera?
Do you want to tie it all together in a sleek, compact system for remote monitoring and control?
Well here's the project for you!
What you'll need:
3 x M6x5mm Bolts (I use Button Head)
3 x M6 Nuts (Regular or Nyloc)
2 x M3x10mm Bolts (I use Socket Head)
2 x M3 Nuts (Regular or Nyloc)
2 x M3 Washers (7mm Max OD)
Printed Parts:
1 x Arm_Piece_Bolt
1 x Arm_Piece_Nut
1 x i3_Frame_Bracket
1 x Octopi_With_Pi_Cam_Body
1 x Octopi_With_Pi_Cam_Lid
1 x Pi_Zero_W_Case_Holder
1 x Raspberry Pi Zero W + microSD card (With OctoPi installed)
1 x Camera Module for Raspberry Pi Zero W
Optional Extras:
1 x DS18B20+ Temperature Sensor
1 x 4.7k Resistor
3 x Small Pieces of Heatshrink
Instructions:
Print all parts.
Gather needed parts.
Install your Raspberry Pi Zero W into the case ("Octopi_With_Pi_Cam_Body" + "Octopi_With_Pi_Cam_Lid"). The Camera Module ribbon cable should fold under the board, and sit nicely in the square cutout on the underside of "Octopi_With_Pi_Cam_Body".
*Optional Step Here - See end*
Slide the Pi-Cam-Case assembly into "Pi_Zero_W_Case_Holder" - The orientation depends on your bed height, there's a few mm up and down for adjustment here.
Using 2 x M3x10 Bolts, Washers and Nuts, attatch "i3_Frame_Bracket" to the spare mounting locations for Z-Stop switches (On the opposite side to your actual Z-stop). Again, there is a few holes to choose from here for adjusting the height of your camera.
Using 1 x M6x5 Bolt and Nut, attach "Arm_Piece_Bolt" to "i3_Frame_Bracket".
Using 1 x M6x5 Bolt and Nut, attach "Arm_Piece_Nut" to "Arm_Piece_Bolt".
Using 1 x M6x5 Bolt and Nut, attach "Arm_Piece_Bolt" to the Pi-Cam-Case-Holder assembly you completed in Step 5.
Sit back and admire your smart new setup!
The mount is adjustable by loosening/tightening the M6 Bolts, the nuts should be retained in the arms. You can also adjust it in the Z direction by using either of the 4 spare Z-Stop locations, and by sliding the Pi Case up and down inside the Holder.
If you need extra length to your arm, simply print off one more of each "Arm_Piece_Bolt" and "Arm_Piece_Nut". You will need an extra 2 x M6x5 Bolts and 2 x M6 Nuts .
*Optional Step to Monitor Enclosure/Room Temperature*:
Solder Pin 1 of the DS18B20+ to a piece of wire. Heatshrink over the connection for added strength.
Connect this Wire to the Ground GPIO Pad/Pin on your Pi Zero W.
Solder the 4.7k resistor between Pins 2 and 3 on the DS18B20+, Heatshrinking over the connections if desired.
Connect a length of wire to Pin 2 of the DS18B20+. Heatshrink over the connection for added strength.
Connect this wire to the GPIO4(GPCLK0) Pad/Pin on your Pi Zero W.
Connect a length of wire to Pin 3 of the DS18B20+. Heatshrink over the connection for added strength.
Connect this wire to the 3V3 Power Pad/Pin on your Pi Zero W.
Install the "Room Temperature" Plugin by Frederic Moutin, detailed here: (https://github.com/l00ma/OctoPrint-roomTemp).
Run the three wires through the three channels in the Pi Zero W case, and install your sensor in a location of your choosing.
Don't Forget:
You may need to flip your PiCam Stream. Do this from inside the OctoPrint Web UI.
Links:
https://github.com/l00ma/OctoPrint-roomTemp - OctoPrint Room Temperature Plugin by Frederic Moutin.
https://github.com/guysoft/OctoPi - OctoPi Build by Guy Sheffer and the community.
https://shop.pimoroni.com/products/raspberry-pi-zero-camera-module - Camera Module for the Raspberry Pi Zero W.
Similar models
thingiverse
free

case for "raspberry pi zero/zero w" with "Camera Module for Raspberry Pi Zero" by atsushi_kbt
...ducts/raspberry-pi-zero-w
camera module for raspberry pi zero
https://shop.pimoroni.com/products/raspberry-pi-zero-camera-module
thingiverse
free
Raspberry Pi Zero W Camera w/Night Vision by adamoutler
.../product/b0748kf97s
usb-otg cable $7: https://www.amazon.com/wireless-micro-usb-data-transfer-connecting-compatible/dp/1059950073
thingiverse
free
Raspberry Pi Zero W case with Camera and tripod mount for Octoprint/Octopi by makerhacks
...gh the hole, or have the cable go out and fold back in with the pi face down (see the pictures for a better idea of what i mean!)
thingiverse
free
Raspberry Pi Zero W + 30A relay module Octoprint case by steelpuxnastik
...or mounting on ender 3 psu (or wherever you want) to control prints and printer shutdown after prints or in case of emergencies.
thingiverse
free

Prusa I3 MK3 OctoPrint Raspberry Pi 3+ Einsy Case by lab27
...//www.thingiverse.com/thing:3121052)
let me know if you have any improvements to the design.
please post photos if you make this!
cults
free
Raspberry Pi Zero W Case w/Camera
...raspberry pi zero w case w/camera
cults
raspberry pi zero w case w/camera
raspberry pi zero w case w/camera
thingiverse
free
Case for Pi Zero W and HQ camera. by MekaBot
...se for pi zero w and hq camera. by mekabot
thingiverse
this is a simple case/mount for raspberry pi zero w and hq camera module.
thingiverse
free
Temperature and humidity by Raspberry Pi zero W by Blauhand
...nding on raspi temperature ;(
made with pla 1,75mm, screws and nuts. no support. anycubic mega 3i
python program can be delivered
thingiverse
free
Prusa i3 MK2 - Raspberry PI Zero W holder by dktosoch
...y dktosoch
thingiverse
raspberry pi zero w holder for original prusa i3 mk2, perfect to octopi and to create smooth time lapse.
thingiverse
free

Raspberry PI Zero Camera Case (v. 1.0.0)
...nnector cable 38mm long
5 mb camera module
1/4 inch 6mm high hex nut (for tripod or camera holder mount)
4x m2*5 flat head screws
Mjw


Mjwmakes
thingiverse
free
25-30mm Scope Adapter by MJWMakes
...ture is a 30mm bubble level mounted on my 25mm scope.
print two copies, one set for each side - place the larger side on the bed.
thingiverse
free

MJW Raspberry Pi Zero W Case by MJWMakes
...t!
easily modified to access the gpio pins if needs be.
(if enough people request it i'll upload a version with a cutout :d )
thingiverse
free
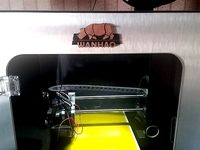
Light Bars for Wanhao i3/i3+ (Or other printers!) by MJWMakes
... intergrated with octipi to remotely switch on/off the lights; simply add your relay board in-line with the psu before the input!
Octopi
thingiverse
free
Octopi by TimDooley
...octopi by timdooley
thingiverse
octopi
thingiverse
free
Octopi Geocache by MasterFun1
...octopi geocache by masterfun1
thingiverse
an octopi geocache, remixed by request.
thingiverse
free
OctoPI and AC enclosure
...octopi and ac enclosure
thingiverse
octopi enclosure for a raspberry pi 4, relay, a/c outlet and a/c inlet.
thingiverse
free
OctoPi 3.5inch touchscreen by FabZ26
...octopi 3.5inch touchscreen by fabz26
thingiverse
a simple housing for octopi with a pen holder
thingiverse
free
Octopi case by Bishamon1987
...topi case by bishamon1987
thingiverse
i made this case because i wanted the alternative octopi icon (8 connected π's) on it.
thingiverse
free
OctoPi - camera and Raspberry Pi stand by Botland
...octopi - camera and raspberry pi stand by botland
thingiverse
octopi - camera and raspberry pi stand
thingiverse
free
OctoPi - Ender v2 by iammurdock
...m/thing:3294512
andhttps://www.thingiverse.com/thing:1415895
to fit the ender 3 v2 with a raspberry pi 3 b+ and camera for octopi
thingiverse
free
![OctoPi OLED Monitor [WemOled] by theveel_com](/t/8164180.jpg)
OctoPi OLED Monitor [WemOled] by theveel_com
...ed] by theveel_com
thingiverse
https://youtu.be/9vxapyzjko4
more about designhttps://theveel.com/3d/octopi-oled-monitor-wemoled/
thingiverse
free

OctoPi with TFT and Camera Case by PhilipC
...n octopi using a raspberry pi model b+, a tft 2.8" screen from adafruit (1601), and a raspberry pi camera
ready to print!
thingiverse
free

Bucket O' Octopi Packaging by LucidOne
...pi this holiday season, you may be interested in this fine packaging solution.
inkscape svg file is ready for your customization.
Wanhao
thingiverse
free
Wanhao Logo Plate / Wanhao Logo Schild by JMDesigns
...wanhao logo plate / wanhao logo schild by jmdesigns
thingiverse
wanhao logo plate / wanhao logo schild
thingiverse
free
Wanhao logo by nebtio
...wanhao logo by nebtio
thingiverse
wanhao logo
thingiverse
free
Wanhao keychain by Rein3003
...wanhao keychain by rein3003
thingiverse
a keychain with the logo of wanhao
thingiverse
free
Wanhao Di3 v2 Light / Wanhao Di3 v2 Beleuchtung by JMDesigns
...wanhao di3 v2 light / wanhao di3 v2 beleuchtung by jmdesigns
thingiverse
wanhao di3 v2 light / wanhao di3 v2 beleuchtung
thingiverse
free
TUSH For Wanhao by wtmi1992
...tush for wanhao by wtmi1992
thingiverse
the ultimate spool holder, modified for the top of the wanhao control box. fits snug.
thingiverse
free
fanduct wanhao d12 by theopoilmek
...fanduct wanhao d12 by theopoilmek
thingiverse
fanduct pour wanhao d12
thingiverse
free
Wanhao i3 Marlin by johan21
...wanhao i3 marlin by johan21
thingiverse
marlin for wanhao i3 rampsboard 1.4.
thingiverse
free
Wanhao Duplicator i3 by imagineering4
...wanhao duplicator i3 by imagineering4
thingiverse
these are the stl files for the improvements to the wanhao duplicator i3, v2
thingiverse
free

Wanhao D6 filament guard
...wanhao d6 filament guard
thingiverse
this is a filament guard for wanhao d6 machine to avoid the filament unrolling
thingiverse
free
Wanhao Duplicator i3 Model by Hilde3D
...wanhao duplicator i3 model by hilde3d
thingiverse
wanhao duplicator i3 model
Duplicator
turbosquid
$10

duplicate
...
turbosquid
royalty free 3d model duplicate for download as on turbosquid: 3d models for games, architecture, videos. (1566034)
turbosquid
$20

Wonderful duplicate kids room
...ul duplicate kids room for download as skp, 3ds, fbx, and obj on turbosquid: 3d models for games, architecture, videos. (1609462)
archive3d
free
Copier 3D Model
...hine duplicating machine
copier n160808 - 3d model (*.gsm+*.3ds) for interior 3d visualization.
3d_export
$30
connect four set
...ate objects that can be disassembled. includes one red and one black checker which can be duplicated to the standard 42 checkers.
3ddd
$1
Черепица
...del
- put it in your scene and duplicate
- level of detail can be edited
- open with 3ds max 2010-2013 or import in your program.
3d_export
$27

Dividing Cell / Ovule 3D Model
...al microbe blob ovum fiction science ovule duplication divide dividing
dividing cell / ovule 3d model duchampmodels 9691 3dexport
3d_ocean
$16

Folding Chair
...tubing. designed to be good low poly at a distance and mesh smooth pretty well and light weight for duplicating a lot. package...
3d_export
$8
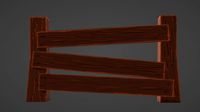
wooden fence
... one post separate so the fence can be duplicated and extended. created in blender 3.0 file format fbx with texture painted maps.
3d_export
$8
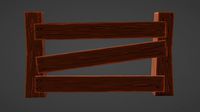
wooden fence
... one post separate so the fence can be duplicated and extended. created in blender 3.0 file format fbx with texture painted maps.
3d_ocean
$2

DNA Strands Of 5 Types
... strands that can be multiplied and can be made long chains by duplicating them and can be easily applied materials and textures.
Zero
3ddd
$1

ZERO, BEAM
...zero, beam
3ddd
zero
поворотная люстра zero , beam
design_connected
$9
Zero-in
...zero-in
designconnected
established & sons zero-in tables computer generated 3d model. designed by jay osgerby .
3ddd
free
Sub-Zero
...sub-zero
3ddd
sub-zero , голова
sub-zero corona render!
3ddd
$1
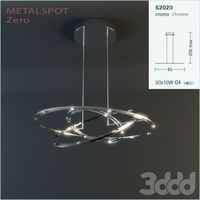
Metalspot / Zero
...metalspot / zero
3ddd
metalspot
metalspot zero
3ddd
$1
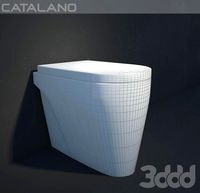
Catalano Zero
...catalano zero
3ddd
catalano , унитаз
catalano zero
3ddd
$1

SUB ZERO
... sub zero
the first and only 3d model of sub zero refrigerator.
the model is very accurate.
turbosquid
free

Zero
... available on turbo squid, the world's leading provider of digital 3d models for visualization, films, television, and games.
turbosquid
free

Zero
... available on turbo squid, the world's leading provider of digital 3d models for visualization, films, television, and games.
turbosquid
free
Zero
... available on turbo squid, the world's leading provider of digital 3d models for visualization, films, television, and games.
3ddd
$1

ZERO / Hide
...zero / hide
3ddd
zero
polys: 25486
wire-spline
Raspberry
3d_export
free

raspberry
...raspberry
3dexport
3d model of a raspberry. i tried to make it realistic.
turbosquid
$27

Raspberries
...y free 3d model raspberries for download as max, obj, and stl on turbosquid: 3d models for games, architecture, videos. (1354176)
turbosquid
$14

Raspberries
...y free 3d model raspberries for download as max, obj, and fbx on turbosquid: 3d models for games, architecture, videos. (1364663)
3d_export
$5

raspberry pi
...raspberry pi
3dexport
carcasa para la raspberry pi
turbosquid
$99

Raspberry
... available on turbo squid, the world's leading provider of digital 3d models for visualization, films, television, and games.
turbosquid
$10

raspberries
... available on turbo squid, the world's leading provider of digital 3d models for visualization, films, television, and games.
archive3d
free

Raspberries 3D Model
...raspberries 3d model archive3d raspberries raspberry raspberries n300911 - 3d model (*.3ds) for interior 3d...
3d_export
$5

raspberry fruit
...raspberry fruit
3dexport
3d_export
$5

raspberry
...y different sizes. their color ranges from light burgundy to pink. there are formats: obj, 3ds, blend, dae, fbx, mtl.<br>:)
evermotion
$12

raspberries 23 am130
...evermotion raspberries 23 am130 evermotion key 23 food fruit raspberry fruits am130 raspberries highly detailed 3d model of raspberries...
I3
3d_export
$10

suv i3
...suv i3
3dexport
suv i3 2013 series
3d_ocean
$89

BMW i3 2012
...y, in real units of measurement, qualitatively and maximally close to the original. model formats: - *.max (3ds max 2008 scanl...
cg_studio
$99

BMW i3 20143d model
...
cgstudio
.3ds .c4d .fbx .lwo .max .obj - bmw i3 2014 3d model, royalty free license available, instant download after purchase.
cg_studio
$99

BMW i3 20123d model
...tudio
.3ds .c4d .fbx .lwo .max .mb .obj - bmw i3 2012 3d model, royalty free license available, instant download after purchase.
cg_studio
$99

BMW i3 20143d model
...tudio
.3ds .c4d .fbx .lwo .max .mb .obj - bmw i3 2014 3d model, royalty free license available, instant download after purchase.
humster3d
$75

3D model of BMW i3 2014
...
buy a detailed 3d model of bmw i3 2014 in various file formats. all our 3d models were created maximally close to the original.
humster3d
$40

3D model of Kitchen Set I3
...uy a detailed 3d model of kitchen set i3 in various file formats. all our 3d models were created maximally close to the original.
3d_ocean
$30

Kitchen set i3
...ensils oven plates shelves sink table ware
kitchen set i3 include 3d models: cooker, oven, sink, cupboards, table, chair, plates.
3d_ocean
$89

BMW i3 2014
...y, in real units of measurement, qualitatively and maximally close to the original. model formats: - *.max (3ds max 2008 scanl...
cg_studio
$99

BMW i3 Concept 20113d model
...i3
.3ds .c4d .fbx .lwo .max .obj - bmw i3 concept 2011 3d model, royalty free license available, instant download after purchase.
Pi
design_connected
$11

Pi
...pi
designconnected
ligne roset pi chairs computer generated 3d model. designed by thibault desombre.
3d_export
$5
raspberry pi
...raspberry pi
3dexport
carcasa para la raspberry pi
turbosquid
$18

pied
... available on turbo squid, the world's leading provider of digital 3d models for visualization, films, television, and games.
3ddd
$1

Emme pi light
...emme pi light
3ddd
emme pi light
люста emme pi light
3ddd
$1

Emme pi light
...emme pi light
3ddd
emme pi light
бра классическое emme pi light
3ddd
$1

Emme Pi Light
...emme pi light
3ddd
emme pi light
3ddd
$1

Emme Pi Light
...emme pi light
3ddd
emme pi light
design_connected
$16

Pi-Air
...pi-air
designconnected
living divani pi-air lounge chairs computer generated 3d model. designed by harry & camila.
3d_ocean
$15

Manneken Pis
...picting a naked little boy urinating into a fountain’s basin. (wikipedia) the model was sculpted in blender 2.70a rendered wit...
3ddd
$1

Emme pi light
...emme pi light
3ddd
emme pi light
люстра классическая фирма: emme pi light
артикул: 3595/5/cot/12/wh
V2
3d_export
free

Lamp v2
...lamp v2
3dexport
lamp v2 with solar panel
3d_export
$5

hammerhead v2
...hammerhead v2
3dexport
razer hammerhead v2 headphones, modeled in cinema 4d, render in corona
3d_export
$5

manometer v2
...manometer v2
3dexport
3d_export
$5

potato v2
...potato v2
3dexport
turbosquid
$52

Lifebuoys v2
...squid
royalty free 3d model lifebuoys v2 for download as fbx on turbosquid: 3d models for games, architecture, videos. (1560870)
turbosquid
$2

Mask v2
...turbosquid
royalty free 3d model mask v2 for download as stl on turbosquid: 3d models for games, architecture, videos. (1527741)
turbosquid
free

Flashlight V2
...d
free 3d model flashlight v2 for download as , obj, and fbx on turbosquid: 3d models for games, architecture, videos. (1663559)
turbosquid
$29

Thanos v2
...
royalty free 3d model thanos v2 for download as ztl and obj on turbosquid: 3d models for games, architecture, videos. (1651077)
turbosquid
$29

Titan v2
...d
royalty free 3d model titan v2 for download as ztl and obj on turbosquid: 3d models for games, architecture, videos. (1540228)
turbosquid
$29

Frieza v2
...
royalty free 3d model frieza v2 for download as ztl and obj on turbosquid: 3d models for games, architecture, videos. (1701238)
Camera
archibase_planet
free
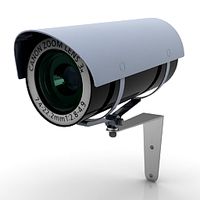
Camera
...base planet
camera surveillance camera video camera
camera surveillance n090211 - 3d model (*.3ds) for interior 3d visualization.
archibase_planet
free

Camera
...hibase planet
camera security camera video camera
camera security n210515 - 3d model (*.gsm+*.3ds) for exterior 3d visualization.
archibase_planet
free
Camera
...se planet
camera web camera webcam
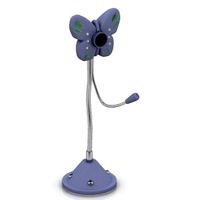
camera butterfly usb pc camera n090713 - 3d model (*.gsm+*.3ds) for interior 3d visualization.
archibase_planet
free
Camera
...mera
archibase planet
surveillance camera video camera camcorder
camera n011211 - 3d model (*.3ds) for exterior 3d visualization.
archibase_planet
free
Camera
...camera
archibase planet
camera digital camera
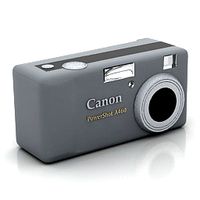
camera canon digital n041211 - 3d model (*.3ds) for interior 3d visualization.
archibase_planet
free
Camera
...camera
archibase planet
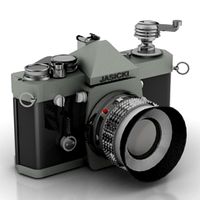
camera film camera phototechnique
camera n100214 - 3d model (*.gsm+*.3ds) for interior 3d visualization.
archibase_planet
free

Camera
...amera
archibase planet
camera video camera camcorder
camera video n070315 - 3d model (*.gsm+*.3ds) for interior 3d visualization.
archibase_planet
free

Camera
...rchibase planet
camera video camera camcorder
camera studio n101213 - 3d model (*.gsm+*.3ds+*.max) for interior 3d visualization.
archibase_planet
free
Camera
...ibase planet
digital camera camera phototechnique
camera canon ixus 400 n310311 - 3d model (*.3ds) for interior 3d visualization.
archibase_planet
free
Camera
...ase planet
photocamera video camera camera
camera sony t300 black n291010 - 3d model (*.gsm+*.3ds) for interior 3d visualization.
W
3ddd
$1
chair W
...chair w
3ddd
chair w
3ddd
$1

кресло w
...кресло w
3ddd
капитоне
кресло w
3ddd
$1
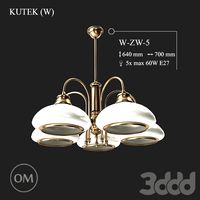
KUTEK (W) W-ZW-5
...kutek (w) w-zw-5
3ddd
kutek
3d модель люстри (w) w-zw-5 фабрики kutek. в архиве: max2012, obj, fbx, mat.(два варианта металла)
3ddd
$1
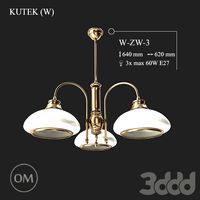
KUTEK (W) W-ZW-3
...kutek (w) w-zw-3
3ddd
kutek
3d модель люстри (w) w-zw-3 фабрики kutek. в архиве: max2012, obj, fbx, mat. (два варианта металла)
3ddd
$1
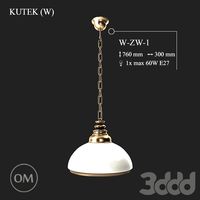
KUTEK (W) W-ZW-1
...kutek (w) w-zw-1
3ddd
kutek
3d модель люстри (w) w-zw-1 фабрики kutek. в архиве: max2012, obj, fbx, mat (два варианта металла).
3ddd
free
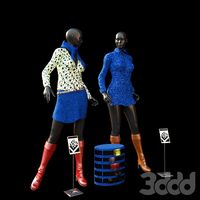
aneken W&W
...aneken w&w
3ddd
2 женских манекена, ценники и фолио. материалы и текстуры прилагаются.
design_connected
$9
KTribe W
...ktribe w
designconnected
ktribe w computer generated 3d model. designed by starck, philippe.
design_connected
$16

Troy W
...troy w
designconnected
magis troy w computer generated 3d model. designed by wanders, marcel.
turbosquid
$9

Menu - Benjamin Hubert - W W Carafe
... available on turbo squid, the world's leading provider of digital 3d models for visualization, films, television, and games.
turbosquid
$9

Menu - Benjamin Hubert - W W Carafe
... available on turbo squid, the world's leading provider of digital 3d models for visualization, films, television, and games.
Mount
3d_export
free

mounting bracket
...mounting plate is the portion of a hinge that attaches to the wood. mounting plates can be used indoors, cabinetry and furniture.
turbosquid
$2

MOUNTING
... available on turbo squid, the world's leading provider of digital 3d models for visualization, films, television, and games.
turbosquid
free

Mounts
... available on turbo squid, the world's leading provider of digital 3d models for visualization, films, television, and games.
turbosquid
free

Mount Fuji
...fuji
turbosquid
free 3d model mount fuji for download as obj on turbosquid: 3d models for games, architecture, videos. (1579977)
3d_export
$5

Headphone mount LR
...headphone mount lr
3dexport
headphone mount l+r
turbosquid
$39

Mount rainier
...quid
royalty free 3d model mount rainier for download as fbx on turbosquid: 3d models for games, architecture, videos. (1492586)
turbosquid
$5

pipe mounting
...quid
royalty free 3d model pipe mounting for download as obj on turbosquid: 3d models for games, architecture, videos. (1293744)
turbosquid
$3

Mounting Tires
...uid
royalty free 3d model mounting tires for download as fbx on turbosquid: 3d models for games, architecture, videos. (1708511)
3d_export
$5

Magnetic GoPro Mount
...pro mount
3dexport
cool magnetic mount for gopro. allows you to mount the camera on flat metal surfaces and get exclusive shots.
turbosquid
$5

Stone Mount
...ty free 3d model stone mount for download as ma, obj, and fbx on turbosquid: 3d models for games, architecture, videos. (1370306)
1
turbosquid
$69

armchairs(1)(1)
... available on turbo squid, the world's leading provider of digital 3d models for visualization, films, television, and games.
turbosquid
$15

ring 1+1
... available on turbo squid, the world's leading provider of digital 3d models for visualization, films, television, and games.
turbosquid
$10

chair(1)(1)
... available on turbo squid, the world's leading provider of digital 3d models for visualization, films, television, and games.
turbosquid
$8

Chair(1)(1)
... available on turbo squid, the world's leading provider of digital 3d models for visualization, films, television, and games.
turbosquid
$2

RING 1(1)
... available on turbo squid, the world's leading provider of digital 3d models for visualization, films, television, and games.
turbosquid
$1

house 1(1)
... available on turbo squid, the world's leading provider of digital 3d models for visualization, films, television, and games.
turbosquid
$1

Table 1(1)
... available on turbo squid, the world's leading provider of digital 3d models for visualization, films, television, and games.
turbosquid
$59

Formula 1(1)
...lty free 3d model formula 1 for download as max, fbx, and obj on turbosquid: 3d models for games, architecture, videos. (1567088)
design_connected
$11

No 1
...no 1
designconnected
sibast no 1 computer generated 3d model. designed by sibast, helge.
turbosquid
$2

desert house(1)(1)
...3d model desert house(1)(1) for download as 3ds, max, and obj on turbosquid: 3d models for games, architecture, videos. (1055095)