Thingiverse
MISE/M3SE Enclosure by bkw
by Thingiverse
Last crawled date: 3 years ago
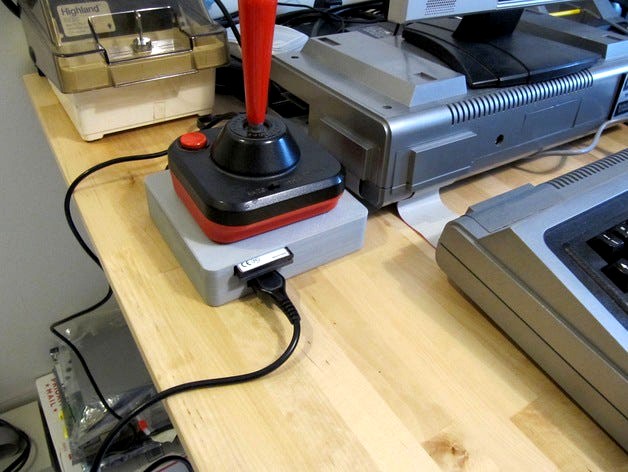
Enclosure for Peter Bartlett's MISE and M3SE
http://bartlettlabs.com/MISE/index.htmlhttp://bartlettlabs.com/M3SE/index.html
UPDATED version 2 - 20191110
Re-drawn in OpenSCAD.
Source file is parametric and customizable.
Re-designed many details to be much more FDM-friendly.
Much easier to print successfully, and requires almost no post-print cleanup.
CF reader holder tray and retainer bar are both simpler now.
Original version is still available in the "orig" directory in the source.
Source is maintained on github!
https://github.com/bkw777/MISE-enclosure
Images
Gallery (current version):https://photos.app.goo.gl/1NdcbL9hprvxRTdB7
Gallery (original version):https://goo.gl/photos/jDpvjbgjePCddrG99
Video (original version):https://youtu.be/Me62yHelnyM
Directions
1 - 3D print the *.stl files
top_cover.stl
bottom_cover.stl
retainer.stl
2 - Aquire the following parts
1 40-pin "IDE" male-female extension cable, 4 inch length
It needs to be an extension, with one male and one female connector.
The direction the cable exits the connector on the male end matters. The cable should go away from the key notch in the side of the connector.
No extra fold / strain relief clip on the male connector.
No special requirements for the female connector.
http://www.cablesonline.com/240pinidedir.html
Change “Available Lengths: 4 inches FI-004”
4 flat-head #6 x 3/4" screwshttps://www.homedepot.com/p/Everbilt-6-32-x-3-4-in-Phillips-Flat-Head-Stainless-Steel-Machine-Screw-6-Pack-814561/204274823
(machine screws or wood screws doesn't matter)
4 small rubber feethttp://www.homedepot.com/p/Everbilt-1-2-in-Self-Adhesive-Vinyl-Surface-Bumpers-16-per-Pack-49967/203661150
3 - Assembly
Unplug the CF reader from the mainboard, and remove the CF cards from the reader.
Remove the 4 nylon stand-offs from the screw holes on the mainbiard.
Plug the male end of the IDE extension cable onto the CF reader.
Lay the top cover top-down on the work surface.
Lay the CF reader flat in the small tray formed into the corner of the top cover, with the lights and jumpers up.
Install the CF reader retainer bar over the cf reader (refer to pictures).
Orient the top cover so that the cf reader is to the right and close to you, and the small square network jack opening is to the left and away from you.
Stand the mainboard up behind the 2 rear screw posts in the top cover, component-side facing you, network/vga/power side down.
Attach the cable from the CF reader to the IDE connector on the mainboard.
Lift the mainboard up from behind the 2 rear screw posts, tip it forward toward youself and lay it flat atop all 4 screw posts.
Place the bottom cover over the back of the mainboard, with the short risers pointing down.
Install the 4 screws.
Painting
A very close off-the-shelf match to the RCA "Mercedes Silver" TRS-80 paint is:
Dupli-Color Bumper Coating FB108 Medium Silver.http://www.amazon.com/Dupli-Color-FB108-Medium-Flexible-Coating/dp/B00296DXN4
Similar models
grabcad
free

IDE Molex male power connector 4-pin
...andard connector, i created it using model of pcb male connector and female cable connector from molex. it is simplified version.
thingiverse
free

CR-10 micro SD adapter by szili83
...micro-sd-card-female-flexible-card-extension-cable-extender-adapter-reader/32884884019.html?spm=a2g0s.9042311.0.0.27424c4dfm9zdp.
3dwarehouse
free

Tech Series - Video Cable - S-Video - Male (4-pin) to Female (4-pin)
...le 4-pin connector and (1) female connector. #cable #connector #electronic #female #male #svideo #tech #techno #technology #video
grabcad
free

USB-C USB 3.1 Type C Male to Female Extension Data Cable
...o female extension data cable
grabcad
usb-c usb 3.1 type c male to female extension data cable
china prod
only female connector!
grabcad
free

JST SM 2.54 3-Pin Male Connector
...in-jst-female-connector-1
male/female 4-pin version here : https://grabcad.com/library/jst-sm-2-54-4-pin-male-female-connector-1
grabcad
free

USB-C USB 3.1 Type C Male to Female Extension Data Cable + Connectors
...rs
grabcad
usb-c usb 3.1 type c male to female extension data cable + connectors
china prod
upd:
step was added
photos was added
3dwarehouse
free

Tech Series - Video Cable - S-Video - Female (4-pin) to Female (4-pin)
...-video cable with (2) male 4-pin connectors. #cable #connector #electronic #female #male #svideo #tech #techno #technology #video
grabcad
free

ATX Power connectors 24 pin, 8 pin, & 4 pin Male and Female
... 4 pin male and female
grabcad
atx power connectors for use on cable extensions.
for the creo models they are in a family table.
thingiverse
free

Anet A8 electronic box ( 2mosfet + 1fan) by jrdn_tsst
....aliexpress.com/item/1pcs-usb-print-cable-for-printer-scanner-extension-cord-panel-mount-extend-cable-usb-b-male/32823270807.html
grabcad
free

Cable USB 7in Adapter Right Angle Type A Male to Type A Female
... a male to type a female
grabcad
cable usb 7" adapter right angle type a male connector to straight type a female connector
Bkw
thingiverse
free

Carenatura CR800 Café Racer (Lego) by Group-C
...mounted engine displacement: 820 cc max. power (street): 102 bkw @ 9600 rpm max. power (gp): 114 bkw @...
thingiverse
free

TT650 RS Sport-Tourer by Group-C
...mounted engine displacement: 647 cc max. power (street): 72 bkw @ 9600 rpm max. power (gp): 78 bkw @...
cg_trader
free

BKW NPP Mühleberg hydroelectric power plant
.... native format is .skp 3dsmax scene is 3ds max 2016 version, rendered with vray 3.00 bkw npp mühleberg hydroelectric power plant
cg_trader
$5

outdoor sofa
...outdoor sofa cg trader outdoor sofa yousef bkw designer please like & subscribe my page on youtube...
cg_trader
free

flower rustic
...flower rustic cg trader flower rustic yousef bkw designer please like & subscribe my page on youtube...
cg_trader
free

golden Chair with table
...with table cg trader golden chair with table yousef bkw designer please like & subscribe my page on youtube...
cg_trader
free

hanging Chair
...hanging chair cg trader hanging chair flower rustic yousef bkw designer please like & subscribe my page on youtube...
3dwarehouse
free

BKW
...bkw
3dwarehouse
3dwarehouse
free

BKW 2.1
...bkw 2.1
3dwarehouse
Mise
design_connected
$27

La Mise 228
...la mise 228
designconnected
la mise 228 computer generated 3d model. designed by nichetto, luca.
design_connected
$25

La Mise 180
...la mise 180
designconnected
la mise 180 computer generated 3d model. designed by nichetto, luca.
design_connected
$18

La Mise Armchair
...la mise armchair
designconnected
la mise armchair computer generated 3d model. designed by nichetto, luca.
3ddd
$1

Luca Nichetto / La Mise
...luca nichetto / la mise
3ddd
luca nichetto
luca nichetto диван la mise
3ddd
$1

Cassina / la mise
...cassina / la mise
3ddd
cassina
диван и кресло фабрики cassina
3ddd
$1

Canape mise en demeure
...canape mise en demeure
3ddd
угловой
canape mise en demeure
пр-во: франция
360*250*h87
max 2014+ max 2011+ fbx
turbosquid
$20

My home collection Bed Mise
...model my home collection bed mise for download as max and obj on turbosquid: 3d models for games, architecture, videos. (1568835)
3ddd
$1

La Mise Cassina
...различные расцветки дотупны из каталога фабрики. коллекция включает кресло, двух- и трехместный диван.
размеры (шхвхг): 228х82х85
3ddd
free

La Mise Cassina
...ичные расцветки дотупны из каталога фабрики. коллекция включает кресло, двух- и трехместный диван.
размеры (шхвхг): 156/180х82х85
3d_sky
free

Luca Nichetto / La Mise
...luca nichetto / la mise
3dsky
luca nichetto sofa la mise
Enclosure
3d_export
free

electrical enclosure
...l enclosure where electrical devices like (relays, contactors, busbars ) are kept in order to protect from hazardous environment.
turbosquid
$100

GPU Enclosure
...yalty free 3d model gpu enclosure for download as obj and stl on turbosquid: 3d models for games, architecture, videos. (1381061)
3d_export
$5

Electrical Enclosure
...ed. also has tower lights attaced on the top.<br>file format that are available:<br>.step<br>.obj<br>.stl
archive3d
free

Enclosure 3D Model
...closure 3d model
archive3d
shower enclosure-acquarius- 3d model for interior 3d visualization.
archive3d
free

Enclosure 3D Model
...enclosure 3d model
archive3d
shower enclosure-omega- 3d model for interior 3d visualization.
archive3d
free

Enclosure 3D Model
...enclosure 3d model
archive3d
shower enclosure-vega - 3d model for interior 3d visualization.
archive3d
free

Enclosure 3D Model
...enclosure 3d model
archive3d
shower enclosure-zenith - 3d model for interior 3d visualization.
turbosquid
$20

shower enclosure
... available on turbo squid, the world's leading provider of digital 3d models for visualization, films, television, and games.
turbosquid
$14

Dumpster Enclosure
... available on turbo squid, the world's leading provider of digital 3d models for visualization, films, television, and games.
turbosquid
$25

3d printer enclosure
... model 3d printer enclosure for download as ipt, skp, and fbx on turbosquid: 3d models for games, architecture, videos. (1634310)