Thingiverse

Minimalist Laser Microscope by fluidmovingfire
by Thingiverse
Last crawled date: 3 years ago
HOW IT WORKS
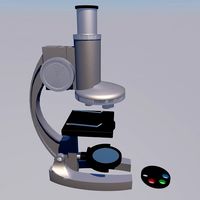
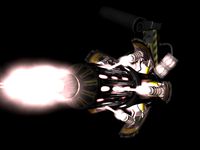
Taking advantage of water's surface tension, by shining laser light through a suspended droplet (for which we use a syringe), you can achieve a projection of what's inside a water sample (ideally, stagnant). The suspended droplet acts as a lens and amplifies the image. Instead of having a blurry shadow, which you would obtain by using just a regular light source; in this case, the projection will be relatively clear, due to the nature of laser light. Here, we use an easily-sourced class III laser (a cat training laser pointer will do!). Photons emitted by a laser are coherently in phase, such that refraction via this light source produces a higher-fidelity projection. This is the principle behind our laser microscope. Make sure you NEVER look directly into the laser source! Long-term exposure can damage your eyes, better be safe than sorry! This build will avoid part of this risk by housing the source and diffracting the light.
BUILDING YOUR TOOL!
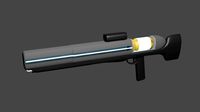
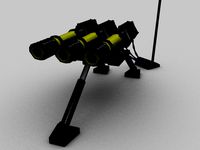
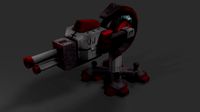
These devices can be quite complex, but they don't have to be. Our design reduces their complexity to a bare minimum without impacting its functionality, by using only 4 parts:
• A class III green laser (https://tinyurl.com/yc6y6a3y)
• A 12 mL syringe with blunt dispensing needles (https://tinyurl.com/y8zw2qd4)
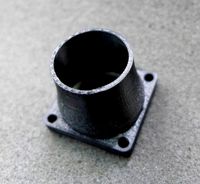
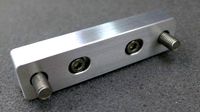
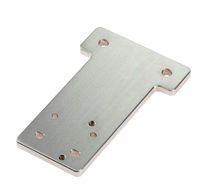
• The 3D-printed body, which holds the business-end of the laser and the syringe
• The 3D-printed end cap
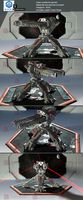
Assemble everything as the pictures show.
USING YOUR TOOL!
• First find an interesting water sample (a puddle a couple of hours after it rains, a public fountain, a river or a lake, a murky swamp... anything you can think of!), then suck up a bit of that sample with your syringe. Go explore the wild!
• Load the syringe into the microscope.
• In a dark room, with the laser light on (you can use a binder clip to keep the button of the laser pressed, stay tuned for extra updates on this design!), gently press down the syringe until an image comes in view. Be careful not to dispense too much or the droplet will fall. Go as slow as possible, patience is key! An upgrade for controlled incremental dosing of the water sample through the syringe will be uploaded at a later date.
• Wait for the image to stabilize and enjoy your new living wallpaper!
Don't forget to share it with friends and have fun with it! :)
Thanks to Antonio Ianiero and Alessandro Ranellucci (http://www.unterwelt.it) for inspiring me to build this laser microscope. Check out their awesome makerspace and amazing work in Rome! For more educational material and build plans, visit Binomica Labs (https://binomicalabs.org) :)
Taking advantage of water's surface tension, by shining laser light through a suspended droplet (for which we use a syringe), you can achieve a projection of what's inside a water sample (ideally, stagnant). The suspended droplet acts as a lens and amplifies the image. Instead of having a blurry shadow, which you would obtain by using just a regular light source; in this case, the projection will be relatively clear, due to the nature of laser light. Here, we use an easily-sourced class III laser (a cat training laser pointer will do!). Photons emitted by a laser are coherently in phase, such that refraction via this light source produces a higher-fidelity projection. This is the principle behind our laser microscope. Make sure you NEVER look directly into the laser source! Long-term exposure can damage your eyes, better be safe than sorry! This build will avoid part of this risk by housing the source and diffracting the light.
BUILDING YOUR TOOL!
These devices can be quite complex, but they don't have to be. Our design reduces their complexity to a bare minimum without impacting its functionality, by using only 4 parts:
• A class III green laser (https://tinyurl.com/yc6y6a3y)
• A 12 mL syringe with blunt dispensing needles (https://tinyurl.com/y8zw2qd4)
• The 3D-printed body, which holds the business-end of the laser and the syringe
• The 3D-printed end cap
Assemble everything as the pictures show.
USING YOUR TOOL!
• First find an interesting water sample (a puddle a couple of hours after it rains, a public fountain, a river or a lake, a murky swamp... anything you can think of!), then suck up a bit of that sample with your syringe. Go explore the wild!
• Load the syringe into the microscope.
• In a dark room, with the laser light on (you can use a binder clip to keep the button of the laser pressed, stay tuned for extra updates on this design!), gently press down the syringe until an image comes in view. Be careful not to dispense too much or the droplet will fall. Go as slow as possible, patience is key! An upgrade for controlled incremental dosing of the water sample through the syringe will be uploaded at a later date.
• Wait for the image to stabilize and enjoy your new living wallpaper!
Don't forget to share it with friends and have fun with it! :)
Thanks to Antonio Ianiero and Alessandro Ranellucci (http://www.unterwelt.it) for inspiring me to build this laser microscope. Check out their awesome makerspace and amazing work in Rome! For more educational material and build plans, visit Binomica Labs (https://binomicalabs.org) :)
Similar models
grabcad
free

Laser drop microscope
... drop of liquid. this model is equipped with screw-bolt supports to fix both the laser and the syringe at the required distances.
cg_trader
$20

Light microscope
...ical microscopes can be very simple, although there are many complex designs which aim to improve resolution and sample contrast.
thingiverse
free

Water drop projector microscope by TynkoJp
... the range of 405nm but other colors work in the same way
original project: http://www.szertar.com/letoltheto/lezermikroszkop.pdf
thingiverse
free

poseidon syringe pump and microscope system by Munfred
...terlab.github.io/poseidon/
all source code is available at the poseidon github repository: https://github.com/pachterlab/poseidon
thingiverse
free

Dremel Drill Press 12mm Microscope Mount by coddingtonbear
...r dremel drill press.
an 'arm' that connects your microscope to the base, aiming roughly at the drill press's target.
thingiverse
free

Micro- Microscope by Beatrice1975
...ng the light of a computer monitor or the light of the sun, to better examine your stuff.
read more in the instruction section.
cg_trader
free

Water dispenser flux
...o model everything from scratch. water dispenser water dispenser asset appliances interior office interior office office interior
thingiverse
free

Droplet separator by Filemone
...and income of air.
on other image is outlet of air behind water sorce separated from droplets.
nozzle: 0.4 mm
layer hight: 0.2 mm
cg_trader
$6

Water dispenser
...sed as per user's wish. this water dispenser is a finished high quality model and can be customised and used in various ways.
grabcad
free

uCNC Automatic Slide Imaging Microscope
...ounted hardware that can move the sample slide. used in a project to help automate malarial microscopy in a low-cost environment.
Fluidmovingfire
thingiverse
free

Stand For Two Plastic Pipettes by fluidmovingfire
...stand for two plastic pipettes by fluidmovingfire
thingiverse
this stand holds two plastic pipettes.
thingiverse
free

Syringe Stand (Blunt Dispensing Needles) by fluidmovingfire
...t and biggest they come in, so anything smaller will still fit. the design binds to the luer lock, not the needle. universal fit.
thingiverse
free

Minimalist Low-Cost Colorimeter by fluidmovingfire
... shabby looks! version #2 will definitely see a substantial diminishment of indoor mounting tape! :d stay tuned for more updates!
Microscope
archibase_planet
free

Microscope
...roscope
archibase planet
microscope optical microscope
microscope n180314 - 3d model (*.gsm+*.3ds) for interior 3d visualization.
archibase_planet
free

Microscope
...microscope
archibase planet
microscope medical facilities
microscope - 3d model for interior 3d visualization.
archibase_planet
free

Microscope
...microscope
archibase planet
microscope
microscope n031107 - 3d model (*.gsm+*.3ds) for interior 3d visualization.
archibase_planet
free

Microscope
...microscope
archibase planet
microscope laboratory equipment
microscope - 3d model (*.gsm+*.3ds) for interior 3d visualization.
archibase_planet
free

Microscope
...planet
microscope medical apparatus medical facilities
microscope n180608 - 3d model (*.gsm+*.3ds) for interior 3d visualization.
3d_ocean
$16
Microscop Toy
...microscop toy
3docean
game games microscop microscop toy play science toy
microscop model toy with materials
turbosquid
free

Microscope
...pe
turbosquid
free 3d model microscope for download as blend on turbosquid: 3d models for games, architecture, videos. (1607423)
turbosquid
$19

Microscope
...bosquid
royalty free 3d model microscope for download as max on turbosquid: 3d models for games, architecture, videos. (1514032)
turbosquid
$19

Microscope
...bosquid
royalty free 3d model microscope for download as max on turbosquid: 3d models for games, architecture, videos. (1514017)
turbosquid
$18

Microscope
...bosquid
royalty free 3d model microscope for download as max on turbosquid: 3d models for games, architecture, videos. (1176709)
Minimalist
3d_export
$20
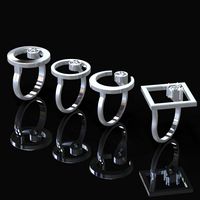
minimalist rings
...minimalist rings
3dexport
minimalist rings
3d_export
$5

minimalistic beach
...minimalistic beach
3dexport
minimalistic scenes for your symbols or other ideas
3d_ocean
$2
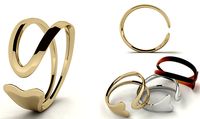
Minimalist Ring
...ring design. its shape is inspired by a fish that is native to the lake near my home town. and it’s patent pending at the moment.
3d_ocean
$15
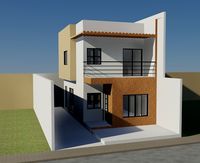
minimalist house
...minimalist house
3docean
architecture minimalist modern
a simple modern house, ready to render in mental ray
3d_export
$15

minimalist table
...list table
3dexport
this is a minimalist table with wood and aluminum materials. in the rar file i've included .stl and .obj
3d_export
$7

modern minimalist bedroom
...modern minimalist bedroom
3dexport
modern minimalist bedroom
turbosquid
$100

Minimalist homes
...d
royalty free 3d model minimalist homes for download as rvt on turbosquid: 3d models for games, architecture, videos. (1253698)
turbosquid
$70

minimalist apartment
...oyalty free 3d model minimalist apartment for download as max on turbosquid: 3d models for games, architecture, videos. (1566613)
turbosquid
$25

The House is Minimalist
...lty free 3d model the house is minimalist for download as skp on turbosquid: 3d models for games, architecture, videos. (1246947)
turbosquid
$18

Tableware minimalistic
...alty free 3d model tableware minimalistic for download as max on turbosquid: 3d models for games, architecture, videos. (1545233)
Laser
3d_export
$5
laser
...laser
3dexport
a 3d laser
3d_export
free
cnc 3dp laser nozzle for 2w laser opt lasers
...logy that gave birth to cutting and engraving laser heads this laser nozzle was designed for, read the article in the link below:
3d_export
free
cnc laser mount opt lasers
...eive the engraving and cutting laser heads this cnc machine laser mount was designed for, read the article on the following page:
turbosquid
$20
Laser
... available on turbo squid, the world's leading provider of digital 3d models for visualization, films, television, and games.
turbosquid
$15
Laser
... available on turbo squid, the world's leading provider of digital 3d models for visualization, films, television, and games.
turbosquid
$3
Laser
... available on turbo squid, the world's leading provider of digital 3d models for visualization, films, television, and games.
3d_export
$5

laser sword
...laser sword
3dexport
it is a blue laser sword with a metal frame
3d_ocean
$19
Laser Turret
...be used in any sf type of game, especially in tower defense games. - laser turret: 3025 polygons - props: 270 polygons - textu...
3d_export
free
workbee cnc laser mount for opt lasers
...the specifications of engraving and cutting laser heads this mount was designed for, please take a look at the following website:
3d_export
free

shapeoko cnc laser mount for opt lasers
...ind out the opportunities that adding a cutting and engraving laser head to your cnc can bring, take a look at the website below: