Thingiverse
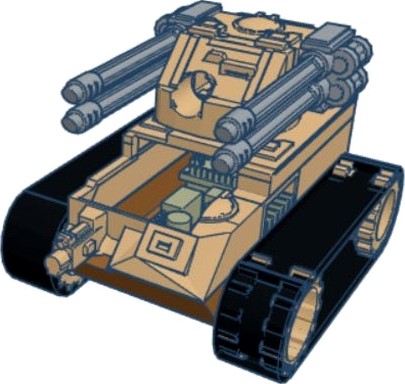
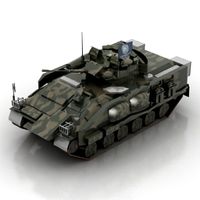
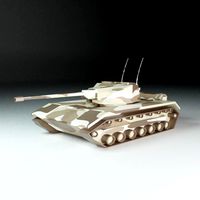
mini RC tank body for Arduino, N20, lego tracks by BuiltBrokenGlued
by Thingiverse
Last crawled date: 3 years ago
Hi,
take a look at my other designs https://www.thingiverse.com/BuiltBrokenGlued/designs
Remixed from https://www.thingiverse.com/Mkhand_Industries.
MK2 tank here https://www.thingiverse.com/thing:3068121
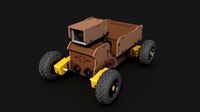
Longer, wider to store the 1400mah battery inside the tank.
Order:
Idea
Remix
Updates
Process build
Idea:
I have wanted to make a Tiny tank but I planned on using 1400mah 3s batteries that I have lying around. I usually crash my quad copter (more practice required) and I wanted something else to use the batteries up as well as get into FPV at some point.
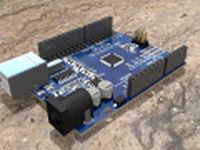
The base for the tank is using Lego Technic 30cm tracks along with 1x 1400mah battery. I am planned on using N20 12v 1200rpm motors running off a Arduino and L298n driver.
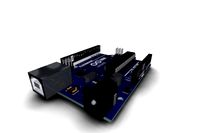
The L298n will be on the left (nearside UK) with a area allowing for passive cooling of the driver.
I am hoping with the small motors that the current draw is low and the cooling does not heat up the PLA around the l298n too much.
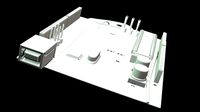
The l298n cooling fin has been cut down to allow better fitment inside the body - see pictures.
I will write an arduino code to allow the PWM signal of the RX to control the tank. This should be a 6 channel setup. This can allow extra functions to be added into the arduino code at a later date, i.e. servo rotating turret, dimmable/flashing leds, adjustable percentage of usable speed (full throttle stick but 50% max speed) etc.
Remix:
I wanted to have a tank design so I have remixed the design by https://www.thingiverse.com/Mkhand_Industries.
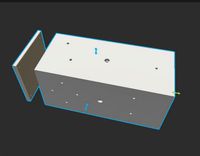
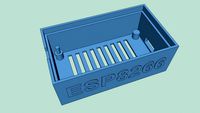
I have removed the tank tracks and made the turret support a little higher to allow the battery to fit underneath a removable lid. The Turret has been increased in scale from the original file.
The inside has been hollowed out to allow a Flysky FS-I6 micro receiver, Arduino nano, battery and a l298n (adapted) to be fitted into the case.
Updated 05/07/2018
I printed the chassis base then mounted the N20 motors. Sorted out the drive and idle wheel size to put the correct tension on the tracks. Mounted the L298N motor driver and soldered the N20 motors direct to the board. I am using XT60 connectors as these fit my 1400 mah battery.
Hot glue the L298N driver into the base frame. Wire up the motors to motor A & B on the L298N. It doesn't really matter if they are not wired up the same, the arduino code can make them run in the correct direction. screw in the battery connector to the + and -. The arduino + & - will be wired in, in a later update.
Updated 18/07/2018
The twin throttle does work but I have found that I tend to have it on full 100% (Variable) all the time. The motors being 1200 rpm are great for speed and are ok but trapped grass in the tracks stops the tank. I will be looking for some 300 rpm motors for off road use.
The design is compact and could be made quite a bit smaller with a smaller battery and using a standard square box body. This is something I will do at a later date.
Updated 19/08/2018
See pictured - I have attached the L298N to a 3s lipo battery and used the 5v off the L298N to power the arduino and the RC receiver.
I have found though that the 5v supply from the L298N may affect the arduino and causes a small amount of interference to the PPM input.
It is running off an arduino code but it is a little glitchy, I'm still learning.
I hooked up a 1400mah battery and drove this home from my local park around 500-600 meters with no heat issues (motors,L298N) affecting the PLA print.
https://youtu.be/aqVu5qaTH8I
I have printed the turret to include a cheap VTX camera and a 9g servo for side to side movement. The camera does work though it has interference from the 5v Supply of the L298N. I haven't tried the servo as yet.
The cut out should rotate enough to allow a good range of movement for the turret allowing the cable to come straight through the top plate.
Update 26/08/2018
MK2 tank https://www.thingiverse.com/thing:3068121
designed for ESC and 3s battery
Update 30/12/2018
Added 3 files for the Upper Chassis.
These split the tub and the front gun for beds that may be too small. The GUN and TUB can be printed separately or there is a file with the gun inside the tub.
Process:
2 x N20_Front_drive_wheel.stl - These are super glued onto the N20 motors
1 x Chassis_Base_MG_Tank_N20.stl - The L298N driver and RX is hot glued in. The N20 motors with wheels are super glued in.
2 x Rear_608s_bearing_idle_wheel.stl - These are super glued onto 608RS bearings. The bearing are then attached to the tank using a 90mm length of M8 studing (or a M8x90mm bolt and nut) and a nut on either end.
See picture.
1 x Upper chassis MG Tank N20.stl - I printed off some little 2mm x 8mm x 2mm rectangles and super glued them to this part to locate the upper chassis to the bottom chassis. It is temporary while I carry on with the design.
1 x Top plate MG Tank N20.stl - This is glued to the Upper Chassis and allows for the RX to slot through at the rear.
1 x Turret Rear MG Tank N20.stl - This houses the 9g servo that allows the turret to move from left to right. The entry hole for the servo may need a little trimming. I hot glued this in due to the print not holding the servo tight enough. You will have the trim the servo screw holes so they don't come out the side of the turret. ( I haven't done this pictured do to the print not being finished)
1 x Turret Front MG Tank N20.stl - This houses the VTX camera. it is hot glued in place.
NOT PRINTED AS YET
1 x Guns MG Tank N20.stl - these are printed together using a 2 mm brace that gets cut off after.
If you have any questions please ask, I'm open to improvement and ideas.
take a look at my other designs https://www.thingiverse.com/BuiltBrokenGlued/designs
Remixed from https://www.thingiverse.com/Mkhand_Industries.
MK2 tank here https://www.thingiverse.com/thing:3068121
Longer, wider to store the 1400mah battery inside the tank.
Order:
Idea
Remix
Updates
Process build
Idea:
I have wanted to make a Tiny tank but I planned on using 1400mah 3s batteries that I have lying around. I usually crash my quad copter (more practice required) and I wanted something else to use the batteries up as well as get into FPV at some point.
The base for the tank is using Lego Technic 30cm tracks along with 1x 1400mah battery. I am planned on using N20 12v 1200rpm motors running off a Arduino and L298n driver.
The L298n will be on the left (nearside UK) with a area allowing for passive cooling of the driver.
I am hoping with the small motors that the current draw is low and the cooling does not heat up the PLA around the l298n too much.
The l298n cooling fin has been cut down to allow better fitment inside the body - see pictures.
I will write an arduino code to allow the PWM signal of the RX to control the tank. This should be a 6 channel setup. This can allow extra functions to be added into the arduino code at a later date, i.e. servo rotating turret, dimmable/flashing leds, adjustable percentage of usable speed (full throttle stick but 50% max speed) etc.
Remix:
I wanted to have a tank design so I have remixed the design by https://www.thingiverse.com/Mkhand_Industries.
I have removed the tank tracks and made the turret support a little higher to allow the battery to fit underneath a removable lid. The Turret has been increased in scale from the original file.
The inside has been hollowed out to allow a Flysky FS-I6 micro receiver, Arduino nano, battery and a l298n (adapted) to be fitted into the case.
Updated 05/07/2018
I printed the chassis base then mounted the N20 motors. Sorted out the drive and idle wheel size to put the correct tension on the tracks. Mounted the L298N motor driver and soldered the N20 motors direct to the board. I am using XT60 connectors as these fit my 1400 mah battery.
Hot glue the L298N driver into the base frame. Wire up the motors to motor A & B on the L298N. It doesn't really matter if they are not wired up the same, the arduino code can make them run in the correct direction. screw in the battery connector to the + and -. The arduino + & - will be wired in, in a later update.
Updated 18/07/2018
The twin throttle does work but I have found that I tend to have it on full 100% (Variable) all the time. The motors being 1200 rpm are great for speed and are ok but trapped grass in the tracks stops the tank. I will be looking for some 300 rpm motors for off road use.
The design is compact and could be made quite a bit smaller with a smaller battery and using a standard square box body. This is something I will do at a later date.
Updated 19/08/2018
See pictured - I have attached the L298N to a 3s lipo battery and used the 5v off the L298N to power the arduino and the RC receiver.
I have found though that the 5v supply from the L298N may affect the arduino and causes a small amount of interference to the PPM input.
It is running off an arduino code but it is a little glitchy, I'm still learning.
I hooked up a 1400mah battery and drove this home from my local park around 500-600 meters with no heat issues (motors,L298N) affecting the PLA print.
https://youtu.be/aqVu5qaTH8I
I have printed the turret to include a cheap VTX camera and a 9g servo for side to side movement. The camera does work though it has interference from the 5v Supply of the L298N. I haven't tried the servo as yet.
The cut out should rotate enough to allow a good range of movement for the turret allowing the cable to come straight through the top plate.
Update 26/08/2018
MK2 tank https://www.thingiverse.com/thing:3068121
designed for ESC and 3s battery
Update 30/12/2018
Added 3 files for the Upper Chassis.
These split the tub and the front gun for beds that may be too small. The GUN and TUB can be printed separately or there is a file with the gun inside the tub.
Process:
2 x N20_Front_drive_wheel.stl - These are super glued onto the N20 motors
1 x Chassis_Base_MG_Tank_N20.stl - The L298N driver and RX is hot glued in. The N20 motors with wheels are super glued in.
2 x Rear_608s_bearing_idle_wheel.stl - These are super glued onto 608RS bearings. The bearing are then attached to the tank using a 90mm length of M8 studing (or a M8x90mm bolt and nut) and a nut on either end.
See picture.
1 x Upper chassis MG Tank N20.stl - I printed off some little 2mm x 8mm x 2mm rectangles and super glued them to this part to locate the upper chassis to the bottom chassis. It is temporary while I carry on with the design.
1 x Top plate MG Tank N20.stl - This is glued to the Upper Chassis and allows for the RX to slot through at the rear.
1 x Turret Rear MG Tank N20.stl - This houses the 9g servo that allows the turret to move from left to right. The entry hole for the servo may need a little trimming. I hot glued this in due to the print not holding the servo tight enough. You will have the trim the servo screw holes so they don't come out the side of the turret. ( I haven't done this pictured do to the print not being finished)
1 x Turret Front MG Tank N20.stl - This houses the VTX camera. it is hot glued in place.
NOT PRINTED AS YET
1 x Guns MG Tank N20.stl - these are printed together using a 2 mm brace that gets cut off after.
If you have any questions please ask, I'm open to improvement and ideas.
Similar models
thingiverse
free

MK2 mini RC tank for N20 motors, lego tracks by BuiltBrokenGlued
...e printed together using a 2 mm brace that gets cut off after.
if you have any questions please ask, i'm open to improvement
thingiverse
free

2s mini RC tank for N20 motors, lego tracks by BuiltBrokenGlued
...#39;ve left it as a stud for now to add a little bit of weight.
if you have any questions please ask, i'm open to improvement
3dwarehouse
free

L298N Motor Driver
...otor driver
3dwarehouse
a simple off the shelf motor driver designed for use with arduino boards. #arduino #driver #l298n #motor
grabcad
free

Motor Driver L298N
...motor driver l298n
grabcad
h bridge motor driver for arduino
l298n
grabcad
free

arduino driven tank
...arduino driven tank
grabcad
aruino driven tank made with arduino nano l298n motor driver ultrasonic sensor mecano
thingiverse
free

L298N motor driver by guillaumedeboosere
...l298n motor driver by guillaumedeboosere
thingiverse
this is a 3d model of the l298n motor driver for arduino
thingiverse
free

Arduino mount for DF Robot devastator tank by peejster
...ing holes for each board that are part of the overall mount. and, i got alignment with the pre-drilled holes in the tank chassis.
thingiverse
free

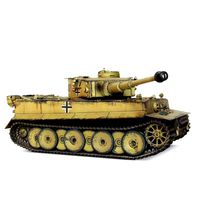
Tiger Tank Breakdown by chanson836
...rt that is easy to remove.
the turret is split also. lay each piece flat to print. the bottom hull should be printed upside-down.
grabcad
free

Arduino Balancing Cam Robot
...bot with camera
-elegoo uno r3
-mpu-6050
-esp32-cam
-geared dc motors
-l298n motor driver
-wheels
-aa battery holder
-9v battery
thingiverse
free

MG90s Servo Turret by crash1844
...tick
3.7v 1400mah lipo
an esp8266 battery charger shield
included are the stl for the 3 parts, the scad file and the arduino code
Builtbrokenglued
thingiverse
free

GGT150 Camera Protector by BuiltBrokenGlued
...ial of the eachine tx02 from crashes or branches
there are 2 files,
1 x split at the rear
1 x unsplit
both files require support.
thingiverse
free

25mm ratchet corner supports by BuiltBrokenGlued
...igned to hook onto the strap so they don't fall off while setting up the strap.
printed with solid infill, skirt, no supports
thingiverse
free

servo 5g dual clamp side by side by BuiltBrokenGlued
...ns
i made this for my nutball using 2 x 5g servos side by side.
it slides on from one side and has 3mm holes for screwing in too.
thingiverse
free

Nutball flap mount for servo connector by BuiltBrokenGlued
...re and 2mm cut in the rudder and flap. i have just super glued it in for now.
i also have a motor mount for the nutball uploaded.
thingiverse
free

action camera to telescope by BuiltBrokenGlued
...elastic or hair bands. it is quick and easy to change lenses.
printed with out support, 0.25 layer hight, 2 shells and 15% infill
thingiverse
free

UK light switch spacer various thickness by BuiltBrokenGlued
...ting a wireless remote.
size: 85.5 x 85.5 mm x (title).
space between holes 60mm.
holes are centered horizontally and vertically.
thingiverse
free

Trailer N20 motor battery carrier by BuiltBrokenGlued
...e the wheels designed yet for the trailer but will be adding updates to this below.
non of the items have been printed or tested.
thingiverse
free

Grasshopper Diatone LED bracket 160mm by BuiltBrokenGlued
...the air.
i bought a 2x2 led that runs off my cc3d board.
this is a slide on bracket that is fitted when the top plate is removed.
thingiverse
free

happy face keyring by BuiltBrokenGlued
...types,
with (hand drawn picture.stl)
without a hole (hand drawn picture (1).stl). there is a space on the top left to put a name.
thingiverse
free

Toy train track joiner. by BuiltBrokenGlued
.../mg_evolution/designs
made for a friend to join brio wooden train track together.
i have not tested it but he says they fit well.
N20
turbosquid
$22

DOOGEE N20 PRO
... n20 pro for download as blend, blend, dae, fbx, obj, and stl on turbosquid: 3d models for games, architecture, videos. (1674621)
turbosquid
$15

Sconce N20 V-Ray
...model sconce n20 v-ray for download as max, 3ds, fbx, and obj on turbosquid: 3d models for games, architecture, videos. (1529041)
3d_export
$11

doogee n20 pro
...e so that the exported files (.dae, .stl, .usdc, .obj and .fbx) is ok please tell me in private message if you have any problems.
3d_export
$10

automatic electric screw driver
...parts can easily available online.<br>part required to buy are<br>1. n20 motor 100 rpm<br>2. tp4056 lithium battery charging module<br>3. dc...
thingiverse
free

N20
...n20
thingiverse
to link n20 lego
thingiverse
free

N20 CUP
...n20 cup
thingiverse
n20 used case
3dbaza
$3

Pouf N20 (345065)
...pouf n20 (345065)
3dbaza
pouf n20 3d model
thingiverse
free

DC Motor GA12-N20
...dc motor ga12-n20
thingiverse
dc motor ga12-n20
thingiverse
free

N20 Motor holder by _efe_
...n20 motor holder by _efe_
thingiverse
n20 motor holder 3mm shaft.
thingiverse
free

N20 Motor Holder by finevlad
...n20 motor holder by finevlad
thingiverse
n20 motor holder to fast mount on prototype pcb
Arduino
turbosquid
$7
Arduino
...turbosquid
royalty free 3d model arduino for download as max on turbosquid: 3d models for games, architecture, videos. (1197165)
turbosquid
$3
Arduino
...turbosquid
royalty free 3d model arduino for download as c4d on turbosquid: 3d models for games, architecture, videos. (1305484)
3d_export
$5
arduino satellite
...rt
this model is the exact arduino based satellite model with some basic sensors and camera modules and also includes batteries.
turbosquid
$1
Arduino UNO
...alty free 3d model arduino uno for download as , stl, and wrl on turbosquid: 3d models for games, architecture, videos. (1515932)
3d_export
$5
esp8266 box arduino
...esp8266 box arduino
3dexport
box for esp8266 module with wire hole. inside dimensions: 49x26 mm. height 15 mm.
3d_export
$60
Arduino Uno Rev3 Microcontroller 3D Model
...mega328p circuit board spark cable wire 5v 74v 9v 111v
arduino uno rev3 microcontroller 3d model danielgarnier4403 97237 3dexport
3d_export
free
arduino rover kit
...no!!! materials: no!!! rigged: no animated: no uv mapped: no it is not an exact copy of the original! not subject to 3d printing!
3d_ocean
$7
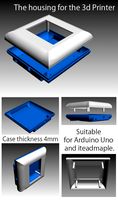
The housing for the 3d Printer
...the housing for the 3d printer 3docean arduino device housing stl the housing consists of two portions:...
3d_export
$5
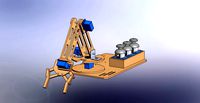
arm 4 axis
...uno -4 servo motor 180° -3 joystick (x,y) for arduino -mdf wood -some wires -cnc laser cut...
3d_export
$5

solar tracker
...machine for the frame . list of material : -arduino uno -2 step motor with driver -4 ldr sensor...
Lego
3ddd
$1

Lego
...lego
3ddd
lego , конструктор
lego
3ddd
$1

Lego
...lego
3ddd
lego , конструктор , машина
lego
3ddd
$1

Lego
...lego
3ddd
lego , конструктор , машина
lego
3ddd
free
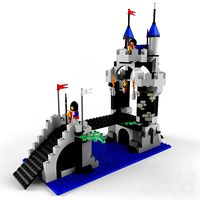
Lego
...lego
3ddd
конструктор , lego , замок
lego
3ddd
$1
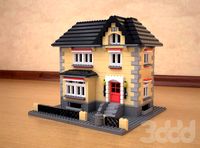
Lego
...lego
3ddd
lego , конструктор
домик из lego
3d_export
$5

lego
...lego
3dexport
lego man
3d_ocean
$5

Lego
...lego
3docean
basic children cube games lego low poly toy
basic lego tile.
3ddd
$1

Lego человески
...lego человески
3ddd
lego
человечки lego
3ddd
$1

Lego полицейский
...lego полицейский
3ddd
lego
lego полицейский
3ddd
$1

LEGO Duplo
...lego duplo
3ddd
lego , конструктор
lego duplo
Rc
3ddd
$1
RC Helicopter
...rc helicopter
3ddd
вертолет
mini rc helicopter
93.329 polys
3d_export
$7
rc helicopter model
...rc helicopter model
3dexport
rc helicopter model
3d_ocean
$25
RC F1
...rc f1
3docean
auto car control f1 formula race rc remote speed
remote control f1 car
turbosquid
$10
rc plane
...lane
turbosquid
free 3d model rc plane for download as blend on turbosquid: 3d models for games, architecture, videos. (1295828)
turbosquid
$100
RC Helicopter
...free 3d model rc helicopter for download as 3ds, max, and obj on turbosquid: 3d models for games, architecture, videos. (1298511)
turbosquid
$59
Drone with RC
...3d model drone with rc for download as 3ds, max, obj, and fbx on turbosquid: 3d models for games, architecture, videos. (1363601)
turbosquid
$75
RC buggy
... available on turbo squid, the world's leading provider of digital 3d models for visualization, films, television, and games.
turbosquid
$39

RC Plane001
... available on turbo squid, the world's leading provider of digital 3d models for visualization, films, television, and games.
turbosquid
$30

RC Jet
... available on turbo squid, the world's leading provider of digital 3d models for visualization, films, television, and games.
turbosquid
$30

Rc airplane
... available on turbo squid, the world's leading provider of digital 3d models for visualization, films, television, and games.
Tracks
design_connected
$11

Tracks
...tracks
designconnected
bonaldo tracks computer generated 3d model. designed by gilles, alain.
3d_export
$30

TRACK
...track
3dexport
turbosquid
$20

tracks
... available on turbo squid, the world's leading provider of digital 3d models for visualization, films, television, and games.
turbosquid
$5

Tracks
... available on turbo squid, the world's leading provider of digital 3d models for visualization, films, television, and games.
turbosquid
$5

Track
... available on turbo squid, the world's leading provider of digital 3d models for visualization, films, television, and games.
turbosquid
$2

Track
... available on turbo squid, the world's leading provider of digital 3d models for visualization, films, television, and games.
3d_export
$65

track
...track
3dexport
simple rendering of the scene file
3d_export
$65

track
...track
3dexport
simple rendering of the scene file
3d_export
$65

track
...track
3dexport
simple rendering of the scene file
3ddd
free

Стол Bonaldo Tracks
...onaldo , tracks , обеденный
стол bonaldo tracks
Tank
archibase_planet
free

Tank
...ibase planet
tank tank-wagon tank-truck tank-car
tank train small n110113 - 3d model (*.gsm+*.3ds) for exterior 3d visualization.
3d_ocean
$49
Tank
...tank
3docean
kv-1s tank
tank kv-1s
archibase_planet
free
Tank
...tank
archibase planet
tank medium tank
tank wmcvun n070712 - 3d model (*.3ds) for exterior 3d visualization.
archibase_planet
free
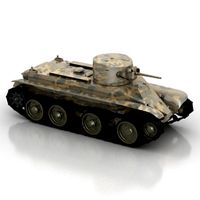
Tank
...k
archibase planet
tank light tank bt-2 high-speed tank
tank bt-2 n200814 - 3d model (*.gsm+*.3ds) for exterior 3d visualization.
3d_export
$5

tanks
...tanks
3dexport
tanks
3d_export
free
tank
...tank
3dexport
tank
archibase_planet
free
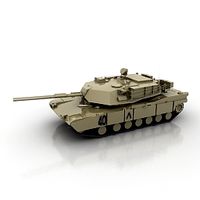
Tank
...tank
archibase planet
tank heavy tank
tank abrams l n090511 - 3d model (*.3ds) for exterior 3d visualization.
archibase_planet
free

Tank
...tank
archibase planet
tank medium tank
tank m60 n070712 - 3d model (*.gsm+*.3ds) for exterior 3d visualization.
archibase_planet
free

Tank
...tank
archibase planet
tank medium tank
tank female n070712 - 3d model (*.gsm+*.3ds) for exterior 3d visualization.
3d_export
$5
tank
...tank
3dexport
tank lowpoly
Mini
turbosquid
$10

Mini Mini Luceplan
...
royalty free 3d model mini mini luceplan for download as max on turbosquid: 3d models for games, architecture, videos. (1227359)
3d_ocean
$39

Mini Cooper
...mini cooper
3docean
cabrioler cooper mini
mini cooper cabrioler
3d_export
$30

Mini lathe
...mini lathe
3dexport
mini lathe
3d_export
$5

mini mouse
...mini mouse
3dexport
mini mouse
3d_export
$5

mini house
...mini house
3dexport
mini house
3d_export
free

Mini Mecha
...mini mecha
3dexport
concept of mini mecha
3d_ocean
$20

Mini Gun
...mini gun
3docean
gatling gun gun machine gun mini gun weapon
model of a mini gatling gun.
3ddd
free

Herve mini
... кофейный , herve
http://www.mobiliavenanti.it/ru/products/hervè-mini
3d_export
$5

mini wall
...mini wall
3dexport
mini wall for living room
3d_export
$5

mini bank
...mini bank
3dexport
mini bank 3d model
Body
3d_ocean
$39

Heart and body
...heart and body
3docean
blood body heart human organ
heart and body highpoly heart inside human body.
turbosquid
free

Body
...lty free 3d model body for download as max, obj, c4d, and fbx on turbosquid: 3d models for games, architecture, videos. (1155461)
3ddd
$1

body
...body
3ddd
маникен
corona mtl
turbosquid
$50

body
... available on turbo squid, the world's leading provider of digital 3d models for visualization, films, television, and games.
turbosquid
$45

Body
... available on turbo squid, the world's leading provider of digital 3d models for visualization, films, television, and games.
turbosquid
$25

bodies
... available on turbo squid, the world's leading provider of digital 3d models for visualization, films, television, and games.
turbosquid
$20

Body
... available on turbo squid, the world's leading provider of digital 3d models for visualization, films, television, and games.
turbosquid
$5

Body
... available on turbo squid, the world's leading provider of digital 3d models for visualization, films, television, and games.
turbosquid
$3

body
... available on turbo squid, the world's leading provider of digital 3d models for visualization, films, television, and games.
turbosquid
$1

body
... available on turbo squid, the world's leading provider of digital 3d models for visualization, films, television, and games.