Thingiverse
Milwaukee M18 to New Bright 12.8V 1/8 R/C Raptor by Omega23jp
by Thingiverse
Last crawled date: 3 years, 3 months ago
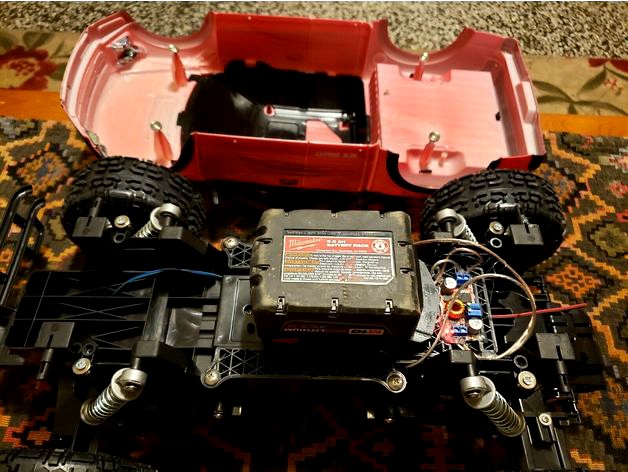
this is a bolt in kit to adapt your new bright , 1:8 scale , 12.8 volt , r/c ford raptor to run on Milwaukee M18 batteries , this fits all M18 batteries up to the 12.0 amp.
thing you will need
1x printed dummy battery with 2x 3/8 long 10-32 set bolts
1x printed adapter body with 1x voltage adapter ,
2x m18 bus bar contacts that are 0.032 thick , 0.500 wide , 0.7 long
2x set bolts that are 1.0 long
4x electrical wires
4x bolts to hold adapter body
8x magnets for body quick connect
4x screws for holding body magnets
4x bolts for holding chassis magnets
https://youtu.be/hK-lAWj71fg
this was a little project i did to get all my stuff on 1 battery platform. it does not make it more powerful and the biggest batteries weight makes it a little sluggish , but the run time and standardized battery made it worth it for me.
this is a easy kit , but it is still a kit and may be beyond the skills of dewalt users. do not try unless you are confident you can do the instructions below.
installation instructions :
take out 4x screws that hold truck body to chassis.
install 4x magnets that are 12MM O.D. , 4MM I.D. ,
4MM thick , countersuck with 4x screws into body
install 4x magnets same as above but with reverse
polarity with 4x bolts into chassis
verify body properly attaches to chassis
install adapter body , route new electrical wire through chassis slits and route motor wire in adapter body slot to not pinch it , then bolt down the adapter body onto chassis using 4x bolts
install the 2x wires from the slits into dummy battery (very important to align polarity) and clamp with the 2x set screws , drives set screws in almost fush
install dummy battery
pull extra wire back above chassis and hot glue or tape it
install m18 battery
place body on chassis
get controller and play
this can also be fully uninstalled just as easy
the voltage adapter is adjustable , i will preset it to 12.8 , it can be easily supered up for more power with a small flathead screwdriver
Tools needed :
philips screwdrivers , 3/32 allen wrench , why is this font so big , tape ,
sheet metal snips , hot glue gun
link for the voltage adapter i used and designed for fit :https://www.ebay.com/itm/5pcs-XL4015-5A-DC-Buck-Step-Down-Voltage-Converter-Constant-Current-Power-Module/142632518904?ssPageName=STRK%3AMEBIDX%3AIT&_trksid=p2057872.m2749.l2649
i have one kit left over for sale on ebay if you would like to save some trouble :https://www.ebay.com/itm/Milwaukee-M18-adapter-KIT-to-New-Bright-12-8v-rc-ford-raptor/114253090193?_trkparms=aid%3D111001%26algo%3DREC.SEED%26ao%3D1%26asc%3D225074%26meid%3De8c3b43f078c4d94a354765ca8ed5253%26pid%3D100290%26rk%3D1%26rkt%3D4%26sd%3D114253090193%26itm%3D114253090193%26pmt%3D0%26noa%3D1%26pg%3D2060778%26brand%3DMilwaukee&_trksid=p2060778.c100290.m3507
it has been a while since i made these , so if you see a missed step or know some of the missing bolt or magnet sizes then leave a comment.
I suspect this adapter may fit several other new bright 1/8 r/c's but do not know
I am placing this on public domain so that every sentient being may use this at their own discretion.
Please give a like if you like this and a photo if you make it.
Computer Aided Designed on Bobcad V30
Computer Aided Manufactured on Simplify 3D V4
Printed on Creality CR-10
I Printed with PLA plus , zero top or bottom ,
2 sidewalls , 20ish percent infill , 0.8mm nozzle
Stop Human Trafficking
Stop Title IV-D
Live long and prosper
Similar models
thingiverse
free

Milwaukee M18 Battery Adapter by JFatula
...ge regulator and battery low voltage shut off device on my sons power wheels (youtube is great inst it!). added in hex bolts for
thingiverse
free

Milwaukee M18 Lithium Tool Battery Adapter by macsboost
....
there are screw holes such that you can adapt this battery to a black and decker 18v weed whacker battery.
power to the people!
grabcad
free

Milwaukee m18 battery holder
... holder for m18 milwaukee batteries
link to magnets used:
https://www.amazon.com/dp/b07mxvy2s4/ref=cm_sw_r_oth_apip_lh2aaleivedhl
thingiverse
free

Milwaukee M18 V2 Battery adapter by macsboost
...ee m18 v2 battery adapter by macsboost
thingiverse
improved m18 adapter, for milwaukee lithium 18v cordless drill battery packs.
thingiverse
free

Tamiya F104W GP chassis adapters by iron2dog
...countersunk 2x6 screws for holding body post adapter and 1x 3x6 countersunk screw for antenna relocation part.
hope you enjoy it!
thingiverse
free

Ryobi One+ Battery Adapter
...ryobi one+ battery adapter
thingiverse
remix milwaukee m18 to ryobi battery adapter for ryobi one+ battery
thingiverse
free

Spektrum Radio Milwaukee M18 Battery Adapter
...in place) 1x mini 360 adustable buck converter or similar some wire paperclips i set the voltage to output...
thingiverse
free

Monka 6x4 robot chassis by Jirkasirka
... you will need:
4x tt motor
6x wheel
servo s3003
2x 625bearing
m3, m4, m5 bolts ans nuts and other custom electronic(arduino ...)
thingiverse
free

LUMITREE - Branch Adaptable Lamp by rapzz
...0mm screw
2x m5 30mm screw
2x m5 lock nut
this project is totally adaptable, so you can make your lamp in the way you want it to.
thingiverse
free

apple travel adapter kit by orlevap
...pple travel adapter kit by orlevap
thingiverse
apple travel adapter kit
3x 10w usb power adapter
1x battery charger
4x usb cable
Omega23Jp
thingiverse
free

Caulking tube nozzle extention by Omega23jp
...
a caulking tube extention
designed for vasemode
i printed mine on a delta , with no supports , vasemode , and with a 0.8 nozzle
thingiverse
free

filament strain relief by Omega23jp
...t being may use this at their own discretion.
designed on bobcad v30
stop human trafficking
stop title iv-d
live long and prosper
thingiverse
free

Big Ole Handle by Omega23jp
...t being may use this at their own discretion.
designed on bobcad v30
stop human trafficking
stop title iv-d
live long and prosper
thingiverse
free

Thru wall filament guide by Omega23jp
...t being may use this at their own discretion.
designed on bobcad v30
stop human trafficking
stop title iv-d
live long and prosper
thingiverse
free

Ornamental Screw BackMount by Omega23jp
...t being may use this at their own discretion.
designed on bobcad v30
stop human trafficking
stop title iv-d
live long and prosper
thingiverse
free

Froppy goggles remix by Omega23jp
....m. , and printing with it. the lens on this variant protrudes considerable more than the real life photo of the original design.
thingiverse
free

backside magnet holder by Omega23jp
...uter aided manufactured on simplify 3d v4
printed on creality cr-10
stop human trafficking
stop title iv-d
live long and prosper
thingiverse
free

double female sided cable chain by Omega23jp
...t being may use this at their own discretion.
designed on bobcad v30
stop human trafficking
stop title iv-d
live long and prosper
thingiverse
free

CR-10 BL-Touch Strain Relief by Omega23jp
...t being may use this at their own discretion.
designed on bobcad v30
stop human trafficking
stop title iv-d
live long and prosper
thingiverse
free

Laptop Ram Cover for Toshiba A505-s6980 by Omega23jp
...giant tab.
i am entering this file for anyone to use as they see fit.
stop human tafficking
stop title iv-d
live long and prosper
8V
3ddd
$1

Venezia 8V
...
3ddd
dolce porte , дверь
багетные межкомнатные двери dolce porte , полотно 2000х800 mm.
humster3d
$15

Moto-Guzzi Norge GT 8V 2015 Blueprint
...15 blueprint 3d model in the format you need. all our 3d models was created on real car base and maximally close to the original.
humster3d
$75

3D model of Moto-Guzzi Norge GT 8V 2015
... 3d model of moto-guzzi norge gt 8v 2015 in various file formats. all our 3d models were created maximally close to the original.
humster3d
$75

3D model of Moto Guzzi Griso 8V SE 2015
... 3d model of moto guzzi griso 8v se 2015 in various file formats. all our 3d models were created maximally close to the original.
3d_export
$99

Audi A3 sedan 2013 3D Model
...audi a3 sedan 2013 3d model 3dexport audi a3 8v 2013 2014 2015 2016 4-door sedan saloon germany german...
3d_export
$99

Audi A3 S line 2013 3D Model
...a3 s line 2013 3d model 3dexport audi a3 8v line limo sport 2013 2014 2015 2016 4-door sedan...
cg_studio
$99

Audi A3 sedan 20133d model
...cgstudio cars sedan 2013 2014 2015 2016 4 door 8v a3 audi german germany saloon .3ds .c4d .fbx .lwo...
3d_ocean
$89

Audi A3 sedan 2013
...audi a3 sedan 2013 3docean 2013-2016 4 door 8v a3 audi audi a3 german germany saloon sedan the...
thingiverse
free

VW GTI 8V by 3DPerf
...vw gti 8v by 3dperf
thingiverse
vw gti 8v
3d_sky
free

Venezia 8V
...venezia 8v
3dsky
venezia doors
baguette porte dolce doors, leaf 2000h800 mm.
M18
turbosquid
$12

M18 Grenade
...osquid
royalty free 3d model m18 grenade for download as fbx on turbosquid: 3d models for games, architecture, videos. (1188831)
3d_export
$5

m18 smoke grenade
...m18 smoke grenade
3dexport
3d model m18 smoke grenade. granada.
3d_export
$29

AN M18 3D Model
...ignal weapon military usa american
an m18 3d model download .c4d .max .obj .fbx .ma .lwo .3ds .3dm .stl humster3d 113547 3dexport
3d_export
$20

M18 Hellcat
...d model is low number of vertices,polygon mesh for games.<br>for further questions please do not hesitate to send a message
turbosquid
$6

M18 Claymore mine
...
royalty free 3d model m18 claymore mine for download as fbx on turbosquid: 3d models for games, architecture, videos. (1712413)
humster3d
$25

3D model of AN M18
...ter3d
buy a detailed 3d model of an m18 in various file formats. all our 3d models were created maximally close to the original.
turbosquid
$14

M18 smoke grenade
...y free 3d model m18 smoke grenade for download as fbx and obj on turbosquid: 3d models for games, architecture, videos. (1587624)
turbosquid
$1

M18 Smoke Grenade
...l m18 smoke grenade for download as obj, fbx, blend, and gltf on turbosquid: 3d models for games, architecture, videos. (1499668)
turbosquid
$16

M18 Smoke Grenade
...8 smoke grenade for download as 3ds, obj, fbx, blend, and dae on turbosquid: 3d models for games, architecture, videos. (1184120)
turbosquid
$11

M18 Smoke Grenade
... available on turbo squid, the world's leading provider of digital 3d models for visualization, films, television, and games.
Raptor
3ddd
free

raptor
...raptor
3ddd
динозавр
turbosquid
$390

raptor
...r
turbosquid
royalty free 3d model raptor for download as ma on turbosquid: 3d models for games, architecture, videos. (1616270)
turbosquid
$60

Raptor
...
turbosquid
royalty free 3d model raptor for download as fbx on turbosquid: 3d models for games, architecture, videos. (1211946)
turbosquid
$25

Raptor
...urbosquid
royalty free 3d model raptor for download as blend on turbosquid: 3d models for games, architecture, videos. (1196384)
turbosquid
$39

Raptor
...d
royalty free 3d model raptor for download as blend and fbx on turbosquid: 3d models for games, architecture, videos. (1710279)
turbosquid
$30

Raptor
...d
royalty free 3d model raptor for download as obj and blend on turbosquid: 3d models for games, architecture, videos. (1304436)
turbosquid
$49

Raptor
... available on turbo squid, the world's leading provider of digital 3d models for visualization, films, television, and games.
turbosquid
$39

Raptor
... available on turbo squid, the world's leading provider of digital 3d models for visualization, films, television, and games.
turbosquid
$39

Raptor
... available on turbo squid, the world's leading provider of digital 3d models for visualization, films, television, and games.
turbosquid
$30

raptor
... available on turbo squid, the world's leading provider of digital 3d models for visualization, films, television, and games.
Milwaukee
3d_export
$49

Milwaukee Mitchell Airport 10km
...milwaukee mitchell airport 10km
3dexport
turbosquid
$30

Table lamp MILWAUKEE by Ferr
...ree 3d model table lamp milwaukee by ferr for download as max on turbosquid: 3d models for games, architecture, videos. (1247510)
turbosquid
$12

Milwaukee m28 cell holder
...y free 3d model milwaukee m28 cell holder for download as 3ds on turbosquid: 3d models for games, architecture, videos. (1237815)
turbosquid
free

milwaukee ep 2 electric locomotive
... model milwaukee ep 2 electric locomotive for download as obj on turbosquid: 3d models for games, architecture, videos. (1707833)
turbosquid
$1

hiawatha milwaukee class a steam locomotive
...aukee class a steam locomotive for download as , 3ds, and obj on turbosquid: 3d models for games, architecture, videos. (1713563)
3d_export
$199

milwaukee city wisconsin usa 50km
...der ready. 1. suitable for games, games, education, architecture etc. 2. mainly used for town and urban planning, real estate etc
3d_export
$7

Wrench 3D Model
...wrench 3d model 3dexport wrench makita torque milwaukee tool dewalt how to impact bosch gun adjustable right...
thingiverse
free

Milwaukee by
...milwaukee by
thingiverse
milwaukee
thingiverse
free

milwaukee batteriholder
...milwaukee batteriholder
thingiverse
batteriholder for milwaukee
easy to print
thingiverse
free

Milwaukee Makerspace by raster
...milwaukee makerspace by raster
thingiverse
a line rendition of the milwaukee makerspace logo.
Bright
3ddd
$1

Bright home paul
...bright home paul
3ddd
bright home
bright home paul
design_connected
$13

Bright Beads
...bright beads
designconnected
marz designs bright beads computer generated 3d model. designed by reynolds, coco.
3ddd
$1

Bright Home COCO
...bright home coco
3ddd
bright home , coco
bright home coco.
dimension - 33x33x17 inch.
turbosquid
$5

Bright light
...uid
royalty free 3d model bright light for download as blend on turbosquid: 3d models for games, architecture, videos. (1457885)
3ddd
$1

BRIGHT CHAIR - ANDREW Sofa/BRIGHT CHAIR
...риал обивки - темно серый вельвет
материал обрамления - черный глянцевый пластик
все модели что на превью - присутствуют в сцене
turbosquid
$55

Elf-Bright
... available on turbo squid, the world's leading provider of digital 3d models for visualization, films, television, and games.
3d_ocean
$2

Bright wood
....zip file contains .mat file and 2k maps of diffuse,specular and bump. (scene is not included) i’m greatly appreciate you choo...
3ddd
$1

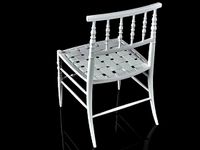
Bright Chair Gosha
...bright chair gosha
3ddd
bright chair
стул bright chair арт. 917 gosha
ширина – 610 мм
глубина – 655 мм
общая высота – 810 мм
3ddd
$1

Кресло Bright Jett
...tt
ширина - 645мм
глубина– 800 мм
общая высота - 1090-1165 мм
высота до сиденья – 455-530 мм
высота до подлокотников – 620-695мм
turbosquid
$25

Mr. Bright-Eyes
...squid
royalty free 3d model mr. bright-eyes for download as on turbosquid: 3d models for games, architecture, videos. (1704051)
R
3ddd
$1
ORLANDO R
...orlando r
3ddd
новый стиль
новый стиль - orlando r
design_connected
$11
R-Table
...r-table
designconnected
henge r-table computer generated 3d model. designed by castagna, massimo.
design_connected
$7

Cone R
...cone r
designconnected
bonaldo cone r computer generated 3d model. designed by pasini, ennio.
3ddd
$1

R&B
...r&b
3ddd
r&b
спальный гарнитур r&b;
3d_export
$5

nissan gt-r
...nissan gt-r
3dexport
this is nissan gt-r
turbosquid
$10

R for ROBOT
...osquid
royalty free 3d model r for robot for download as max on turbosquid: 3d models for games, architecture, videos. (1694233)
turbosquid
$5

Letter r
...urbosquid
royalty free 3d model letter r for download as max on turbosquid: 3d models for games, architecture, videos. (1408525)
turbosquid
$5

Letter R
...urbosquid
royalty free 3d model letter r for download as max on turbosquid: 3d models for games, architecture, videos. (1408526)
3d_export
$5
react r
...r 9 lamps (6+3) ø 60 × 21 cm 12 lamps (9+3) ø 80 × 21 cm polys: 208 539 verts: 213 675 https://ru.lampachn.com/react-r-p0551.html
turbosquid
$40
R-73
...uid
royalty free 3d model r-73 for download as blend and fbx on turbosquid: 3d models for games, architecture, videos. (1620664)
C
3ddd
$1
Gustavsberg Skandic 160 c-c
...gustavsberg skandic 160 c-c
3ddd
gustavsberg , смеситель
3dmax 2009
3ddd
$1

Кресло Victoria C
...кресло victoria c
3ddd
victoria c , стул
victoria c
design_connected
$25

Mobius C
...mobius c
designconnected
zenith mobius c computer generated 3d model. designed by schamburg, marc.
3ddd
$1

Molteni & C
...molteni & c
3ddd
molteni&c
molteni & c
turbosquid
$10
Raids house C&C Tiberian sun
... raids house c&c tiberian sun for download as max and fbx on turbosquid: 3d models for games, architecture, videos. (1188376)
turbosquid
$10
Civilian Asylum C&C Tiberian sun
...ilian asylum c&c tiberian sun for download as max and fbx on turbosquid: 3d models for games, architecture, videos. (1188365)
3ddd
$1

Molteni & C
...molteni & c
3ddd
molteni&c
стул molteni & c
3ddd
free
kamina&c
...kamina&c
3ddd
kamina-c , табурет барашек
sheep chair by kamina-c
design_connected
$29

Extrasoft C
...extrasoft c
designconnected
living divani extrasoft c computer generated 3d model. designed by lissoni, piero.
design_connected
$4
Mono C
...mono c
designconnected
scp mono c tables computer generated 3d model. designed by konstantin grcic.
12
3ddd
free
декор№12
...декор№12
3ddd
декор№12
turbosquid
$25

12
... available on turbo squid, the world's leading provider of digital 3d models for visualization, films, television, and games.
turbosquid
free
bed 01 12/12/2019
...rbosquid
free 3d model bed_01_12/12/2019 for download as max on turbosquid: 3d models for games, architecture, videos. (1482189)
3d_export
$5
12
...12
3dexport
карабин сайга с рожком и патроном
turbosquid
$24

Chandelier MD 89330-12+12 Osgona
... chandelier md 89330-12+12 osgona for download as max and fbx on turbosquid: 3d models for games, architecture, videos. (1222937)
design_connected
$29

Nuvola 12
...nuvola 12
designconnected
gervasoni nuvola 12 computer generated 3d model. designed by navone, paola.
design_connected
$25
Kilt 12
...kilt 12
designconnected
zanotta kilt 12 computer generated 3d model. designed by progetti, emaf.
design_connected
$11
Domino 12
...domino 12
designconnected
zanotta domino 12 computer generated 3d model. designed by progetti, emaf.
design_connected
$9
Croco 12
...croco 12
designconnected
gervasoni croco 12 computer generated 3d model. designed by navone, paola.
design_connected
$16

12 plates
...12 plates
designconnected
isi milano 12 plates computer generated 3d model. designed by rattin, rosaria.
8
turbosquid
$6

Rock 8-8
...urbosquid
royalty free 3d model rock 8-8 for download as obj on turbosquid: 3d models for games, architecture, videos. (1659393)
3ddd
$1
Italamp 387/8+8
...italamp 387/8+8
3ddd
italamp
люстра italamp 387/8+8
размеры 92x71h
3ddd
$1

8 марта
...8 марта
3ddd
8 марта
кресло 8 марта
design_connected
$16

No 8
...nected
photo-realistic 3d models of the sibast no 8 armchair from sibast for 3d architectural and interior design presentations.
3d_export
$5
hinge 8
...hinge 8
3dexport
hinge 8
3d_export
$5

iphone 8
...iphone 8
3dexport
iphone 8
turbosquid
$69

iPhone 8 and iPhone 8 Plus
... free 3d model iphone 8 and iphone 8 plus for download as max on turbosquid: 3d models for games, architecture, videos. (1202442)
turbosquid
$12

Calligraphic Digit 8 Number 8
...hic digit 8 number 8 for download as max, obj, fbx, and blend on turbosquid: 3d models for games, architecture, videos. (1389341)
3ddd
free

PLANTS 8
...plants 8
3ddd
цветок , горшок
plant 8,,, hope u all like it
3ddd
$1
8 Марта / Amadey
...8 марта / amadey
3ddd
8 марта
8 marta amadey
New
turbosquid
$119

New New Beetle
... available on turbo squid, the world's leading provider of digital 3d models for visualization, films, television, and games.
3d_export
$5

New-feather
...new-feather
3dexport
new-feather
3d_export
$6

new style
...new style
3dexport
new style room
3ddd
free
New Items
...ew items
3ddd
new items , барный
барный стул от китайского производителя фирмы new items
3d_export
$6

Logo new
...logo new
3dexport
new american style logo
3d_export
$10
New jersey
...new jersey
3dexport
new jersey stp and stl format
design_connected
$20

New Deal
...new deal
designconnected
new deal computer generated 3d model.
3d_ocean
$15
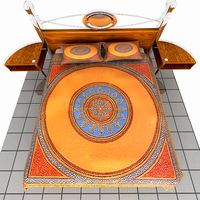
New bed
... for this bed all this file format include in zip file 3ds,obj,max,zip file change material and re-size very easy very for render
3ddd
free

Sofa-New Classic
...sofa-new classic
3ddd
new classic
sofa,new classic
design_connected
$13
New Antiques
...new antiques
designconnected
cappellini new antiques computer generated 3d model. designed by wanders, marcel.
1
turbosquid
$69

armchairs(1)(1)
... available on turbo squid, the world's leading provider of digital 3d models for visualization, films, television, and games.
turbosquid
$15

ring 1+1
... available on turbo squid, the world's leading provider of digital 3d models for visualization, films, television, and games.
turbosquid
$10

chair(1)(1)
... available on turbo squid, the world's leading provider of digital 3d models for visualization, films, television, and games.
turbosquid
$8

Chair(1)(1)
... available on turbo squid, the world's leading provider of digital 3d models for visualization, films, television, and games.
turbosquid
$2

RING 1(1)
... available on turbo squid, the world's leading provider of digital 3d models for visualization, films, television, and games.
turbosquid
$1

Table 1(1)
... available on turbo squid, the world's leading provider of digital 3d models for visualization, films, television, and games.
turbosquid
$1

house 1(1)
... available on turbo squid, the world's leading provider of digital 3d models for visualization, films, television, and games.
turbosquid
$59

Formula 1(1)
...lty free 3d model formula 1 for download as max, fbx, and obj on turbosquid: 3d models for games, architecture, videos. (1567088)
design_connected
$11

No 1
...no 1
designconnected
sibast no 1 computer generated 3d model. designed by sibast, helge.
turbosquid
$2

desert house(1)(1)
...3d model desert house(1)(1) for download as 3ds, max, and obj on turbosquid: 3d models for games, architecture, videos. (1055095)