Thingiverse

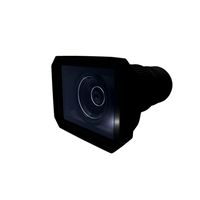
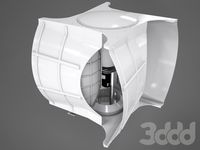
Micro Four Thirds Pinhole "Lens" - 11mm FL by awdemuth
by Thingiverse
Last crawled date: 3 years ago
Are you tired of your modern lens with it's tack-sharp focus, vibrant colors and incredible contrast? Do you wish your photos had strangely colored areas, hot spots and heavy vignetting? Is f22 entirely too fast for your tastes? Well strap in, folks, I have just the project for you!
When I first started my photography class in high school, I fell in love with alternative photographic methods. Whether making a slit scan camera or playing around with strange processing effects in the darkroom, I was into it. Pinhole cameras were my favorite though: empty film box, some tape, a piece of aluminum foil and a needle: instant camera!
Pinhole photography in the digital world admittedly loses some of it's charm, mostly due to the convenience factor: some of the fun of pinhole photography was wondering exactly how the scene was framed or if you had the exposure right. What convenience takes away, it also gives back in spades: now you don't have to wait until you get back to a changing box to put new film into the camera just so you can take one more picture!
Thanks to hstahl for helping out with the MFT mount!
This STL is just a cap to affix a pinhole aperture to. You will still need to make your own aperture. I followed the excellent instructions on how to make a precision pinhole at (LINK DOWN!!!http://www.withoutlenses.com/articles/how-to/drill-your-own-precision-pinhole-aperturesLINK DOWN!!! read at end of description). Any maker here will probably have most of the tools mentioned and should be able to improvise for anything you don't have (I used my digital calipers instead of a micrometer), so all you need is time and patience. Though, if you lack the patience like I did in high school, aluminum foil and a needle will work, just know that your photos are likely to look even worse than what I posted.
The focal length for this is 11mm: this is as short of a focal length you can have with a pinhole and have an image circle that mostly covers a MFT sensor. Ideally, the pinhole diameter should be 0.14mm, or roughly f80 for this focal length. Calculations for pinhole sizes and daylight exposure estimates can be found at http://www.mrpinhole.com/calcpinh.php
The aperture I used was designed for my 20mm FL pinhole cap (which I'll post later) and is roughly f115, which is why I think I have such poor colors and so much diffusion in my photos. Once the pinhole was made, I cut it and taped it to the backside of my printed adapter with duct tape that I then covered with electrical tape (to avoid internal reflections).
IMPORTANT!!!! Since without lenses is down, here is some supplemental information:
How to make a quality pinhole: this is from user JoeVanCleave on from http://www.f295.org/main/archive/index.php/t-13823.html and is roughly how I made mine
04-14-2009, 11:24 PM
I use 2 mil thick brass sheet, available at hobby stores in the States. K & S is a common brand; it's also available at most True Value hardware stores in their K & S display. I use a sewing needle, the eyelet end pushed into a small piece of round wooden dowel to use as a mandrel; don't push the needle completely through the brass unless the shank diameter is your desired size (for longer focal length cameras, perhaps.)
I spin the needle until it barely penetrates the brass (against a soft surface like cardboard), then sand the bottom side with fine emory paper, and twist/penetrate again, then sand a bit more. Once you think you're in the ballpark of the correct size I'll estimate the diameter using a loupe slide viewer and a millimeter scale. I place the piece of brass against the backside of the scale so that the pinhole is adjacent to the markings on the scale, then backlight the hole, with enough light on the scale side to read the measurement. Using the loupe I can estimate the diameter to within a fraction of a millimeter (i.e. 1/4, 1/3 or 1/2 millimeter.)
It's also important when doing this procedure to look for burrs and other irregularities in the hole; a simple spin/ream of the needle, with little pressure, usually clears the burrs. Also try blowing real hard through the hole, that helps sometimes.
The idea is to slowly ream the hole out, while sanding down the backside dimple, while keeping the hole uniform and burr-free, all the while you approach your target hole diameter (in fractions of a millimeter.) This method is "close enough" in accuracy I feel for all but the most scientific of pinholers.
What happens sometimes is I'll get real close to the ideal diameter, but the hole still has a burr or two; an additional ream and I've gone too wide. I'll just start over again. Sometimes it takes two or three tries to get the correct sized hole clean and circular. It's okay, take your time; the better quality hole will yield higher quality images; the extra time is an investment in your future imagery.
~Joe
PS: I use a pack of sewing needles of various diameters to choose from, but usually the smallest size is what I end up using, unless it's a real long focal length box camera.
Similar models
thingiverse
free

Solargraphy pinhole camera by dominik4949
... mm.
focal length: 30 mm
the example solar photography in the gallery is from a different, smaller camera and is only an example.
thingiverse
free

Fujifilm X mount pinhole lens by vegos
...nner space bigger for better adhesion.
v3:
no hole at all. more distance from sensor (bigger focal rate length).
still testing...
thingiverse
free

Digital Camera Pinhole Adapter by Staf27
...
more here
first outdoor hiking test
more photos here
other sourses
didgital pinhole v1.1.
idea.
thingiverse
free

Koroll 6x 4.5 pinhole camera by Ktronik
...and using a 0.26mm pinhole aperture has a f-stop of f192...have shot a test roll, but not processed it yet...
work in progress...
thingiverse
free

Solarography / Pinhole Coke Can Camera by vegos
...on the internet of how to make a beer/coke/whatever-can-pinhole-camera.
v2 has a bottom (external) ring with holes for tie-wraps.
thingiverse
free

Canon EF-M moint pinhole by brettpim
...pinhole.
focal length must be at least 21.
add your own pinhole to slot
stl files are examples of 21mm, 50mm, 100mm focal lengths
thingiverse
free

Eye Shaped Pinhole Camera ( read description) by AdmiralPumpkinPie24
...y suggest to print in black filament and use some screws and screw washers
pd: im not so good with english, sorry for bad grammar
thingiverse
free

pinhole135 camera mini by sss860149
...s cap are not good.
use the fixed one can be better.
i think i should use more black tape to prevent the unexpected light@@"
thingiverse
free

Pinhole body cap for Micro Four Thirds camera
...at the camera uses to sense if it has a body cap or a lens attached.
i have been making pinholes form aluminum soft drink cans :)
thingiverse
free

Canon EF-S pinhole 'lens' by Amplivibe
...le.
print with a thin layer thickness (i used 0.15mm), the fitting has a sharp overhang. then use a needle to make a tiny hole.
Awdemuth
thingiverse
free

Propane Torch Keeper by awdemuth
... .step, and .ipt parts included, because it makes it easier for everybody to remix if original files or .step files are included!
thingiverse
free

Screwless EASY SANDING BLOCK faster printing by awdemuth
...ps://www.thingiverse.com/thing:4655051/files
i just filled in the triangular structure. now prints 30% faster with less filament.
thingiverse
free

Colgate Toothpaste Syringe. by awdemuth
...e we really should be providing the best files for remixing whenever we can. not that you'd want to remix this stupid thing.
thingiverse
free

Marksman Slingshot handle fishing reel clamp by awdemuth
...ose an ear/eye/rip open your jugular vein... you get the picture.
i'd like to know what you want to use such a device for!
thingiverse
free

Aeropress Storage/Travel Cover with Sealed Filter Compartment by muddyfeet
...storage/travel cover with sealed filter compartment by muddyfeet thingiverse awdemuth made a really nice aeropress travel cap that you...
Pinhole
turbosquid
free

Pinhole Glasses
... available on turbo squid, the world's leading provider of digital 3d models for visualization, films, television, and games.
thingiverse
free

Pinhole Camera by StarScape
...pinhole camera by starscape
thingiverse
pinhole camera
thingiverse
free

Pinhole Camera by asoberon
...pinhole camera by asoberon
thingiverse
a pinhole camera.
thingiverse
free

Pinhole Glasses by amitkalia
...pinhole glasses by amitkalia
thingiverse
pinhole glasseshttps://en.wikipedia.org/wiki/pinhole_glasses
thingiverse
free

Pinhole Eclipse Viewer by ThunderClan
...pinhole eclipse viewer by thunderclan
thingiverse
this is a pinhole viewer for the sun.
thingiverse
free

Top pinhole cofee by Vanson
...erse.com/thing:1486588
viewfinder for the pinhole cofee : http://www.thingiverse.com/thing:1500169
diameter box of coffee : 85 mm
thingiverse
free

Simple Pinhole Projector by kattanasio
...simple pinhole projector by kattanasio
thingiverse
very simple pinhole projector for the solar eclipse.
thingiverse
free

Viewfinder Pinhole sténopé by Vanson
...574
pinhole cofee mount for vanguard : http://www.thingiverse.com/thing:1486588
diameter box of coffee : 85 mm
31/0/2018 : add v2
thingiverse
free

Pinhole camera, Sténopé by Pradaldi
...pinhole camera, sténopé by pradaldi
thingiverse
simple design for a pinhole camera.
un sténopé tout simple.
thingiverse
free

pinhole cofee mount for vanguard by Vanson
...verse.com/thing:245574
viewfinder for the pinhole cofee : http://www.thingiverse.com/thing:1500169
diameter box of coffee : 85 mm
11Mm
3d_ocean
$5

40mm Red Dot Sight with 11mm mount
...h 11mm mount. ideal for hunting and military grade rifles. delivered with diffuse, specular and normal map (1k mount, 2k sight).
3d_export
$7

spoon
...stl<br>- spoon: 11,641 vertices, 11,273 faces<br>- spoon: (w)42mm (l)180mm (h)11mmlt;br>other models may be found in my...
3d_export
$39

tooth molars with arrow 03
...vertex with more than 5 edges: 0<br>object:<br>- dimension mm: 11mm x 9mm x 15mm<br>- dimension cm: 1.1cm x 0.9cm...
3d_export
$19

cutlery set 3 pieces
...faces<br>- knife: 20,232 vertices, 23,920 faces<br>- spoon: (w)42mm (l)180mm (h)11mmlt;br>- fork: (w)26mm (l)184mm (h)9mm<br>- knife: (w)22mm (l)195mm (h)9mm<br>other models...
3d_export
$19

Eraser 01
...5 edges: 0<br>object:<br>- dimension mm: 21mm x 36mm x 11mmlt;br>- dimension cm: 2.09cm x 3.6cm x 1.1cm<br>- dimension m:...
3d_export
$19

Gingerbread cookie 001
...5 edges: 0<br>object:<br>- dimension mm: 65mm x 99mm x 11mmlt;br>- dimension cm: 6.5cm x 9.89cm x 1.1cm<br>- dimension m:...
3d_export
$19

Gingerbread cookie 003
...5 edges: 0<br>object:<br>- dimension mm: 39mm x 88mm x 11mmlt;br>- dimension cm: 3.9cm x 8.8cm x 1.1cm<br>- dimension m:...
3d_export
$19

Gingerbread cookie 005
...5 edges: 0<br>object:<br>- dimension mm: 64mm x 56mm x 11mmlt;br>- dimension cm: 6.4cm x 5.6cm x 1.1cm<br>- dimension m:...
thingiverse
free

globs cruciger 11mm by jarekmn
...globs cruciger 11mm by jarekmn
thingiverse
charm diam 11mm
thingiverse
free

11mm bearing blocks by outcastrc
...11mm bearing blocks by outcastrc
thingiverse
11mm bearing blocks in 2 and 4 hole.
Lens
3d_ocean
$16
Lens
...lens
3docean
camera film lens video widescreen
a standard camera lens with reflections.
3d_export
$15

Lens optical lens 3D Model
...odel
3dexport
lens optical accessories for the tablet accessories electronics
lens optical lens 3d model sergio108 76763 3dexport
turbosquid
$1

Lens
... available on turbo squid, the world's leading provider of digital 3d models for visualization, films, television, and games.
3ddd
free
Massive / Len
...massive / len
3ddd
massive , встроенный
светильник потолочный massive len
3d_ocean
$9
50mm Canon lens
...50mm canon lens
3docean
50mm canon foto lens photo
canon lens 50mm 1.8 the most practical affordable lens to start with
turbosquid
$20
Camera Lens
...osquid
royalty free 3d model camera lens for download as c4d on turbosquid: 3d models for games, architecture, videos. (1414988)
turbosquid
$2

Axicon Lens
...osquid
royalty free 3d model axicon lens for download as max on turbosquid: 3d models for games, architecture, videos. (1169215)
turbosquid
free

Camera Lens
...quid
royalty free 3d model camera lens for download as blend on turbosquid: 3d models for games, architecture, videos. (1546983)
turbosquid
$2

MAGNIFYING LENS
...y free 3d model magnifying lens for download as blend and fbx on turbosquid: 3d models for games, architecture, videos. (1633553)
turbosquid
$1

MAGNIFYING LENS
...y free 3d model magnifying lens for download as blend and fbx on turbosquid: 3d models for games, architecture, videos. (1633707)
Fl
3ddd
$1

Brench Design FL
...brench design fl
3ddd
brench , design fl
люстра "brench" от design fl.
3d_export
$5

abelina fl
...de dimensions (l × w × h) 30 × 25 × 166 cm polys: 46 055 verts: 46 472 https://www.lampatron.ru/cat/item/design-lamps-abelina-fl/
turbosquid
$18

FL-Lampshape
... 3d model fl-lampshape for download as 3ds, obj, c4d, and fbx on turbosquid: 3d models for games, architecture, videos. (1228338)
turbosquid
$1

FL matador.max
... available on turbo squid, the world's leading provider of digital 3d models for visualization, films, television, and games.
3ddd
$1

Торшер CONTARDI Liseuse FL
...торшер contardi liseuse fl
3ddd
contardi
торшер contardi liseuse fl
каркас - хром
3ddd
$1
Jotul I 400 FL
...jotul i 400 fl
3ddd
jotul , камин
jotul i 400 fl
jotul.com
turbosquid
$9

hotel room FL
...3d model hotel room fl for download as 3ds, max, obj, and fbx on turbosquid: 3d models for games, architecture, videos. (1445399)
3d_ocean
$10

Robot FL-130
...etal robot robotic scanner sci-fi science spy technics technologies technology
robot fl-130 3d model by alekrazum v-ray materials
cg_studio
$18

fl lamp 013d model
...esign down light lighting bulb floor
.3ds - fl lamp 01 3d model, royalty free license available, instant download after purchase.
cg_studio
$1800

fl lamp 023d model
... lighting bulb floor
professional 3d model fl lamp 02 - .3ds - , royalty free license available, instant download after purchase.
Thirds
turbosquid
$9

Thirds Cocktail Table
... available on turbo squid, the world's leading provider of digital 3d models for visualization, films, television, and games.
turbosquid
$3

The third of May 1808 in Madrid
...third of may 1808 in madrid for download as 3ds, obj, and fbx on turbosquid: 3d models for games, architecture, videos. (1261411)
turbosquid
$12

Third Reich 5 Reichsmark Germany
...3d model third reich 5 reichsmark germany for download as max on turbosquid: 3d models for games, architecture, videos. (1525982)
turbosquid
$10

Smith and Wesson Third Gun Model
...3d model smith and wesson third gun model for download as fbx on turbosquid: 3d models for games, architecture, videos. (1304640)
turbosquid
$5

Anja Third Eye Chakra Pendant
...ee 3d model anja third eye chakra pendant for download as stl on turbosquid: 3d models for games, architecture, videos. (1525282)
turbosquid
$5

Anja Third Eye Chakra Coaster
...ee 3d model anja third eye chakra coaster for download as stl on turbosquid: 3d models for games, architecture, videos. (1525280)
turbosquid
free

Free MiniBus -third world style-
... available on turbo squid, the world's leading provider of digital 3d models for visualization, films, television, and games.
3d_export
$20

Printable Third Millennium bridge form Zaragoza 3D Model
...cture arquitectura escultura miniature miniatura
printable third millennium bridge form zaragoza 3d model geo.resy 92119 3dexport
3d_export
$20

third woman 0428
...gt;- cjp technology suitable<br>- source file (.wrl) is included<br>suitable for 3d-systems projet 3d printer series.
3ddd
$1

Fine Art Lamps 420840 Portobello
...fine art lamps 420840 portobello
3ddd
fine art lamps
no third party plugin required.
Micro
3ddd
$1

Micro
...micro
3ddd
автобус
turbosquid
$80

MICRO
...ty free 3d model micro for download as max, c4d, obj, and fbx on turbosquid: 3d models for games, architecture, videos. (1700743)
3ddd
$1

JBL Micro Wireless
... micro , колонка , плеер
jbl micro wireless
turbosquid
$10
Suppressor Micro
...quid
royalty free 3d model suppressor micro for download as on turbosquid: 3d models for games, architecture, videos. (1380433)
turbosquid
$20
Micro Meter
...osquid
royalty free 3d model micro meter for download as fbx on turbosquid: 3d models for games, architecture, videos. (1350448)
turbosquid
$7
NIghtstand Micro
...d
royalty free 3d model nightstand micro for download as max on turbosquid: 3d models for games, architecture, videos. (1248117)
3ddd
$1
Micro wind turbine
...micro wind turbine
3ddd
турбина
micro wind turbine for your green building projects
turbosquid
$29
Micro Speakers
... available on turbo squid, the world's leading provider of digital 3d models for visualization, films, television, and games.
turbosquid
$29

Micro Servo.max
... available on turbo squid, the world's leading provider of digital 3d models for visualization, films, television, and games.
turbosquid
$20

Micro cells
... available on turbo squid, the world's leading provider of digital 3d models for visualization, films, television, and games.
Four
design_connected
$7

Four
...four
designconnected
muuto four computer generated 3d model. designed by klenell, matti.
3d_export
$120

Four cylinder
...four cylinder
3dexport
four cylinder render 3d modelling
3d_ocean
$5

Table Four Kartell
...table four kartell
3docean
cartel cinema4d design four table
3d model of the “four” table created by kartell
turbosquid
$15

Alba Four
...rbosquid
royalty free 3d model alba four for download as obj on turbosquid: 3d models for games, architecture, videos. (1674466)
turbosquid
$12

four Buddhas
...oyalty free 3d model four buddhas for download as obj and stl on turbosquid: 3d models for games, architecture, videos. (1285096)
turbosquid
$5

Four Barrels
...lty free 3d model four barrels for download as , obj, and fbx on turbosquid: 3d models for games, architecture, videos. (1707387)
turbosquid
$199

Four Arms
...lty free 3d model four arms for download as obj, c4d, and fbx on turbosquid: 3d models for games, architecture, videos. (1313147)
turbosquid
$100

four interiors
... available on turbo squid, the world's leading provider of digital 3d models for visualization, films, television, and games.
turbosquid
$18

Four Station
... available on turbo squid, the world's leading provider of digital 3d models for visualization, films, television, and games.
turbosquid
$10

Table for four
... available on turbo squid, the world's leading provider of digital 3d models for visualization, films, television, and games.