Thingiverse
METHOD - silicone baking mat bed insulation and surface adhesion by BETLOG
by Thingiverse
Last crawled date: 3 years ago
Silicone baking mats, used for 2 things:
The much LESS interesting use:
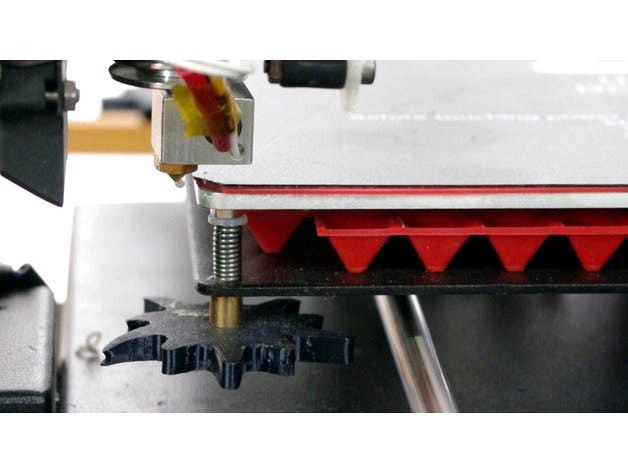
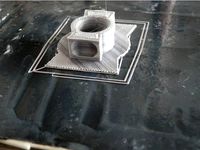
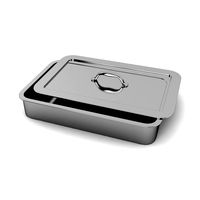
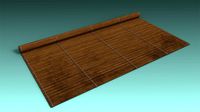
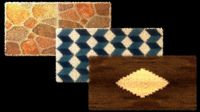
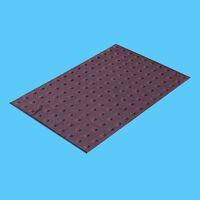
The pyramidal surface mat - thermal insulation between silicone heater pad/aluminium hotbed and the Y axis chassis.https://www.aliexpress.com/item/Creative-Pyramid-Silicone-Baking-Mat-Nonstick-Pan-Pad-Cooking-Mat-Oven-Baking-Tray-Mat-Kitchen-Tools/32807788480.html
I have been using the pyramid mat for a few months. Compared to proper stuck-on insulation this is probably quite insubstantial, but as a simple, removable method to retain and constrain heat under the bed, this works better than nothing.
The much MORE interesting use:
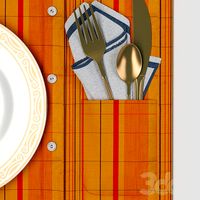
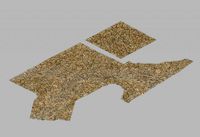
The flat mat - sticky interface between polymer 'buildtak' style bed surface and aluminium hotbed.https://www.aliexpress.com/item/Red-Silicone-Pastry-Bread-Bakeware-Tray-Oven-Rolling-Kitchen-Baking-Mat-Sheet-PML/32693285580.html
Lay the silicone mat out matte side up, without stretching or deforming it, and check that it is flat with no ripples or deformation, and lift the corners and allow the mat to 'roll' back onto the surface to eliminate bubbles. Not all mats arrive perfectly flat, so it's possible some will not be completely appropriate to use, however heating them to 60 or 80C has been known the help them 'relax' a little into their as-produced form. So just getting it flat enough to stick a build surface to without significant tension or distortions will usually be good enough.
A polymer build surface with adhesive on one side is stuck to the matte - NOT the shiny side - of the mat, and cut to size.
Silicone cuts like butter, just use a sharp knife and cut slowly or it will ripple and mess up your edge.
Note that almost nothing "sticks" to silicone in the intended sense, so in this scenario it is removable, but will not come off unless you want it to.
The silicone mat's shiny side is applied to the clean aluminium build plate, where it will stick, and yet be easily removeable.
Yes, I clean all of the surfaces with isopropyl alcohol. The matte side before sticking the build surface to it. The shiny side of the silicone and the aluminium build plate, before installing the silicone/surface onto the bed. Silicone likes to attract particles, so clean it and avoid putting it down anywhere until it's stuck to the relevant surface.
This combination at first seemed a little unreliable in terms of flatness and having the required hardness to allow the nozzle to 'press' the filament into it to get intended toolpath widths, but after heating it to 60C a few times these issues seem to be gone. I'm not sure If heat rectified it or if I'm just now 'doing it right", because now I find it very easy to use, right down to 0.1mm initial layers.
Print removal is trivial, especially when you allow it to cool completely first. Simply remove the entire surface/mat/print from the bed in a peeling motion (at which time the print usually just alls off) and carefully peel the mat/surface away from the print, IF it is still stuck.
Realign one edge of the mat/surface with the hotbed, and roll it back into the bed. I usually swipe the flat of my NTcutter bladed scraper across the surcae to encourage any bubbled to migrate to the edges, I suspect this is useless, but it does ensure that the mat is stuck down.
I always orient the mat/surface the same way on the bed. This may not be relevant, but consistency is important when you are testing things like this.
Heating the silicone/buildsurface imparts a static charge that makes it cling to the aluminium. You will notice this if removing it hot. In some localities/humidities this may cause static discharge, so be careful of your electronics when peeling it off.
The red mat is really soft. Cutting it with a blade is only difficult becasue it's so easy that the mat moves around, even when i'm holding it down with a steel ruler. You could probably cut it by pinching hard with your fingernails.
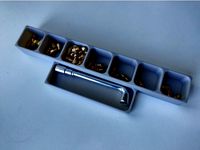
Also useful in the kitchen, and I use an offcut to solder on, or to herd bolts/nuts.
.
I intend to also test the silicone mat/build surface method with the following:
Mats:https://www.aliexpress.com/item/WALFOS-3pc-teflon-Extra-thick-heat-resistant-teflon-BBQ-Grill-Mat-Reusable-non-stick-barbecue-grilling/32741735053.html
.https://www.aliexpress.com/item/Bakeware-Mat-Oil-Paper-Non-Stick-Baking-Sheet-For-Pastry-Kitchen-Tool-30X40cm/32840502560.html
.
NOTE: The previous two items are teflon, not silicone, so obviously there may or may not be issues with prints sticking.
They are like stiff paper...not sure if i'll bother trying to stick a square of 3m adhesive to them and try then as surfaces.. im pretty sure prints would stick to them, but they are fabric textured, and kind of crumpled from shipping.
.https://www.aliexpress.com/item/Non-Stick-Silicone-Baking-Mat-Kneading-Dough-Mat-Baking-Rolling-pastry-Mat-Bakeware-Liners-Pads-Cooking/32799677298.html
.
Is like fine fibreglass fabric wrapped in a thin layer of something vaguely gummy. You can crease it, probably permanently, but if it's clean and dry it will stick to aluminium plates...not half as well as the red one, but thats almost an adhesive type of sticking... but neither will slide off a hotplate, and both can be adhered to with buildtak clone and regualr 3m sheet adhesives....and then easily removed with no damage to any component.
.
and surfaces:https://www.aliexpress.com/item/SWMAKER-10pcs-Wanhao-3D-Printing-Build-Surface-220-220-mm-Square-Polyimide-Tape-sticker-build-tape/32808421081.html
.
This will not be stiff enough, but I may find something to mount it on.https://www.aliexpress.com/item/SWMAKER-10pcs-Wanhao-3D-Printing-Build-Surface-220-220-mm-Square-Polyimide-Tape-sticker-build-tape/32808421081.html
This will also not be stiff enough, but I may find something to mount it on.
.https://www.aliexpress.com/item/220-220-0-8mm-White-PEI-Sheet-Polyetherimide-Sheets-for-3D-Printer-with-468MP-Adhesive-Tape/32838696009.html
This has a lot of potential, I will probably be sticking a mat to this next. The qualities of the surface material will determine how it compares; I'm sure the flexibility and removeability part will be almost identical to chinesium buildtak.
2018-01-28--13-46-15minor update
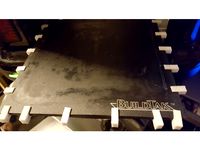
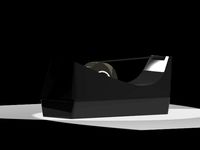
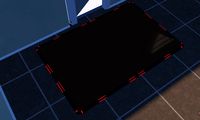
red silicone mat - black polymer 'buildtak' clone
Printing 0.05mm thick first layers seems to be a lot easier than before I started using the silicone layer. I still level my bed by eye, and I have not at all been dilligent about doing it accurately for the last few weeks. Essentially just doing each corner once (frontL frontR, backR backL) and adjusting bed the usual amount ( so i can see there is a gap under the nozzle, but cant make that gap any smaller without it being obvious the nozzle is touching the bed firmly).
I suspect that the slight amount of compliance that the silicone layer gives is allowing my nozzle height to be a little more forgiving. Possibly my 'by eye' gap estimation has also improved .
Added photos of 0.05m initial layers... on a bed I didn't even clean properly. It seems I am being intentionally lazy about a number of things just to see if they still work because of the silicone.
2018-02-11https://www.aliexpress.com/item/220-220-0-8mm-White-PEI-Sheet-Polyetherimide-Sheets-for-3D-Printer-with-468MP-Adhesive-Tape/32838696009.html
It's crap. Heat warps it unpredictably, it seems to like being convex. I'm not even going to try to constrain this by sticking it down.
However this combo:https://www.aliexpress.com/item/SWMAKER-10pcs-Wanhao-3D-Printing-Build-Surface-220-220-mm-Square-Polyimide-Tape-sticker-build-tape/32808421081.html
andhttps://www.aliexpress.com/item/Non-Stick-Silicone-Baking-Mat-Kneading-Dough-Mat-Baking-Rolling-pastry-Mat-Bakeware-Liners-Pads-Cooking/32799677298.html
Works pretty well.
PLA is actually really difficult to keep stuck on this. I have 600 grit sanded it, and it still barely holds small prints. It's tenous if the nozzle bumps over anyhting, but it does usually hold.
The surface doesnt stick to the silicone as well as the red stuff sticks, but it does stick. Bubbles are evident, and less easy to squeeze out becasue the thin surface is easy to distort, but none of this is too difficult ot deal with, and what bubbles and distortion from the markings on the mat I do have seem to be irrelevant by the time the nozzle hits the surface.
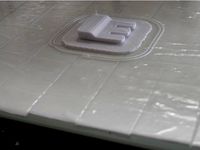
I'm printing 0.04mm layers in the image I just added (2018-02-11--11-22-02.png), and i'm pretty sure the first two layers were effectively not above the surface, rather; pressed into it. Yet it's working perfectly anyway.
2018-02-17
The yellow Polyimide-Tape-sticker lifts far too easily on anyhting except tiny prints, and even then it's very difficult to stick PLA to. Pretty sure it will be well suited to PET-G though. I'll probably try using a sheed of adhesive to bind the yellow sheet to a layer of 1mm silicone I just got. Like the red stuff, but seems different somehow, tinner maybe. Will need to measure it when I start slicing and dicing.
I have gone back to the red silicone sheet with black buildtak clone. It still lifts at the edges on larger prints, but for small quick prints it is a no-brainer to toss on the red&black sheet. Considering how relatively easy it is to print 0.04mm thick layers after leveling my bed by eye only I assume that the silicone offers some degree of latitude by squashing away from the nozzle, and presumably it's thickness/density are perfectly suited to the viscosity of PLA and feed rate.... or something thats not just pure luck that I can print 0.04 layers almost without trying. For small thin-layered prints this is now my goto surface combination.
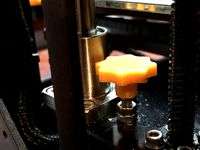
The much LESS interesting use:
The pyramidal surface mat - thermal insulation between silicone heater pad/aluminium hotbed and the Y axis chassis.https://www.aliexpress.com/item/Creative-Pyramid-Silicone-Baking-Mat-Nonstick-Pan-Pad-Cooking-Mat-Oven-Baking-Tray-Mat-Kitchen-Tools/32807788480.html
I have been using the pyramid mat for a few months. Compared to proper stuck-on insulation this is probably quite insubstantial, but as a simple, removable method to retain and constrain heat under the bed, this works better than nothing.
The much MORE interesting use:
The flat mat - sticky interface between polymer 'buildtak' style bed surface and aluminium hotbed.https://www.aliexpress.com/item/Red-Silicone-Pastry-Bread-Bakeware-Tray-Oven-Rolling-Kitchen-Baking-Mat-Sheet-PML/32693285580.html
Lay the silicone mat out matte side up, without stretching or deforming it, and check that it is flat with no ripples or deformation, and lift the corners and allow the mat to 'roll' back onto the surface to eliminate bubbles. Not all mats arrive perfectly flat, so it's possible some will not be completely appropriate to use, however heating them to 60 or 80C has been known the help them 'relax' a little into their as-produced form. So just getting it flat enough to stick a build surface to without significant tension or distortions will usually be good enough.
A polymer build surface with adhesive on one side is stuck to the matte - NOT the shiny side - of the mat, and cut to size.
Silicone cuts like butter, just use a sharp knife and cut slowly or it will ripple and mess up your edge.
Note that almost nothing "sticks" to silicone in the intended sense, so in this scenario it is removable, but will not come off unless you want it to.
The silicone mat's shiny side is applied to the clean aluminium build plate, where it will stick, and yet be easily removeable.
Yes, I clean all of the surfaces with isopropyl alcohol. The matte side before sticking the build surface to it. The shiny side of the silicone and the aluminium build plate, before installing the silicone/surface onto the bed. Silicone likes to attract particles, so clean it and avoid putting it down anywhere until it's stuck to the relevant surface.
This combination at first seemed a little unreliable in terms of flatness and having the required hardness to allow the nozzle to 'press' the filament into it to get intended toolpath widths, but after heating it to 60C a few times these issues seem to be gone. I'm not sure If heat rectified it or if I'm just now 'doing it right", because now I find it very easy to use, right down to 0.1mm initial layers.
Print removal is trivial, especially when you allow it to cool completely first. Simply remove the entire surface/mat/print from the bed in a peeling motion (at which time the print usually just alls off) and carefully peel the mat/surface away from the print, IF it is still stuck.
Realign one edge of the mat/surface with the hotbed, and roll it back into the bed. I usually swipe the flat of my NTcutter bladed scraper across the surcae to encourage any bubbled to migrate to the edges, I suspect this is useless, but it does ensure that the mat is stuck down.
I always orient the mat/surface the same way on the bed. This may not be relevant, but consistency is important when you are testing things like this.
Heating the silicone/buildsurface imparts a static charge that makes it cling to the aluminium. You will notice this if removing it hot. In some localities/humidities this may cause static discharge, so be careful of your electronics when peeling it off.
The red mat is really soft. Cutting it with a blade is only difficult becasue it's so easy that the mat moves around, even when i'm holding it down with a steel ruler. You could probably cut it by pinching hard with your fingernails.
Also useful in the kitchen, and I use an offcut to solder on, or to herd bolts/nuts.
.
I intend to also test the silicone mat/build surface method with the following:
Mats:https://www.aliexpress.com/item/WALFOS-3pc-teflon-Extra-thick-heat-resistant-teflon-BBQ-Grill-Mat-Reusable-non-stick-barbecue-grilling/32741735053.html
.https://www.aliexpress.com/item/Bakeware-Mat-Oil-Paper-Non-Stick-Baking-Sheet-For-Pastry-Kitchen-Tool-30X40cm/32840502560.html
.
NOTE: The previous two items are teflon, not silicone, so obviously there may or may not be issues with prints sticking.
They are like stiff paper...not sure if i'll bother trying to stick a square of 3m adhesive to them and try then as surfaces.. im pretty sure prints would stick to them, but they are fabric textured, and kind of crumpled from shipping.
.https://www.aliexpress.com/item/Non-Stick-Silicone-Baking-Mat-Kneading-Dough-Mat-Baking-Rolling-pastry-Mat-Bakeware-Liners-Pads-Cooking/32799677298.html
.
Is like fine fibreglass fabric wrapped in a thin layer of something vaguely gummy. You can crease it, probably permanently, but if it's clean and dry it will stick to aluminium plates...not half as well as the red one, but thats almost an adhesive type of sticking... but neither will slide off a hotplate, and both can be adhered to with buildtak clone and regualr 3m sheet adhesives....and then easily removed with no damage to any component.
.
and surfaces:https://www.aliexpress.com/item/SWMAKER-10pcs-Wanhao-3D-Printing-Build-Surface-220-220-mm-Square-Polyimide-Tape-sticker-build-tape/32808421081.html
.
This will not be stiff enough, but I may find something to mount it on.https://www.aliexpress.com/item/SWMAKER-10pcs-Wanhao-3D-Printing-Build-Surface-220-220-mm-Square-Polyimide-Tape-sticker-build-tape/32808421081.html
This will also not be stiff enough, but I may find something to mount it on.
.https://www.aliexpress.com/item/220-220-0-8mm-White-PEI-Sheet-Polyetherimide-Sheets-for-3D-Printer-with-468MP-Adhesive-Tape/32838696009.html
This has a lot of potential, I will probably be sticking a mat to this next. The qualities of the surface material will determine how it compares; I'm sure the flexibility and removeability part will be almost identical to chinesium buildtak.
2018-01-28--13-46-15minor update
red silicone mat - black polymer 'buildtak' clone
Printing 0.05mm thick first layers seems to be a lot easier than before I started using the silicone layer. I still level my bed by eye, and I have not at all been dilligent about doing it accurately for the last few weeks. Essentially just doing each corner once (frontL frontR, backR backL) and adjusting bed the usual amount ( so i can see there is a gap under the nozzle, but cant make that gap any smaller without it being obvious the nozzle is touching the bed firmly).
I suspect that the slight amount of compliance that the silicone layer gives is allowing my nozzle height to be a little more forgiving. Possibly my 'by eye' gap estimation has also improved .
Added photos of 0.05m initial layers... on a bed I didn't even clean properly. It seems I am being intentionally lazy about a number of things just to see if they still work because of the silicone.
2018-02-11https://www.aliexpress.com/item/220-220-0-8mm-White-PEI-Sheet-Polyetherimide-Sheets-for-3D-Printer-with-468MP-Adhesive-Tape/32838696009.html
It's crap. Heat warps it unpredictably, it seems to like being convex. I'm not even going to try to constrain this by sticking it down.
However this combo:https://www.aliexpress.com/item/SWMAKER-10pcs-Wanhao-3D-Printing-Build-Surface-220-220-mm-Square-Polyimide-Tape-sticker-build-tape/32808421081.html
andhttps://www.aliexpress.com/item/Non-Stick-Silicone-Baking-Mat-Kneading-Dough-Mat-Baking-Rolling-pastry-Mat-Bakeware-Liners-Pads-Cooking/32799677298.html
Works pretty well.
PLA is actually really difficult to keep stuck on this. I have 600 grit sanded it, and it still barely holds small prints. It's tenous if the nozzle bumps over anyhting, but it does usually hold.
The surface doesnt stick to the silicone as well as the red stuff sticks, but it does stick. Bubbles are evident, and less easy to squeeze out becasue the thin surface is easy to distort, but none of this is too difficult ot deal with, and what bubbles and distortion from the markings on the mat I do have seem to be irrelevant by the time the nozzle hits the surface.
I'm printing 0.04mm layers in the image I just added (2018-02-11--11-22-02.png), and i'm pretty sure the first two layers were effectively not above the surface, rather; pressed into it. Yet it's working perfectly anyway.
2018-02-17
The yellow Polyimide-Tape-sticker lifts far too easily on anyhting except tiny prints, and even then it's very difficult to stick PLA to. Pretty sure it will be well suited to PET-G though. I'll probably try using a sheed of adhesive to bind the yellow sheet to a layer of 1mm silicone I just got. Like the red stuff, but seems different somehow, tinner maybe. Will need to measure it when I start slicing and dicing.
I have gone back to the red silicone sheet with black buildtak clone. It still lifts at the edges on larger prints, but for small quick prints it is a no-brainer to toss on the red&black sheet. Considering how relatively easy it is to print 0.04mm thick layers after leveling my bed by eye only I assume that the silicone offers some degree of latitude by squashing away from the nozzle, and presumably it's thickness/density are perfectly suited to the viscosity of PLA and feed rate.... or something thats not just pure luck that I can print 0.04 layers almost without trying. For small thin-layered prints this is now my goto surface combination.
Similar models
thingiverse
free
Clip to hold buildtak to daVinci mini build plate by ShinyBlueThing
...lear both the enclosure and the machinery.
also a plain shorter clip in case you don't like the length of the back edge clip.
thingiverse
free
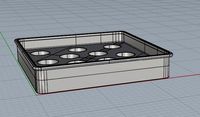
Desktop Nozzle Tray by greensladenz
...nozzles i buy: https://www.aliexpress.com/item/4000414939069.html
nozzle tool: https://www.aliexpress.com/item/4001121556653.html
thingiverse
free
Dried PVAc Bed for PLA Printing by mrm64
...proof sandpaper to increase heat resistance, but even with this version you can increase heat resistance by stacking pvac layers.
thingiverse
free
Prusa Enclosure Door Stop by LubomiTomandl
...sa enclosure or other modification. i recommend sticking self-adhesive felt as https://www.aliexpress.com/item/4000619346973.html
thingiverse
free
Rigidbot heated bed cable holder by guysoft
...ctor.
the clip is ~5.2mm wide, so if your cable is thicker you might need to resize it, but not to large so it grips the cable.
thingiverse
free

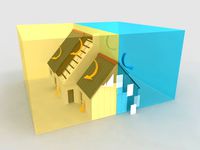
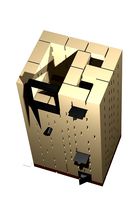
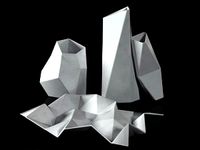
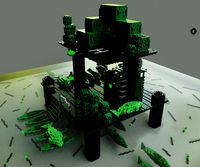
Pavilion by TanyaAkinora
...pavilion by tanyaakinora
thingiverse
the pavilion wall print top bottom = 0
all items sticking silicone adhesive.
thingiverse
free
Dried PVAc Bed V2 for PLA Printing by mrm64
...en peeling off between the waterproof sandpaper and pvac layer, cut off the peeled pvac layer and apply new pvac glue and dry it.
thingiverse
free
Ender-3 print bed insulation holder (revision 2) by magnurz
...e-i3-ultimaker-2-um2/32819038515.html?spm=a2g0s.9042311.0.0.3da24c4dsnlfh3
revision 2 : added a loop outside the bolt holes too.
thingiverse
free
Z-Stop for Makergear M2 by Neo_Usagi
...them. . if you are using buildtak or a similar surface, i think its really important to be able...
thingiverse
free
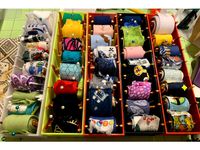
Bias tape(or ribbon) holder and tray by NoNoCovid
...with pla unless you have great bed adhesion. what helped a lot on a glass bed is using a glue stick just on the two short edges.
Betlog
thingiverse
free
dummy - barrel connector 5.5mm female by BETLOG
...- barrel connector 5.5mm female by betlog
thingiverse
a reference object i needed to make for "does it fit?" purposes.
thingiverse
free
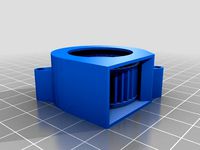
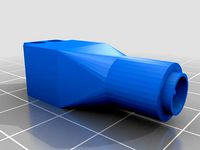
DUMMY DC12V 40mm 4500RPM Brushless Fan Blower by BETLOG
...an blower by betlog
thingiverse
dummy/mockup/reference model of a
dc12v 40mm 4500rpm brushless fan blower
like the images shown.
thingiverse
free
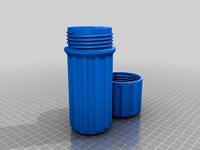
Drill_bits_cylindrical_case-BETLOG-002 by BETLOG
...precise than needing to add 0.45 to 0.48...divided by two (0.225 to 0.24) to everything....0.4 divided by 2 is 0.2... and easier.
thingiverse
free

Z Leadscrew Rod Stabilizer - Flyingbear P902 by BETLOG
...e loud squeaking it makes when moving the z axis large distances.
connects to the 2020 frame by the usual m4 bolts and hammernuts
thingiverse
free
dummy - regulator 9-35V to 5v 5A by BETLOG
...e for "does it fit?" purposes.
2017-07-28 - replaced. previous version holes and width were incorrect enough to matter.
thingiverse
free
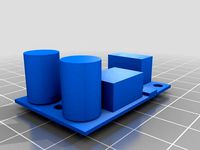
tool-capsuleFiller by BETLOG
...is to work reliably.
designed for size #00 caps.
requires 4x 0.8x10x15mm springs https://www.aliexpress.com/item/32963259463.html
thingiverse
free
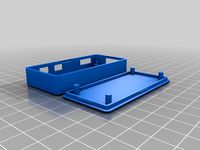
Raspberry Pi Zero Case - BETLOG version by BETLOG
...precise than needing to add 0.45 to 0.48...divided by two (0.225 to 0.24) to everything....0.4 divided by 2 is 0.2... and easier.
thingiverse
free

calibration - quick - support angle by BETLOG
...el is small to print fast, and simulate almost worst case scenario where heater is always in fairly close proximity to the print.
thingiverse
free
fan guard - 60mm by BETLOG
...lades will almost always be the last time.
as always; assumes a 0.4mm nozzle. layer height is fairly irrelevant, but i used 0.3mm
thingiverse
free
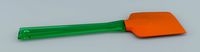
BladeScraper by BETLOG
...t;hold" the blade so once you get it under the print yo can remove the block and just move the blade around under the print.
Insulation
3d_ocean
$2
Insulated Block Element
...insulated block element 3docean block construction element insulation wall insulated block element for wall...
3d_export
$5

bedroom and balcony insulated
...bedroom and balcony insulated
3dexport
bedroom and balcony insulated
turbosquid
$9
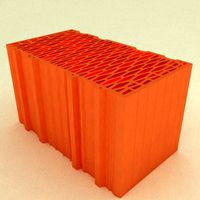
insulating brick
... available on turbo squid, the world's leading provider of digital 3d models for visualization, films, television, and games.
turbosquid
free
Insulator substation
... available on turbo squid, the world's leading provider of digital 3d models for visualization, films, television, and games.
turbosquid
$59
old insulated shoes
... available on turbo squid, the world's leading provider of digital 3d models for visualization, films, television, and games.
3d_export
$10
Insulation Tape 01 3D Model
...odel
3dexport
tape insulation-tape electricity wire fittings tool household
insulation tape 01 3d model vijaysaini 92886 3dexport
turbosquid
$17
Insulator 123kv
...tage transformer 123kv for download as max, obj, fbx, and dwg on turbosquid: 3d models for games, architecture, videos. (1391725)
turbosquid
$65

Insulated Multi Core Cable
... available on turbo squid, the world's leading provider of digital 3d models for visualization, films, television, and games.
turbosquid
$20

Insulated sewage pipe crosscut
... available on turbo squid, the world's leading provider of digital 3d models for visualization, films, television, and games.
turbosquid
$10
modern insulation house project
... available on turbo squid, the world's leading provider of digital 3d models for visualization, films, television, and games.
Silicone
3d_export
$5
cake molds silicone
...cake molds silicone
3dexport
silicone cake molds
turbosquid
$19

Bunny Silicone
...ree 3d model bunny silicone for download as max, fbx, and obj on turbosquid: 3d models for games, architecture, videos. (1672014)
turbosquid
free
silicone spatula
... available on turbo squid, the world's leading provider of digital 3d models for visualization, films, television, and games.
turbosquid
$5
Container Silicon
...for download as ma, max, obj, fbx, prj, unitypackage, and upk on turbosquid: 3d models for games, architecture, videos. (1415212)
turbosquid
$1
Silicone Oil Brush
...
royalty free 3d model silicone oil brush for download as max on turbosquid: 3d models for games, architecture, videos. (1700355)
cg_studio
$35
silicon gun3d model
...cgstudio
industrial slicon gun tool
.lwo - silicon gun 3d model, royalty free license available, instant download after purchase.
turbosquid
free
Acetic Silicon Sealant
... available on turbo squid, the world's leading provider of digital 3d models for visualization, films, television, and games.
turbosquid
$19
Silicone Cute Modern Lamp
...l silicone cute modern lamp for download as max, obj, and fbx on turbosquid: 3d models for games, architecture, videos. (1161149)
3ddd
$1
Silicon Power Ultima II I-Series
... usb , флешка
флеш накопитель silicon power ultima ii i-series.
turbosquid
$12
Pendant lamp shade silicone mold
...nt lamp shade silicone mold for download as max, max, and obj on turbosquid: 3d models for games, architecture, videos. (1610347)
Method
turbosquid
$29

Grams Method
... available on turbo squid, the world's leading provider of digital 3d models for visualization, films, television, and games.
turbosquid
$30
Kitchen Ikea Method Dalarna
... available on turbo squid, the world's leading provider of digital 3d models for visualization, films, television, and games.
turbosquid
$60
Kitchen Ikea Method Ekestad brown.
...itchen ikea method ekestad brown. for download as max and fbx on turbosquid: 3d models for games, architecture, videos. (1260046)
3d_export
$5
method lounge chair
...t for a smooth, natural look. dimensions: 31 "(w) x 33" (l) x 28 "(h); seat height 20 inches. designed in the usa.
3d_export
$15

Helicopter Pack EC130-H130 Air Methods Livery
...ck asset produced, created and rendered by cgamp - it is prohibited to resell or to modify and resell this stock asset in any way
3d_export
$10

neo classic kitchen 13
...neo classic kitchen 13 3dexport used new method in...
3d_export
$5
modern light table
...3dexport a modern light table with a simple manufacturing method ...
3d_export
free
sword
...sword 3dexport sword i made to test a method is a little crooked, but i hope it will...
3ddd
$1

meteorite
...3ds max 2011,2014 vray material, have also vraydisplacement map method decoration...
3d_export
$10

3D printer Oasis
...to create a stand for the egyptian eye, a method was used to reduce the number of viewport levels...
Adhesion
turbosquid
$1
Adhesive tape
...quid
royalty free 3d model adhesive tape for download as obj on turbosquid: 3d models for games, architecture, videos. (1352737)
3d_export
$5
adhesive tape carrier
...adhesive tape carrier
3dexport
adhesive tape carrier
turbosquid
$18
adhesive tape
... available on turbo squid, the world's leading provider of digital 3d models for visualization, films, television, and games.
turbosquid
$20
NORDSK STYLISH ADHESIVE TAPE DISPENSER IGES
... available on turbo squid, the world's leading provider of digital 3d models for visualization, films, television, and games.
3d_export
$20
power cord adhesive tape machine
...anipulator: 0.005 mm, repeated positioning accuracy of manipulator: ≤ ± 0.01 mm, and material change mode: manual material change
3d_export
$1000
bead triangle adhesive laminating machine
...m onto the steel ring (3) the outlet of the rubber conveying device is connected with the inlet of the winding laminating device.
3d_export
$16

Two White Round Stickers - smooth and bended adhesive labels
...rt editable mesh object to editable poly and load *stickers_uvw.uvw* in unwrap uvw modifier; -studio environment is not included;
3d_export
$20
Black Stickers set - 8 adhesive sticky labels
...bject to editable poly and load<br>*stickers_uvw.uvw* in unwrap uvw modifier;<br>-studio environment is not included;
3d_export
$20
White Stickers set - 8 adhesive sticky labels
...bject to editable poly and load<br>*stickers_uvw.uvw* in unwrap uvw modifier;<br>-studio environment is not included;
3d_export
$20
8 Stickers set - silver adhesive sticky labels
...bject to editable poly and load<br>*stickers_uvw.uvw* in unwrap uvw modifier;<br>-studio environment is not included;
Baking
turbosquid
$5
Bake
...squid
royalty free 3d model bake for download as 3ds and fbx on turbosquid: 3d models for games, architecture, videos. (1247617)
turbosquid
free
Kitchen Baked 2020 Max Scene Baked
...0 max scene baked for download as max, blend, gltf, and fbx on turbosquid: 3d models for games, architecture, videos. (1611240)
turbosquid
$4
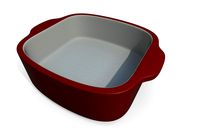
Baking Dish
...
royalty free 3d model baking dish for download as ma and obj on turbosquid: 3d models for games, architecture, videos. (1471648)
turbosquid
$39
baked duck
...ty free 3d model baked duck for download as max, obj, and fbx on turbosquid: 3d models for games, architecture, videos. (1365302)
turbosquid
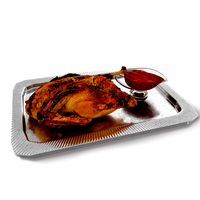
$19
Baking Tray
...y free 3d model baking tray for download as max, 3ds, and obj on turbosquid: 3d models for games, architecture, videos. (1547522)
turbosquid
$39

Baking Collection
...odel baking collection for download as max, obj, fbx, and dae on turbosquid: 3d models for games, architecture, videos. (1408847)
turbosquid
$2
Baking Station
... available on turbo squid, the world's leading provider of digital 3d models for visualization, films, television, and games.
3d_export
$13
Baking Dishes 3D Model
...rome cook cooker cooking hot meat room interior home house 3ds max cinema c4d mental
baking dishes 3d model cgaxis 52493 3dexport
3d_export
$10

Baking Plates 3D Model
...ite ceramic round set room interior home house 3ds max cinema c4d mental ray fbx obj
baking plates 3d model cgaxis 52398 3dexport
3d_export
$10
Baking Pans 3D Model
...el
3dexport
cookware kitchenware baking pans kitchen muffin tray cookie sheet pie pan
baking pans 3d model 3dsiver 79078 3dexport
Mat
archibase_planet
free

Mat
...mat
archibase planet
mat rug mate
mat - 3d model (*.gsm+*.3ds) for interior 3d visualization.
turbosquid
$5
Mats
... available on turbo squid, the world's leading provider of digital 3d models for visualization, films, television, and games.
turbosquid
$19
Mat
...del mat for download as ma, max, 3ds, fbx, gltf, obj, and stl on turbosquid: 3d models for games, architecture, videos. (1658503)
3d_export
$20
mat keeper
...e use mat but cant keep that mat properly . we cant stand that roll of mat easily. this stand is very use ful in it. have a look.
3ddd
free
mat 3
... нож , ложка
this is kitchen mat - "cuadro"
3ddd
free
mat 1
... нож , ложка
this is a kitchen mat- "cuadro"
3d_ocean
$2

Door Mat
...fiber welcome door mat, file includes textures and displacement maps. 3d files in the following formats: dwg, dxf, skp , 3ds, obj
turbosquid
$15
Door Mat
...urbosquid
royalty free 3d model door mat for download as max on turbosquid: 3d models for games, architecture, videos. (1203408)
archive3d
free
Mat 3D Model
...mat 3d model
archive3d
mat rug mate
mat - 3d model (*.gsm+*.3ds) for interior 3d visualization.
turbosquid
$13

Bamboo Mat
...
royalty free 3d model bamboo mat for download as max and obj on turbosquid: 3d models for games, architecture, videos. (1266236)
Surface
design_connected
$9
Surface
...surface
designconnected
rosenthal surface computer generated 3d model.
3d_export
$18

surface-cracked surface 27
...surface 27
3dexport
surface-cracked surface 27<br>max 2015 v-ray 3 max 2015<br>textures<br>all files in zip...
3d_export
$18
surface-cracked surface 27
...surface 27
3dexport
surface-cracked surface 27<br>max 2015 v-ray 3 max 2015<br>textures<br>all files in zip...
3d_export
$5
surface base
...surface base
3dexport
surface base
3ddd
$1
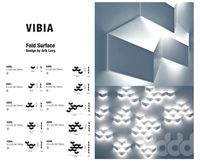
vibia fold surface
...vibia fold surface
3ddd
vibia fold surface , vibia
vibia fold surface
3d_export
$18
surface-yellow river dam-horizontal surface 03
...surface-yellow river dam-horizontal surface 03
3dexport
surface-yellow river dam-horizontal surface 03<br>3ds max 2015
3d_export
$18
surface-yellow river dam-horizontal surface 01
...surface-yellow river dam-horizontal surface 01
3dexport
surface-yellow river dam-horizontal surface 01<br>3ds max 2015
3d_export
$10

surface book 2
...surface book 2
3dexport
surface book 2 laptop
3ddd
$1
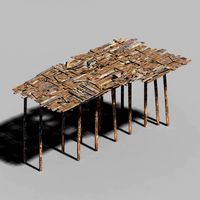
Modular Kurk Surface
...modular kurk surface
3ddd
modular
modular kurk surface
turbosquid
$38
Barrier Surface
...ree 3d model barrier surface for download as ma, obj, and fbx on turbosquid: 3d models for games, architecture, videos. (1233275)
Bed
3ddd
$1

bed
...bed
3ddd
bed , постельное белье
bed
3ddd
$1

bed
...bed
3ddd
bed , постельное белье
bed
3ddd
$1

bed
...bed
3ddd
bed , постельное белье
bed
3ddd
$1

bed
...bed
3ddd
bed , постельное белье
bed
3ddd
$1

bed
...bed
3ddd
bed , постельное белье
bed
3ddd
$1

bed
...bed
3ddd
bed , постельное белье
bed
3ddd
free

bed
...bed
3ddd
bed , постельное белье
bed
3ddd
free

bed
...bed
3ddd
bed , постельное белье
bed
3ddd
$1

Bed
...bed
3ddd
bed , постельное белье , постель
bed
3d_export
$7

bed adairs bed
...rs bed
3dexport
bed adairs bed in modern style. if you want a smoother surface, please turn on turbosmooth in the modifier list.