Thingiverse
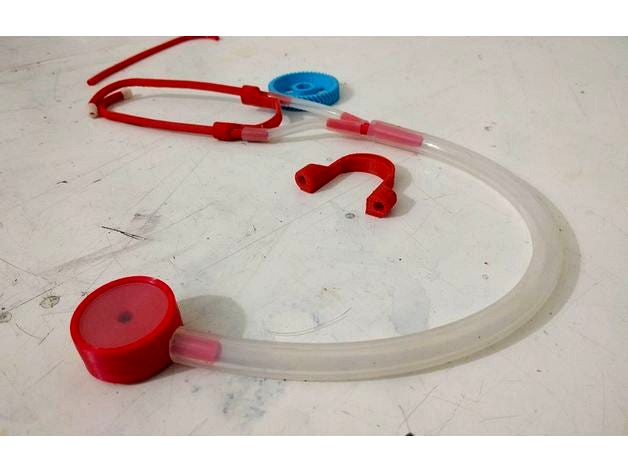
Medical-grade stethoscope v2.0 by Tareko
by Thingiverse
Last crawled date: 3 years ago
This project is the work of a large team, including Alex Pavlosky, Jennifer Glauche, Spencer Chambers, Mahmoud Al-Alawi, Kliment Yanev, Carrie Wakem, Shaker Shaheen, Mohammed Khdair, Mohammed Abu Matar and Tarek Loubani.
This project aims to create a research-validated stethoscope whose plans are
available freely and openly. The goal is for the bell to cost ~USD$1-2 to produce,
and the rest of the stethoscope to cost approximately the same. You can see the peer-reviewed publication relating to this stethoscope's validation here:
http://journals.plos.org/plosone/article?id=10.1371/journal.pone.0193087
Currently, the stethoscope resulting from this project functions as well as the
market gold standard, the Littmann Cardiology III.
Bill of Materials
Printed parts:
1 stethoscope head (head.stl)
2 ear tubes (eartube.stl)
1 Y-piece (y_piece.stl)
1 Spring (spring.stl)
Other hardware:
Some vendors are suggested.
40cm - 50cm Silicone 13mm (preferred) or 12mm OD, 8mm ID, 50 durometer
8MM I.D X 13MM O.D NGP60 Clear Translucent Silicone Hose Pipe Tubing (USD$7.34/meter)
20cm Silicone 8mm (preferred) or 6mm OD, 4mm ID (cut into 10cm pieces), 60 durometer
4mm ID x 8mm OD
Diaphragm: 40mm diameter cut from a report cover with approx 0.35mm plastic sheet
Staples 21639 report cover (UPC 718103160223) (USD$8.84)
You can cut the diaphragm by hand or with a stamp like this one
Earbuds / Eartips: Any large-sized standard earbuds will do.
Silicone Earbuds 7 Pairs - Large size
Optional hardware:
Metal spring for holding ear tubes together
Print Instructions
INFILL MUST BE 100% INFILL MUST BE 100% INFILL MUST BE 100% INFILL MUST BE 100%
Use PETG or ABS
Layer height: 0.2mm
Use PrusaSlicer 2.0 or above to import 3MF file
Modify filament and printer settings as needed.
DO NOT MODIFY PRINT SETTINGS
Export and print
Troubleshooting
If the spring and eartubes do not fit well, go ahead and scale the spring as needed
If the head and ring do not fit well, use caution as you may be modifying the acoustics. You can scale the head a little.
Notes
We do not use PLA due to deformation in heat and poor plastic quality in the spring causing early failure. PLA may be used, but the lifetime of the stethoscope will decrease significantly.
We do not use brims, but you may print the eartubes and Y-pieces with a brim of 2mm to ensure that none of the parts lift off.
INFILL MUST BE 100% INFILL MUST BE 100% INFILL MUST BE 100%. Otherwise, the stethoscope will not produce a correct sound.
Assembly Instructions
See this instructional video for assembly instructions.
Attach the diaphragm (40mm) to the stethoscope head.
Attach the stethoscope head to the silicone tube.
Attach the silicone tube to the Y-Piece.
Attach spring to ear tubes.
Attach the Y-piece to the ear tubes.
Attach the ear tubes to the eartips / earbuds.
Test the stethoscope as per the validation instructions.
Printing the inserts
The inserts are included in the manual directory. Using 8.5 x 11 (Legal) paper,
they can be printed at 8.25" page width with 95% scale for the top print and
90% scale for the bottom print using GIMP.
The top insert is cut at 14.5cm and again at 1cm creating two labels of 13.5cm height.
These inserts are printed on adhesive material.
The bottom insert is cut at a width of 20cm with a height cuts at 25cm, 15cm,
13.5cm and 3.5cm creating 10cm x 20cm inserts.
Changing and creating SCAD files
CrystalSCAD and OpenSCAD
were used to create all STL files. To recreate the stethoscope head, simply do:
gem install crystalscad
ruby source_files/stethoscope_head/stethoscope_head.rb
The SCAD files output from CrystalSCAD are found in source_files/stethoscope_head/output and are named as follows:
PrintableStethoscopeHead1Assembly_output.scad - The head
Mass Manufacturing
We generally print 4 stethoscopes per plate to ensure that each stethoscope is created out of the same material.
Our serial numbering system consists of two parts. The last number part is the total number of unique stethoscopes created since day 1. All numbers before that dash are spool identifiers involved in that stethoscope. For example:
001-010 would be the tenth stethoscope made with the first spool in our inventory. If the first spool makes a total of 15 stethoscopes, then the first stethoscope of the second spool would be 002-016. If the twentieth stethoscope uses plastic from spool 002 and spool 003, it would be 002-003-020.
Other stethoscopes
Others have made 3D printed stethoscopes too. See:
https://www.youmagine.com/designs/stethoscope-chestpiece
Licensing notes
As per our understanding, hardware is not covered by copyright. However, we present
our work under the TAPR OHL license insofar as it applies.
Similar models
cg_trader
$29

Stethoscope Parts
...cope parts
cg trader
1.collada (.dae). ( eartip with binaural - right, eartip with binaural - left, biaural tube, chest pieces)
thingiverse
free

Quality Low Cost Stethoscope by mistertech
...00?ie=utf8&psc=1
tubing size should be close to 3/8in (9-10mm) od, 1/4in (6-7mm) id.
see sections below for important notes.
thingiverse
free

Stethoscope (with diaphram) by TheLOLNinja
...the capability to attach a membrane (in this case a stretched balloon) to increase the capability of the device to pick up noise.
thingiverse
free

Earbud Tip / Cushion
...er, but these printed with flexible filament seal pretty good. may require sanding, otherwise it'll be rough against the ear.
thingiverse
free

Silicone Tube Cutter by Dexerit
... was a problem for straight cutting.
just press the tube to fit the ovale hole and put in.
just cut in the slot with scalpel ;)
grabcad
free

Inflatable Eartips
...lated manually ( with a tool ) to fit any ear-canal sizes. the design allowed the eartips to fit onto any in-ear earphone nozzle.
thingiverse
free

Silicone Diaphragm Adapter - Top by ColdFusion
...medela would need at least two of these.
if you are interested in designing a dual-diaphragm version - please do so, and share.
thingiverse
free

Silicone Diaphragm Adapter - Body by ColdFusion
...medela would need at least two of these.
if you are interested in designing a dual-diaphragm version - please do so, and share.
thingiverse
free

Filament spool holder for 8mm rod by nickpgre
... 54mm
the white pieces printed while the spool was without the attachments, the black pieces after i installed the spool holders.
thingiverse
free

Ar15 Buffer tube picatinny adapter by chubbyzook
...ded piece into the rifle, then attache the picatinny with a 1/4-20 socket head screw to lock it in
100% solid printing is a must
Tareko
thingiverse
free

3DR quad legs by Tareko
...nt legs for a 3dr quad. 6mm width, so they are substantially thicker than the stock legs, but they are strong in both pla and abs
thingiverse
free

Gimbal optimized for 3DR Quad by Tareko
...r 3dr quad by tareko
thingiverse
gimbal optimized for 3dr quad. uses mini servos on both axes instead of regular / micro servos.
thingiverse
free

Spool hanger by Tareko
...d enough for my purposes. it is indeed overkill in terms of thickness. total print time for two hangers is 6 hours on my printer.
thingiverse
free

The ultimate PEG board accessory creator v1.3 by Tareko
...verse
this is a derivative of the 1.1 version (nod to pxt). it was designed to allow for the bottom bracket to be dropped lower.
thingiverse
free

Prusa i3 MK2 Sport Camera holder (corrected STLs) by Tareko
... the stls are all positioned correctly and scaled properly for slic3r. not tested on other slicers, but should resolve the issue.
thingiverse
free

IGUS version of X-Carriage for Prusa i3 MK2S by Tareko
...roved by the use of igus bearings. either of the 8mm id bearings work : rjzm-01-08 (aka rjum-01-08) or rj4jp-01-08 (all plastic).
thingiverse
free

Prusa i3 MK2 induction probe converter by Tareko
...e work, it should be easy to convert it to also use 18mm probes.
simply use a piece of 8mm threaded rod or such to keep in place.
thingiverse
free

Prusa i3 MK2S extruder body with 12mm induction probe holder by Tareko
...oes require a bit of play to make it fit properly with the extruder-cover, since it rises higher than the 8mm (original) version.
Stethoscope
3d_ocean
$8

stethoscope
...lated listening medical equipment medical exam medical instrument single object stethoscope work tool
3d stethoscope and material
turbosquid
$19

Stethoscope
...ty free 3d model stethoscope for download as ma, fbx, and obj on turbosquid: 3d models for games, architecture, videos. (1588312)
turbosquid
$39

Stethoscope
... available on turbo squid, the world's leading provider of digital 3d models for visualization, films, television, and games.
turbosquid
$35

Stethoscope
... available on turbo squid, the world's leading provider of digital 3d models for visualization, films, television, and games.
turbosquid
$20

stethoscope
... available on turbo squid, the world's leading provider of digital 3d models for visualization, films, television, and games.
turbosquid
$19

Stethoscope
... available on turbo squid, the world's leading provider of digital 3d models for visualization, films, television, and games.
turbosquid
$19

Stethoscope
... available on turbo squid, the world's leading provider of digital 3d models for visualization, films, television, and games.
turbosquid
$15

stethoscope
...model stethoscope for download as c4d, max, max, obj, and fbx on turbosquid: 3d models for games, architecture, videos. (1671976)
turbosquid
$15

Stethoscope
... available on turbo squid, the world's leading provider of digital 3d models for visualization, films, television, and games.
turbosquid
$15

Stethoscope
...model stethoscope for download as 3ds, max, obj, fbx, and prj on turbosquid: 3d models for games, architecture, videos. (1400542)
Grade
3ddd
$1
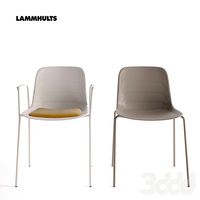
Lammhults Grade
...mhults , grade
размеры:http://www.lammhults.se/products/chairs-armchairs/grade
turbosquid
$1

grade obj
... available on turbo squid, the world's leading provider of digital 3d models for visualization, films, television, and games.
turbosquid
$19

Cartoony Grade School
...model cartoony grade school for download as max, obj, and fbx on turbosquid: 3d models for games, architecture, videos. (1240182)
3d_export
$9

Food Grading Machine
...food grading machine
3dexport
this 3d model is make in solidworks, render in keyshot.
3ddd
free
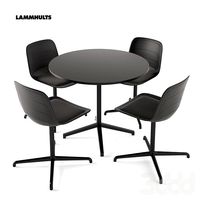
Lammhults Grade Chair+Archal table X
...www.lammhults.se/products/chairs-armchairs/grade
стол:http://www.lammhults.se/products/tables-trolleys/archal
3d_export
$39

Military Grade Acid Rifle 3D Model
...
3dexport
fantasy gun acid weapon rifle military goo alien scifi
military grade acid rifle 3d model progamemodeler 82946 3dexport
turbosquid
$19
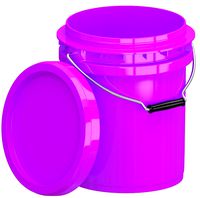
Food Grade 5l Plastic Bucket Purple
... as max, c4d, lxo, 3dm, obj, 3ds, dae, dwg, dxf, fbx, and wrl on turbosquid: 3d models for games, architecture, videos. (1640611)
turbosquid
$19

Food Grade 5l Plastic Bucket Turquoise
..., 3dm, blend, c4d, lwo, lxo, 3ds, dae, dwg, dxf, fbx, and wrl on turbosquid: 3d models for games, architecture, videos. (1642245)
turbosquid
$88

Food Grade 5l Plastic Bucket All Colors(1)
... as max, 3dm, c4d, lxo, 3ds, dae, dwg, dxf, fbx, obj, and wrl on turbosquid: 3d models for games, architecture, videos. (1643097)
3d_export
$10
Winix official certification store 1st grade dehumidifier
...painter available for all software<br>ue4. ue5. blender. maya. 3d max. unity. c4d.<br>formats: .obj .gltf .fbx .blend
Medical
3d_ocean
$4
Medical Front
...medical front
3docean
horror low medical
medical front
turbosquid
$100

MEDICAL EQUIPMENT, Equipement Medical
... available on turbo squid, the world's leading provider of digital 3d models for visualization, films, television, and games.
turbosquid
$30

Medical Pallet , Paillasse Medical
... available on turbo squid, the world's leading provider of digital 3d models for visualization, films, television, and games.
3d_export
$18

medical mask
...medical mask
3dexport
medical mask
3d_export
$5

Medical
...medical
3dexport
3d_ocean
$12
Medical Scissors
...medical scissors
3docean
cut cutter scissors tool. metal medical
realistic high poly model of medical scissors.
3d_export
$6

medics chest
...medics chest
3dexport
medic's chest
turbosquid
$30
Medic
... available on turbo squid, the world's leading provider of digital 3d models for visualization, films, television, and games.
turbosquid
$15
Medic
... available on turbo squid, the world's leading provider of digital 3d models for visualization, films, television, and games.
3d_export
$7

medical mask
...medical mask
3dexport
medical mask against corona virus
V2
3d_export
free

Lamp v2
...lamp v2
3dexport
lamp v2 with solar panel
3d_export
$5

hammerhead v2
...hammerhead v2
3dexport
razer hammerhead v2 headphones, modeled in cinema 4d, render in corona
3d_export
$5

manometer v2
...manometer v2
3dexport
3d_export
$5

potato v2
...potato v2
3dexport
turbosquid
$52

Lifebuoys v2
...squid
royalty free 3d model lifebuoys v2 for download as fbx on turbosquid: 3d models for games, architecture, videos. (1560870)
turbosquid
$2

Mask v2
...turbosquid
royalty free 3d model mask v2 for download as stl on turbosquid: 3d models for games, architecture, videos. (1527741)
turbosquid
free

Flashlight V2
...d
free 3d model flashlight v2 for download as , obj, and fbx on turbosquid: 3d models for games, architecture, videos. (1663559)
turbosquid
$29

Thanos v2
...
royalty free 3d model thanos v2 for download as ztl and obj on turbosquid: 3d models for games, architecture, videos. (1651077)
turbosquid
$29

Titan v2
...d
royalty free 3d model titan v2 for download as ztl and obj on turbosquid: 3d models for games, architecture, videos. (1540228)
turbosquid
$29

Frieza v2
...
royalty free 3d model frieza v2 for download as ztl and obj on turbosquid: 3d models for games, architecture, videos. (1701238)
0
turbosquid
$12

Calligraphic Digit 0 Number 0
...hic digit 0 number 0 for download as max, obj, fbx, and blend on turbosquid: 3d models for games, architecture, videos. (1389318)
3d_export
$6

set-0
...set-0
3dexport
turbosquid
$6

hedge 0
...yalty free 3d model hedge 0 for download as max, obj, and fbx on turbosquid: 3d models for games, architecture, videos. (1450353)
turbosquid
$5

Nuber 0
...oyalty free 3d model nuber 0 for download as ma, obj, and fbx on turbosquid: 3d models for games, architecture, videos. (1564674)
turbosquid
$22

0.jpg
... available on turbo squid, the world's leading provider of digital 3d models for visualization, films, television, and games.
turbosquid
free

Steam Locomotive Fowler 4F 0-6-0
... available on turbo squid, the world's leading provider of digital 3d models for visualization, films, television, and games.
turbosquid
$10

Liquid Number 0
... model liquid number 0 for download as c4d, 3ds, fbx, and obj on turbosquid: 3d models for games, architecture, videos. (1689919)
turbosquid
$45

Dragon360_perspShape_tmp.0.jpg
... available on turbo squid, the world's leading provider of digital 3d models for visualization, films, television, and games.
turbosquid
$8

Rocks Debris 0
... available on turbo squid, the world's leading provider of digital 3d models for visualization, films, television, and games.
3d_export
$18

wood-guardrail-fence 0
...wood-guardrail-fence 0
3dexport
wood-guardrail-fence 0<br>3ds max 2015