Thingiverse
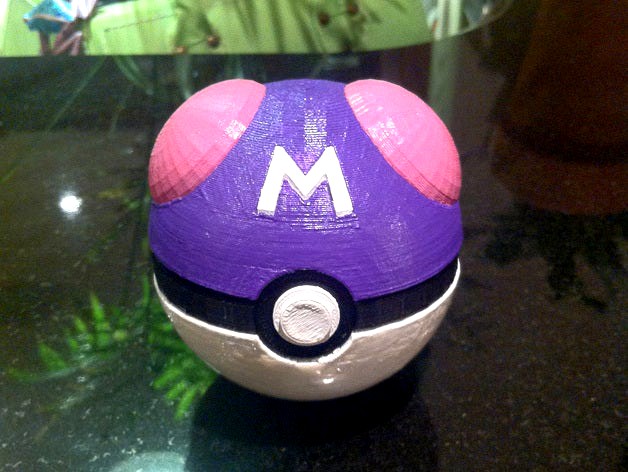
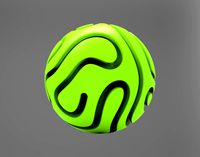
Master Ball, with magnetic clasp (Fixed Lid) by random11
by Thingiverse
Last crawled date: 3 years ago
Update: I have now got around to printing this and the M was way too small and also didn't even fit. No one told me, but now I fixed it.
The only thing I changed from the original "Pokeball, with magnetic clasp" was the lid.
Print the Lid, M, BumpTopLeft and BumpTopRigh (right/left with button facing towards you). The two Bump files in theory should be the same but just in case I provided both.
After printing the parts you should be able to easily assemble the lid. From there glue the button into the button holder. Then glue the button assembly and the ring to the bottom with the hinge in place as you glue the ring down. Then snap the hinge into the lid.
You will need 2 magnets (1/4" X 1/16") and just glue them in place too.
Tip: Print your bottom piece at a higher in fill percentage, around 40-50% and then all the other parts at 5-10%. That way it will be bottom heavy and not roll around as much.
Similar models
thingiverse
free

Ultra Ball, with magnetic clasp by random11
...ll percentage, around 40-50% and then all the other parts at 5-10%. that way it will be bottom heavy and not roll around as much.
thingiverse
free

Love Ball, with magnetic clasp by random11
...ll percentage, around 40-50% and then all the other parts at 5-10%. that way it will be bottom heavy and not roll around as much.
thingiverse
free

Great Ball, with magnetic clasp by random11
...ll percentage, around 40-50% and then all the other parts at 5-10%. that way it will be bottom heavy and not roll around as much.
thingiverse
free

Dusk Ball, with magnetic clasp (6th Gen) by random11
...ll percentage, around 40-50% and then all the other parts at 5-10%. that way it will be bottom heavy and not roll around as much.
thingiverse
free

Dusk Ball, with magnetic clasp (5th Gen) by random11
...ll percentage, around 40-50% and then all the other parts at 5-10%. that way it will be bottom heavy and not roll around as much.
thingiverse
free

Luxury Ball, with magnetic clasp by random11
...ll percentage, around 40-50% and then all the other parts at 5-10%. that way it will be bottom heavy and not roll around as much.
thingiverse
free

Dive Ball, with magnetic clasp by random11
...ll percentage, around 40-50% and then all the other parts at 5-10%. that way it will be bottom heavy and not roll around as much.
thingiverse
free

Luxury Ball, with magnetic clasp (In Parts) by random11
...ll percentage, around 40-50% and then all the other parts at 5-10%. that way it will be bottom heavy and not roll around as much.
thingiverse
free

Quick Ball, with magnetic clasp by random11
...ll percentage, around 40-50% and then all the other parts at 5-10%. that way it will be bottom heavy and not roll around as much.
thingiverse
free

Fast Ball, with magnetic clasp by random11
...ll percentage, around 40-50% and then all the other parts at 5-10%. that way it will be bottom heavy and not roll around as much.
Random11
thingiverse
free

Lan Cover for Mini Nes by random11
...an cover for mini nes by random11
thingiverse
haven't tested it. but it should work
http://www.thingiverse.com/thing:1727668
thingiverse
free

Easy-Print Master Ball by random11
... inner ring. otherwise you can use all original parts form the easy print pokeball which have been mirrored here for convenience.
thingiverse
free

Karambit (CS:GO Kinfe) Stand by random11
...ne at 200mm it seams more right but still smaller than in-game scale so i do suggest you upscale the knife and the stand in turn.
thingiverse
free

Bulbasaur Planter With Bulb by random11
... and they had a fake plant section so i bought some and cut them up to make a fake plant that you can also store inside the bulb.
thingiverse
free

Karambit (CS:GO Kinfe) Wall Mount by random11
...nd the stand in turn.
this wall mount is a work in progress. depending on the screw you use it may not sit on the wall correctly.
thingiverse
free
Ultra Ball, with magnetic clasp by random11
...ll percentage, around 40-50% and then all the other parts at 5-10%. that way it will be bottom heavy and not roll around as much.
thingiverse
free
Great Ball, with magnetic clasp by random11
...ll percentage, around 40-50% and then all the other parts at 5-10%. that way it will be bottom heavy and not roll around as much.
thingiverse
free
Love Ball, with magnetic clasp by random11
...ll percentage, around 40-50% and then all the other parts at 5-10%. that way it will be bottom heavy and not roll around as much.
thingiverse
free
Dive Ball, with magnetic clasp by random11
...ll percentage, around 40-50% and then all the other parts at 5-10%. that way it will be bottom heavy and not roll around as much.
thingiverse
free
Quick Ball, with magnetic clasp by random11
...ll percentage, around 40-50% and then all the other parts at 5-10%. that way it will be bottom heavy and not roll around as much.
Clasp
3d_ocean
$7

Clasp-Knife
...clasp-knife
3docean
clasp-knife knife melee weapon
3ds max 2011 mental ray render
turbosquid
$10

Clasp Knife
...quid
royalty free 3d model clasp knife for download as blend on turbosquid: 3d models for games, architecture, videos. (1315583)
3d_export
$15

Clasp knife 3D Model
...clasp knife 3d model
3dexport
clasp-knife knife weapon blade wenge cold steel folding
clasp knife 3d model beardmax 9393 3dexport
3d_export
$9

Clasp Knife A 3D Model
...dexport
cutter blade knife weapon tool arm folding clasp design military sword war
clasp knife a 3d model julius_k 18791 3dexport
turbosquid
$19

Iron Hand Clasp
... available on turbo squid, the world's leading provider of digital 3d models for visualization, films, television, and games.
turbosquid
$12

Clasp knives vol pack
...yalty free 3d model clasp knives vol pack for download as fbx on turbosquid: 3d models for games, architecture, videos. (1640307)
turbosquid
$6

Clasp knife vol 3
...
royalty free 3d model clasp knife vol 3 for download as fbx on turbosquid: 3d models for games, architecture, videos. (1640291)
turbosquid
$6

Clasp knife vol 2
...
royalty free 3d model clasp knife vol 2 for download as fbx on turbosquid: 3d models for games, architecture, videos. (1640288)
turbosquid
$6

Clasp knife vol 1
...
royalty free 3d model clasp knife vol 1 for download as fbx on turbosquid: 3d models for games, architecture, videos. (1640283)
turbosquid
$12

Clasp knives vulcan vol pack
...ree 3d model clasp knives vulcan vol pack for download as fbx on turbosquid: 3d models for games, architecture, videos. (1655161)
Master
3ddd
$1
Master
...master
3ddd
besana , master
фабрика: besana
master
размер: 80х60х80
design_connected
$20

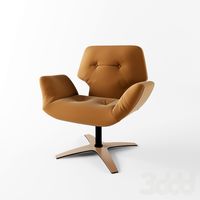
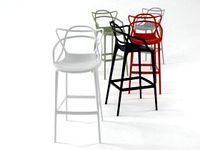
Masters
...photo-realistic 3d models of the kartell masters chair by philippe starck for 3d architectural and interior design presentations.
3ddd
$1
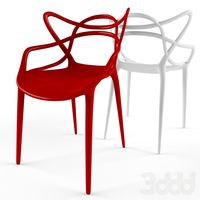
Masters
...ка на производительяhttp://www.designboom.com/design/philippe-starck-masters-chair-for-kartell-at-milan-design-week-09/
3d_export
$5
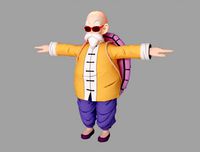
master roshi
...master roshi
3dexport
master roshi 3d model good quality for animation
design_connected
$18
Masters Stool
...masters stool
designconnected
kartell masters stool computer generated 3d model. designed by starck, philippe.
3ddd
free
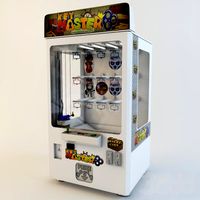
Key Master
...key master
3ddd
игровой автомат , key master
д 950 / ш 950 / в 1850
3ddd
$1
Стул: Masters Chair
... kartell
стул: masters chair
коллекция: masters
бренд: kartell
страна: италия
размеры, см: 83x54x54; высота сиденья – 47.
3d_export
$5

master bedroom
...master bedroom
3dexport
zhu design<br>a modern tropical inspired master bedroom for your model
3ddd
$1
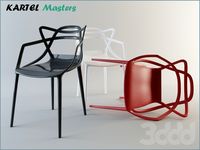
kartel masters
...el masters
3ddd
kartel , masters
в архиве присутствует fbx и модель в 2011 версии макса.
turbosquid
$150

Master Bedroom
...osquid
royalty free 3d model master bedroom for download as on turbosquid: 3d models for games, architecture, videos. (1329485)
Lid
3d_export
$5
plastic lid
...plastic lid
3dexport
plastic lid
turbosquid
$4

Sewer lid
...osquid
royalty free 3d model sewer lid for download as blend on turbosquid: 3d models for games, architecture, videos. (1460159)
turbosquid
$15

Lid planter
...y free 3d model lid planter for download as max, obj, and fbx on turbosquid: 3d models for games, architecture, videos. (1462865)
turbosquid
$1

Bootle (with Lid)
...e 3d model bootle (with lid) for download as ma, obj, and fbx on turbosquid: 3d models for games, architecture, videos. (1362012)
turbosquid
$7

Box Lid
... free 3d model box lid for download as fbx, stl, dae, and obj on turbosquid: 3d models for games, architecture, videos. (1694087)
turbosquid
$30

Sewer Lid
... available on turbo squid, the world's leading provider of digital 3d models for visualization, films, television, and games.
turbosquid
$29

SportsBottle4Latches-Lid
... available on turbo squid, the world's leading provider of digital 3d models for visualization, films, television, and games.
turbosquid
$20

lid dispenser.max
... available on turbo squid, the world's leading provider of digital 3d models for visualization, films, television, and games.
turbosquid
$12

Bucket with lid
... available on turbo squid, the world's leading provider of digital 3d models for visualization, films, television, and games.
turbosquid
$10

sewer lid
... available on turbo squid, the world's leading provider of digital 3d models for visualization, films, television, and games.
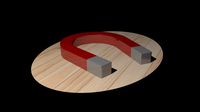
Magnetic
3d_ocean
$2

Magnet
...magnet 3docean 3d 3ds max electric magnet magnetic magnetism max model polygon realistic tesla magnet created in...
turbosquid
$6
Magnet
...
turbosquid
royalty free 3d model magnet for download as obj on turbosquid: 3d models for games, architecture, videos. (1548733)
turbosquid
$6

magnet
...uid
royalty free 3d model magnet for download as 3dm and max on turbosquid: 3d models for games, architecture, videos. (1670606)
turbosquid
$1

Magnet
...y free 3d model magnet for download as 3ds, max, obj, and fbx on turbosquid: 3d models for games, architecture, videos. (1215037)
turbosquid
$7

Magnet
...agnet for download as blend, unitypackage, fbx, gltf, and obj on turbosquid: 3d models for games, architecture, videos. (1576588)
3d_export
$5

magnetic knife holder
...magnetic knife holder
3dexport
ordinary magnetic knife holder
archive3d
free

Fridge magnet 3D Model
...3d model archive3d refrigerator magnet fridge magnet magnet toy magnetic s n280712 - 3d model (*.3ds) for interior 3d...
turbosquid
$35

Magnetic butterflies
...alty free 3d model magnetic butterflies for download as blend on turbosquid: 3d models for games, architecture, videos. (1315792)
turbosquid
$2
Magnetic Board
...quid
royalty free 3d model magnetic board for download as ma on turbosquid: 3d models for games, architecture, videos. (1264141)
turbosquid
$977
Magnetic Lego
...oyalty free 3d model magnetic lego for download as ma and obj on turbosquid: 3d models for games, architecture, videos. (1142761)
Ball
turbosquid
$5
Ball on a Ball
...uid
royalty free 3d model ball on a ball for download as obj on turbosquid: 3d models for games, architecture, videos. (1484719)
archibase_planet
free
Ball
...ball
archibase planet
ball golf ball
ball - 3d model (*.gsm+*.3ds) for 3d visualization.
3d_export
$5
ball
...ball
3dexport
ball
archibase_planet
free

Ball
...ball
archibase planet
ball football soccer ball
ball n100714 - 3d model (*.gsm+*.3ds+*.max) for exterior 3d visualization.
3d_export
$5
ball
...ball
3dexport
soccer ball
archibase_planet
free

Ball
...ball
archibase planet
ball football
ball n100914 - 3d model (*.gsm+*.3ds+*.max) for 3d visualization.
3d_ocean
$5
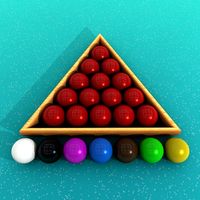
Snooker Balls
... set balls snooker snooker balls white ball yellow ball
set snooker balls format include : .c4d .3ds .obj build in cinema 4d r13
3d_export
free

ball
...ball
3dexport
this is 3d model ball's
3d_ocean
$2
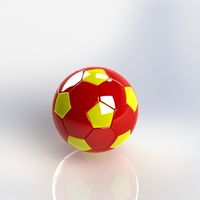
Soccer Ball
...soccer ball
3docean
ball red and yellow ball red ball soccer ball
a gorgeous red and yellow seamless soccer ball
3d_ocean
$5

Billard Balls
...low poly billiard balls. numbering from 1 to 15 plus the cue ball. each of the balls excluding the cue ball has a 4k texture map.
Fixed
3ddd
$1
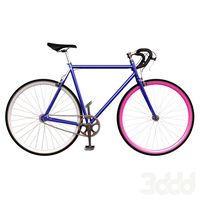
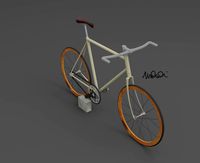
Fixed Gear Велосипед
... fixed , bicycle
классический шоссейный велосипед, переделанный под fixed gear.
design_connected
$16
Idée fixe
...idée fixe
designconnected
jacco maris idée fixe computer generated 3d model. designed by maris , jacco.
3d_export
$5
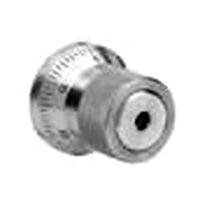
fixing scale knob
...fixing scale knob
3dexport
fixing scale knob
turbosquid
$10

Mini Fix
...bosquid
royalty free 3d model mini fix for download as sldas on turbosquid: 3d models for games, architecture, videos. (1581558)
turbosquid
$49
fixed bike
... available on turbo squid, the world's leading provider of digital 3d models for visualization, films, television, and games.
turbosquid
$39

Fixed Bicycle
... available on turbo squid, the world's leading provider of digital 3d models for visualization, films, television, and games.
3ddd
$1
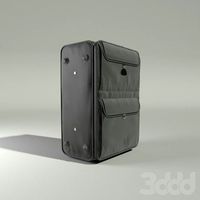
Bag Fixed
...bag fixed
3ddd
чемодан
a bag model by me
3ddd
$1
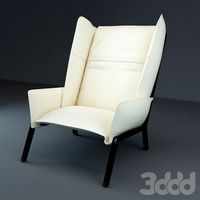
Кресло BEAU FIXE
...fixe
3ddd
beau fixe , ligne roset
кресло beau fixe:
w 80 cm d 106 cm h 97 cm sh 43,5 cm
turbosquid
free

Crowbar "Fixed"
... available on turbo squid, the world's leading provider of digital 3d models for visualization, films, television, and games.
3ddd
$1
Fixed gear
...fixed gear
3ddd
велосипед
шоссейный велосипед с фиксированной передачей