Thingiverse
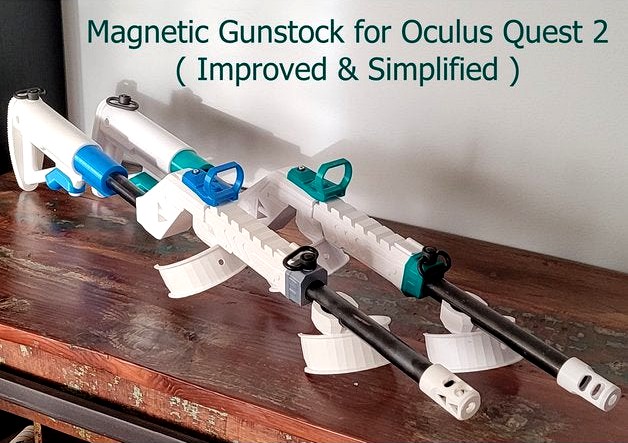
Magnetic Gunstock for Oculus Quest 2 (Improved & Simplified) by Teque5
by Thingiverse
Last crawled date: 3 years ago
Neat gunstock for FPS games on the Oculus 2.
After printing three of these for friends I decided to improve a few issues I found and greatly simplify the process for others. Most of the source models have disparate and confusing instructions, so I tried to put everything here in once place. The addition of the adjustable buttstock makes this feel really high quality. Generally I tried to make this a cleaner build.
Required Materials
Normal stuff
(2) M3x5mm caphead for cushion
(1) M3x8mm caphead for sight
(1) M3x40mm caphead for adjustable stock
(2) M3 nuts
(1) 0.5x6x20mm spring for adjustable stock
(2) #6x(5/8)" or #6x0.5" countersunk woodscrews for controllers
Loctite / Superglue
Amazzon stuff
(3) 0.5x8" Lightweight Steel Pipes (nothing at Home Depot will work)
(1) 32x8mm 90lb magnet for Right Hand
(1) 32x6mm 65lb magnet for Left Hand
(2) optional sling mount (these look & work great even if you don't get the sling)
(1) optional sling
(1) optional double sided removable stickers
If you buy everything you will have enough materials to make three of these gunstocks. The parts you need end up being about 80 USD.
Printing
In the 3mf I grouped all the files into “A”, “B”, etc so you can print each group overnight instead of one big mega print. None of the files require any supports.
Groups A, B, and C should be printed in your primary color - in the photos I chose white.
Group C should be printed with a big brim since there is a large overhang to support.
Group D should be printed in your accent color.
Group E is just the buttstock cushion and ideally should be TPU but it probably doesn't matter. For this I did Archimedean Chords at low infill, with 1 perimeter, and 2 top & bottom layers. If you don't print this with air it will be rock hard.
Since PLA is garbage I did everything out of PETG / HTPLA+ / ASA since you get a bit of flex and higher strength overall. You should use 3+ perimeters and 15%+ gyroid infill. For rectilinear go much higher infill.
I printed some parts w/0.6mm nozzle but I think it's worth using the 0.4mm for better resolution. Variable layer height for all parts.
Assembly
Adjustable Buttstock
See image
Hold “B_Lock-Pin” with pliers and screw in the long M3 screw all the way down. This can't be easily done by hand - drill recommended.
Insert this part with the spring into “A_buttstock-body” and hold the screw tight w/pliers.
Place “D_FGC9-PART” on and thread on “A_Washer”. Leave just enough thread for both nuts.
Loctite and screw on both nuts. Don't touch plastic parts w/glue.
For the cushion use the two short M3 screws to attach.
Main Parts
start with this video by sunlaki
Screw in the M3 screw into the sight to lock in place.
Place a double-sided removable sticker on each controller to solidly attach controllers.
Remix Info
For “C_Body” part I eliminated branding allowing high quality-supportless printing.
For “C_Front” part I eliminated branding to smooth out handle.
For “D_Sight” part I added a M3 screw hole to fix loose sight in position.
For adjustable gunstock, increased M3 hole dimensions so no drilling is required.
The “D_Coupler” height impacts overall assembly heavily and since it's the weakest part you don't want to overtighten. I included two alternative parts that are +0.5mm or +1.0mm height. Depending on the pipe threading you may need a taller part.
For “E_Cushion” I aligned the part with the build plate correctly.
Grouping parts & removing legacy components.
Source Models
The main source is thing:4538594 by sanlaki and he seems to keep links updated. My version is from 2021-03.
The adjustable buttstock is thing:4565145 by slykittycat, which is actually a remix of thing:4412938 by Untangle.
Notes
The original on thingiverse contains various videos & a jillion extra notes. If you want left-hand controllers or parts for Oculus 1 go there.
The meshes for some of these parts are A+ and really clean, but the controllers and front coupler meshes look terrible so feel free to post a clean remix.
Similar models
cg_trader
$10

Gunstock for oculus quest 2 and rift s controllers | 3D
... need to use magnets 20mm x 5mm for optimal experience.
you can use default pipes from nearest store (example is on screenshots).
thingiverse
free

Oculus Touch Adjustable Gunstock by TAspect
...ly modeled right-handed versions.
only downside after months of use is, that you will have to throw grenades with your left hand.
thingiverse
free

Oculus Quest 2 magnetic gunstock by Gulliver501
...mp; nuts,
buy 8x2 mm round magnetic from harbor freight.
buy 1/2 inches pvc tube from home depot.
***this project is in progress
thingiverse
free

2020 V-slot VR Gunstock by Rumpsvett
...ole gunrig). here's a link to printable t-nuts if you have a hard time finding them https://www.thingiverse.com/thing:3050607
thingiverse
free

Baikal MP61 dioptric rear and flip-down front sights by ToughAce
...0mm m3 cylinder head screw for flip-down front sight
2x 10mm m3 socket head screw to lock windage and elevation sliders
3x m3 nut
thingiverse
free

Knuckle Quest (for Oculus Quest 2) by aaaahron
...urse!
please use at your own risk, i will not be held liable for any damaged controllers or people/possessions due to this print.
thingiverse
free

Oculus Rift Wall Mount by javierruve
... mount isn't carrying that much weight. i don't have abs but maybe with that even less than 50% infill would be required.
thingiverse
free

Airsoft KWA 1911 Mk I adjustable sight by peroulas
... sight. unscrewing the screw will cause the top portion of the sight to flex and move upwards also making the pellets arc higher.
thingiverse
free

Simple Oculus controller marker clip by trickyRic
...clips. designed for oculus quest 2, maybe they also fit on the older ones. a left handed "l" version is also available.
thingiverse
free

crosman 1377 1322 rear sight by mdunay
...al models.
adjust, enjoy and practice.
i recomend print my front sight design too.
note: you need 1/8 bolt to joint parts 1 and 2
Teque5
thingiverse
free

Dishwasher Wheel (Samsung DD68) by Teque5
...r wheel diameter is 38mm.
inner wheel diameter is just under 28mm.
dishwasher axle (metal rack) that this slides onto is 6.57 mm.
thingiverse
free

1U Rack Mount Bracket (Cage Nut Remix) by Teque5
...age nuts. this remix allows you to use the cage nuts with the original design.
it's also an excuse to flex my blender skills.
thingiverse
free

Filament Swatch (more types) by Teque5
... the original design with a slight modification:
metal (28mm)
wood(26mm)
pla+ (24mm)
asa(22mm)
fpe (20mm)
glow-in-the-dark (18mm)
thingiverse
free

Jetson Nano Case (Vented) by Teque5
...ation.
removed author's signature in corner so i could print hostname.
based on thing:3603594 v11 from april 2021 by ecoiras.
thingiverse
free

Modular Controller Stand (Top Mount Under Desk) by Teque5
... similar to original top cap.
ceiling mount w/screw holes remixed from stand.
materials
(4) #6 or 3.5mm wood screws for mounting.
thingiverse
free

Battery Wall-Tray (AA and AAA) w/Labels by Teque5
...d 2 mm of yellow top & bottom for kicks.
charger mounts
to hold my bc900 & bc1000 lacrosse chargers i used thing:2071664.
thingiverse
free

Counter-Strike "Mirage" Planter Turntable by Teque5
...yer height no problem.
to ensure water-tightness i'd advise at least 3 perimeters & 10% fill. i think i did 5 perimeters.
Gunstock
3d_export
$19

Animated Pistol 3D 3D Model
...weapons trigger cylinder war cowboy far west gunbarrel bullett gunstock revolver gun hammer animated pistol 3d 3d model codethislab...
thingiverse
free

Gunstock handle bottom by XVavron
...ottom piece (shoe) for gunstock handle for my cz858 rifle. propably it won´t work for your rifles, but take it as an inspiration.
thingiverse
free

Wall Mount for Magnetic Gunstock by crackadev
...he upper support and the steel pipe resting on top of the lower support with any soft padding (foam tape , bike handle tape, etc)
thingiverse
free

Magnetic Gunstock for Quest/Rift S
...s. see image for magnet orientation.#4 1/2 in flathead philip screw
you can also get a diy kit on etsy here:magnetic gunstock kit
thingiverse
free

Valve Index Radical Gunstock by Kerag
...ht become a bit too tight. in order to fix this, do a little bit of sandpaper work in the slot... till controller fits perfectly.
thingiverse
free

Addition to the design "Magnetic Gunstock for Quest/Rift S"
...et support.stl - is to be placed between magnets and pipe using through and through bolts to prevent sideways movement of magnet.
thingiverse
free

Rift S Gunstock mounts with 8mm Magnets mount by Soul6in6Gun
...om controller while using it. probably i'll create some sort of solid hooks to help magnets.
printed in petg with 20% infill.
thingiverse
free

VR Gunstock Components 1/2" PVC by wildBill83
...it well.
fit's 1/2" pvc pipe cut to a comfortable length.
not 100% complete yet! still working on controller attachment.
thingiverse
free

Valve Index Radical Gunstock LONG by IronChumbo
...f https://www.thingiverse.com/thing:4815675
small cutout for magnetic type chargers and a long version. mirror for left hand use.
thingiverse
free

Oculus Quest 2 Gunstock, redesign for less material waste etc. by RealFloki
...ere are no supporters needed at all.
also changed the size of the holes etc. so you can use pipes from your local hardware store.
Oculus
3ddd
free

CH468 Oculus
...ch468 oculus
3ddd
oculus
кресло ch468 oculus.
3ddd
$1

Кресло Oculus
...//www.coalesse.com/products/ch468-oculus-chair/
41 h | 37 d | 37 w
в файле находятся модели кресла в 4-х цветах + obj
turbosquid
$10

Oculus Touch
...squid
royalty free 3d model oculus touch for download as skp on turbosquid: 3d models for games, architecture, videos. (1462433)
3ddd
$1

CH468 Oculus Chair
...ch468 oculus chair
3ddd
oculus
http://www.aram.co.uk/ch468-chair.html
3ddd
free

Oculus Chair Hans J. Wegner
...oculus chair hans j. wegner
3ddd
oculus , hans wegner
стильное кресло из 60-х
3d_export
$39

Oculus Rift S
...21000 triangles. pbr texture pack for vray, redshift, unity standart specular, unreal included textures 8192x8192 fully unwrapped
turbosquid
$15

Oculus chair by Hans J. Wegner
... available on turbo squid, the world's leading provider of digital 3d models for visualization, films, television, and games.
turbosquid
$799

World Trade Center Transportation Hub Oculus
...ld trade center transportation hub oculus for download as skp on turbosquid: 3d models for games, architecture, videos. (1304140)
evermotion
$120

Archinteriors for UE vol. 2
...kitchen home interior engine unreal ue now compatible with oculus rift! evermotion collections for unreal engine gives another dimension...
evermotion
$75

Scene 04 Archinteriors for UE vol. 2
...engine 4.9.0. scene is not optimized or tested for oculus rift. evermotion 3d models...
Quest
3d_export
$5

malroth dragon quest ii
...malroth dragon quest ii
3dexport
malroth dragon quest ii sprite voxel
3d_ocean
$89

Nissan Quest 2011
...y, in real units of measurement, qualitatively and maximally close to the original. model formats: - *.max (3ds max 2008 scanl...
3d_export
$99

Nissan Quest 2011 3D Model
...n quest minivan van bus 2011 2012 2013 2014 family city 4-door japan japanese
nissan quest 2011 3d model humster3d 52172 3dexport
3d_export
$20

2008 Nissan Quest 3D Model
...2009 low poly lowpoly truck car vehicle van vagon large vario minivan bus famely
2008 nissan quest 3d model be_fast 8181 3dexport
cg_studio
$99

Nissan Quest 20113d model
...
.3ds .c4d .fbx .lwo .max .mb .obj - nissan quest 2011 3d model, royalty free license available, instant download after purchase.
turbosquid
$18

Office chair Orion quest
... available on turbo squid, the world's leading provider of digital 3d models for visualization, films, television, and games.
turbosquid
$15

Office chair Samba quest
... available on turbo squid, the world's leading provider of digital 3d models for visualization, films, television, and games.
humster3d
$75

3D model of Nissan Quest 2011
...a detailed 3d model of nissan quest 2011 in various file formats. all our 3d models were created maximally close to the original.
humster3d
$75

3D model of Nissan Quest 2006
...a detailed 3d model of nissan quest 2006 in various file formats. all our 3d models were created maximally close to the original.
turbosquid
$49

ISS Module - Quest Joint Airlock
... available on turbo squid, the world's leading provider of digital 3d models for visualization, films, television, and games.
Simplified
turbosquid
$5

Simplified Trumpet
... available on turbo squid, the world's leading provider of digital 3d models for visualization, films, television, and games.
turbosquid
free

Simplified Bike
... available on turbo squid, the world's leading provider of digital 3d models for visualization, films, television, and games.
3d_export
$5

simplified model of a bundle of dollars
...simplified model of a bundle of dollars
3dexport
a simplified model of a bundle of dollars. models for subdiv
turbosquid
$19

The Simplified model of a telescope
... available on turbo squid, the world's leading provider of digital 3d models for visualization, films, television, and games.
turbosquid
$1

Simplified sports car
... available on turbo squid, the world's leading provider of digital 3d models for visualization, films, television, and games.
3d_export
$5

Simplified male-female base mesh
...simplified male-female base mesh
3dexport
simplified male/female character base mesh in .ztl and .fbx
3ddd
$1

Soane - Simplified quiver klismos chair
...
3ddd
капитоне
модель кресла soane - simplified quiver klismos chair.
- лоуполи геометрия
- мультисаб материал
- fbx + obj + 3ds
turbosquid
$24

Coronavirus 2 COVID-19 simplified model
...irus 2 covid-19 simplified model. for download as c4d and obj on turbosquid: 3d models for games, architecture, videos. (1534962)
3d_export
free
g17
...g17 3dexport glock 17 simplified style,little...
3d_export
$10
biblical altar
...biblical altar 3dexport a simplified model of the altar spoken of in the bible,...
Magnetic
3d_ocean
$2

Magnet
...magnet 3docean 3d 3ds max electric magnet magnetic magnetism max model polygon realistic tesla magnet created in...
turbosquid
$6
Magnet
...
turbosquid
royalty free 3d model magnet for download as obj on turbosquid: 3d models for games, architecture, videos. (1548733)
turbosquid
$6

magnet
...uid
royalty free 3d model magnet for download as 3dm and max on turbosquid: 3d models for games, architecture, videos. (1670606)
turbosquid
$1

Magnet
...y free 3d model magnet for download as 3ds, max, obj, and fbx on turbosquid: 3d models for games, architecture, videos. (1215037)
turbosquid
$7

Magnet
...agnet for download as blend, unitypackage, fbx, gltf, and obj on turbosquid: 3d models for games, architecture, videos. (1576588)
3d_export
$5

magnetic knife holder
...magnetic knife holder
3dexport
ordinary magnetic knife holder
archive3d
free

Fridge magnet 3D Model
...3d model archive3d refrigerator magnet fridge magnet magnet toy magnetic s n280712 - 3d model (*.3ds) for interior 3d...
turbosquid
$35

Magnetic butterflies
...alty free 3d model magnetic butterflies for download as blend on turbosquid: 3d models for games, architecture, videos. (1315792)
turbosquid
$2
Magnetic Board
...quid
royalty free 3d model magnetic board for download as ma on turbosquid: 3d models for games, architecture, videos. (1264141)
turbosquid
$977
Magnetic Lego
...oyalty free 3d model magnetic lego for download as ma and obj on turbosquid: 3d models for games, architecture, videos. (1142761)
Improved
cg_studio
$49
Robot Z300 (improved version)3d model
...o
.3ds .fbx .max .obj - robot z300 (improved version) 3d model, royalty free license available, instant download after purchase.
3d_export
$39

Robot Z300 improved version 3D Model
...fantasy sci-fi robots bot humanoid droid sci fi materials character
robot z300 improved version 3d model alekrazum 55067 3dexport
3d_export
$75

CV-90 Improved
...nnon. export versions are fitted with hägglunds e-series turrets, armed with either a 30 mm mk44 or a 35 mm bushmaster autocannon
turbosquid
$55
(Important textures coming back soon after improvements)Cuboid gazebo bench area
... available on turbo squid, the world's leading provider of digital 3d models for visualization, films, television, and games.
3d_export
$15

COMPLETE AUDI 80-100 SHIFT LEVER REPAIR KIT WITH IMPROVED BUSHING
...dexport
• sleeve - 1 pc. • elastic band - 1 pc. • hinge - 1 pc. audi 100c3 audi 100 c4 audi 80 b3 (checked) audi 80 b4 (checked)
3d_export
$7

REPAIR KIT FOR GEARSHIFT LEVER AUDI 80-100 IMPROVED
...ar of the gum is excluded. - rusk - 1 pc. - elastic band - 1 pc. audi 100c3 audi 100 c4 audi 80 b3 (checked) audi 80 b4 (checked)
3d_export
$30
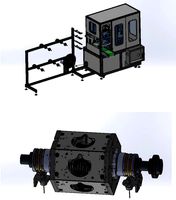
cup mask machine front section stereo mask manufacturing machine improved version
...ing rack cad outsourcing list. the drawings are mature drawings that have been produced.<br>drawing version solidworks 2018
3d_export
free
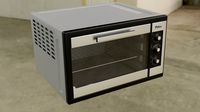
oven - forno
...oven - forno
3dexport
gradually i'm trying to improve my 3d.
3d_export
$75
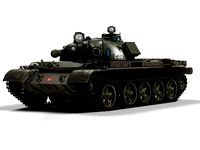
T-55
...nally, but these improvements made the tank more efficient and lethal. the t-55 was officially adopted by the soviet army in 1958
3d_export
$5

civil registration authorities
...civil registration authorities
3dexport
city wedding square. the model can be used for projects, to improve the project, etc.
2
design_connected
$11

No 2
...no 2
designconnected
sibast no 2 computer generated 3d model. designed by sibast, helge.
turbosquid
$6

Cliff Rock 2-2
...uid
royalty free 3d model cliff rock 2-2 for download as obj on turbosquid: 3d models for games, architecture, videos. (1619161)
turbosquid
$29

Book variation 2 2
...3d model book variation 2 2 for download as max, obj, and fbx on turbosquid: 3d models for games, architecture, videos. (1366868)
turbosquid
$22

Classic baluster (2) (2)
...assic baluster (2) (2) for download as max, obj, fbx, and stl on turbosquid: 3d models for games, architecture, videos. (1483789)
turbosquid
$99

Smilodon 2 Pose 2
... available on turbo squid, the world's leading provider of digital 3d models for visualization, films, television, and games.
turbosquid
$20

Barrel Barricade 2-2
... available on turbo squid, the world's leading provider of digital 3d models for visualization, films, television, and games.
turbosquid
$6

Wall Trophy (2) (2)
... available on turbo squid, the world's leading provider of digital 3d models for visualization, films, television, and games.
turbosquid
free

Tire label 2 of 2
... available on turbo squid, the world's leading provider of digital 3d models for visualization, films, television, and games.
3ddd
$1

Кровать, 2 тумбочки, 2 светильника
...кровать, 2 тумбочки, 2 светильника
3ddd
кровать, 2 тумбочки, 2 светильника
нормальное качество
формат 3ds max
без текстур
3ddd
free

Кровать, 2 тумбочки, 2 светильника
...кровать, 2 тумбочки, 2 светильника
3ddd
кровать, 2 тумбочки, 2 светильника
нормальное качество
формат 3ds max
без текстур