Thingiverse
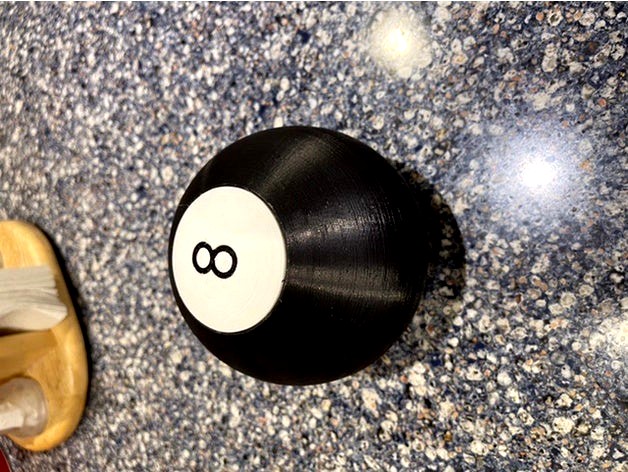
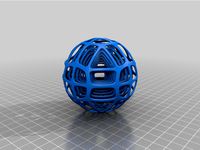
Magic 8 ball with battery by fhogphil
by Thingiverse
Last crawled date: 2 years, 10 months ago
Remake of my plug-in magic 8 ball.
You will need some basic Arduino and soldering skills for this. You can get the info you need for the Arduino skills at www.Arduino.cc
With a little bit of practice and training you can easily change all of the responses.
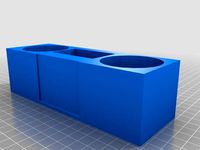
Setting up electronics on a breadboard print to printing is a good idea.
Wiring setup:
Battery holder:
Positive to B+ on Charger Board
Negative to B- on Charger Board
Charger Board:
Out+ to PIN 30 (VIN) on Nano 33
Out- to PIN 29 (GND) on Nano 33
Nano 33:
PN 4 (GND) to GND on OLED
PIN 17 (3.3v) to VCC on OLED
PIN 23 to SDA on OLED
PIN 24 to SCL on OLED
PART LIST:
Jumper wires and/or soldering setup.
Battery holderhttps://www.amazon.com/dp/B00LSG5BKO/ref=cm_sw_em_r_mt_dp_66Q4CJF6CMS4ZG26CWQS?_encoding=UTF8&psc=1
Charger boardhttps://www.amazon.com/dp/B00LTQU2RK/ref=cm_sw_em_r_mt_dp_SNPDM7BEHPXMW4NR1PA1?_encoding=UTF8&psc=1
Nanohttps://www.amazon.com/dp/B07WV59YTZ/ref=cm_sw_em_r_mt_dp_Z8989X72S619W05CXSWT?_encoding=UTF8&psc=1
Screenhttps://www.amazon.com/dp/B08LYL7QFQ/ref=cm_sw_em_r_mt_dp_CP87FPW8CZRK0F9EV4GM?_encoding=UTF8&psc=1
Magnets:https://www.amazon.com/dp/B07873ZCY4/ref=cm_sw_em_r_mt_dp_MC788KGSXTP0GN3GPN6W?_encoding=UTF8&psc=1
Any 18650 battery
You will need some basic Arduino and soldering skills for this. You can get the info you need for the Arduino skills at www.Arduino.cc
With a little bit of practice and training you can easily change all of the responses.
Setting up electronics on a breadboard print to printing is a good idea.
Wiring setup:
Battery holder:
Positive to B+ on Charger Board
Negative to B- on Charger Board
Charger Board:
Out+ to PIN 30 (VIN) on Nano 33
Out- to PIN 29 (GND) on Nano 33
Nano 33:
PN 4 (GND) to GND on OLED
PIN 17 (3.3v) to VCC on OLED
PIN 23 to SDA on OLED
PIN 24 to SCL on OLED
PART LIST:
Jumper wires and/or soldering setup.
Battery holderhttps://www.amazon.com/dp/B00LSG5BKO/ref=cm_sw_em_r_mt_dp_66Q4CJF6CMS4ZG26CWQS?_encoding=UTF8&psc=1
Charger boardhttps://www.amazon.com/dp/B00LTQU2RK/ref=cm_sw_em_r_mt_dp_SNPDM7BEHPXMW4NR1PA1?_encoding=UTF8&psc=1
Nanohttps://www.amazon.com/dp/B07WV59YTZ/ref=cm_sw_em_r_mt_dp_Z8989X72S619W05CXSWT?_encoding=UTF8&psc=1
Screenhttps://www.amazon.com/dp/B08LYL7QFQ/ref=cm_sw_em_r_mt_dp_CP87FPW8CZRK0F9EV4GM?_encoding=UTF8&psc=1
Magnets:https://www.amazon.com/dp/B07873ZCY4/ref=cm_sw_em_r_mt_dp_MC788KGSXTP0GN3GPN6W?_encoding=UTF8&psc=1
Any 18650 battery
Similar models
thingiverse
free

Curved Lithophane Holder by vbdcbrenner
..._s00?ie=utf8&psc=1
switch - https://www.amazon.com/gp/product/b07cg2vgwg/ref=ppx_yo_dt_b_asin_title_o01_s00?ie=utf8&psc=1
thingiverse
free

Electric Screwdriver Dock by stevesch
...for a common model i purchased from amazon. it's similar to some of the "wowstick" models in form factor....
thingiverse
free

Magic 8 Ball by fhogphil
...ts
by gbymiuy
learn more: https://www.amazon.com/dp/b07873zcy4/ref=cm_sw_em_r_mt_dp_am3fvmff3wc0143b1czb?_encoding=utf8&psc=1
thingiverse
free

Desk Fan by NebNorse
...lpages04?ie=utf8&psc=1
motor control: https://www.amazon.com/gp/product/b01cnl6imc/ref=od_aui_detailpages04?ie=utf8&psc=1
thingiverse
free
Speaker box by Ratakis
...-4ft/dp/b01kstsv76/ref=sr_1_1_sspa?s=electronics&ie=utf8&qid=1521518432&sr=1-1-spons&keywords=aux+cable&psc=1
thingiverse
free

Flowerpot IoT by joseantonioalvarez
...vsa?_encoding=utf8&psc=1
arduino mkr wifi 1010: https://www.amazon.es/dp/b07fyff5yz/ref=cm_sw_em_r_mt_dp_zxnrv6hkdq6sdaz19zae
thingiverse
free

Easy Pixel hilt side pcb by Peace_toker
...ightsaber blade. pins used are : https://www.amazon.com/dp/b07fpfbfv3/ref=cm_sw_em_r_mt_dp_rf2ufbv9w50s3?_encoding=utf8&psc=1
thingiverse
free

eTopxizu 12v 30a Power Supply Cover by Magikmerlin
...d_rd_i=b00e1jpha4&pd_rd_r=j7jddetyaqysnwgj4ecf&pd_rd_w=cagta&pd_rd_wg=aps8o&psc=1&refrid=j7jddetyaqysnwgj4ecf
thingiverse
free
LED Paracord Dog Collar, Rechargeable by DemonicArchr
...utf8&psc=1
18650 charger board - https://www.amazon.com/gp/product/b01lhd9d7e/ref=oh_aui_detailpage_o02_s00?ie=utf8&psc=1
thingiverse
free

KCD4 Switch Box by segchris
... the one i used with it.
https://www.amazon.com/dp/b07qkfk6m8/ref=cm_sw_em_r_mt_dp_21854qe89vesthvvet66?_encoding=utf8&psc=1
Fhogphil
thingiverse
free

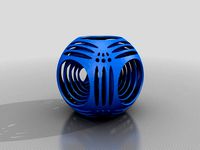
Vase Twisted 5 flute by fhogphil
...vase twisted 5 flute by fhogphil
thingiverse
five flute twisted vase
****please post your makes!
thingiverse
free

Vase with twisted semi circle flutes by fhogphil
...vase with twisted semi circle flutes by fhogphil
thingiverse
vase with semicircle twisted flutes
thingiverse
free

Vase with twisted Clover shape fillets by fhogphil
...vase with twisted clover shape fillets by fhogphil
thingiverse
a vase with clover shaped twisted flutes
thingiverse
free

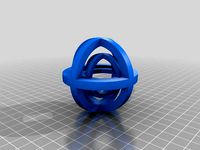
Double Mirror Spiral Vase by fhogphil
...al vase this one is double mirrored .
three sizes shown the clear one is as designed, the colored one 150% and the black is 200%
thingiverse
free

Bed Calibration level and Z-offset by fhogphil
...st for checking your bed settings. level? z-offset? first layer height?
print at 0.2 layer height as this is just a single layer.
thingiverse
free

CR10 V2 BTT Smart Sensor mount by fhogphil
...l
thingiverse
this one is pretty simple. replaces stock sensor
updated upon further prototyping.
4 m3 bolts with washers used.
thingiverse
free

BIQU H2 Fan duct by fhogphil
...designed to avoid interferences on x or z
the two pieces are friction fit. takes a tiny bit of convincing but they slid together.
thingiverse
free

Mock Camera Vase by fhogphil
...
the top was started with medium wood and paused at layer to switch to true gold pla
the view finders are carbon fiber black pla.
thingiverse
free

RPi Project Box by fhogphil
...looking at my wiring:
yellow: data from gpio10
black: ground
red: 5v
green: 3.3v
i am powered via poe and a splitter, on the lan.
thingiverse
free

Three flute large vase by fhogphil
....
if you want to make it extra stout, use vase mode model, print with zero top layer, zero infill and as many walls as you want.
Magic
thingiverse
free

magic force field or magic trap - terrain
...magic force field or magic trap - terrain
thingiverse
magic force field or magic trap - terrain
thingiverse
free

Magic Box
...magic box
thingiverse
magic box
thingiverse
free

Magical Square by Imura_Industries
...magical square by imura_industries
thingiverse
magical square
thingiverse
free

magic table by papp328
...magic table by papp328
thingiverse
magic table.
thingiverse
free

small magic box
...small magic box
thingiverse
a magic box
thingiverse
free

Magic key by gauducheau2000
...magic key by gauducheau2000
thingiverse
magic ,maybe or not !
thingiverse
free
jgmaker magic fanduct
...jgmaker magic fanduct
thingiverse
jgmaker magic fanduct
thingiverse
free

Magic Desk 256KB_BETA
...magic desk 256kb_beta
thingiverse
magic desk 256kb
thingiverse
free

Haunted magic book
...haunted magic book
thingiverse
haunted magic book
thingiverse
free

magic gear by ankasem
...magic gear by ankasem
thingiverse
magic gear castomize
Ball
thingiverse
free
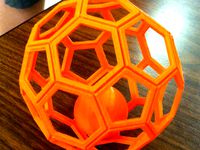
ball in ball in ball in ball by Syzguru11
...ww.thingiverse.com/syzguru11/collections/balls
(donations appreciated, but not necessary. my things are free and will always be).
thingiverse
free

Ball in Ball by PatrickSalvador
...ball in ball by patricksalvador
thingiverse
ball in ball
thingiverse
free

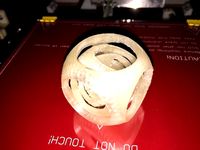
ball in a ball in a ball in a ball by Simon_Vance
...in a ball by simon_vance
thingiverse
i just put together a random thing because i was bored and it was just a 20 minute project.
thingiverse
free
Ball in a ball by zakw
...ball in a ball by zakw
thingiverse
ball within a ball
thingiverse
free
Ball in Ball by DevinWilcox
... by devinwilcox
thingiverse
break ball loose and enjoy!
big thanks to gkewley for the picture of the white printed ball in ball.
thingiverse
free
Ball in a Ball in a Ball - by Flightcache by Flightcache
...lls.
2015 | printed the ball in ball in ball with my mendel 90 with support sliced with slic3r and it is working fine. 50% size
thingiverse
free
ball in ball 2020
...://www.thingiverse.com/thing:2754149
also check out my oyher ball designshttps://www.thingiverse.com/syzguru11/collections/balls
thingiverse
free

Ball for ball bearing by Quanrbit
...l bearing by quanrbit
thingiverse
this remix is designed for single balls in ball bearings
7.3mm/0.287" diameter
using brim
thingiverse
free
twisted ball in ball in ba.... by Syzguru11
...twisted ball in ball in ba.... by syzguru11
thingiverse
twisted ball in ball in ba....
thingiverse
free
twisted ball in ball in ba.... by Syzguru11
...twisted ball in ball in ba.... by syzguru11
thingiverse
twisted ball in ball in ba....
Battery
thingiverse
free

Battery Container - (Battery Shaped)
...ttery shaped)
thingiverse
a battery container in the shape of a chunky battery. it contains up to 4 aaa batteries and 5 aa ones.
thingiverse
free

FT009 BATTERY SUPPORT FOR GREATER BATTERY
...ter battery
thingiverse
[en] ft009 battery support for greater battery
[fr] support batterie ft009 pour une plus grande batterie
thingiverse
free

Battery pack for 2xAA batteries by hawkan
...attery pack for 2xaa batteries by hawkan
thingiverse
battery pack for two aa batteries., practical for diy electronics projects.
thingiverse
free

Battery Holder
...battery holder
thingiverse
this is a battery holder for multiple types of batteries.
thingiverse
free

Batterie holder / Batterie Magazin by banto
...tterie holder
110 mm x 180 mm
21 x batterie aa 1.5 volt
36 x batterie aaa 1.5 volt
6 x batterie 9.0v block
10 x batterie 3.7 volt
thingiverse
free

Battery organizer
...battery organizer
thingiverse
simplest battery organizer for 10aa and 12 aaa batteries
thingiverse
free

Battery holder for H8 Mini batteries by RobinLin
...ini batteries by robinlin
thingiverse
this is a battery holder for lipo batteries usable for the original 150mah jjrc batteries.
thingiverse
free

For battery by Krabsters
...for battery by krabsters
thingiverse
for battery
thingiverse
free

Battery by leonk
...battery by leonk
thingiverse
battery
thingiverse
free

battery pack for three 18650 batterys by ricardo__xyz
...battery pack for three 18650 batterys by ricardo__xyz
thingiverse
this is a battery pack for three 1865er batterys.
8
thingiverse
free

1/8 to 8/32
...1/8 to 8/32
thingiverse
adapter for 1/8'' to 8/32'' without screw-thread.
thingiverse
free

8 by lawless34
...8 by lawless34
thingiverse
8
thingiverse
free

Tutorial #8
...tutorial #8
thingiverse
tutorial #8
thingiverse
free

Coupling 5/8 and 3/8 by fsadak
...coupling 5/8 and 3/8 by fsadak
thingiverse
two size coupling. 5/8 for nema 17 and 3/8 for nema 14.
thingiverse
free

BB-8
...bb-8
thingiverse
bb-8 model, moderate detail.
thingiverse
free

Pages 5-8(7/8 revised) by MattBubernak
...pages 5-8(7/8 revised) by mattbubernak
thingiverse
pages 5-8, we revised 7 and 8!
thingiverse
free

8 марта by shura2000
...8 марта by shura2000
thingiverse
8 марта
8 march
thingiverse
free

support 8 clefs usb - 8 usb stand
...support 8 clefs usb - 8 usb stand
thingiverse
support pour 8 clefs usb.
stand fot 8 usb keys
thingiverse
free

support 8 clefs usb - stand for 8 usb
...support 8 clefs usb - stand for 8 usb
thingiverse
support rond pour 8 clefs usb
round stand for 8 usb keys
thingiverse
free

8 Ball by TheInsideMan
...the same time. then i just push the 8 into the space on the 8 ball and then you are left with an 8 ball as shown in the pictures!