Thingiverse

Mac Mini Wallmount for models from 2010-pre2014 by makibox850
by Thingiverse
Last crawled date: 3 years, 1 month ago
This thing is a holder for Mac Mini models built from 2010 up to 2014 before the they have startet soldering on the RAM.
It has to be mounted having the cable ports looking to the top side.
Will be mounted onto a pixel board or similar in my workshop.
Now it is good enough to make it a usefull thing in my workshop.
--THE END--
Have fun.
This thing will not win the Red Dot Award ;-) Visual appearance has no priority.
Some parts are taken from thing 385676
Had to change, combine, resize them much for using with the newer MacMini's (2010-pre 2014 model).
Do not use the (bottom) holders alone. The Mini might fall off.
Some pics are taken in early stages while developing the thing.
Requirements:
-screws M5x20mm (lenshead, slotted or cylindric), screw length is depending on the board thickness
-hexnuts M5 or hammernuts M5
-screws 2x M4x16-20mm (depending on the bar thickness)
-hexnuts M4 for the top bar mount thing
Parts:
-left side bottom holder
-right side bottom holder
-top clamp (single board mount screw), can turn a bit when removing the Mini, depends on your mount technology
-top clamp (two board mount screws), it should not turn a bit when removing the Mini
The bottom mount parts
bottom mounts V4 , cutout following the spherically shaped backside better then before
Please have in mind the case model I have designed is a very rough approximation only.
So the cutouts might not match the body perfectly.
Now it has deeper pockets - regular cylindric head screws should fit now as well.
The top bar clamps.
They have to be mounted leftside/rightside 30mm away from the top edge where the rounded corners have ended.
Put one clamp to the left / right side each, make a bar across the top surface, screw it on using screws M4x20.
If you have one grab a ruler from the childrens schoolbag, cut it to length, put two holes in.
I have measured the hole distance on the bar to 218mm.
Check it out before drilling holes into your stuff.
If you want put some film/foam/thin rubber inbetween to protect the top surface of the case.
Exception:
If you have a Mini running headless, means having less cables, there is a chance securing it by putting a single top clamp only into the middle of the ports side. Find a small bar the goes down toward the centre of the case.
Check carefully if you have made the bottom holders following the shape of the case very well so it can not move to the left/right.
Printing:
Parts can be printed out even on small printers.
1x right bottom mount
1x left bottom mount
2x top bar mount of your choice
Filament: PLA, no fancy stuff required here
print settings:
perimeter/shell count: 4 or 5 when printing at
layer hight: 0.2 or 0.3mm
infill: 10-15 percent
support: no
No raft or brim required if your filament sticks very well.
Lay the parts flat for printing.
Postprocessing:
When you have printed them out remove any blobs, sharp edges comeing from the first and the top layers, esp when printing PLA.
Slide the parts over the edge gently, start from the outermost left / right side
Feel the resistence, have an sharp eye, do small adjustments on the printed parts using a file,
Remove tiny portions from the inside of the beveled plane on the back claw.
Check often.
For the single screw mount only.
On the backside of the board I will use nuts to be hammered into the soft surface MDF or pixeldust board. Those nuts spares some space on the wall side and the requirement for cutting out a cave for a regular hexnut.
For the two screw mount take something other like regular hexnuts,...
Very tight fit with two hammernuts, not recommended.
Put the holes 5mm on the board/wall:
all screws positions layout should be symmetrical
Best praxis: put all the parts on a paper, board, cardboard or so, find the best fit arangement, mark the lines/holes then, drill at last
single top holes line, 42mm below the top case edge
holes distance 198mm (the single screw mount)
two bottom holes lines
exact hole distance left/right is uncritical
but think of it-the beveled edge insed the mounts cutout should match the shape of the caseback, better match the mounts first find the holes positions then
two lines each with two screws 120mm apart
-first bottom line 140mm below the top holes line (not critical)
-second bottom line 50mm below the first bottom holes line (given by parts dimensions)
Easy? No drawing atm.
Mac Mini case dimensions (with bottom coverplate):
-Mac Mini 2004 -> 2009
165x165x54mm
-Mac Mini 2010 -> latest model before they introduced the 2014 crap with the RAM soldered on
197x197x36mm
The body thickness alone at the front edges is 30.5mm on the MacMini 2010/21012
Similar models
thingiverse
free

TDA7492P Bluetooth Amp Case by jasonsd
... in place. holes line up with the buttons on the board and a printable button allow use of the onboard buttons while in the case.
thingiverse
free

Dual 3.5" HDD Mount for Casetronic Travla C137 Mini-ITX by poberauer
...e drives drives
manual finishing:
drill (or melt) screw holes through the bottom piece, to mount to the bottom of the lower drive
thingiverse
free

CaravanPi circuit board base plate by spitzlbergerj
...at the cable clamps can be operated without danger.
after printing, the threads for the pcb hole screws should be cut with a tap.
thingiverse
free

PSU MKS Bracket by casesensitive
...holes in main bracket for orange pi (or any similar layout board). there is no room for nuts behind...
thingiverse
free

Ramps 1.4 to Solidoodle SD3 Motherboard Electronics Adapter by ne14pez
...almost touching the right side wall and i kept accidentally bumping it and causing a reset. there is now some extra space there.
thingiverse
free

Blackmagic Atem Mini Case by calebpike
...with supports turned on:
corner supports
left face plate
right face plate
clamp (2 needed)
short monitor mount
long monitor mount
thingiverse
free

Western Digital Case for 2TB drive by johnantoni
...bumpers to stick on the bottom.
4x 4/40 screws to mount the drive into the case from the sides.
printing:
no raft.
with supports.
thingiverse
free

turn your laptop into a second monitor - elevated 120mm fan mount for Adjustable Vertical Laptop Stand by elfie2002
...t adequately mounted it could fall and damage your laptop. mounted securely, my laptop feels quite stable, ensure yours does too.
thingiverse
free

Fysetc and BigTreeTech 12864 Mini Display Case with 2020 side attachment by DanAndersen
...round edges to 45° seam which does have a similar nice effect, but is easier to print rear cover...
thingiverse
free

Eyepiece case for mount tray by ym1964
...ot; hole, screw the bottom part under the tray to fix it. you put an eyepiece in it and cover it with the top part to protect it.
Makibox850
thingiverse
free

Messbuchsenfassung by makibox850
...unting of metal sockets for banana plugs onto panels.
the banana sockets have 3.6mm holes, 7mm collar on the opening, 6mm thread.
thingiverse
free

x-axis adjustment helper by makibox850
...iverse
this things helps for adjusting the y-axis to be square with the x-axis on the k8200/3drag.
take this at your own risk.
thingiverse
free

CTC keypad support by makibox850
...the pads upright more so they do not get stuck when they were pressed at an angle.
it replaces the big amount of washers as well.
thingiverse
free

Cameo2 pen holder adapter (refresh) by makibox850
...om/thing:3776350
cameo2 penholder, type of stabilo pen 88
changes made
-smoother shape
-less space between the pen and the walls.
thingiverse
free

IC Pinausrichter Kombo by makibox850
...ken können pins im abstand von 15mm gerichtet werden.
in dieser zusammenstellung noch nicht gedruckt.
sollte aber funktionieren.
thingiverse
free

Shuttle barebon psu coverplate by makibox850
...
having the stock psu removed this thing holds the fan and the powerinlet of a replacement high efficiency passivly cooled psu.
thingiverse
free

frame 4mm with slot for slides 60x100x2mm by makibox850
... films, photos, pcb,…
use it alone or combined with other parts from my modular box systemhttp://www.thingiverse.com/thing:506288
thingiverse
free

backplate for Wanhao Duplicator i3 (remixed from jamesarm97) by makibox850
...e fans only.
added some kind of standoffs for the bigger screws.
removed the beveled openings.
files:
with standoffs
no standoffs
thingiverse
free

keyring bottle opener by makibox850
...://www.tinkercad.com/things/cjsg16g1vlv-keyring-bottle-opener-redrawn-and-improved
update:
second file now with the keyring hole.
thingiverse
free

Apple wireless keyboard dish 3D model by makibox850
...keyboard riser for apple wireless keyboard model a1314.
eventually i have scaled the thing up by adding 1mm in x and y direction.
Wallmount
turbosquid
$24

Wallmount Lantern
... available on turbo squid, the world's leading provider of digital 3d models for visualization, films, television, and games.
turbosquid
$50

Wallmounted Bathroom Sink
...l wallmounted bathroom sink for download as 3ds, max, and obj on turbosquid: 3d models for games, architecture, videos. (1299967)
turbosquid
$35

Wallmounted Soap Dispenser
... wallmounted soap dispenser for download as max, 3ds, and obj on turbosquid: 3d models for games, architecture, videos. (1515993)
turbosquid
$15

WallMount Signboard No.5
...mount signboard no.5 for download as blend, dae, fbx, and obj on turbosquid: 3d models for games, architecture, videos. (1576301)
turbosquid
$15

WallMount Signboard No.4
...mount signboard no.4 for download as blend, dae, fbx, and obj on turbosquid: 3d models for games, architecture, videos. (1576296)
turbosquid
$15

WallMount Signboard No.2
...mount signboard no.2 for download as blend, dae, fbx, and obj on turbosquid: 3d models for games, architecture, videos. (1576283)
turbosquid
$15

WallMount Signboard No.1
...mount signboard no.1 for download as blend, dae, fbx, and obj on turbosquid: 3d models for games, architecture, videos. (1576282)
turbosquid
$42

Tiger Head Wallmount
... available on turbo squid, the world's leading provider of digital 3d models for visualization, films, television, and games.
3d_export
$40

Wallmounted Bathroom Sink 3D Model
...ed bathroom sink vray faucet towel water soap wood accessory interior
wallmounted bathroom sink 3d model plutonius 15557 3dexport
3ddd
$1

Roll and hill Fiddlehead wallmount lamp
...roll and hill fiddlehead wallmount lamp
3ddd
roll&hill
roll and hill fiddlehead wallmount lamp
Mac
3ddd
$1

i mac
...i mac
3ddd
i mac
i mac
design_connected
$11

Mac 60
...mac 60
designconnected
linbrasil mac 60 computer generated 3d model. designed by rodrigues, sergio.
3ddd
free

I MAC
...3ddd
apple , imac
комплект i mac. моноблок с беспроводной клавиатурой, мышью и тачпэдом.
3d_export
$100

Mac 3D Model
...mac 3d model
3dexport
mac laptop computadora metal sonic
mac 3d model mariiox23 65409 3dexport
3d_export
$7

lipstick mac packshot
...lipstick mac packshot
3dexport
lipstick mac packshot
3d_export
$5

submachine mac-10
...submachine mac-10
3dexport
submachine, mac-10
3ddd
$1
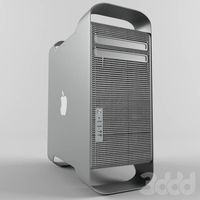
Mac Pro (appel)
...mac pro (appel)
3ddd
компьютер , apple
mac pro
turbosquid
$19

MAC-11
...
turbosquid
royalty free 3d model mac-11 for download as fbx on turbosquid: 3d models for games, architecture, videos. (1537748)
turbosquid
$15

Mac 10
...
turbosquid
royalty free 3d model mac 10 for download as obj on turbosquid: 3d models for games, architecture, videos. (1160523)
3d_export
free

apple mac
...this is a 3d model of apple mac. very good work with materials and textures. this model is well suited for creating room designs.
2010
3ddd
$1

Торшер 2010
...торшер 2010
3ddd
ковка
торшер 2010
turbosquid
$15

Human-2010
...turbosquid
royalty free 3d model human-2010 for download as on turbosquid: 3d models for games, architecture, videos. (1175069)
turbosquid
$59

Xm 2010
...id
royalty free 3d model xm 2010 for download as max and obj on turbosquid: 3d models for games, architecture, videos. (1668165)
3ddd
free

South Africa 2010
...south africa 2010
3ddd
статуэтка
south africa 2010
3d_ocean
$8

Mesh_Fence max 2010
...4 vertices: 41,376 =======formats=========== • max (3dstudiomax 2010) • ma (maya 2010) • mb (maya 2010) • cd4 (cinema4d 12) • ...
turbosquid
$99

Chevrolet 2010
... available on turbo squid, the world's leading provider of digital 3d models for visualization, films, television, and games.
turbosquid
$30

2010.max
... available on turbo squid, the world's leading provider of digital 3d models for visualization, films, television, and games.
turbosquid
$20

quattro 2010
... available on turbo squid, the world's leading provider of digital 3d models for visualization, films, television, and games.
3d_ocean
$49

Camaro 2010
...camaro 2010
3docean
camaro camaro2010 car
car,camaro,camaro2010
3d_export
$90

Camaro 2010 3D Model
...camaro 2010 3d model
3dexport
camaro 2010 camaro2010 car
camaro 2010 3d model wakuku 11175 3dexport
Mini
turbosquid
$10
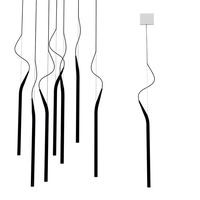
Mini Mini Luceplan
...
royalty free 3d model mini mini luceplan for download as max on turbosquid: 3d models for games, architecture, videos. (1227359)
3d_ocean
$39
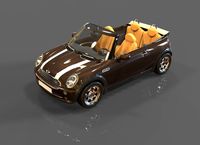
Mini Cooper
...mini cooper
3docean
cabrioler cooper mini
mini cooper cabrioler
3d_export
$30

Mini lathe
...mini lathe
3dexport
mini lathe
3d_export
$5

mini mouse
...mini mouse
3dexport
mini mouse
3d_export
$5
mini house
...mini house
3dexport
mini house
3d_export
free

Mini Mecha
...mini mecha
3dexport
concept of mini mecha
3d_ocean
$20
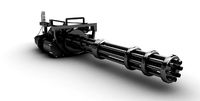
Mini Gun
...mini gun
3docean
gatling gun gun machine gun mini gun weapon
model of a mini gatling gun.
3ddd
free
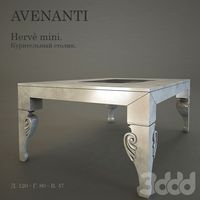
Herve mini
... кофейный , herve
http://www.mobiliavenanti.it/ru/products/hervè-mini
3d_export
$5
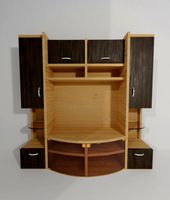
mini wall
...mini wall
3dexport
mini wall for living room
3d_export
$5

mini bank
...mini bank
3dexport
mini bank 3d model
