Thingiverse
LS-30 replacement handle for the Happ Rotary Joystick by PL1
by Thingiverse
Last crawled date: 4 years, 4 months ago
Originally posted on the Build Your Own Arcade Controls (BYOAC) forums.
http://forum.arcadecontrols.com/index.php/topic,158253.0.html
The photos above are in the same order as the text below.
Do you want the look and feel of an LS-30 handle for your Happ Rotary Joystick?
(01-Replacement handle installed.jpg)
If so, this is the thread for you. :)
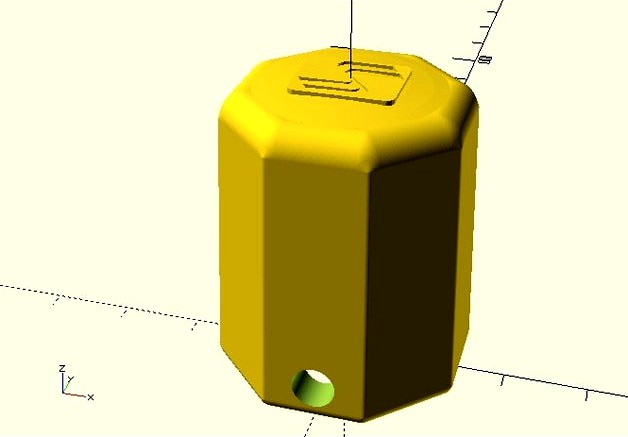
All 3D printed parts in this project are easy to customise by changing the related variable(s) in OpenSCAD.
The code is extensively commented to make it easy to understand, modify, and reuse.
Original LS-30 handle next to the printed version.
(02-Handles side-by-side.jpg)
Special thanks to 8BitMonk for loaning me an LS-30 handle. :cheers
Tools:
3d printer
Drill press
4mm and 5mm drill bits
Calipers (preferably metric)
Allen wrenches
Metal saw or cutting bit
Files
Hardware:
10mm shaft (~105-125mm per stick, depending on panel thickness)https://www.amazon.com/500mm-Cylinder-Linear-Optical-Accuracy/dp/B01N7RXCOQ/
20x10x10 shaft collarhttps://www.amazon.com/SC45CS10-Carbon-Steel-Collars-Outsize/dp/B074BV3GYH/
5mm-0.80 x 10mm metric setscrewhttps://www.menards.com/main/tools-hardware/fasteners-fastener-accessories/screws/specialty-screws-accessories/5mm-0-80-x-10mm-metric-socket-set-screws-1-pcs/p-1444440045536-c-8938.htm
3D print-coating epoxy (optional)https://www.amazon.com/gp/product/B00PFXK4JY/
Threaded inserts for mounting the joystick in a wood panelhttp://groovygamegear.com/webstore/index.php?main_page=product_info&cPath=70&products_id=317
Software:
OpenSCADhttp://www.openscad.org/
Inkscape (optional)https://inkscape.org/en/
Inkscape to OpenSCAD converter plugin (optional)https://www.thingiverse.com/thing:24808
LS-30 handle measurements
8BitMonk provided the clearance measurements and panel thickness from his Ikari Warriors cab. :applaud: :notworthy:
Most of the remaining handle measurements were straight-forward.
The difficult part was measuring the tiny curve on the vertical edges of the octagon.
Most fillet gauges are designed to measure a curve where the faces are at 90 degrees.
(03-Fillet gauge right angle.jpg)
To measure the curve on an octagon where the faces are at 135 degrees, I designed some small octagonal fillet gauges.
https://www.thingiverse.com/thing:2924356
(04-Fillet Gauge X-Small.png)
Happ Rotary measurements
Once again, the measurements were pretty straight-forward.
(05-Happ Rotary Parts.jpg)
The 38mm distance from the actuator/coupler (P/N 96-1012-00) setscrew hole to the base of the pivot cone (P/N 96-1302-00) is a critical distance to ensure that the actuator is at the right height to engage the microswitches and keep the right tension on the centering spring.
To match that distance, the replacement handle and shaft cover has to stop the pivot cone where the shoulder on the original shaft (P/N 95-1274-00) did.
(06-Original and replacement shafts.jpg)
The top of the pivot cone is 2.5mm below the top of the joystick body.
(07-LS-30 Handle Measurements.jpg)
Fabricating the shaft
Make a horizontal mark at 4.2mm for the first hole.
One way to do that is to paint part of the shaft with a Sharpie, set your calipers to 4.2 mm, barely rest one jaw on the end, and roll the shaft so the tip of the other jaw leaves a scratch.
(08-Sharpie and Scratch 1.JPG) (09-Sharpie and Scratch 2.JPG)
Drill a 4mm hole, 4mm deep, 4.2mm from the end of the shaft.
Measure and mark the distance from the center of the first hole to the center of the shaft collar setscrew.
That distance = 55mm + the estimated shaft cover height from this list:
-- 19.7mm shaft cover for a metal panel
(15.6mm above + 1.6mm panel + 2.5mm under)
-- 37.2mm shaft cover for 3/4" MDF
(15.6mm above + 19.1mm panel + 2.5mm under)
-- 34mm for a 5/8" wood panel
-- 30.8mm for a 1/2" wood panel
If you plan on using threaded inserts like the ones from GGG to mount your joystick, you may want to add an extra mm for the flange.
For a 3/4" MDF panel with GGG-style threaded inserts, there should be 93.2mm (55mm + 37.2mm + 1mm) between the centers of the holes.
Drill a 5mm hole or grind a 5mm flat ~2mm deep for the shaft collar setscrew
Must be deep enough for the setscrew to be flush with the handle and shallow enough for the setscrew to transfer torque to the shaft
Go an extra mm deeper if you want to cover the setscrew hole with LS30_Setscrew_Cover.scad.
The distance between the bottom edge of the 4mm hole (step 1) and the top of the setscrew flat/hole (step 3) minus 59.5mm (60.5mm if you're using GGG-style inserts) = the actual printed shaft cover height
This ensures the correct amount of joystick spring tension
Cut the top of the shaft 24-25mm from center of the shaft collar set screw hole/flat
(10-Drilled shaft.jpg)
When the handle is assembled, there should be 38mm from the base of the pivot cone to the center of the 4mm screw hole
(11-Fabricating the Shaft.jpg)
Test print for hardware fit
LS30_Test_Print.scad allows you to check if your Shaft Collar, Set Screw, and Shaft will work with the following variables:
-- ShaftDiameter
-- ShaftCollarHeight
-- ShaftCollarOuterDiameter
-- SetScrewDiameter
Open the file in OpenSCAD.
Make any desired changes to the variables on lines 17 thru 22.
There must be a ";" after the variable.
-- Think of it like the game "Simon Says". No ";" = not saying "Simon says" = don't do it.
"//" indicates a comment or disabled code.
Preview
(toolbar icon or F5)
If there is a syntax error like a missing ";", preview will crash and flag the next line of code
Render
(toolbar icon or F6)
Prepares the object for export.
Export as STL
(toolbar icon or File -- Export -- Export as STL . . .)
Print the .STL file
Print parts:
Handle
Shaft cover
Setscrew cover (optional)
Ikari Warriors dust washer https://www.thingiverse.com/thing:3094055 (optional + you might want to paint it)
Like before, open the .scad file, change variables as desired, preview, render, export as .STL, and print the .STL file.
(12-Printed parts.jpg)
Assemble the handle:
Insert and tighten the setscrew so it is completely inside the shaft collar.
(13-Setscrew inside.jpg)
Align setscrew/hole and insert the shaft collar into the handle.
(14-Shaft collar aligned.jpg)
Loosen the setscrew through the setscrew hole in the handle.
-- If the hole is tight enough to engage the threads on the setscrew, you want it to cut threads from the inside out.
Insert the shaft into the shaft collar and handle.
Tighten the setscrew.
Hold the setscrew cover by the stem to test-fit the cover thickness. You may need to sand it or print a thicker cover. (optional)
(15-Setscrew cover test-fit.jpg)
Insert the setscrew cover. (optional)
Apply print smoothing epoxy to the handle, shaft cover, and dust washer. Allow to cure fully. (optional)
Install shaft cover.
Install dust washer.
Install pivot cone with the narrow side toward the handle.
(16-Handle assembly.jpg)
Insert the handle into the body of the joystick
Brace the handle against the tabletop and press down on the body to expose the setscrew hole.
Put the arm loop over the post and place the actuator/coupler on the shaft.
Align the hole/setscrew and tighten.
Rotary encoder options:
KADE miniArcade 2.0 firmware (rotary + keyboard buttons, two sticks)http://forum.arcadecontrols.com/index.php/topic,154126.0.html
-- Runs on your choice of 32u4 AVRs
--- MattairTech MT-DB-U4
--- Arduino Leonardo Micro
--- Arduino Leonardo Pro Micro has some pins/ports not connected so it can only handle one joystick
GGG GP-Wiz40 (rotary + gamepad buttons, two sticks)
Ultimarc Rotary encoder board (rotary only, you'll need a separate encoder for the buttons and joystick microswitches, fixed keystroke outputs, two sticks)
Ultimarc U-HID (rotary + keyboard or gamepad buttons)
-- Need to wire 4 diodes to convert the 12-position rotary switch into a quadrature (mouse) waveform.
KADE miniArcade firmware (original)
-- Minimus AVRs are hard to find
Mechanical Rotary Joystick Games:
Battle Field (Japanese version of Time Soldiers)
Bermuda Triangle
Dogou Souken a.k.a. Dogosoken (Japanese version of Victory Road)
Downtown
Gondomania
Guerilla War
Guevara (Japanese version of Guerrilla War)
Heavy Barrel
Ikari III - The Rescue (This is the only rotary game that uses three player buttons.)
Ikari Warriors
Jackal (Japanese version of Top Gunner)
Makyou Senshi (Japanese version of Gondomania)
Midnight Resistance
SAR - Search And Rescue
T.N.K. III
Time Soldiers
Top Gunner (bootleg)
Victory Road
World Wars
MAME Settings for Mechanical Rotary Joysticks
For mechanical rotary games:
Input (this Game) menu
Positional Analog to none
Analog Control menu
Positional Digital Speed = 0
Positional Sensitivity = 100
Scott
http://forum.arcadecontrols.com/index.php/topic,158253.0.html
The photos above are in the same order as the text below.
Do you want the look and feel of an LS-30 handle for your Happ Rotary Joystick?
(01-Replacement handle installed.jpg)
If so, this is the thread for you. :)
All 3D printed parts in this project are easy to customise by changing the related variable(s) in OpenSCAD.
The code is extensively commented to make it easy to understand, modify, and reuse.
Original LS-30 handle next to the printed version.
(02-Handles side-by-side.jpg)
Special thanks to 8BitMonk for loaning me an LS-30 handle. :cheers
Tools:
3d printer
Drill press
4mm and 5mm drill bits
Calipers (preferably metric)
Allen wrenches
Metal saw or cutting bit
Files
Hardware:
10mm shaft (~105-125mm per stick, depending on panel thickness)https://www.amazon.com/500mm-Cylinder-Linear-Optical-Accuracy/dp/B01N7RXCOQ/
20x10x10 shaft collarhttps://www.amazon.com/SC45CS10-Carbon-Steel-Collars-Outsize/dp/B074BV3GYH/
5mm-0.80 x 10mm metric setscrewhttps://www.menards.com/main/tools-hardware/fasteners-fastener-accessories/screws/specialty-screws-accessories/5mm-0-80-x-10mm-metric-socket-set-screws-1-pcs/p-1444440045536-c-8938.htm
3D print-coating epoxy (optional)https://www.amazon.com/gp/product/B00PFXK4JY/
Threaded inserts for mounting the joystick in a wood panelhttp://groovygamegear.com/webstore/index.php?main_page=product_info&cPath=70&products_id=317
Software:
OpenSCADhttp://www.openscad.org/
Inkscape (optional)https://inkscape.org/en/
Inkscape to OpenSCAD converter plugin (optional)https://www.thingiverse.com/thing:24808
LS-30 handle measurements
8BitMonk provided the clearance measurements and panel thickness from his Ikari Warriors cab. :applaud: :notworthy:
Most of the remaining handle measurements were straight-forward.
The difficult part was measuring the tiny curve on the vertical edges of the octagon.
Most fillet gauges are designed to measure a curve where the faces are at 90 degrees.
(03-Fillet gauge right angle.jpg)
To measure the curve on an octagon where the faces are at 135 degrees, I designed some small octagonal fillet gauges.
https://www.thingiverse.com/thing:2924356
(04-Fillet Gauge X-Small.png)
Happ Rotary measurements
Once again, the measurements were pretty straight-forward.
(05-Happ Rotary Parts.jpg)
The 38mm distance from the actuator/coupler (P/N 96-1012-00) setscrew hole to the base of the pivot cone (P/N 96-1302-00) is a critical distance to ensure that the actuator is at the right height to engage the microswitches and keep the right tension on the centering spring.
To match that distance, the replacement handle and shaft cover has to stop the pivot cone where the shoulder on the original shaft (P/N 95-1274-00) did.
(06-Original and replacement shafts.jpg)
The top of the pivot cone is 2.5mm below the top of the joystick body.
(07-LS-30 Handle Measurements.jpg)
Fabricating the shaft
Make a horizontal mark at 4.2mm for the first hole.
One way to do that is to paint part of the shaft with a Sharpie, set your calipers to 4.2 mm, barely rest one jaw on the end, and roll the shaft so the tip of the other jaw leaves a scratch.
(08-Sharpie and Scratch 1.JPG) (09-Sharpie and Scratch 2.JPG)
Drill a 4mm hole, 4mm deep, 4.2mm from the end of the shaft.
Measure and mark the distance from the center of the first hole to the center of the shaft collar setscrew.
That distance = 55mm + the estimated shaft cover height from this list:
-- 19.7mm shaft cover for a metal panel
(15.6mm above + 1.6mm panel + 2.5mm under)
-- 37.2mm shaft cover for 3/4" MDF
(15.6mm above + 19.1mm panel + 2.5mm under)
-- 34mm for a 5/8" wood panel
-- 30.8mm for a 1/2" wood panel
If you plan on using threaded inserts like the ones from GGG to mount your joystick, you may want to add an extra mm for the flange.
For a 3/4" MDF panel with GGG-style threaded inserts, there should be 93.2mm (55mm + 37.2mm + 1mm) between the centers of the holes.
Drill a 5mm hole or grind a 5mm flat ~2mm deep for the shaft collar setscrew
Must be deep enough for the setscrew to be flush with the handle and shallow enough for the setscrew to transfer torque to the shaft
Go an extra mm deeper if you want to cover the setscrew hole with LS30_Setscrew_Cover.scad.
The distance between the bottom edge of the 4mm hole (step 1) and the top of the setscrew flat/hole (step 3) minus 59.5mm (60.5mm if you're using GGG-style inserts) = the actual printed shaft cover height
This ensures the correct amount of joystick spring tension
Cut the top of the shaft 24-25mm from center of the shaft collar set screw hole/flat
(10-Drilled shaft.jpg)
When the handle is assembled, there should be 38mm from the base of the pivot cone to the center of the 4mm screw hole
(11-Fabricating the Shaft.jpg)
Test print for hardware fit
LS30_Test_Print.scad allows you to check if your Shaft Collar, Set Screw, and Shaft will work with the following variables:
-- ShaftDiameter
-- ShaftCollarHeight
-- ShaftCollarOuterDiameter
-- SetScrewDiameter
Open the file in OpenSCAD.
Make any desired changes to the variables on lines 17 thru 22.
There must be a ";" after the variable.
-- Think of it like the game "Simon Says". No ";" = not saying "Simon says" = don't do it.
"//" indicates a comment or disabled code.
Preview
(toolbar icon or F5)
If there is a syntax error like a missing ";", preview will crash and flag the next line of code
Render
(toolbar icon or F6)
Prepares the object for export.
Export as STL
(toolbar icon or File -- Export -- Export as STL . . .)
Print the .STL file
Print parts:
Handle
Shaft cover
Setscrew cover (optional)
Ikari Warriors dust washer https://www.thingiverse.com/thing:3094055 (optional + you might want to paint it)
Like before, open the .scad file, change variables as desired, preview, render, export as .STL, and print the .STL file.
(12-Printed parts.jpg)
Assemble the handle:
Insert and tighten the setscrew so it is completely inside the shaft collar.
(13-Setscrew inside.jpg)
Align setscrew/hole and insert the shaft collar into the handle.
(14-Shaft collar aligned.jpg)
Loosen the setscrew through the setscrew hole in the handle.
-- If the hole is tight enough to engage the threads on the setscrew, you want it to cut threads from the inside out.
Insert the shaft into the shaft collar and handle.
Tighten the setscrew.
Hold the setscrew cover by the stem to test-fit the cover thickness. You may need to sand it or print a thicker cover. (optional)
(15-Setscrew cover test-fit.jpg)
Insert the setscrew cover. (optional)
Apply print smoothing epoxy to the handle, shaft cover, and dust washer. Allow to cure fully. (optional)
Install shaft cover.
Install dust washer.
Install pivot cone with the narrow side toward the handle.
(16-Handle assembly.jpg)
Insert the handle into the body of the joystick
Brace the handle against the tabletop and press down on the body to expose the setscrew hole.
Put the arm loop over the post and place the actuator/coupler on the shaft.
Align the hole/setscrew and tighten.
Rotary encoder options:
KADE miniArcade 2.0 firmware (rotary + keyboard buttons, two sticks)http://forum.arcadecontrols.com/index.php/topic,154126.0.html
-- Runs on your choice of 32u4 AVRs
--- MattairTech MT-DB-U4
--- Arduino Leonardo Micro
--- Arduino Leonardo Pro Micro has some pins/ports not connected so it can only handle one joystick
GGG GP-Wiz40 (rotary + gamepad buttons, two sticks)
Ultimarc Rotary encoder board (rotary only, you'll need a separate encoder for the buttons and joystick microswitches, fixed keystroke outputs, two sticks)
Ultimarc U-HID (rotary + keyboard or gamepad buttons)
-- Need to wire 4 diodes to convert the 12-position rotary switch into a quadrature (mouse) waveform.
KADE miniArcade firmware (original)
-- Minimus AVRs are hard to find
Mechanical Rotary Joystick Games:
Battle Field (Japanese version of Time Soldiers)
Bermuda Triangle
Dogou Souken a.k.a. Dogosoken (Japanese version of Victory Road)
Downtown
Gondomania
Guerilla War
Guevara (Japanese version of Guerrilla War)
Heavy Barrel
Ikari III - The Rescue (This is the only rotary game that uses three player buttons.)
Ikari Warriors
Jackal (Japanese version of Top Gunner)
Makyou Senshi (Japanese version of Gondomania)
Midnight Resistance
SAR - Search And Rescue
T.N.K. III
Time Soldiers
Top Gunner (bootleg)
Victory Road
World Wars
MAME Settings for Mechanical Rotary Joysticks
For mechanical rotary games:
Input (this Game) menu
Positional Analog to none
Analog Control menu
Positional Digital Speed = 0
Positional Sensitivity = 100
Scott