Thingiverse

Lithophane Photo Lamp by lambdahindiii
by Thingiverse
Last crawled date: 3 years, 1 month ago
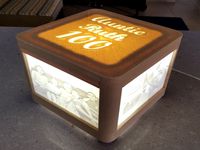
Lithophane Lamp
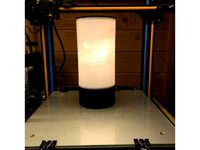
This is a lithophane lamp shade I designed to work with this lamp: Aukey Table Lamp
The lamp shown in photos is one I made with 8 lithophane images of (mostly) tropical fruits. Aside from the 8 lithophanes, the lamp consists of two support rings, and an upper surface. Follow the directions below to make your own.
Also, I included the G-code files I used with my MP Select Mini. You can import my slicer settings into Cura by going to Preferences > Profiles > Import and choosing the G-code file.
Lithophane photo panels
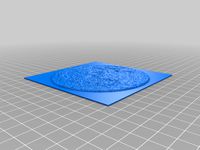
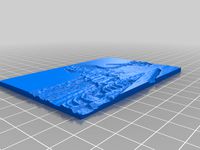
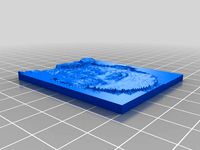
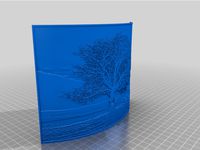
Choose a photo and crop it to a perfect square. I did this in Photos on Mac, but it could be done in an photo editing software. It’s important that it has equal width and height. It may also help to increase the contrast a bit depending on your photo, but not necessary.
Use this awesome site to generate a lithophane panel (STL) from your image. Here are the settings I used:
Model: Choose "Outer Curve"
Model Settings:
Maximum Size (MM): 87
Thickness (MM): 2
Border (MM): 2
Thinnest Layer (MM): 0.8
Vectors Per Pixel: 10 (could set this lower for a smaller STL)
Base/Stand Depth: 0
Curve: 90
Image Settings:
Positive Image
Mirror Image Off
Flip Image Off
Manual Refresh
Repeat X Count 1
Repeat Y Count 1
Mirror Repeat Off
Flip Repeat Off
Repeat for all your images.
For the best quality, I strongly recommend printing the lithophane panels in high quality (I used 0.0875 mm layer height), 100% infill, standing upright, and with the z-axis seam set so that each layer starts on the edge of the image. I've included my G-code files which you can import into Cura to use as an example.
Support rings and upper surface.
The lower and middle rings can both be printed in lower quality (I used 0.175 mm layer height) and without support.
The upper surface is probably best printed upside-down. My print bed isn't perfectly level, so I printed the upper surface right side up with supports and got nice results.
Assembly
Clean any excess plastic or rough edges off the lithophane panels. Four lithophane panels should fit into the outer groove of the lower ring, completing a circle. These will be the panels for the lower part of the lamp shade. I had to trim a bit of plastic off the bottom of the lithophanes and sand the side edges just a little (it’s a tight fit).
Fit the middle ring on to the top of the same four panels. Once it is perfect, use a few drops of super glue to permanently attach the lithophane panels into the groove of the lower and middle rings.
Place the other four lithophane panels into the top groove of the middle ring. Then fit the upper surface onto the top of these panels. Again, lock it in place with super glue.
The lamp shade should fit perfectly on this lamp. It is designed to be snug, so you may need to sand/trim the inner rings a little if it won’t slide onto the lamp.
Links
Lamp: Aukey Table Lamp
Lithophane generator: Image to Lithophane
Tinkercad:
Upper Surface
Middle Ring
Lower Ring
Update Dec 2017
Added Upper Surface V2, which has a stronger groove edge and a slightly wider groove for easier assembly.
Added Gap Filler which can be glued to the inside between the lithophane panels to keep light from coming through between the panels.
This is a lithophane lamp shade I designed to work with this lamp: Aukey Table Lamp
The lamp shown in photos is one I made with 8 lithophane images of (mostly) tropical fruits. Aside from the 8 lithophanes, the lamp consists of two support rings, and an upper surface. Follow the directions below to make your own.
Also, I included the G-code files I used with my MP Select Mini. You can import my slicer settings into Cura by going to Preferences > Profiles > Import and choosing the G-code file.
Lithophane photo panels
Choose a photo and crop it to a perfect square. I did this in Photos on Mac, but it could be done in an photo editing software. It’s important that it has equal width and height. It may also help to increase the contrast a bit depending on your photo, but not necessary.
Use this awesome site to generate a lithophane panel (STL) from your image. Here are the settings I used:
Model: Choose "Outer Curve"
Model Settings:
Maximum Size (MM): 87
Thickness (MM): 2
Border (MM): 2
Thinnest Layer (MM): 0.8
Vectors Per Pixel: 10 (could set this lower for a smaller STL)
Base/Stand Depth: 0
Curve: 90
Image Settings:
Positive Image
Mirror Image Off
Flip Image Off
Manual Refresh
Repeat X Count 1
Repeat Y Count 1
Mirror Repeat Off
Flip Repeat Off
Repeat for all your images.
For the best quality, I strongly recommend printing the lithophane panels in high quality (I used 0.0875 mm layer height), 100% infill, standing upright, and with the z-axis seam set so that each layer starts on the edge of the image. I've included my G-code files which you can import into Cura to use as an example.
Support rings and upper surface.
The lower and middle rings can both be printed in lower quality (I used 0.175 mm layer height) and without support.
The upper surface is probably best printed upside-down. My print bed isn't perfectly level, so I printed the upper surface right side up with supports and got nice results.
Assembly
Clean any excess plastic or rough edges off the lithophane panels. Four lithophane panels should fit into the outer groove of the lower ring, completing a circle. These will be the panels for the lower part of the lamp shade. I had to trim a bit of plastic off the bottom of the lithophanes and sand the side edges just a little (it’s a tight fit).
Fit the middle ring on to the top of the same four panels. Once it is perfect, use a few drops of super glue to permanently attach the lithophane panels into the groove of the lower and middle rings.
Place the other four lithophane panels into the top groove of the middle ring. Then fit the upper surface onto the top of these panels. Again, lock it in place with super glue.
The lamp shade should fit perfectly on this lamp. It is designed to be snug, so you may need to sand/trim the inner rings a little if it won’t slide onto the lamp.
Links
Lamp: Aukey Table Lamp
Lithophane generator: Image to Lithophane
Tinkercad:
Upper Surface
Middle Ring
Lower Ring
Update Dec 2017
Added Upper Surface V2, which has a stronger groove edge and a slightly wider groove for easier assembly.
Added Gap Filler which can be glued to the inside between the lithophane panels to keep light from coming through between the panels.
Similar models
thingiverse
free

Lithophane Lamp by brimstone326
...ulcrum-30010-301-wireless-stick--silver/dp/b000r7pm36/ref=sr_1_3?ie=utf8&qid=1467161530&sr=8-3&keywords=led+tap+light
thingiverse
free

IKEA LAMPAN Lithophane lamp shade conversion by nivs1978
...choose the outer curve and set the maximum size to 590, curve 360 in the model settings and positive image in the image settings.
thingiverse
free

litophane lamp by 1mp3r4t0r
...age off
refresh on image click
repeat x count 1
repeat y count 1
mirror repeat off
flip repeat off
ps: sorry for bad english :d
thingiverse
free

Lithophane Light Box by Polymaker_3D
...rs - 3
infill - 0%
layer height - 0.15mm
allow single extrusion fill - (internal 20%)
print with a brim to help with bed adhesion
thingiverse
free

Lithophane LED Lamp
...icing program makeing sure to only rescale the x and y dimensions.
included some super mario themed lithophanes i made.
enjoy! :)
thingiverse
free

Yet another Lithophane Lamp
...//www.amazon.com/gp/product/b07t8dxmpn/
note: you must use an led bulb in this lamp. incandescant bulbs generate too much heat.
thingiverse
free

Yet Another Lithophane Lamp
...age):
maximum size: 75 mm
thickness: 2 mm
border: 2.5 mm
thinnest layer: 0.6 mm
vectors per pixel: 4
base/stand depth: 0
curve: 0
thingiverse
free
Lithophane Lamp
... the letters are cutout 0.6mm deep. i also created a blank lid - you can print in like that or add some cutouts in a cad program.
thingiverse
free

Star Wars Lithophane Lamp by trexlertechie
...07rx62616/ref=ppx_yo_dt_b_asin_title_o00_s00?ie=utf8&psc=1
a video of the make can be found here:https://youtu.be/b-w4wnw6ioe
thingiverse
free

Lithophane by Titusone
...push light with an diameter 70 mm and hight 25 mm
i have added on extra part when you want to use ledstrip which run with battery
Lambdahindiii
thingiverse
free

Vortex Genie Vortexer Dial Knob by lambdahindiii
...th a little wiggle room, but it holds in place well if you place a small piece of parafilm on the pin before putting on the knob.
thingiverse
free

PCR qPCR Plate Loading Guide by lambdahindiii
...f a pcr plate as a visual aid to loading wells in triplicate.
links
pcr plate: bio-rad hsp9655
tinkercad: pcr plate loading guide
thingiverse
free

0.2 mL PCR Tube Rotor for Mini-Microcentrifuge by lambdahindiii
...olding the base and carefully pulling the rotor off, then pressing the new rotor in place.
links
tinkercad: 0.2 ml pcr tube rotor
thingiverse
free

Avocado Aperture Aid (for Felix Instruments produce quality meter) by lambdahindiii
... instruments f-750 and f-751.
link: felix instruments
i printed this with tpu for flexibility, but any material should work fine.
thingiverse
free

Star Trek Science MP Select Mini Extruder Spinner by lambdahindiii
...se two things:rebel starbird mp mini extruder medallionstar trek comm badge - science - fixed
copy and edit your own on tinkercad
thingiverse
free

Star Trek Engineering MP Select Mini Extruder Spinner by lambdahindiii
...wo things:rebel starbird mp mini extruder medallionstar trek comm badge - engineering - fixed
copy and edit your own on tinkercad
thingiverse
free

Raspberry Pi 3 Case and Mount by lambdahindiii
..." sheet metal screws
top to bottom: four #4 x 3/4" sheet metal screws
bottom to tv: four m4-0.70 x 10 mm machine screws
thingiverse
free
Case for Aukey USB-C Adapter by lambdahindiii
...id and box are attracted to each other when assembled.
links
aukey usb-c to usb 3.0 (usb-a) adapter6 x 3 mm magnetgcode simulator
thingiverse
free

Penny Tri Spinner (Pennies encased inside) by lambdahindiii
...fectly seal in the 4 pennies.
i use these bearings from amazon.
remixed with tinkercad: https://tinkercad.com/things/dwgsh8iomye
thingiverse
free

250 mL Laboratory Flask Holder by lambdahindiii
...lue the pieces together with a drop or two of super glue.
links
source: 250ml conical flask holder
tinkercad: 250 ml flask holder
Lithophane
3d_export
free

lithophane of elfen lied
...lithophane of elfen lied
3dexport
elfen lied lithophane free
turbosquid
$25
Table Lamp (Bamboo Motif Lithophane Accent - Model 015)
... available on turbo squid, the world's leading provider of digital 3d models for visualization, films, television, and games.
thingiverse
free

at at lithophane by philip3dprinter
...at at lithophane by philip3dprinter
thingiverse
at at lithophane
thingiverse
free
Lithophane universe
...lithophane universe
thingiverse
it is a lithophane if the universe
thingiverse
free
Lithophane Moon
...lithophane moon
thingiverse
lithophane moon
thingiverse
free
Lithophane Sphinx
...lithophane sphinx
thingiverse
lithophane sphinx
thingiverse
free

Lithophane NewYork
...lithophane newyork
thingiverse
lithophane newyork
thingiverse
free
Lithophane by sromanos
...lithophane by sromanos
thingiverse
experimenting with lithophanes
thingiverse
free
Tree Lithophane
...tree lithophane
thingiverse
a lithophane of a tree
thingiverse
free

Toyota Lithophane
...toyota lithophane
thingiverse
toyota lithophane logo print.
Photo
3ddd
$1

photo frame
...photo frame
3ddd
photo frame
3ddd
$1

Photo Frame
...photo frame
3ddd
рисунок
photo frame
3d_export
$5

photo frame
...or photos, pictures. you can put shes anywhere. in the kitchen, on the table in the bedroom, on the shelf in the hall, and so on.
archive3d
free
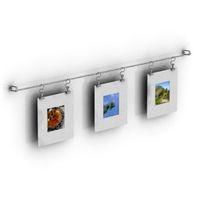
Photos 3D Model
...tos photo photos set
set photos n160216 - 3d model (*.gsm+*.3ds) for interior 3d visualization.
3d_export
$5
Photo 3D Model
...photo 3d model
3dexport
photo
photo 3d model max140588 62242 3dexport
3d_export
$14

photo printer
...g projects, and was originally modeled in 3ds max 2012 and rendered with v-ray. renders have no postprocessing. hope you like it!
turbosquid
$10

photo frame
...osquid
royalty free 3d model photo frame for download as obj on turbosquid: 3d models for games, architecture, videos. (1404417)
turbosquid
$9

Photo studio
...uid
royalty free 3d model photo studio for download as blend on turbosquid: 3d models for games, architecture, videos. (1498830)
turbosquid
$5

Photo Frame
...royalty free 3d model photo frame for download as fbx and upk on turbosquid: 3d models for games, architecture, videos. (1163533)
turbosquid
$2

Photo Frame
...royalty free 3d model photo frame for download as max and fbx on turbosquid: 3d models for games, architecture, videos. (1352878)
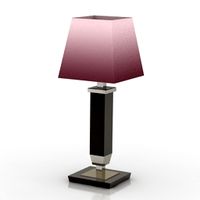
Lamp
archibase_planet
free
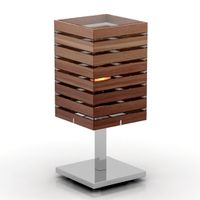
Lamp
...lamp
archibase planet
lamp reading lamp table lamp
lamp - 3d model (*.gsm+*.3ds) for interior 3d visualization.
archibase_planet
free
Lamp
...lamp
archibase planet
lamp reading lamp table lamp
lamp - 3d model (*.gsm+*.3ds) for interior 3d visualization.
archibase_planet
free

Lamp
...lamp
archibase planet
lamp table lamp reading lamp
lamp - 3d model (*.gsm+*.3ds) for interior 3d visualization.
archibase_planet
free

Lamp
...lamp
archibase planet
lamp table lamp reading lamp
lamp - 3d model (*.gsm+*.3ds) for interior 3d visualization.
archibase_planet
free

Lamp
...lamp
archibase planet
lamp reading lamp table lamp
lamp - 3d model (*.gsm+*.3ds) for interior 3d visualization.
archibase_planet
free
Lamp
...lamp
archibase planet
lamp reading lamp table lamp
lamp - 3d model (*.gsm+*.3ds) for interior 3d visualization.
archibase_planet
free
Lamp
...lamp
archibase planet
lamp table lamp reading lamp
lamp - 3d model (*.gsm+*.3ds) for interior 3d visualization.
archibase_planet
free

Lamp
...lamp
archibase planet
lamp table lamp reading lamp
lamp - 3d model (*.gsm+*.3ds) for interior 3d visualization.
archibase_planet
free
Lamp
...lamp
archibase planet
lamp reading lamp table lamp lantern
lamp - 3d model (*.3ds) for interior 3d visualization.
3d_ocean
$6
Lamp
...lamp
3docean
lamp
a high quality lamp.