Thingiverse
LightRider by Geisel
by Thingiverse
Last crawled date: 2 years, 11 months ago
Project "LightRider"
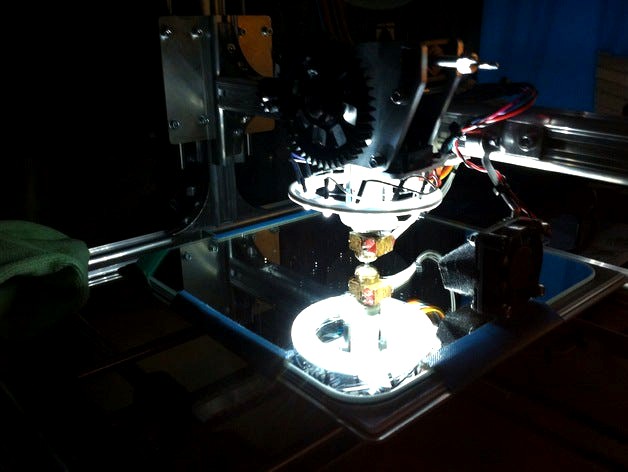
Raspberry Pi driven chaser lights for K8200 printbed enlightment. UsingOctoPrint events with runable Python script for event handling and starting LED sequences.
Standalone runner with buttoncontrolled demo mode and developing sequences.
Hardware layouts included
Video: http://www.youtube.com/watch?v=xRhgaWbLEP4 (How could i add this to the gallery??)
The Project
i did a Remix of http://www.thingiverse.com/thing:155262 , but i what more lights, use my M3 screws for mounting the ring and -of course- i what to control every LED for itself. So i rebuild the ring for 12 LEDs and desgin a M3x16mm screws capable mount.
Thus far everything works fine, but controlling 12x 5500MCD-LED with 14mA per led may burn the Raspberry Pi GPIOs.
To turn LEDs on and off for seconds or minutes with 5v(500mA) from a free USB-Port is no problem - I'm so mighty, i can make light!
On the other hand -let Raspberry Pi GPIO controll LEDs that external powered- could handle the power problem with the Pi GPIOs.
I start reading ... AH transistors ... multiplier hfe ... what? ... RTFM ... ah gpio->resistor->transistor->"CONTROL" ... after days of reading
physics, math, calculating, understanding, failing and keyboard biteing the plan stands with bias resistors for transistor controll and
matching LED resistor arrays.
I ask a colleague for checking my calculations and he advised Darlinton-Arrays to me.
Darlington Arrays combine all the suff i calculated days ago and its build for TTL inputs from Pi's GPIO, great! Thanks Robert!
So all i need is calculate the LED bias resistors and combine everything on a small prefboad. Thanks to www.fritzing.org i can provide a full circuit diagram for rebuilding it yourself!
The Prefboad
The prefboad buffers 14 GPIO pins(3.3v) to 5v include 12x 150Ohm resistors and 2x 300(2x150)Ohm.
One GPIO (pin 26 3.3v OUT) used without Darlington Array as one LED controll with bias resistor.
Two buttons connected to I2C witch allready has a 1.8kOhm pull-up resistor so i don't need resistors for button controll.
So you get 15 ouputs(3 onBoard) and 2 Inputs.
I use the 12(150Ohm) as chaser lights on my remix of http://www.thingiverse.com/thing:155262 ,
the three on board LEDs for OctoPrint Sever and Printer status (Server Startup, Printer Connected etc)
and the 2 Buttons for chaser light controll (play funky light sequences)
The curse of logic
Cause the presents of 1.8kOhm Pull-Up resistors i use the SDA/SCL as inputs for Buttons.
Addressed: Pin 3,5 - GPIO-BCM(Rev.2 Board) 2,3, WireingPi Pin 8,9
The Pull-Ups turn the inputs to HIGH, in default state your Buttonpress turn the Input to LOW.
So:
Pressed = 0, Low, False
Normal = 1, High, True
That annoying behavior looks kind of "unlogic" ... so i connect the Buttons (they have two connections for Pressed = connected or Pressed = cut Connection)
other way to get a logic behavoir: Pressed = 1,True Normal = 0,False.
While you connect the Buttons after Booting this works perfect!
BUT after i try to restart the "RainbowScreen" stays and no SD-Card Reading was recognizable (little green LED on Pi).
That driving me nuts, everything works fine AFTER booting ... some coffes later i decided to trail and error this out!
All measurements going fine - no shorts, no unwanted soldering ... have to be a logic problem!
It was .. MY Logic problem!
After turnaround the Buttons logic i short circuit the Pi itself through connect ping 3,5 to ground over the Buttons.
Pi Boots if you press both buttons, nice for unwanted access (noobs blocked, too) but very annoying for development.
Turnd the buttons back to "normal" behavior:
Pressed = 0, False, Low
Unpressed = 1, True, High
and handle this in Code :]
The Code
It's my first Python-Project ever so don't be harsh, i'm open minded and happy about codereviews and feedback :)
All python code can be found here https://github.com/thomaskneisel/LightRider
I'm still a Python noob so its stay a while in "progress" :)
Here are my Project Targets:
get rid off that "fleshburningsunlike" living room lamp
until i use Sörli - the first 3D-Printer part Ikea ever invented (good job btw) - everytime i watch the
printer doing his work i get blinded for 4-5 min
Now you say: "Stop watching, you dirty peeper!", but i love to watch my little printer working :D
learn some "useable" Elektronics
controll something "really useful" with a self written program
Microcontroller concept
Raspberry Pi GPIO as "Microcontroller"
Watt is Voltage and Current ;)
"Short Circuit" is not a Hipster-Band, its not even a friend!
Calculate bias resistor for LEDs
Transistors or "why Darlington Arrays are awesome!"
Soldering - don't burn yourself! - still try that
Build concepts on Breadboard
Plan own Prefboards on Computer
Build my own "hardware"
don't incinerate my Raspberry Pi, printer, house or myself!
learn Python
Syntax
Project Structure
OOP
CommandLine tool
Raspberry Pi GPIO with Python
Input handling with running program e.g. ButtonDaemon(BuDae)
UnitTesting (@TODO)
"read" and understand code from an other person
let OctoPrint take controll of hardware
On Board Status Lights
run chaser light sequences by event
create some GUI Command to permit control
try "Event Driven Command Line API" (Stateless)
How To RPC in Python ?
Controll via 2 Hardware Buttons
On/Off - keep lights on, overwrite states from other instances!
while Sequence playing to break sequence loop (static var ?)
Program-Button
plays sequences incremental
import all from sequence folder
loops until On/Off Button - to stop sequence looping
Press for next sequence
consolidate openScad skills
reuse code (screws)
How to use for loops to place reapeated holes in circular shape
"Remix by rebuild"
Unite OpenSource Prints with OpenSource Code based on a OpenSource Platform controll OpenSource 3D-Printer!
http://www.thingiverse.com/
http://www.github.com/
http://www.raspberrypi.org/
http://reprap.org/wiki/RepRap/
OpenWorld!
drink a lot of coffee :D
"Use" English as Project language
Till we "Start hacking away" in Job
Similar models
thingiverse
free

Raspberry Pi Switched LED Nightlight
...istor
i've gone as high was 8 whites, or 6 reds powered from a 12v supply, but that's overkill for that small of a light.
thingiverse
free

Raspberry Pi Bumper Button Holder by techyg
...ton that i am using with this design:https://www.amazon.com/gp/product/b01dz8cowk/ref=oh_aui_detailpage_o01_s01?ie=utf8&psc=1
thingiverse
free

Ender 3 Raspberry Pi 3 Case Switch Version
...a-power-button-to-your-raspberry-pi
led:https://howchoo.com/g/ytzjyzy4m2e/build-a-simple-raspberry-pi-led-power-status-indicator
thingiverse
free

DIY MIDI Controller with LED Arcade Buttons and Raspberry Pi Pico by adafruit
...41
arcade button with led - 30mmhttps://www.adafruit.com/product/3491
5-way navigation switchhttps://www.adafruit.com/product/504
thingiverse
free

Raspberry Pi Camera IR LED mount
... to pull the voltage down for the leds. do not try to run 4 leds directly from gpio, use a transistor if you want to switch them.
thingiverse
free

Raspberry pi controller by HunterM
...all and use the scratchgpio are on, (http://cymplecy.wordpress.com/2013/04/22/scratch-gpio-version-2-introduction-for-beginners/)
thingiverse
free

Arcade Button Frame by protospork
... shell scripts, to gpio inputs.
the buttons are just momentary switches and they're pretty cheap and reasonably good looking.
thingiverse
free

On/Off Button mount for Makerselect v2/wanhao duplicator. by mkanoap
... &
now enjoy turning your printer on and off with the press of a button, while still being able to control it from octoprint.
thingiverse
free

Raspberry Pi 40mm Fan Mount by Homwer
... fan
40mm fan grill
3x led 3mm
3x 56 ohm resistor
1x bc337 transisitor
4x m2,5x10mm spacer
8x m2,5x4mm screws
4x m2,5x16mm screws
grabcad
free

ULN2803A
...uln2803a
grabcad
uln2803a darlington transistor arrays
Geisel
3d_export
$18

Sci-fi Laboratory block 002
...is a sci-fi laboratory block highly inspired by the geisel library,california. it is an addition to the sci-fi 002...
thingiverse
free

K8200 frame lock by Geisel
...me lock by geisel
thingiverse
k8200 frame adapter for my uniboard.
update:
rename scad objects
better nut fitting in lock
thingiverse
free

M3 Tool Holder by Geisel
...emix and combination for uniboard adapter (http://www.thingiverse.com/thing:218891) for 2 tweezers and 3mm hole for screw driver
thingiverse
free

Raspberry Pi Cam Arm by Geisel
...nculdes all elements in different layouts except http://www.thingiverse.com/thing:218891.
uniboard compatible(20mm screwholes).
thingiverse
free

"Third Hand" Magnifier replacement by Geisel
...arts:
"third hand"
magnifier glass(50mm, 5.5 - 2.4 convex)
1 x m3 hexagon full nut (din 934)
1 x m3 (cheese head) screw
cg_trader
$10

Geisel Library
...isel library
cg trader
3d model geisel library , available formats obj, 3ds, stl, blend, dae, abc, ready for 3d animation and ot
cg_trader
free

UCSD Geisel Library
...by chenda va of the arc hub pnh team and 3d printed in cambodia! ucsd geisel library landmark architecture architectural exterior
cg_trader
$199

Geisel Library
...s created on real base. it’s created accurately, in real units of measurement, qualitatively and maximally close to the original.
cg_trader
$9

Grinch | 3D
...christmas! is a children's story by theodor dr. seuss geisel written in rhymed verse with illustrations by the author....