GrabCAD
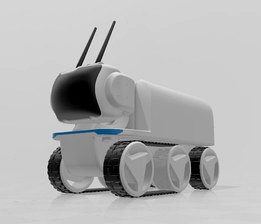
LEVi Rover Raspberry Pi Modular Robot Platform
by GrabCAD
Last crawled date: 1 year, 10 months ago
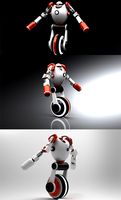
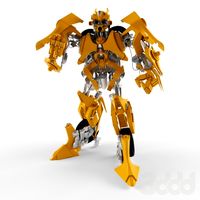
Hello everyone, let me introduce myself. I am Josh Starnes, an Application Development student at Western Govoners University. I have taken some time to develope this first edition of the LEVi Rover Robot platform. The original purpose was to have a multi use platform that can perform many tasks by adding on accessories to expand capability. The first accessory that I started test was for mowing the lawn. An extremely satisfying experience when you see the fruits of hard word, doing your hard work maintaining your beautiful turf. :)
The options do not stop here, the purpose of this project is to put a vanilla unmodified platform out in the wild so that accessories can be cultivated for that intended task. It could be a floor scrubber, a pressure washer, or even a leaf vacuum. Levi could play giant sized robo soccer and SUMO match agianst another LEVi! The options are endless and I would love to see this platform make a way into the educational classroom.
I will continue to update this project. Eventually I would like to make molds that I can use to pop out copies of the robot in resin, until then if you need one printed then this is possible. It is not cheap because it requires a lot of filament, but it could save thousands over buying even the most basic educational platforms of this size.
I do ask that everyone who downloads and prints this project keep the name LEVi Rover and also provides credit to me the creator. This helps me keep track as google indexes photos and project posts on the internet. This is ultimately a project for school.
ABOUT THE MODEL
TIres- The tires are meant to me printed in plastic and then a mold made with silicon. Liquid rubber can be mixed with pigment or powdered carbon to give it a tough but flexible texture. You can however combine and print the tire and wheel together as one piece if you wanted a simpler approach.
Tracks- The tracks CANNOT be printed and used in plastic, they are too rigid. You could print them in ninja flex, but I prefer to make a cast from a mold just like discussed with the Tires. I have a file loaded with the track stretched out into a big round circle. Unless your printer is very large you will want to slice this up into 4 pieces and reorient on your printers bed. When it is printed, you will need to glue together all the peices and fill the cracks if there are any. Then cast the large track ring in rubber. I would make a mold box that gets within a inch of the track model so that you are not wasting a gallon of expensive rubber filling the large voide in the center of the mold. You may need to underside the scaled maybe 1-5 percent in order to get some tension on the wheels. Try printing in the normal shape first to check sizing.
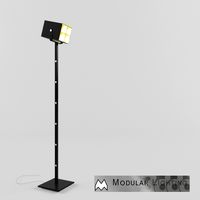
Headlights and Tail Lights- These are basically a place holder. You can print them and put some leds in them for good lighting, you could leave the covers off and fill the area with epoxy to encapsulate any leds you put in there too.
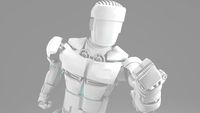
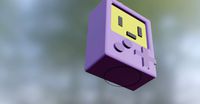
Head/ face- The face is colored black , but the long run purpose is to print the face and then use vacuum molding to make a copy in acrylic or plexiglass. Then you can tint that plastic with grey or black clothing dye and warm water.
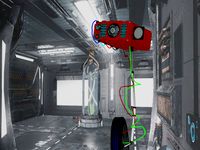
The Raspberry pi and other electronics are supposed to be printed on DIN mount cards and mounted on the DIN rail rack on the inside of the body behind the head area.
Movement-
Head- uses two standard sized servos
Wheels- uses 6 x 120rpm worm gear 12v motors
Credits- The DIN files are from another contributer " imstrng " on thingiverse, I included them in this post in case theirs is ever removed as they are incorperated into this project.
https://www.thingiverse.com/thing:2610621
The options do not stop here, the purpose of this project is to put a vanilla unmodified platform out in the wild so that accessories can be cultivated for that intended task. It could be a floor scrubber, a pressure washer, or even a leaf vacuum. Levi could play giant sized robo soccer and SUMO match agianst another LEVi! The options are endless and I would love to see this platform make a way into the educational classroom.
I will continue to update this project. Eventually I would like to make molds that I can use to pop out copies of the robot in resin, until then if you need one printed then this is possible. It is not cheap because it requires a lot of filament, but it could save thousands over buying even the most basic educational platforms of this size.
I do ask that everyone who downloads and prints this project keep the name LEVi Rover and also provides credit to me the creator. This helps me keep track as google indexes photos and project posts on the internet. This is ultimately a project for school.
ABOUT THE MODEL
TIres- The tires are meant to me printed in plastic and then a mold made with silicon. Liquid rubber can be mixed with pigment or powdered carbon to give it a tough but flexible texture. You can however combine and print the tire and wheel together as one piece if you wanted a simpler approach.
Tracks- The tracks CANNOT be printed and used in plastic, they are too rigid. You could print them in ninja flex, but I prefer to make a cast from a mold just like discussed with the Tires. I have a file loaded with the track stretched out into a big round circle. Unless your printer is very large you will want to slice this up into 4 pieces and reorient on your printers bed. When it is printed, you will need to glue together all the peices and fill the cracks if there are any. Then cast the large track ring in rubber. I would make a mold box that gets within a inch of the track model so that you are not wasting a gallon of expensive rubber filling the large voide in the center of the mold. You may need to underside the scaled maybe 1-5 percent in order to get some tension on the wheels. Try printing in the normal shape first to check sizing.
Headlights and Tail Lights- These are basically a place holder. You can print them and put some leds in them for good lighting, you could leave the covers off and fill the area with epoxy to encapsulate any leds you put in there too.
Head/ face- The face is colored black , but the long run purpose is to print the face and then use vacuum molding to make a copy in acrylic or plexiglass. Then you can tint that plastic with grey or black clothing dye and warm water.
The Raspberry pi and other electronics are supposed to be printed on DIN mount cards and mounted on the DIN rail rack on the inside of the body behind the head area.
Movement-
Head- uses two standard sized servos
Wheels- uses 6 x 120rpm worm gear 12v motors
Credits- The DIN files are from another contributer " imstrng " on thingiverse, I included them in this post in case theirs is ever removed as they are incorperated into this project.
https://www.thingiverse.com/thing:2610621
Similar models
thingiverse
free

LEVi Rover Raspberry Pi Modular Robot , OPEN Hardware, 3D Print Edition
... in this post in case theirs is ever removed as they are incorporated into this project.https://www.thingiverse.com/thing:2610621
cg_trader
$15

RC Wheel and Tire - Extreme | 3D
...e ugv super model big robot diy engine motor differential truck rally heavy duty military bone miniature hobby hobby diy robotics
cg_trader
$5

3D printable - RC Truck wheel and tire kit | 3D
...tures rc off road robot drone diy rally rubber big truck best project rover mechanical toy mountain tractor games toys games toys
thingiverse
free

Molding Silicone Rubber Tire with PLA printed mold
...molding silicone rubber tire with pla printed mold
thingiverse
molding a silicon rubber tires for any vehicle project.
cg_trader
free

BASE FOR SILICONE MOLDS PLASTER ETC
...n scale it and print it to the size you want. i hope it helps you for your projects. mold silicone resin 3d print character other
thingiverse
free

Chocolate BB-8 Mold by Gobbla
... remove bb-8 from the mold and enjoy.
print in pet or abs
for abs:
print both sides and brush them with some acetone abs mixture.
grabcad
free

Amp Clam shell covers
...amp clam shell covers
grabcad
a continuation, i will make plastic molds for these, but these could be printed and used
grabcad
free

RC CAR Concept (Part4)
...ng.
the tires can be made by molding, or 3d printed using flexible materials.
the idea for this car design is to make it printed.
thingiverse
free

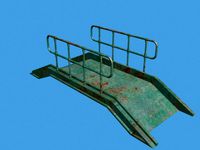
Rover Tracks v2 by nahueltaibo
... designing this. if you like it and want to say thanks by giving me a tip and help me continue to make amazing things!
good luck!
grabcad
free

RC CAR Concept (Part3)
... printing.
the tires can be made by molding, or 3d printed using flexible materials.
the idea for this car is to make it printed.
Levi
3ddd
free

Meridiani Levis Up divan
..., угловой
модульный диван на металлических ножках levis up итальянской фирмы meridiani.
turbosquid
$100

Levis Grinder.3ds
... available on turbo squid, the world's leading provider of digital 3d models for visualization, films, television, and games.
3ddd
free

Edward Ferrell + Levis Mittman DOGWOOD BENCH
... edward ferrell , levis mittman
be7880
dimensions: 61”w x 25.5”d x 26”h
3d_export
$12

levi ackerman - shingeki no kyojin - attack on titan
...levi ackerman - shingeki no kyojin - attack on titan
3dexport
no subdivision
humster3d
$150

3D model of Levi’s Stadium
...uy a detailed 3d model of levi’s stadium in various file formats. all our 3d models were created maximally close to the original.
turbosquid
$3

Bernhardt Forest Arik Levy Bar Stool
... forest arik levy bar stool for download as 3ds, max, and obj on turbosquid: 3d models for games, architecture, videos. (1476391)
3ddd
$1

LEVI'S мужская
...levi's мужская
3ddd
сумка
мужская сумка, моделил с оригинала с соблюдением размеров, текстуры прилагаются
turbosquid
$35

Levis Mens Desoto Burnish Low-Top Sneakers
...op sneakers for download as 3ds, max, obj, fbx, dae, and gltf on turbosquid: 3d models for games, architecture, videos. (1441276)
3ddd
$1

Patchwork Table
...chwork , журнальный , круглый
дизайн: arik levy
3ddd
free

VIBIA Rhythm
...vibia rhythm
3ddd
vibia
rhythm 2112
дизайнер: arik levy
Rover
3d_ocean
$89
Land-Rover Range Rover 2011
...andling have been transformed with the introduction of new engines, transmission and chassis systems. combine these enhancemen...
3d_export
$20
land rover
...land rover
3dexport
land rover
3d_export
$14

Land Rover Range Rover 2022
...land rover range rover 2022
3dexport
3d_export
$39

land rover range rover iii
... rover iii
3dexport
land rover range rover iii, year 2002.<br>model with high quality finishing on the outside and inside.
3d_export
$7

the rover
...the rover
3dexport
turbosquid
$5
Rover
...royalty free 3d model rover for download as max, obj, and fbx on turbosquid: 3d models for games, architecture, videos. (1673120)
3d_ocean
$89
Land Rover Range Rover 1986
...y, in real units of measurement, qualitatively and maximally close to the original. model formats: - *.max (3ds max 2008 scanl...
3d_export
$29

Land Rover Range Rover 1993 3D Model
... rover range rover 1993 3d model
3dexport
land rover range 1993
land rover range rover 1993 3d model 3dlogicline 39509 3dexport
3d_export
$69
Land Rover Range Rover Velar 2023
...land rover range rover velar 2023
3dexport
3d_export
$20

land rover range rover
...e apps.<br>car textures:png - 2k resolution other available formats: obj, 3ds, fbx, max. polycount: 35742 poly / 37163 tris
Raspberry
3d_export
free

raspberry
...raspberry
3dexport
3d model of a raspberry. i tried to make it realistic.
turbosquid
$27

Raspberries
...y free 3d model raspberries for download as max, obj, and stl on turbosquid: 3d models for games, architecture, videos. (1354176)
3d_export
$5

raspberry pi
...raspberry pi
3dexport
carcasa para la raspberry pi
turbosquid
$99

Raspberry
... available on turbo squid, the world's leading provider of digital 3d models for visualization, films, television, and games.
turbosquid
$10

raspberries
... available on turbo squid, the world's leading provider of digital 3d models for visualization, films, television, and games.
archive3d
free

Raspberries 3D Model
...raspberries 3d model archive3d raspberries raspberry raspberries n300911 - 3d model (*.3ds) for interior 3d...
3d_export
$5

raspberry fruit
...raspberry fruit
3dexport
3d_export
$5

raspberry
...y different sizes. their color ranges from light burgundy to pink. there are formats: obj, 3ds, blend, dae, fbx, mtl.<br>:)
evermotion
$12

raspberries 23 am130
...evermotion raspberries 23 am130 evermotion key 23 food fruit raspberry fruits am130 raspberries highly detailed 3d model of raspberries...
turbosquid
$59

Raspberry collection
...ree 3d model raspberry collection for download as 3ds and max on turbosquid: 3d models for games, architecture, videos. (1159260)
Pi
design_connected
$11

Pi
...pi
designconnected
ligne roset pi chairs computer generated 3d model. designed by thibault desombre.
3d_export
$5
raspberry pi
...raspberry pi
3dexport
carcasa para la raspberry pi
turbosquid
$18

pied
... available on turbo squid, the world's leading provider of digital 3d models for visualization, films, television, and games.
3ddd
$1

Emme pi light
...emme pi light
3ddd
emme pi light
люста emme pi light
3ddd
$1

Emme pi light
...emme pi light
3ddd
emme pi light
бра классическое emme pi light
3ddd
$1

Emme Pi Light
...emme pi light
3ddd
emme pi light
3ddd
$1

Emme Pi Light
...emme pi light
3ddd
emme pi light
design_connected
$16

Pi-Air
...pi-air
designconnected
living divani pi-air lounge chairs computer generated 3d model. designed by harry & camila.
3d_ocean
$15

Manneken Pis
...picting a naked little boy urinating into a fountain’s basin. (wikipedia) the model was sculpted in blender 2.70a rendered wit...
3ddd
$1

Emme pi light
...emme pi light
3ddd
emme pi light
люстра классическая фирма: emme pi light
артикул: 3595/5/cot/12/wh
Platform
archibase_planet
free
Platform
...rm
archibase planet
platform
platform stefano galli savio cerrato n040413 - 3d model (*.gsm+*.3ds) for exterior 3d visualization.
turbosquid
$4
Platform
...d
royalty free 3d model platform for download as max and fbx on turbosquid: 3d models for games, architecture, videos. (1363559)
3d_export
$5
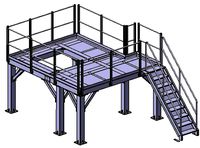
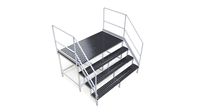
WORKING PLATFORM
...working platform
3dexport
working platform 4000x3000x1500mm
turbosquid
$20
Platform
... available on turbo squid, the world's leading provider of digital 3d models for visualization, films, television, and games.
turbosquid
$9
Platform
... available on turbo squid, the world's leading provider of digital 3d models for visualization, films, television, and games.
turbosquid
$1
Platform
... available on turbo squid, the world's leading provider of digital 3d models for visualization, films, television, and games.
turbosquid
$1

Platform
... available on turbo squid, the world's leading provider of digital 3d models for visualization, films, television, and games.
turbosquid
$1
Platform
... available on turbo squid, the world's leading provider of digital 3d models for visualization, films, television, and games.
3d_ocean
$19
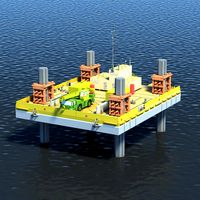
Drilling Platform
...rm for coastal areas. designed to perform drilling operations. include standart materials scene and v-ray scene with environment.
3d_export
$15
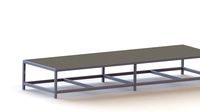
steel grill platform
...steel grill platform
3dexport
steel grill platform
Modular
3ddd
$1
MODULAR
...modular
3ddd
modular , врезной свет
modular потолочные светильники
3ddd
$1
Modular Spock
...modular spock
3ddd
modular
modular spock
3ddd
$1
MODULAR / Spock
...modular / spock
3ddd
modular
modular/spock
design_connected
$7
Modular
...modular
designconnected
emmemobili modular shelves and storage computer generated 3d model. designed by ferruccio laviani.
3ddd
$1
Modular spock
...modular spock
3ddd
modular
spock wall led
turbosquid
$25
Modular sofa Angelo Cappellini Modular
...a angelo cappellini modular for download as max, fbx, and obj on turbosquid: 3d models for games, architecture, videos. (1570923)
turbosquid
$15
Modular sofa Angelo Cappellini Modular
...a angelo cappellini modular for download as max, fbx, and obj on turbosquid: 3d models for games, architecture, videos. (1570304)
3ddd
$1
Modular 2FLAT2C
...modular 2flat2c
3ddd
modular
modularhttp://www.supermodular.com/
3d_export
free
Modular walls
...modular walls
3dexport
modular walls for playing without materials and textures
3ddd
$1
Modular / Lighting Juliette
...modular / lighting juliette
3ddd
modular
modular lighting juliette
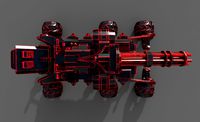
Robot
3d_ocean
$20

Robot
...robot
3docean
character metal robot robot robotic white
robot model for 3dsmax 2009 and greater
3d_ocean
$45
Robot
...robot
3docean
fighing machine robot
a fighting robot from the scrapyard.
3d_ocean
$18
Robot
...robot
3docean
machin robot science fiction
high poly robot.
3d_export
$7

Robot
...robot
3dexport
robot
3d_export
$5
robot
...robot
3dexport
robot
3d_export
free
Robot
...robot
3dexport
robot
turbosquid
$10
Robot/ Alien Robot
...
royalty free 3d model robot/ alien robot for download as max on turbosquid: 3d models for games, architecture, videos. (1442828)
3d_export
$5

robot
...robot
3dexport
robot in blender
3ddd
$1
robot
...robot
3ddd
робот
robot
3ddd
$1

Robot
...robot
3ddd
робот
robot