Thingiverse
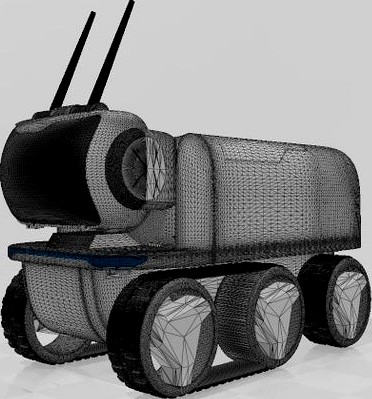
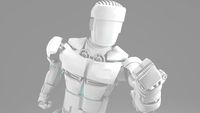
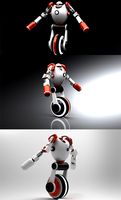
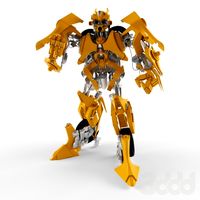
LEVi Rover Raspberry Pi Modular Robot , OPEN Hardware, 3D Print Edition
by Thingiverse
Last crawled date: 4 years, 2 months ago
Facbook Group dedicated to prints, mods and builds https://www.facebook.com/groups/810303052767348/
Update 1.23.2020 - All parts have been uploaded split for smaller beds like a Replicator 2 or a Ender 3 for example. You will want to open the parts in 3d Builder and delete every piece of the split except the one your about to print and save that part. I recommend numbering them. I did not individually do this because of the shear amount of pieces would mean a lot of files to keep up with.
Myself-
Hello everyone, let me introduce myself. I am Josh Starnes, an Application Development student at Western Governors University. I have taken some time to develop this first edition of the LEVi Rover Robot platform. The original purpose was to have a multi-use platform that can perform many tasks by adding on accessories to expand capability. The first accessory that I started test was for mowing the lawn. An extremely satisfying experience when you see the fruits of hard word, doing your hard work maintaining your beautiful turf. :)
The options do not stop here, the purpose of this project is to put a vanilla unmodified platform out in the wild so that accessories can be cultivated for that intended task. It could be a floor scrubber, a pressure washer, or even a leaf vacuum. Levi could play giant sized robot soccer and SUMO match against another LEVi! The options are endless and I would love to see this platform make a way into the educational classroom.
I will continue to update this project. Eventually I would like to make molds that I can use to pop out copies of the robot in resin, until then if you need one printed then this is possible. It is not cheap because it requires a lot of filament, but it could save thousands over buying even the most basic educational platforms of this size.
I do ask that everyone who downloads and prints this project keep the name LEVi Rover and also provides credit to me the creator. This helps me keep track as google indexes photos and project posts on the internet. This is ultimately a project for school.
ABOUT THE MODEL
Tires- The tires are meant to me printed in plastic and then a mold made with silicon. Liquid rubber can be mixed with pigment or powdered carbon to give it a tough but flexible texture. You can however combine and print the tire and wheel together as one piece if you wanted a simpler approach.
Tracks- The tracks CANNOT be printed and used in plastic, they are too rigid. You could print them in ninja flex, but I prefer to make a cast from a mold just like discussed with the Tires. I have a file loaded with the track stretched out into a big round circle. Unless your printer is very large you will want to slice this up into 4 pieces and reorient on your printers bed. When it is printed, you will need to glue together all the pieces and fill the cracks if there are any. Then cast the large track ring in rubber. I would make a mold box that gets within a inch of the track model so that you are not wasting a gallon of expensive rubber filling the large void in the center of the mold. You may need to underside the scaled maybe 1-5 percent in order to get some tension on the wheels. Try printing in the normal shape first to check sizing.
Headlights and Tail Lights- These are basically a place holder. You can print them and put some LEDs in them for good lighting, you could leave the covers off and fill the area with epoxy to encapsulate any LEDS you put in there too.
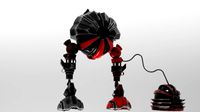
Head/ face- The face is colored black , but the long run purpose is to print the face and then use vacuum molding to make a copy in acrylic or Plexiglas. Then you can tint that plastic with grey or black clothing dye and warm water.
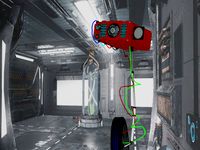
The Raspberry pi and other electronics are supposed to be printed on DIN mount cards and mounted on the DIN rail rack on the inside of the body behind the head area.
Movement-
Head- uses two standard sized servos
Wheels- uses 6 x 120rpm worm gear 12v motors
Credits- The DIN files are from another contributor " imstrng " on thingiverse, I included them in this post in case theirs is ever removed as they are incorporated into this project.https://www.thingiverse.com/thing:2610621
Update 1.23.2020 - All parts have been uploaded split for smaller beds like a Replicator 2 or a Ender 3 for example. You will want to open the parts in 3d Builder and delete every piece of the split except the one your about to print and save that part. I recommend numbering them. I did not individually do this because of the shear amount of pieces would mean a lot of files to keep up with.
Myself-
Hello everyone, let me introduce myself. I am Josh Starnes, an Application Development student at Western Governors University. I have taken some time to develop this first edition of the LEVi Rover Robot platform. The original purpose was to have a multi-use platform that can perform many tasks by adding on accessories to expand capability. The first accessory that I started test was for mowing the lawn. An extremely satisfying experience when you see the fruits of hard word, doing your hard work maintaining your beautiful turf. :)
The options do not stop here, the purpose of this project is to put a vanilla unmodified platform out in the wild so that accessories can be cultivated for that intended task. It could be a floor scrubber, a pressure washer, or even a leaf vacuum. Levi could play giant sized robot soccer and SUMO match against another LEVi! The options are endless and I would love to see this platform make a way into the educational classroom.
I will continue to update this project. Eventually I would like to make molds that I can use to pop out copies of the robot in resin, until then if you need one printed then this is possible. It is not cheap because it requires a lot of filament, but it could save thousands over buying even the most basic educational platforms of this size.
I do ask that everyone who downloads and prints this project keep the name LEVi Rover and also provides credit to me the creator. This helps me keep track as google indexes photos and project posts on the internet. This is ultimately a project for school.
ABOUT THE MODEL
Tires- The tires are meant to me printed in plastic and then a mold made with silicon. Liquid rubber can be mixed with pigment or powdered carbon to give it a tough but flexible texture. You can however combine and print the tire and wheel together as one piece if you wanted a simpler approach.
Tracks- The tracks CANNOT be printed and used in plastic, they are too rigid. You could print them in ninja flex, but I prefer to make a cast from a mold just like discussed with the Tires. I have a file loaded with the track stretched out into a big round circle. Unless your printer is very large you will want to slice this up into 4 pieces and reorient on your printers bed. When it is printed, you will need to glue together all the pieces and fill the cracks if there are any. Then cast the large track ring in rubber. I would make a mold box that gets within a inch of the track model so that you are not wasting a gallon of expensive rubber filling the large void in the center of the mold. You may need to underside the scaled maybe 1-5 percent in order to get some tension on the wheels. Try printing in the normal shape first to check sizing.
Headlights and Tail Lights- These are basically a place holder. You can print them and put some LEDs in them for good lighting, you could leave the covers off and fill the area with epoxy to encapsulate any LEDS you put in there too.
Head/ face- The face is colored black , but the long run purpose is to print the face and then use vacuum molding to make a copy in acrylic or Plexiglas. Then you can tint that plastic with grey or black clothing dye and warm water.
The Raspberry pi and other electronics are supposed to be printed on DIN mount cards and mounted on the DIN rail rack on the inside of the body behind the head area.
Movement-
Head- uses two standard sized servos
Wheels- uses 6 x 120rpm worm gear 12v motors
Credits- The DIN files are from another contributor " imstrng " on thingiverse, I included them in this post in case theirs is ever removed as they are incorporated into this project.https://www.thingiverse.com/thing:2610621
Similar models
grabcad
free

LEVi Rover Raspberry Pi Modular Robot Platform
...in this post in case theirs is ever removed as they are incorperated into this project.
https://www.thingiverse.com/thing:2610621
thingiverse
free

Chocolate BB-8 Mold by Gobbla
... remove bb-8 from the mold and enjoy.
print in pet or abs
for abs:
print both sides and brush them with some acetone abs mixture.
cg_trader
$5

3D printable - RC Truck wheel and tire kit | 3D
...tures rc off road robot drone diy rally rubber big truck best project rover mechanical toy mountain tractor games toys games toys
cg_trader
$15

RC Wheel and Tire - Extreme | 3D
...e ugv super model big robot diy engine motor differential truck rally heavy duty military bone miniature hobby hobby diy robotics
thingiverse
free

Molding Silicone Rubber Tire with PLA printed mold
...molding silicone rubber tire with pla printed mold
thingiverse
molding a silicon rubber tires for any vehicle project.
thingiverse
free

Modular Rover Tracks - Adafruit Mini Red Round Robot Chassis by nahueltaibo
...
added v2 with external holes half millimeter further away as they were too close.
see this make for more history on this changes
thingiverse
free

Project Dong1 Dildo Mold
...o not stick that thing anywhere!
btw: can anyone tell me how to mark a thing nsfw? i cannot find any checkbox or tag or anything.
cg_trader
free

BASE FOR SILICONE MOLDS PLASTER ETC
...n scale it and print it to the size you want. i hope it helps you for your projects. mold silicone resin 3d print character other
thingiverse
free

1:14 oogoo truck tire mold. by Morpheus_vip
...eate mold to make them from oogoo. screw holes are 3 mm, you will need five m3 х 30 мм screw. i would suggest to use washers too.
thingiverse
free

Modular Rover Tracks by nahueltaibo
...end you the fusion 360 files.
update 2018-03-08
you can find an example on how to add this to an already existing chassis in here
Levi
3ddd
free

Meridiani Levis Up divan
..., угловой
модульный диван на металлических ножках levis up итальянской фирмы meridiani.
turbosquid
$100

Levis Grinder.3ds
... available on turbo squid, the world's leading provider of digital 3d models for visualization, films, television, and games.
3ddd
free

Edward Ferrell + Levis Mittman DOGWOOD BENCH
... edward ferrell , levis mittman
be7880
dimensions: 61”w x 25.5”d x 26”h
3d_export
$12

levi ackerman - shingeki no kyojin - attack on titan
...levi ackerman - shingeki no kyojin - attack on titan
3dexport
no subdivision
humster3d
$150

3D model of Levi’s Stadium
...uy a detailed 3d model of levi’s stadium in various file formats. all our 3d models were created maximally close to the original.
turbosquid
$3

Bernhardt Forest Arik Levy Bar Stool
... forest arik levy bar stool for download as 3ds, max, and obj on turbosquid: 3d models for games, architecture, videos. (1476391)
3ddd
$1

LEVI'S мужская
...levi's мужская
3ddd
сумка
мужская сумка, моделил с оригинала с соблюдением размеров, текстуры прилагаются
turbosquid
$35

Levis Mens Desoto Burnish Low-Top Sneakers
...op sneakers for download as 3ds, max, obj, fbx, dae, and gltf on turbosquid: 3d models for games, architecture, videos. (1441276)
3ddd
$1

Patchwork Table
...chwork , журнальный , круглый
дизайн: arik levy
3ddd
free

VIBIA Rhythm
...vibia rhythm
3ddd
vibia
rhythm 2112
дизайнер: arik levy
Rover
3d_ocean
$89
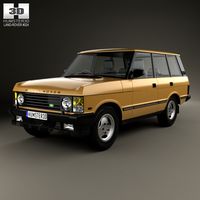
Land-Rover Range Rover 2011
...andling have been transformed with the introduction of new engines, transmission and chassis systems. combine these enhancemen...
3d_export
$20
land rover
...land rover
3dexport
land rover
3d_export
$14

Land Rover Range Rover 2022
...land rover range rover 2022
3dexport
3d_export
$39

land rover range rover iii
... rover iii
3dexport
land rover range rover iii, year 2002.<br>model with high quality finishing on the outside and inside.
3d_export
$7

the rover
...the rover
3dexport
turbosquid
$5
Rover
...royalty free 3d model rover for download as max, obj, and fbx on turbosquid: 3d models for games, architecture, videos. (1673120)
3d_ocean
$89
Land Rover Range Rover 1986
...y, in real units of measurement, qualitatively and maximally close to the original. model formats: - *.max (3ds max 2008 scanl...
3d_export
$29

Land Rover Range Rover 1993 3D Model
... rover range rover 1993 3d model
3dexport
land rover range 1993
land rover range rover 1993 3d model 3dlogicline 39509 3dexport
3d_export
$69

Land Rover Range Rover Velar 2023
...land rover range rover velar 2023
3dexport
3d_export
$20

land rover range rover
...e apps.<br>car textures:png - 2k resolution other available formats: obj, 3ds, fbx, max. polycount: 35742 poly / 37163 tris
Raspberry
3d_export
free

raspberry
...raspberry
3dexport
3d model of a raspberry. i tried to make it realistic.
turbosquid
$27

Raspberries
...y free 3d model raspberries for download as max, obj, and stl on turbosquid: 3d models for games, architecture, videos. (1354176)
turbosquid
$14

Raspberries
...y free 3d model raspberries for download as max, obj, and fbx on turbosquid: 3d models for games, architecture, videos. (1364663)
3d_export
$5

raspberry pi
...raspberry pi
3dexport
carcasa para la raspberry pi
turbosquid
$99

Raspberry
... available on turbo squid, the world's leading provider of digital 3d models for visualization, films, television, and games.
turbosquid
$10

raspberries
... available on turbo squid, the world's leading provider of digital 3d models for visualization, films, television, and games.
archive3d
free

Raspberries 3D Model
...raspberries 3d model archive3d raspberries raspberry raspberries n300911 - 3d model (*.3ds) for interior 3d...
3d_export
$5

raspberry fruit
...raspberry fruit
3dexport
3d_export
$5

raspberry
...y different sizes. their color ranges from light burgundy to pink. there are formats: obj, 3ds, blend, dae, fbx, mtl.<br>:)
evermotion
$12

raspberries 23 am130
...evermotion raspberries 23 am130 evermotion key 23 food fruit raspberry fruits am130 raspberries highly detailed 3d model of raspberries...
Pi
design_connected
$11

Pi
...pi
designconnected
ligne roset pi chairs computer generated 3d model. designed by thibault desombre.
3d_export
$5
raspberry pi
...raspberry pi
3dexport
carcasa para la raspberry pi
turbosquid
$18

pied
... available on turbo squid, the world's leading provider of digital 3d models for visualization, films, television, and games.
3ddd
$1

Emme pi light
...emme pi light
3ddd
emme pi light
люста emme pi light
3ddd
$1

Emme pi light
...emme pi light
3ddd
emme pi light
бра классическое emme pi light
3ddd
$1

Emme Pi Light
...emme pi light
3ddd
emme pi light
3ddd
$1

Emme Pi Light
...emme pi light
3ddd
emme pi light
design_connected
$16

Pi-Air
...pi-air
designconnected
living divani pi-air lounge chairs computer generated 3d model. designed by harry & camila.
3d_ocean
$15

Manneken Pis
...picting a naked little boy urinating into a fountain’s basin. (wikipedia) the model was sculpted in blender 2.70a rendered wit...
3ddd
$1

Emme pi light
...emme pi light
3ddd
emme pi light
люстра классическая фирма: emme pi light
артикул: 3595/5/cot/12/wh
Modular
3ddd
$1
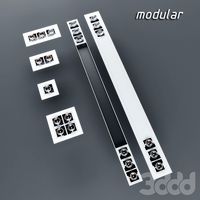
MODULAR
...modular
3ddd
modular , врезной свет
modular потолочные светильники
3ddd
$1
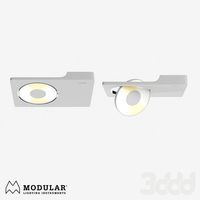
Modular Spock
...modular spock
3ddd
modular
modular spock
3ddd
$1
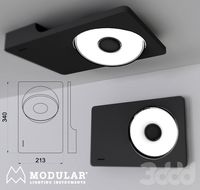
MODULAR / Spock
...modular / spock
3ddd
modular
modular/spock
design_connected
$7
Modular
...modular
designconnected
emmemobili modular shelves and storage computer generated 3d model. designed by ferruccio laviani.
3ddd
$1
Modular spock
...modular spock
3ddd
modular
spock wall led
turbosquid
$25
Modular sofa Angelo Cappellini Modular
...a angelo cappellini modular for download as max, fbx, and obj on turbosquid: 3d models for games, architecture, videos. (1570923)
turbosquid
$15
Modular sofa Angelo Cappellini Modular
...a angelo cappellini modular for download as max, fbx, and obj on turbosquid: 3d models for games, architecture, videos. (1570304)
3ddd
$1
Modular 2FLAT2C
...modular 2flat2c
3ddd
modular
modularhttp://www.supermodular.com/
3d_export
free
Modular walls
...modular walls
3dexport
modular walls for playing without materials and textures
3ddd
$1
Modular / Lighting Juliette
...modular / lighting juliette
3ddd
modular
modular lighting juliette
Hardware
3ddd
$1

Restoration Hardware
...restoration hardware
3ddd
restoration hardware
restoration hardware
3ddd
$1
RESTORATION HARDWARE
...restoration hardware
3ddd
restoration hardware , телескоп
restoration hardware
3ddd
$1

Restoration Hardware
...restoration hardware
3ddd
restoration hardware
restoration hardware, кресло,
3ddd
$1

Restoration Hardware
...restoration hardware
3ddd
restoration hardware , декоративный набор
restoration hardware
3ddd
$1

Restoration Hardware
...restoration hardware
3ddd
restoration hardware , декоративный набор
restoration hardware
3ddd
$1
Restoration Hardware
... hardware , боров , свинья
restoration hardware
3ddd
$1

Restoration Hardware
...ardware , корона , медведь
restoration hardware
3ddd
$1
Restoration Hardware
...ation hardware
3ddd
restoration hardware , тумба
тумба прикроватная restoration hardware
3ddd
free

Restoration Hardware
... кашпо , куст , свеча
restoration hardware
3ddd
free
Restoration Hardware
...restoration hardware
3ddd
restoration hardware
restoration hardware menlo table lamp
Robot
3d_ocean
$20

Robot
...robot
3docean
character metal robot robot robotic white
robot model for 3dsmax 2009 and greater
3d_ocean
$45
Robot
...robot
3docean
fighing machine robot
a fighting robot from the scrapyard.
3d_ocean
$18
Robot
...robot
3docean
machin robot science fiction
high poly robot.
3d_export
$7

Robot
...robot
3dexport
robot
3d_export
$5
robot
...robot
3dexport
robot
3d_export
free

Robot
...robot
3dexport
robot
turbosquid
$10
Robot/ Alien Robot
...
royalty free 3d model robot/ alien robot for download as max on turbosquid: 3d models for games, architecture, videos. (1442828)
3d_export
$5

robot
...robot
3dexport
robot in blender
3ddd
$1
robot
...robot
3ddd
робот
robot
3ddd
$1

Robot
...robot
3ddd
робот
robot
Edition
turbosquid
$33
Natuzzi Editions
... available on turbo squid, the world's leading provider of digital 3d models for visualization, films, television, and games.
turbosquid
$29
Guitar_MJ-Edition
... available on turbo squid, the world's leading provider of digital 3d models for visualization, films, television, and games.
turbosquid
$20
Editable Fountain
... available on turbo squid, the world's leading provider of digital 3d models for visualization, films, television, and games.
3ddd
$1

Kueco Edition Palais
...kueco edition palais
3ddd
keuco
зеркальный шкаф kueco edition palais
design_connected
$16
369 Classic Edition
...369 classic edition
designconnected
walter knoll 369 classic edition computer generated 3d model.
3ddd
$1
Martz Edition
...martz edition
3ddd
martzedition
http://www.martzedition.com/a-500-3
3ddd
$1

Martz Edition
...martz edition
3ddd
martzedition
http://www.martzedition.com/b-400-3
design_connected
$25
Chester - Limited Edition
...nnected
established & sons chester - limited edition computer generated 3d model. designed by future systems, amanda levete.
3ddd
$1
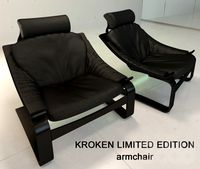
KROKEN LIMITED EDITION
...d
rochebobois
autumn/winter collections 2012 rochebobois paris
kroken limited edition armchairhttp://m.roche-bobois.com
3ddd
$1
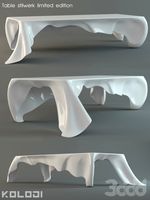
stilwerk limited edition
...stilwerk limited edition
3ddd
3000х1200х750
Open
3d_export
free
Opener
...r
3dexport
3d model of can opener. its my first work, if u can please show me my mistakes. this 3d model was created in autocad.
3d_export
free
Cap opener
...cap opener
3dexport
handy cap opener, more files/formats here:
3ddd
$1
Кресло, Open Oreon.
...кресло, open oreon.
3ddd
open , oreon
кресло, open oreon.
3d_ocean
$4
Open Book
...r interior max mental model open ray reading shelf text vray
open hardcover book with unique texture map on front and back cover.
turbosquid
$6
Opening Flag
...squid
royalty free 3d model opening flag for download as c4d on turbosquid: 3d models for games, architecture, videos. (1593555)
turbosquid
$10

Open book
...
royalty free 3d model open book for download as skp and obj on turbosquid: 3d models for games, architecture, videos. (1690781)
turbosquid
$2
bottle opener
...lty free 3d model bottle opener for download as blend and obj on turbosquid: 3d models for games, architecture, videos. (1621201)
turbosquid
$24

Bottle Opener
...free 3d model bottle opener for download as max, obj, and fbx on turbosquid: 3d models for games, architecture, videos. (1300948)
turbosquid
$20
Open Box
...yalty free 3d model open box for download as ma, obj, and fbx on turbosquid: 3d models for games, architecture, videos. (1481218)
turbosquid
$10

Wine Opener
...ty free 3d model wine opener for download as ma, obj, and fbx on turbosquid: 3d models for games, architecture, videos. (1240730)
design_connected
$27

...print
designconnected
moroso print computer generated 3d model. designed by wanders, marcel.
3ddd
free

Eichholtz Prints
...- eichholtz print central station i
13 - eichholtz print central station ii
14 - eichholtz print marisa
15 - eichholtz print tish
3ddd
$1

Eichholtz Prints
...print abstract - set of 2
10 - eichholtz print orange abstract
11 - eichholtz print buddha right
12 - eichholtz print buddha left
turbosquid
$1

... available on turbo squid, the world's leading provider of digital 3d models for visualization, films, television, and games.
3ddd
free

Eichholtz Prints
...of 4
2 - print dunbar 2 set of 4
3 - print guadeloupe 1 set of 4
4 - print guadeloupe 2 set of 4
5 - print giles
6 - print trett
3ddd
$1

Eichholtz Prints
...nt tutti frutti
3 - eichholtz prints watson - set of 2
4 - eichholtz prints antique nautilus - set of 2
5 - eichholtz print tiara
3d_export
$5

Monster for printing
...monster for printing
3dexport
monster 3d model printing
3ddd
free

printed rug
...printed rug
3ddd
ковер
very creative printed rug
3ddd
free

Eichholtz Prints
...иал: бумага
габариты (вхш): 72 x 62 см
описание: print sweetmeat - постер в деревянной раме.
3 - prints varsity set of 2
арти
3ddd
free

Art Print Posters
...art print posters
3ddd
прованс
art print posters by patrician prints