Thingiverse
LED USB candle by Unordung
by Thingiverse
Last crawled date: 3 years ago
https://youtu.be/d8oGNrZc4sUhttps://youtu.be/tYhKVuVkttQ
DISCLAIMER
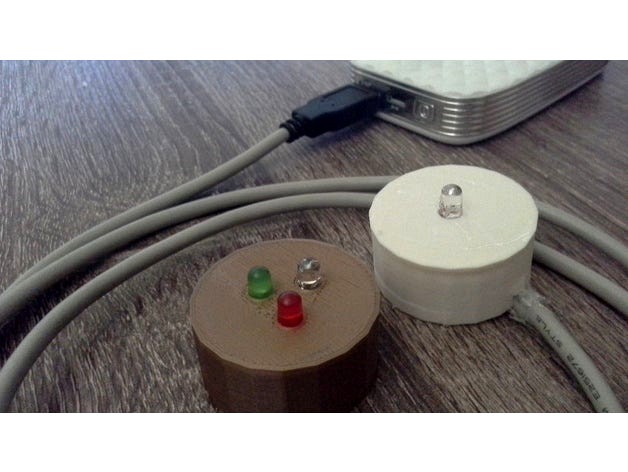
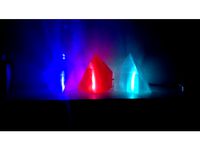
I used a flashing RGB lED for this project, however you can use any 5mm LED you choose. You can have it a solid color, slow changing or even a flickering candle LED.
If it's a 5mm LED it will fit. Just keep in mind that this setup will allow 27mA of current through the LED series. This is the high end to ensure maximum brightness please ensure your LED can comfortably handle this current. Failing that you can put a larger resistor a 200 ohm will produce 25mA, a 250 ohm 20mA and a 300ohm 16mA.
(For the more tech savvy thees calculations deliberately ignore the forward voltage of the LED as a way to ensure a safety buffer so don't bother trying to correct my math =)
INSTRUCTIONS
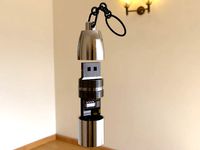
This was a simple project to replace the battery powered RGB LED candle in a night light I built for my son.
I originally designed the nightlight to work with an RGB LED candle from Ebay link below.http://www.ebay.com.au/itm/New-10-20-30-PCS-LED-WEDDING-TEA-LIGHT-TEALIGHT-CANDLE-FLICKERING-FLAMELESS/201168843821?_trksid=p2045573.c100033.m2042&_trkparms=aid%3D111001%26algo%3DREC.SEED%26ao%3D1%26asc%3D39923%26meid%3D53157d5a5e5e44468c973e67e06549d3%26pid%3D100033%26rk%3D3%26rkt%3D8%26sd%3D172158427096
To make this you will need a few things.
I used 1 - 3 5mm RGB Fast flashing LEDs link belowhttp://www.ebay.com.au/itm/5-8mm-LED-0-25-0-5W-Straw-Hat-Red-Blu-Grn-Whi-Fast-Slow-6Color-Waterclear-Emitt/252568823084?_trksid=p2045573.c100033.m2042&_trkparms=aid%3D111001%26algo%3DREC.SEED%26ao%3D1%26asc%3D39923%26meid%3D53157d5a5e5e44468c973e67e06549d3%26pid%3D100033%26rk%3D2%26rkt%3D8%26sd%3D172158427096
a 180 ohm resistor link belowhttp://www.ebay.com.au/itm/100pcs-1-4W-Watt-0-25W-Metal-Film-Resistor-180ohm-1-precision-/172158427096?hash=item2815711fd8:g:X6oAAOSwZ8ZXBERL
and just an old USB cable.
To make it all you need to do is cut off the unused end of the USB cable.
Strip back the insulating and shielding to expose the following wires.
Red = 5V+
Black = 0v or GND
White = Data +
Green = Data -
You don't need the white or green for this so cut them back and insulate them with tape.
Simply connect the red 5v+ wire to the anode of the LED (longer lead)
Solder the 180 ohm resistor to the cathode of the LED and the black wire from the USB to the other end of the resistor.
Remember to check it's operation in an old phone charger or a battery bank before plugging it into your expensive laptop or PC!!!!!
DISCLAIMER
I used a flashing RGB lED for this project, however you can use any 5mm LED you choose. You can have it a solid color, slow changing or even a flickering candle LED.
If it's a 5mm LED it will fit. Just keep in mind that this setup will allow 27mA of current through the LED series. This is the high end to ensure maximum brightness please ensure your LED can comfortably handle this current. Failing that you can put a larger resistor a 200 ohm will produce 25mA, a 250 ohm 20mA and a 300ohm 16mA.
(For the more tech savvy thees calculations deliberately ignore the forward voltage of the LED as a way to ensure a safety buffer so don't bother trying to correct my math =)
INSTRUCTIONS
This was a simple project to replace the battery powered RGB LED candle in a night light I built for my son.
I originally designed the nightlight to work with an RGB LED candle from Ebay link below.http://www.ebay.com.au/itm/New-10-20-30-PCS-LED-WEDDING-TEA-LIGHT-TEALIGHT-CANDLE-FLICKERING-FLAMELESS/201168843821?_trksid=p2045573.c100033.m2042&_trkparms=aid%3D111001%26algo%3DREC.SEED%26ao%3D1%26asc%3D39923%26meid%3D53157d5a5e5e44468c973e67e06549d3%26pid%3D100033%26rk%3D3%26rkt%3D8%26sd%3D172158427096
To make this you will need a few things.
I used 1 - 3 5mm RGB Fast flashing LEDs link belowhttp://www.ebay.com.au/itm/5-8mm-LED-0-25-0-5W-Straw-Hat-Red-Blu-Grn-Whi-Fast-Slow-6Color-Waterclear-Emitt/252568823084?_trksid=p2045573.c100033.m2042&_trkparms=aid%3D111001%26algo%3DREC.SEED%26ao%3D1%26asc%3D39923%26meid%3D53157d5a5e5e44468c973e67e06549d3%26pid%3D100033%26rk%3D2%26rkt%3D8%26sd%3D172158427096
a 180 ohm resistor link belowhttp://www.ebay.com.au/itm/100pcs-1-4W-Watt-0-25W-Metal-Film-Resistor-180ohm-1-precision-/172158427096?hash=item2815711fd8:g:X6oAAOSwZ8ZXBERL
and just an old USB cable.
To make it all you need to do is cut off the unused end of the USB cable.
Strip back the insulating and shielding to expose the following wires.
Red = 5V+
Black = 0v or GND
White = Data +
Green = Data -
You don't need the white or green for this so cut them back and insulate them with tape.
Simply connect the red 5v+ wire to the anode of the LED (longer lead)
Solder the 180 ohm resistor to the cathode of the LED and the black wire from the USB to the other end of the resistor.
Remember to check it's operation in an old phone charger or a battery bank before plugging it into your expensive laptop or PC!!!!!
Similar models
thingiverse
free

RGB LED Candle Nightlight by Unordung
...r batteries and connects directly to a usb port.
to use the usb candle please download and print the other nightlight on my page.
thingiverse
free

anycubic kossel power switch box by jasobrino66
...d%26ao%3d1%26asc%3d20140423084956%26meid%3d5cf73ee720014130aa2a94f393f426a2%26pid%3d100033%26rk%3d2%26rkt%3d8%26sd%3d122564203643
grabcad
free

Magnetic Levitation Pen
...c100675.m4236&_trkparms=pageci%3a0b5ebb49-3fed-11ed-a3fe-6e6332c08a84%7cparentrq%3a891651a11830a646c73edee7fffc4e1e%7ciid%3a1
thingiverse
free

Sunshield for ipad mini4 by Jimbob_McCoi
...3fe3%26pid%3d100227%26rk%3d1%26rkt%3d8%26mehot%3dpp%26sd%3d252394156947%26itm%3d252394156947&_trksid=p2054502.c100227.m3827 )
thingiverse
free

Wheel spacer for encoder | controller | plate by MehVod
...rms=pageci%3a1b9999b7-b279-11eb-bca9-5e90696f1619%7cparentrq%3a5c570ab01790a0f33fe51a43ffff231a%7ciid%3a1
you will need screw m5.
thingiverse
free

Li‑ion 18650 dual charger case by julmo99
...c100675.m4236&_trkparms=pageci%3a7bf1d4fa-b82f-11e8-bb0f-74dbd1807c88%7cparentrq%3ad89cae911650ad7897f5d1cbfff8f11b%7ciid%3a1
thingiverse
free

20s LiPo Configuration by mikeep
...c100675.m4236&_trkparms=pageci%3a29c6888a-9f10-11e8-bd42-74dbd180df51%7cparentrq%3a33f8608d1650a9cc18eda908fffcc5c9%7ciid%3a1
thingiverse
free

Pulse 80W Squonk Door by millertime1620
...804b5785c574392bded%26pid%3d100290%26rk%3d1%26rkt%3d2%26sd%3d263147626781%26itm%3d263147626781&_trksid=p2060778.c100290.m3507
thingiverse
free

super capacitor battery housing by TThompson
...ao%3d1%26asc%3d34575%26meid%3df88811c26de94f7c98d91434f617c5e2%26pid%3d100009%26rk%3d1%26rkt%3d1%26mehot%3dag%26sd%3d300945126145
thingiverse
free

Yoda USB powered lamp / nightlight "Gloda" by Unordung
...m bigger to be sure.
disclaimer
i did not create the yoda texture, i simply remodeled it from adam beamish's original model.
Unordung
thingiverse
free

FlashForge Creator Pro Thermometer by Unordung
...-fridge-freezer-lcd-thermograph-for-refrigerator-50-100-wfau-/251537550253?var=&hash=item3a90ce6bad:m:mjrghfhgcmvzw6xrequu7iw
thingiverse
free
RGB LED Candle Nightlight by Unordung
...r batteries and connects directly to a usb port.
to use the usb candle please download and print the other nightlight on my page.
thingiverse
free

America is great Again President Trump by Unordung
...ious little snowflakes who insist on calling you names for having the audacity to possess a different political ideology to them.
thingiverse
free

3D printer and CNC mill enclosure by Unordung
...just needing to get another sheet of the "sunlite" acrylic i used for the sides as i messed up with my measuring.......
thingiverse
free

Hiland 50MHz Frequency counter simple bumper by Unordung
.../50-mhz-crystal-oscillator-frequency-counter-testers-diy-kit-5-resolution-hy-/192036387851?hash=item2cb642bc0b:g:ztoaaosw44byn1ll
thingiverse
free
Yoda USB powered lamp / nightlight "Gloda" by Unordung
...m bigger to be sure.
disclaimer
i did not create the yoda texture, i simply remodeled it from adam beamish's original model.
thingiverse
free
USB flashing Iceberg Night light by Unordung
...er to check it's operation in an old phone charger or a battery bank before plugging it into your expensive laptop or pc!!!!!
Candle
3d_ocean
$7

Candle
...candle
3docean
candle gold candle wax
high poly candle .
archibase_planet
free

Candles
...candles
archibase planet
candles candle
candles - 3d model (*.gsm+*.3ds) for interior 3d visualization.
archibase_planet
free

Candles
...candles
archibase planet
candles candle light
candles n070411 - 3d model (*.3ds) for interior 3d visualization.
archibase_planet
free

Candle
...candle
archibase planet
candle
candle - 3d model (*.3ds) for interior 3d visualization.
3d_export
$5

candle and candle holder
...candle and candle holder
3dexport
3d_export
$5

candle
...candle
3dexport
animated red candle
3ddd
$1

Candle
...candle
3ddd
подсвечник , свеча
candle
3d_export
$1

candle
...candle
3dexport
lowpoly animation candle
turbosquid
$2

Candle holder ( with candle )
... available on turbo squid, the world's leading provider of digital 3d models for visualization, films, television, and games.
3d_ocean
$4

Candle
...dle candles candlestick fire max model
the burning candle – it is intended for use as home decoration. thanks for your attention.
Usb
3d_ocean
$3
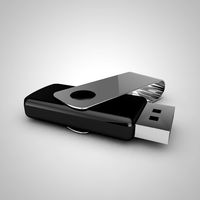
USB Thumbdrive
...usb thumbdrive
3docean
thumbdrive usb usb drive usb stick
this is a swivel type usb thumb drive.
3d_ocean
$5

Usb Stick
...usb stick
3docean
flash stick usb usb memory usb stick
usb stick created using 3ds max 2015 and rendered on mental ray.
3ddd
$1
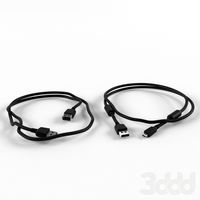
USB cable
... кабель , провод
высокополигональные модели кабелей usb.
3d_ocean
$5
USB Stick
...usb stick
3docean
32gb computer memory plug plugin protection usb usb stick
an usb stick with built-in plug protection
3d_ocean
$6

USB Stick
...tick
3docean
32 gb flash ram gigabyte memory metal nand plug ram stick usb usb 3 usb stick
usb stick with texture and normal map.
turbosquid
$5

USBS
...bs
turbosquid
royalty free 3d model usbs for download as max on turbosquid: 3d models for games, architecture, videos. (1466594)
3d_export
$5
usb flash
...usb flash
3dexport
usb flash
3d_export
free
usb flash
...usb flash
3dexport
usb flash
3d_export
free
usb flash
...usb flash
3dexport
usb flash driver
3ddd
$1

usb
...usb
3ddd
флешка
флешка
Led
3d_export
$5

led
...led
3dexport
the led is cut with all the parts.
3ddd
$1

Monacor / PARL56DMX / LED-320RGBW / LED-345RGBW / LED-300RGB
... прожектор
http://www.monacor.dk/
parl56dmx
led-320rgbw
led-345rgbw
led-300rgb
turbosquid
$10

LED
...led
turbosquid
free 3d model led for download as blend on turbosquid: 3d models for games, architecture, videos. (1691856)
3d_export
$5

led lamp
...led lamp
3dexport
led lamp, brightness animation
3ddd
free

leds-c4
...leds-c4
3ddd
leds-c4
современный торшер
3ddd
free

leds-c4
...leds-c4
3ddd
leds-c4
настольный лампа
turbosquid
$19

LED
... available on turbo squid, the world's leading provider of digital 3d models for visualization, films, television, and games.
turbosquid
$12

Led
... available on turbo squid, the world's leading provider of digital 3d models for visualization, films, television, and games.
turbosquid
free

LED
... available on turbo squid, the world's leading provider of digital 3d models for visualization, films, television, and games.
turbosquid
free

LED
... available on turbo squid, the world's leading provider of digital 3d models for visualization, films, television, and games.