Thingiverse
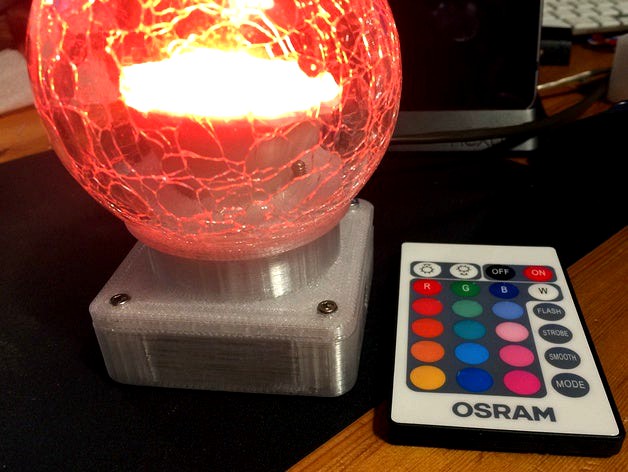
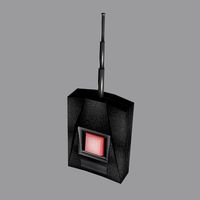
LED glas ball lamp with remote
by Thingiverse
Last crawled date: 4 years, 2 months ago
This is an application using parts from my versatile LED cube / dice.
There are two versions:
-using the cube 43x43mm as a base / mount (low voltage electronics from garden lighting or DIY)
-using a separately made case 64x64mm as the base of the stand
The stand has a case / compartment for some electronics and the low voltage power plug.
Osram GU10 lamp 3D modelhttps://www.thingiverse.com/thing:3951293
Update:
The RADAR version has moved into a separeted project:https://www.thingiverse.com/thing:3972757
Have put the Osram LED lamp with GU10 socket into the glas ball.
The base case holds the wire terminals and the cable strain relief.
To keep the things safe a socket for the lamp could be mounted.
The base has some stand offs for a mount plate made from plastic or FR2 or FR4 pcb material without the copper foil.
Some flat sockets can be found. The hight of the body is 16mm.
Amazone item No. B00LAZXMG8.
Some tinkering required.
.
See the LED cube:
(now part of a series of parts making a system for several applications)https://www.thingiverse.com/thing:3926580
Indoor use only.
This thing is not waterproof.
Mount the glass ball UPRIGHT all the time.
Have fun.
Warning: The WAF
Regardless of all the shiny look, the blinking LED it has been almost rejected by my wife.
She wants no visible screws.
But a number of the small dices filled with blinking stuff got her O.K.
The WAF, sometimes hard to meet.
Some RC-modellers have made those circular warning lights.
Interestingly not only those made with motors but many LED arranged as a circle.
With no doubt there do exist a few (or many?) solutions using multilexed or charlieplexed LED's.https://www-user.tu-chemnitz.de/~heha/Mikrocontroller/LEDs/https://translate.google.de/translate?sl=de&tl=en&u=https%3A%2F%2Fwww-user.tu-chemnitz.de%2F~heha%2FMikrocontroller%2FLEDs%2F
Schematics:https://www-user.tu-chemnitz.de/~heha/Mikrocontroller/LEDs/Rundum.pnghttps://www-user.tu-chemnitz.de/~heha/Mikrocontroller/LEDs/Rundum2.pnghttps://www-user.tu-chemnitz.de/~heha/Mikrocontroller/LEDs/Eagle.zip/rundum4.wmf?bin=SVG
Henrik Haftman made a pcb design (no software)
See the pcb images, exported from Eagle.
PCB file (Eagle format)https://www-user.tu-chemnitz.de/~heha/Mikrocontroller/LEDs/Eagle.zip
He declares all his stuff comes (when available) with Open Source software.
So i assume nobody can start stupid DMCA requests.
Tiny bit of software grabbed from the BASCOM-forum:
bascomforum.de/index.php?thread/690-rundumlicht-mit-led-und-attiny13/&pageNo=2
Change the $crystal frequency accordingly to your MC setup.
DIY LED light using ATTiny13, with simple BASCOM code, but no schematics
YT watch?v=iC9bg38YGSA
.
The things:
It holds the glas made ball, taken from gardening LED light.
The dome holder assembly consists of 3 parts, see the drawing.
The base part goes as a top part toward the cube mid section with bottom part.
The electronics blinky stuff will be hidden mostly by the cube/stand.
Requiered parts:
glas ball diameter 80mm, bottom opening 50mm
blinky electronics, DIY or salvaged from garden lighting
small no mount plate version:
radar dome printed ring connector parts (upper, lower)
mid section from versatile cube (has no screw connection)
solid bottom part from versatile cube
4 screws machine screws M3 x 17mm with hex nuts (ring connector parts)
big mount plate version
radar dome printed ring connector parts (upper, lower)
4 screws machine screws M3 x 17mm with hex nuts (ring connector parts)
mount plate connector 64x64mm
4 screws machine screws M3 x 23mm
For using these parts the 4 mount screws must match the total hight of both parts.
Assembling tricks:
See the assembling pictures first.
Printing gives no problems, assembly ist almost fool proof now. (Just kidding.)
The ring connector is tricky to assemble.
Do not apply much force , do not push the screws or nuts hard.
Use a small file as a reamer if you feel much resistance.
If the nuts do not fall into the caves, use a little amount of heat to warm up the nuts first
Do not cut away plastics here. Better melting and pushing excess aside.
The screw holes are 2.5mm. so 3mm screws will not pass through easily.
Where screws go through with no grip required widen the holes, let them pass.
Predrill the other holes gently, turning the drill bit by hand.
Improving the lighting:
Regarding the light diffusion Hackaday has an article.https://hackaday.com/2017/04/25/ask-hackaday-what-about-the-diffusers/
THE END
Similar models
thingiverse
free

LED dice 29mm Harald edition
...om my experience:
i made a print using raft it ripped the filament out of the small holes when separating the raft from the part.
3dwarehouse
free

Converter From USB To Parallel (full LPT, but at usb LowSpeed)
...b lowspeed)
3dwarehouse
design based on: http://www-user.tu-chemnitz.de/~heha/bastelecke/rund%20um%20den%20pc/usb2lpt/ul-khs.htm
3dwarehouse
free

2F Wall Light
...2f wall light
3dwarehouse
2f-leuchten gmbh www.2f-leuchten.com design: df color: brass light source: led
thingiverse
free

Small Ball Mounting System for Philips Hue Motion Sensor by wolwin_de
...h nut
ball mount with narrow wheel: m3 x 20 - slotted screw with nut
ball mount with wide wheel: m3 x 25 - slotted screw with nut
3dwarehouse
free

2F Downlight Orbis
...2f downlight orbis
3dwarehouse
2f-leuchten gmbh www.2f-leuchten.com design: df color: black light source: led
3dwarehouse
free

2F-Floor Lamp
...2f-floor lamp
3dwarehouse
2f-leuchten gmbh www.2f-leuchten.com design: df color: black light source: led e27
thingiverse
free

4x4x4 Led Cube Bottom PCB Cover by NotEnoughCheese
...uses 4 m3 screws.
it provides some basic protection against fingers and conductive surfaces, also makes the cube easier to carry.
3dwarehouse
free

2F Recessed Wall Light
...all light
3dwarehouse
2f-leuchten gmbh www.2f-leuchten.com design: df color: tbc light source: led recessed in standard wall box
thingiverse
free

PCB Workstation - Low Profile Mounts
...et-head screw and nut. unfortunately this requires the use of an allen key, but larger boards can be mounted on the workstation.
thingiverse
free

Brunswick Frameworx LED Ball Light Bracket by Kanga80
...bracket by kanga80
thingiverse
brunswick frameworx led ball light conversion.
for use with associated custom led ball light pcb.
Glas
3d_ocean
$5

Champagne Glas
...s bubbly champagne champagne glas drinking drinks glas party sekt sparkling wine
a photorealistic glas of champagne with bubbles.
3d_ocean
$5

Beer Glas
...ubbles drinking foam glas glas of beer lager party pils
a photorealistc looking glas of beer with foam, foam residue and bubbles.
3d_ocean
$5

Glas of Beer
...rinking drinks foam food glas glas of beer guinness party
a photorealistic glas of dark beer with foam, foam residue and bubbles.
turbosquid
$15

glas
... available on turbo squid, the world's leading provider of digital 3d models for visualization, films, television, and games.
3ddd
$1

Foscarini / Glas
...foscarini / glas
3ddd
foscarini
foscarini "glas"
3d_ocean
$5

Glas of White Wine
...ne
3docean
alkohol bottle drink food glas glas of wine party vine white wine wine
glas of white wine and a bottle with some wine.
3d_ocean
$5

Martini Glas with Olive
...s james bond martini martini glas needle olive party
a martini glas with an olive. rnedered in blender using the cycles renderer.
turbosquid
$1

Glas Mine
...
royalty free 3d model glas mine for download as obj and upk on turbosquid: 3d models for games, architecture, videos. (1393090)
3ddd
$1

Glas spot
...glas spot
3ddd
простой светильник
turbosquid
$3

Stair Glas
...ee 3d model stair glas for download as 3ds, obj, c4d, and fbx on turbosquid: 3d models for games, architecture, videos. (1184319)
Remote
archibase_planet
free

Remote
...remote
archibase planet
tv remote remote controller remote
remote - 3d model for interior 3d visualization.
archibase_planet
free

Remote
...e
archibase planet
remote control remote controller remote
remote n140512 - 3d model (*.gsm+*.3ds) for interior 3d visualization.
turbosquid
$1

Remote
...
turbosquid
royalty free 3d model remote for download as obj on turbosquid: 3d models for games, architecture, videos. (1487515)
3d_export
$5
Tv Remote
...tv remote
3dexport
tv remote
3d_ocean
$7

Remote controller
... control switcher tv remote
remote controller for tv, sound systems etc easy to edit textures photo real rendered with mental ray
turbosquid
$39

remote
...free 3d model remote for download as obj, fbx, blend, and dae on turbosquid: 3d models for games, architecture, videos. (1387531)
turbosquid
$5
remote
...free 3d model remote for download as 3ds, obj, fbx, and blend on turbosquid: 3d models for games, architecture, videos. (1401849)
archive3d
free
Remote 3D Model
...l
archive3d
tv remote remote controller remote
remote - 3d model for interior 3d visualization.
turbosquid
$11
Remote
... available on turbo squid, the world's leading provider of digital 3d models for visualization, films, television, and games.
turbosquid
$10

remote
... available on turbo squid, the world's leading provider of digital 3d models for visualization, films, television, and games.
Ball
turbosquid
$5
Ball on a Ball
...uid
royalty free 3d model ball on a ball for download as obj on turbosquid: 3d models for games, architecture, videos. (1484719)
archibase_planet
free
Ball
...ball
archibase planet
ball golf ball
ball - 3d model (*.gsm+*.3ds) for 3d visualization.
3d_export
$5
ball
...ball
3dexport
ball
archibase_planet
free

Ball
...ball
archibase planet
ball football soccer ball
ball n100714 - 3d model (*.gsm+*.3ds+*.max) for exterior 3d visualization.
3d_export
$5

ball
...ball
3dexport
soccer ball
archibase_planet
free

Ball
...ball
archibase planet
ball football
ball n100914 - 3d model (*.gsm+*.3ds+*.max) for 3d visualization.
3d_ocean
$5
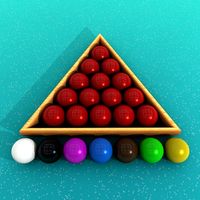
Snooker Balls
... set balls snooker snooker balls white ball yellow ball
set snooker balls format include : .c4d .3ds .obj build in cinema 4d r13
3d_export
free

ball
...ball
3dexport
this is 3d model ball's
3d_ocean
$2
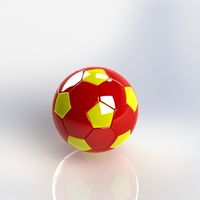
Soccer Ball
...soccer ball
3docean
ball red and yellow ball red ball soccer ball
a gorgeous red and yellow seamless soccer ball
3d_ocean
$5

Billard Balls
...low poly billiard balls. numbering from 1 to 15 plus the cue ball. each of the balls excluding the cue ball has a 4k texture map.
Led
3d_export
$5

led
...led
3dexport
the led is cut with all the parts.
3ddd
$1

Monacor / PARL56DMX / LED-320RGBW / LED-345RGBW / LED-300RGB
... прожектор
http://www.monacor.dk/
parl56dmx
led-320rgbw
led-345rgbw
led-300rgb
turbosquid
$10

LED
...led
turbosquid
free 3d model led for download as blend on turbosquid: 3d models for games, architecture, videos. (1691856)
3d_export
$5

led lamp
...led lamp
3dexport
led lamp, brightness animation
3ddd
free

leds-c4
...leds-c4
3ddd
leds-c4
современный торшер
3ddd
free

leds-c4
...leds-c4
3ddd
leds-c4
настольный лампа
turbosquid
$19

LED
... available on turbo squid, the world's leading provider of digital 3d models for visualization, films, television, and games.
turbosquid
$12

Led
... available on turbo squid, the world's leading provider of digital 3d models for visualization, films, television, and games.
turbosquid
free

LED
... available on turbo squid, the world's leading provider of digital 3d models for visualization, films, television, and games.
turbosquid
free

LED
... available on turbo squid, the world's leading provider of digital 3d models for visualization, films, television, and games.
Lamp
archibase_planet
free
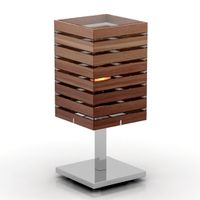
Lamp
...lamp
archibase planet
lamp reading lamp table lamp
lamp - 3d model (*.gsm+*.3ds) for interior 3d visualization.
archibase_planet
free
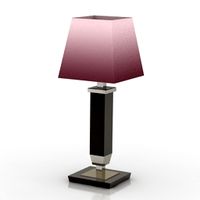
Lamp
...lamp
archibase planet
lamp reading lamp table lamp
lamp - 3d model (*.gsm+*.3ds) for interior 3d visualization.
archibase_planet
free
Lamp
...lamp
archibase planet
lamp table lamp reading lamp
lamp - 3d model (*.gsm+*.3ds) for interior 3d visualization.
archibase_planet
free

Lamp
...lamp
archibase planet
lamp table lamp reading lamp
lamp - 3d model (*.gsm+*.3ds) for interior 3d visualization.
archibase_planet
free

Lamp
...lamp
archibase planet
lamp reading lamp table lamp
lamp - 3d model (*.gsm+*.3ds) for interior 3d visualization.
archibase_planet
free
Lamp
...lamp
archibase planet
lamp reading lamp table lamp
lamp - 3d model (*.gsm+*.3ds) for interior 3d visualization.
archibase_planet
free
Lamp
...lamp
archibase planet
lamp table lamp reading lamp
lamp - 3d model (*.gsm+*.3ds) for interior 3d visualization.
archibase_planet
free

Lamp
...lamp
archibase planet
lamp table lamp reading lamp
lamp - 3d model (*.gsm+*.3ds) for interior 3d visualization.
archibase_planet
free
Lamp
...lamp
archibase planet
lamp reading lamp table lamp lantern
lamp - 3d model (*.3ds) for interior 3d visualization.
3d_ocean
$6
Lamp
...lamp
3docean
lamp
a high quality lamp.