Thingiverse
Kossel 3mm Plexi Frame Enclosure Holders by ggiavelli
by Thingiverse
Last crawled date: 4 years, 2 months ago
Update 11-19
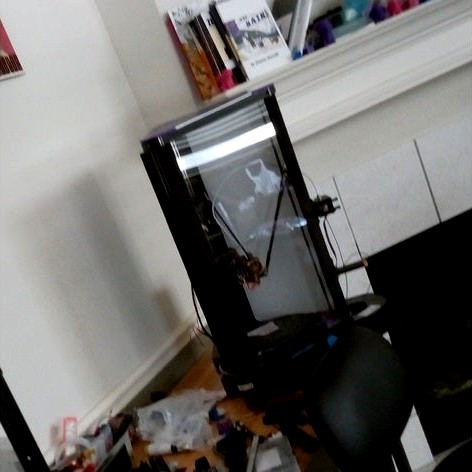
So I think what you need to do is use the 10mm extrusions and just use the outer door slot all the way around on the sides. that should help give it clearance. the issue then is we need to add a bottom piece that seals the bottom gap when the sides are pushed out that far, and I think I will move the MB to the TOP not the side so that theres no issue if you want to use ONE long piece of plexi on the sides. (otherwise theres no hole you can make, with the board you can just cut a small hole and slot to get the wires in)
It's still something I haven't gotten back to but one other idea I had was to make slide up doors the same as the front on each side. Then you just slide up all the doors and you don't have to wrry about an issue when you do the bed leveling. You might have to reduce your print area by 5mm or 10mm or so to then avoid hitting the walls. Or it might just work with the 10mm spacing. Don't know and I will update when I get time. Alas I'm slammed at work and haven't gotten further .... but its really close. I might work on it this weekend a bit or over the holidays.
The advantage of this design over some others is its minimal printing as the parts just aren't that big.
Anyone who wants to test this approach or needs support msg me and I'll try to help.
Update 8-22-18
This is a DRAFT stage make. Please read everything. Be prepared to do some tweaking.
TODO: need to measure the heights of all the pieces so they can size correctly for u they are approx 125-140mm except for the door bridge which is 30mm.
To use this you will need linear rails because it uses the slots that the wheels used to ride on.
there are 8mm and 10mm extrusions.
For the front:
8mm-----------------------------------------------8mm
8mm-----------------------------------------------8mm
10mm door bridge --------------------------- 10mm door bridge
10mm----------------------------------------------10mm
10mm----------------------------------------------10mm
(doorgap piece on top of lower lexan, door handle on bottom of lower lexan)
The door bridge piece does not mirror thats why there are 2 in the stl one for the left and one for the right. prevents the top lexan from moving.
Current side design:
topangle----------------topangle
8mm----------------------8mm
8mm----------------------8mm
8mm----------------------8mm
8mm----------------------8mm
(note: not quite far out enough.. eventually work on moving to the 10mm but then there are issues with the bottom and probably need to reloact mb holder side rail and also have a bottom piece to close the gap)
So the interchange piece is about 20mm high and stops the top plate from sliding down.
Why multiple pieces and not just one long piece? Its because the shorter pieces are easier to work with and get snapped in fully. The original snap was much more severe so using shorter pieces was required. The new snap is not so strong.
There is a corner 90 degree piece which is used at the top. Because the cardboard moves out fairly far from the frame so I dont want heat to get out. this is only used on the 2 back sides not the front.
There is a little straight piece which goes over the front door that slides up at the top. again just to prevent the gap and heat loss.
The cardstock sides are done with all 8mm displacement extrusions. For the bottom, thats not quite enough. so when you level it bangs into it. BUT to move the extrusions out to 10mm now you would need a new bottom piece (which isnt done yet) to close the gap as now you are moved far outside the lower base. Hmmm. So it's still not done yet and I'll keep tuning. Basically if you keep your print area a smidge less than max it will print fine, but not level or z measure as that goes out too far.
So it's not a perfect project but its getting there. still draft stage. But on the other hand it's pretty cool and working well. the card stock just flexes when the extruder moves into it its not such a big deal just anoying its not quite enough space.
If i mirrored the front design to the sides that would be good its just a bit more expensive and then I'd have to relocate my motherboard external case as thats in the way on that side. The other issue with lexan is you have to figure out how to route thebowdein in on one side and the wires on the other.
OK its getting there. hope you like the effort its a lot of tiny tuning.
THIS IS DRAFT STAGE. BUILD AT YOUR OWN RISK.