Thingiverse
Koch Snowflake-An Iterated Function System by nvanoort
by Thingiverse
Last crawled date: 3 years ago
Nicole Van Oort
04/04/16
George Mason University
Math 493-Mathematics Through 3D Printing
Shows the progression of an iterated function system from a hexagon to a Koch Snowflake.
The Koch Snowflake also known as the Koch curve is a fractal curve, and an iterated function system. Fractals are images, or mathematical sets that display a repeating pattern at every scale, also known as self-symmetry. In other words at any scale you look at the image, the image appears to copy or repeat itself. One can also describe a fractal as a shape made up of smaller images of itself. An iterated function system is a method of creating a fractal, repetition of a function creates a union of several copies of the same fractal varying in size, rotation and translation. The Koch Snowflake is based of iterations of the Koch curve, which was first described by Helge von Koch, a Swedish mathematician in 1904. This was one of the earliest fractal curves to be described and he described it in his paper “On a continuous curve without tangents constructible from elementary geometry”. The Koch curve follows the same iteration pattern as the Koch Snowflake, but starts out as a line and then emerges into equilateral triangles, rather than starting out as a complete shape for the first iteration like the Koch Snowflake does. The box containing fractal dimension of the Koch Curve is log 4/log 3 ≈ 1.26186.
The Koch Snowflake has multiple ways it can be created, although not all of them are true iterated function systems (adding iterations in different places as the iteration continues). One example of this version is starting the Koch Snowflake with an equilateral triangle and iterating smaller equilateral triangles off of each side. The issue with the version is that after the first iteration, equilateral triangles are only iterated off of two sides of the pervious triangles to produce the accurate Koch Snowflake. Therefore the iteration doesn’t stay the same throughout and it is not a true iterated functions system. This is the most common representative version of the Koch Snowflake seen in the mathematical world. The version of the Koch Snowflake I utilized is a version using a true iterated function system. Instead of using triangles, it utilizes hexagons and iterates 6 smaller hexagons around its edges, while translating and rotating them different amounts. The iterated function system of equations used to produce this Koch Snowflake are as follows where the scalex and scaley represent the scaling factors, theta represents rotation, and e and f represent translations in the x and y directions respectively. A more detailed version of this system can be seen in the photos provided.
scale1x = 1/sqrt(3);
scale2x = 0.333333;
scale3x = 0.333333;
scale4x = 0.333333;
scale5x = 0.333333;
scale6x = 0.333333;
scale7x = 0.333333;
scale1y = 1/sqrt(3);
scale2y = 0.333333;
scale3y = 0.333333;
scale4y = 0.333333;
scale5y = 0.333333;
scale6y = 0.333333;
scale7y = 0.333333;
scalez = 2;
theta1 = 30;
theta2 = 0;
theta3 = 0;
theta4 = 0;
theta5 = 0;
theta6 = 0;
theta7 = 0;
e1 = 0;
e2 = 0.57735027;
e3 = 0;
e4 = -0.57735027;
e5 = -0.57735027;
e6 = 0;
e7 = 0.57735027;
f1 = 0;
f2 = 0.33333333;
f3 = 0.66666666;
f4 = 0.33333333;
f5 = -0.3333333;
f6 = -0.6666666;
f7 = -0.3333333;
The way one can obtain a Koch Snowflake from the basic hexagon in 3D vary, but I utilized an OpenSCAD code by Torsten Paul and modified it to fit the parameters and function qualifications for the Koch curve and the Koch Snowflake. One of the first modifications his code needed was to increase the number of smaller images produced during each iteration. His specified that each iteration would multiply the image 3 times, where I needed 7 multiplications. This fix was easy by following the same pattern he used for his three copies and I just added more so there was a total of seven. Further in detail, I needed to provide 7 x scaling factors, 7 y scaling factors, 7 rotation degrees, and 7 x and y translation amounts. Each smaller copy created during an iteration has a certain scaling degree in the x and y direction, a specific amount it is rotated as well as a certain degree of translation. The specific code can be seen in the provided images. The importance of this code is to make sure each smaller image that is iterated is placed in the accurate spot, otherwise after multiple iterations the Koch Snowflake will not be the image that gets produced. Each iteration must be in the proper location so that the correct image on the Koch Snowflake gets iterated in the end. For scaling, the scaling in the x and y direction was the same for each iterated image. The first copy was scaled by 1 over the square root of three while the reaming 6 copies were all scaled by one third. This scaling factor is placed as both the x and y factor for each of the copies. The only copy to have any rotation was the first copy, rotated 30 degrees. The remaining copies all had zero degrees of rotation so zeroes were placed in those spots of the code. Lastly was translation factors. This can be seen as the second matrix in the iterated function system for each copy. The top number is the x translation while the bottom is the y translation. These varied for each copy.
The next step in producing the proper OpenSCAD code for the Koch Snowflake was to create the proper starting polygon, making sure that the dimensions of the vertices formed an equilateral hexagon. While the original code provided the spot to place the starting polygon dimensions, it did not have a hexagon as its starting shape so therefore I needed to add vertices and change them to the dimensions of an equilateral hexagon. These new vertices also required me to change the length and width of the starting image defined at the beginning of the code. These dimensions are used to scale the overall iteration, but if I did not change them to the new dimensions of the hexagon it would force the iterations to be off centered, since length and width is used later on in the code. Therefore this was also an important step in the process. Lastly, was to create iterations for 7 copies. The code I had obtained again only produced 3 copies each iteration, when I needed seven. This was a simple fix though, copying the iteration code for the first copy I placed it 4 more times below the previous iteration code and changed the values and scaling factors to 4, 5, 6, and 7 respectively so that it would call those numbers that we defined above for that specific copy. This code can also be seen in the images attached. To give it more detail though, the code for one image copy can be seen below:
ifuns( length, width, count - 1, m mt(e1, f1) mr(theta1)*ms(scale1x,scale1y));.
This calls into account the scaling factor in both the x and y direction for the first copy (scale1x and scal1y) the rotation degree for the 1st copy (theta1) and the translation in the x (e1) and y(f1) directions for the first copy. This code was repeated 6 more times changing the number 1 to 2, 3, 4, 5, 6 and 7 respectively each time to make sure that each copy needed was going to be iterated. This left my code ready to be rendered to create this 3D Koch Snowflake.
A few issues did arise while using this code to produce the Koch Snowflake. At first, I attempted to use the equilateral triangle method not realizing that it wasn’t a true iterated function. Not only was this difficult because equations for the iterated function system weren’t provided, it was also a guessing game as to where and how far to translate and rotate each copy of the triangle. Finally after manipulating the copies into the right spots and creating multiple iterations I realized that I was getting copies that aimed back toward the middle of my first triangle and that the corresponding image didn’t appear to resemble the Koch Snowflake, and thus I decided a new method must be used. The method of using hexagons provided a method that was much easier to follow not only because it was a true iterated functions system, but that a system of equations was actually provided with it making the code that much easier to modify and produce. The only issue I had with the hexagon method was that the scaling and translating factors were in relation to a unit size of 1, in other words they were numbers under the assumption that the first hexagon was of size 1. This provided problematic when finding the vertices to define this initial hexagon. At first making the first hexagon too large, made the whole iteration all off. Thus I scaled down the original hexagon to have a length and width of 1. This provided a more accurate iteration and produced image of the Koch Snowflake, yet it was very small. This was a much easier fix though because all I had to do was create a scale command right before the module for the iteration was called into command, that way the whole iteration system would be scaled all together. This created a proper Koch Snowflake that was larger and ready to print. The last step was to render it, save it as an .stl file and import it into MakerBot to specify settings and get the final touches on it to print.
The code and equations for this project were fairly straightforward thanks to the ease of already having a code that modeled the same idea to go off of and the ability to alter to fit my iterated system function needs. The links below also provided the useful information such as the actual iterated function system of equations used to produce the Koch Snowflake, as well as helpful background information if more information is needed. The STL file, as well as the OpenSCAD file of the Koch Snowflake are found under thing files.
Citations:http://ecademy.agnesscott.edu/~lriddle/ifs/ksnow/IFSdetailsHexagons.htmhttps://en.wikipedia.org/wiki/Helge_von_Kochhttp://users.math.yale.edu/public_html/People/frame/Fractals/
Similar models
thingiverse
free

Sierpinski Pentagon IFS project by khorstm
...example of ifs is the sierpinski pentagon, which is similar to the sierpinski triangle, which scales a pentagon and...
3dwarehouse
free

Fractal Sierpinski
...eral triangle, magnification factor of 2 and the iteration pattern is removal of the interior triangle. #introduction_to_fractals
thingiverse
free

Fractal Candy Dish (Koch snowflake)
...to be printed in vase mode. this uses a similar fractal construction to my fractal christmas tree (kochmas tree)....
cults
free

Koch Fractal Snowflake Lamp
...koch fractal snowflake lamp
cults
koch fractal snowflake lamp
koch fractal snowflake lamp
3dwarehouse
free

Koch snowflake fractal
...koch snowflake fractal
3dwarehouse
2d koch snowflake fractal #2d #abstract #fractal #geometry #koch #snowflake
3dwarehouse
free

Koch Snowflake Ornament
... iterations of the koch curve. the resultant snowflake component is then duplicated about each of the six initial snowflake axes.
thingiverse
free

Sixfold Koch Type Fractals by pmoews
... koch_sixfold.scad is included. it can carry out two more cycles of iteration but the resulting fractals are difficult to print.
thingiverse
free

Koch Snowflakes by pmoews
...ts. the openscad programs that created the snowflakes are provided and they can be easily modified to create numerous variations.
3dwarehouse
free

Koch Snowflake
...koch snowflake
3dwarehouse
this is a model of the famous fractal the knch snowflake #fractal #koch #snowflake
thingiverse
free

Von Koch Snowflake by FabianFriethjoph
...h of the sides of the resulting star, turning this into a snowflaky object. in this case, there are 4 repetitions of this proces.

Koch
design_connected
$11

GABRIELE KOCH Vases
...gabriele koch vases
designconnected
gabriele koch vases computer generated 3d model.
turbosquid
$59

koch Gun
... available on turbo squid, the world's leading provider of digital 3d models for visualization, films, television, and games.
3d_export
$30

Heckler Koch USC 3D Model
...c 3d model
3dexport
heckler koch rifle carbine gun weapon usc millitary
heckler koch usc 3d model anton9421942322 96810 3dexport
3d_export
$99

Heckler Koch MP7 3D Model
...mp;koch heckler koch hk machine mp mp7 pistol submachine usp weapon 3d models
heckler koch mp7 3d model humster3d 94607 3dexport
turbosquid
$40

Heckler & Koch USC
... available on turbo squid, the world's leading provider of digital 3d models for visualization, films, television, and games.
turbosquid
$10

Heckler&Koch 416
... available on turbo squid, the world's leading provider of digital 3d models for visualization, films, television, and games.
turbosquid
$6

Heckler & Koch USP45
... available on turbo squid, the world's leading provider of digital 3d models for visualization, films, television, and games.
3d_export
$59

Heckler Koch USP 3D Model
...r koch loading pistol self semi semi-automatic universal usp weapon 3d models
heckler koch usp 3d model humster3d 93543 3dexport
3d_export
$99

Heckler Koch G3A3 3D Model
...weapon military germany
heckler koch g3a3 3d model download .c4d .max .obj .fbx .ma .lwo .3ds .3dm .stl humster3d 110222 3dexport
3d_export
$99

Heckler Koch UMP 3D Model
...ol submachine ump weapon
heckler koch ump 3d model download .c4d .max .obj .fbx .ma .lwo .3ds .3dm .stl humster3d 102517 3dexport
Snowflake
3d_ocean
$9

Snowflake
...lake”. created using standard tools & render of the program cinema4d. can be used in printing, web-congratulation, animation.
turbosquid
free

Snowflake
...flake
turbosquid
free 3d model snowflake for download as max on turbosquid: 3d models for games, architecture, videos. (1477293)
turbosquid
$20

Snowflakes
...bosquid
royalty free 3d model snowflakes for download as max on turbosquid: 3d models for games, architecture, videos. (1484124)
turbosquid
$5

SNOWFLAKES
...squid
royalty free 3d model snowflakes for download as blend on turbosquid: 3d models for games, architecture, videos. (1231765)
turbosquid
$7

Snowflake
...
royalty free 3d model snowflake for download as 3dm and stl on turbosquid: 3d models for games, architecture, videos. (1418508)
turbosquid
$3

SNOWFLAKES
...oyalty free 3d model snowflakes for download as obj and blend on turbosquid: 3d models for games, architecture, videos. (1231789)
turbosquid
$3

snowflake
...royalty free 3d model snowflake for download as obj and blend on turbosquid: 3d models for games, architecture, videos. (1231808)
turbosquid
$1

Snowflake
...
royalty free 3d model snowflake for download as obj and fbx on turbosquid: 3d models for games, architecture, videos. (1357686)
3d_export
free

snowflake
...snowflake
3dexport
winter, snow
turbosquid
$10

Snowflake
...lty free 3d model snowflake for download as max, obj, and fbx on turbosquid: 3d models for games, architecture, videos. (1335166)
Iterated
3ddd
$1

лепнина
...лепнина
3ddd
капитель
iteration=0 => polygons = 7860
iteration=2 => polygons = 125504
3ddd
$1

Decorative figurine cat
...decorative figurine cat
3ddd
статуэтка
iterations:
1.13344
2.53376
3ddd
$1
Футуристическая Дай-Катана
...
модель во вьюпорте не сглажена (mesh smooth iteration = 0), но на рендере будет сглаженной (mesh smooth render iteration = 2-3)
3ddd
$1

Samsung Galaxy II
...0, при применении turbosmooth: iterations 1 - 28000 polys, iterations 2 - 112300 polys. на рендере 28000. все текстуры 2048x2048.
3ddd
$1

Union Trend TR11
... 2230 мм (hmax=2400)
в папке max 2012+fbx.
polys:
0-iterations=9763
1-iterations=78104
2-iterations=211688 (наличник и ручка-1)
3ddd
free
Corner curtains
...corner curtains
3ddd
угловая
curtain (quad polygons) - 126878
+ turbosmooth with 2 iterations
3d_export
$5
collection of eglo bayman lamps
...r of polygons: 8952 (without smoothing iterations) number of vertices: 9665 (without smoothing iterations) material: glass, metal
3d_export
$129
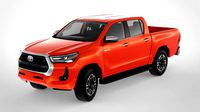
toyota hilux double cab 4wd 2020
...n of subdivision 1.5m with selective apply of two iterations any custom adjustments or low-poly conversions available by request.
3ddd
free
Vermont 12
...www.barovier.com/
высота: 1170 мм.
диаметр: 1180 мм.
текстуры в архиве.
на моделе turbosmooth(iters=0, render iters=2)
3ddd
$1
ELEYUS Allegro BG
...нза)
turbosmooth iterations=0 polys: 9346 verts: 8849 (1 модель )
turbosmooth iterations=1 polys: 36399 verts: 70774 (1 модель )
Function
turbosquid
$1
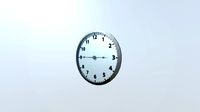
functional clock
...d
royalty free 3d model functional clock for download as fbx on turbosquid: 3d models for games, architecture, videos. (1378928)
turbosquid
$5

functional door
... model functional door for download as 3ds, obj, c4d, and stl on turbosquid: 3d models for games, architecture, videos. (1483785)
3d_export
$5
multi function box
...multi function box
3dexport
it is multi function box in iges format
3ddd
$1
Fitness Equipament - Functional
...fitness equipament - functional
3ddd
треножер
fitness equipament functional, modeled from real model.
turbosquid
$19

Four function formula
...
royalty free 3d model four function formula for download as on turbosquid: 3d models for games, architecture, videos. (1154985)
turbosquid
$1
functional work table
...yalty free 3d model functional work table for download as max on turbosquid: 3d models for games, architecture, videos. (1198733)
3d_export
free
Multi-functional anaquel
...multi-functional anaquel
3dexport
https://www.dock4all.com/
turbosquid
$12
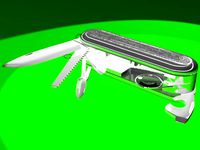
Multi-Function Knife
... available on turbo squid, the world's leading provider of digital 3d models for visualization, films, television, and games.
turbosquid
$9
function x black coin
...yalty free 3d model function x black coin for download as max on turbosquid: 3d models for games, architecture, videos. (1457828)
3ddd
free
Буфеты Function и комод Parma
...д , тумба , parma
буфеты function и комод parma
System
archibase_planet
free

System
...m
archibase planet
fire alarm system fire alarm box
security light system - 3d model (*.gsm+*.3ds) for interior 3d visualization.
archibase_planet
free

Spider system
...stem spider glass system
spider system to fix glass stefano galli n050912 - 3d model (*.gsm+*.3ds) for interior 3d visualization.
3ddd
$1

Euforia System
...euforia system
3ddd
euforia
euforia system
3d_export
$50

Roof system Truss system 3D Model
...oof system truss system 3d model
3dexport
roof system truss truss stage
roof system truss system 3d model aleksbel 38970 3dexport
3ddd
$1

DVD System
...dvd system
3ddd
dvd , schneider
dvd system
design_connected
free

Seating system
...seating system
designconnected
free 3d model of seating system
3d_export
$5

solar system
...solar system
3dexport
solar system in c4d, with 8k nasa textures
3ddd
$1

Quanta System
...quanta system
3ddd
медицина
quanta system.
лазерное оборудование для медицинских центров
3d_export
$15

solar system
...nd the other the sun, the earth and the moon, the latter has an animation with camera movement included, the files are in spanish
3d_export
$14

missile system
...missile system
3dexport