Thingiverse
Kerfmaker Ultimate for Table Saw (Tenonmaker) by zeropage
by Thingiverse
Last crawled date: 3 years ago
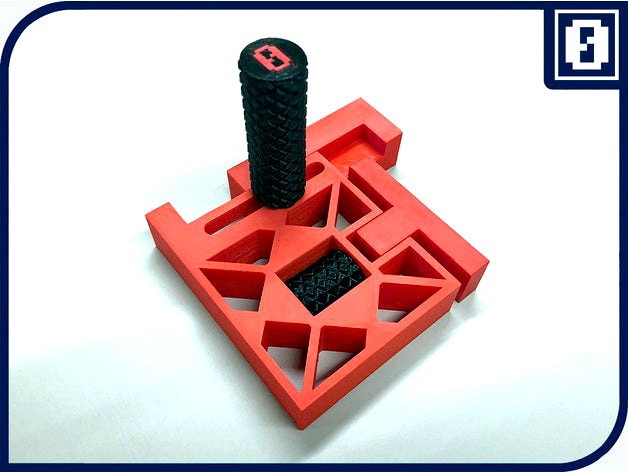
This is a kerf maker. A tool that is usually used with a table saw to simplify the process of cutting kerfs into wood. Especially helpful, if you want to repeatedly cut kerfs of the same size.
There are a quit a few kerf-makers available here on Thingiverse. Most of them have a similar design and while one maker refers to "the real McCoy" as being the source of inspiration, I found a commercially available one as KM-1 or KM-2 from Bridge City.
Though these designs are sleek and cleverly constructed, I saw - admittedly a pretty tiny - room for improvement: After the first cut you have to turn the kerfmaker bei 180°, then do the second and subsequent cuts → I chose a design that utilizes a big/long handle which makes it very easy to grab and turn the kerfmaker.
What you need
• all five parts printed
• 1 x M6 threaded bar, 57 mm length
• 1 x M6 threaded bar, 33 mm length
• 2 x M6 nut
• 1 x M6 self-locking hex nut
If you want to make bigger kerfs print the "EXTRA WIDE" base and sliding block. You'll then have a maximum kerf width of about 63mm.
How to assemble
• Put a hex nut into the hole on the flipside of the sliding block. Glue it, if it's to loose.
• Glue a hex nut into one hole of the small knob and a self-locking hex nut into the other one.
NB1: The holes have different depths to accommodate the different heights of a normal nut and a self-locking nut (which is, usually, higher).
NB2: The self-locking nuts have a job, namely to lock on the threaded bar. While we do want friction, it might be necessary to get the threaded bar more free-moving by removing some plastic from the inside of the self-locking nut. You will have to experiment.
• Glue the 57 mm threaded bar into the blade distance piece.
• Lay the base on a table and put the small knob into the base. I recommend to let the normal nut face the blade distance piece. Less of the threaded bar to screw thru the self-locking nut.
• Stick the blade distance piece's threaded bar through the hole and start screwing it into the small knob. Go on till you come to the end. Then stop.
• Glue the 33 mm threaded bar into the big knob (handle). Take care that the threaded bar is sticking out 19mm.
• Join the sliding block with the base using the big knob (handle).
Done!
You can see my Kerfmaker How to use video on YouTube.
Disclaimer
If you print this model and use it, you do this on your own risk. I cannot be held responsible if someone or something gets damaged or injured by using this model.
Similar models
thingiverse
free

Machine Knob to suit M6 bolts by d3delta3d
...nyloc nut on to the end of the thread, then press the assembly into the knob and glue the closed infill into the top of the knob.
thingiverse
free

Sabre Saw by FMMT666
...ing.
they will cut while you pull the blade out, in contrast to an ordinary hand saw which will cut while pushing the blade in...
thingiverse
free

Stopblock for Elektra Beckum table saw PK250
...nd insert a m6 nut.
for mounting on the guide rail, take a m6 carriage bolt. reduce the square of the carriage bolt with a rasp.
thingiverse
free

Goodman Handle
... 12 allen screws to attach the mount on the handle.
openings in base fit self-locking m6 din-nuts
handle itself was not modified.
thingiverse
free

"wrong" side cut kerf subtraction guide by iLikeDarbo
... by the precise amount needed to account for the saw kerf
freecad file is included to allow for customisation to other saw kerfs
grabcad
free

Porca sextavada auto travante M6 (Self locking hex nut M6)
...porca sextavada auto travante m6 (self locking hex nut m6)
grabcad
porca modelada no solidworks detalhadamente.
thingiverse
free

Hex Key Handle for GRS micro block by dozzycatt
...iverse
hex key handle for grs micro block. buy cheap hex key and cut in desired length then stick into the hole with super glue.
cg_trader
free

Porca sextavada auto travante M6 Self locking hex nut M6
...porca sextavada auto travante m6 self locking hex nut m6
cg trader
porca modelada no solidworks detalhadamente.
thingiverse
free

BAHCO KRON Stiletto 12" Saw Handle by Broddan
...y broddan
thingiverse
remake for the bahco kron stiletto 12" saw. works with wood / metal blades.
a m6-.20 nut is required.
grabcad
free

Self clinching Hex Nut M6
...self clinching hex nut m6
grabcad
self clinching hex nuts m6, ws 9310, simple shape
Tenonmaker
thingiverse
free

Tenonmaker (M4x16mm bolts version) by MarcElbichon
...at my local hardware stores (home depot, rona,...), so i remix ccrumpacker's tenonmaker to use these bolt instead of m4x20mm.
thingiverse
free

Tenonmaker by ccrumpacker
...qk
added the 123d design files too incase anyone wants to monkey with the design. just be sure to "remix" it from mine.
thingiverse
free

Kerfmaker by ccrumpacker
..."remix" it from mine. edit: i've just completed the tenonmaker as well,...
3dwarehouse
free

Tenonmaker, KM-1
...tenonmaker, km-1
3dwarehouse
#km1 #tenonmaker
Zeropage
thingiverse
free

Additional M8 T-nuts for 'Zeropage' featherboard by mejico
...t the featherboard by 'zeropage'. one is for a hikoki table saw model c10rj and the other is for a router table t-slot.
thingiverse
free

Zeropages Screwdriver Holder some more Versions by Mago3DService
...ion. more files types at https://www.thingiverse.com/thing:4744045
the font is not the same but the similarest i found.
greetings
thingiverse
free

Nightlight Late-Night Edition by zeropage
..., you do this on your own risk. i cannot be held responsible if someone or something gets damaged or injured by using this model.
thingiverse
free

Resistor Storage / Sorter with Wall Mount by zeropage
...sistor storage box with wall mount with some additional pieces of information on printing, warping, labeling, and the wall mount.
thingiverse
free

long slots by noize4U
...by noize4u thingiverse just a edit of trevm and zeropage ' s...
thingiverse
free

Sonoff Pow R2 Enclosure with two sockets (Mennekes) by zeropage
...gland with a thread diameter of 18mm. in case you'd like to mount the enclosure there is a simple wall holder in the package.
thingiverse
free

Mini Drawers Ultimate by zeropage
... according drawer in the meantime while dealing with the magnet stuff; cf. above.)
15.11.2016 -- added a drawer with two slots.
thingiverse
free

Magnetic Bit Holder Portable by zeropage
... slide the holder in on the bottom side of the add-on, and push the screwdriver into the holder. here is a video of the assembly.
thingiverse
free

Featherboard with large star grip screw and T-Nut by zeropage
..., you do this on your own risk. i cannot be held responsible if someone or something gets damaged or injured by using this model.
Kerfmaker
thingiverse
free

KerfMaker Jig
...ead square neck bolt.
to see the jig in action and understand how to set up, please watch the video: https://youtu.be/sotqqsetvng
thingiverse
free

Kerfmaker for Woodworking Dados by holdy97
...y video below for how to use this jig.
required hardware:
8-32x1/2" flathead machine screw
6-32x1/8" socket cap screw
thingiverse
free

revised top for kerfmaker by chrismolloy
... kerfmaker by chrismolloy
thingiverse
a shorter version of the top part to allow making larger dadoes with a regular kerf blade.
thingiverse
free

Kerfmaker (M5x20mm bolts version) by MarcElbichon
...al hardware stores (home depot, rona,...), so i remix it.
this version use m5x20mm bolts instead, there is also a m4x16mm version
thingiverse
free

Kerfmaker (M4x16mm bolts version) by MarcElbichon
...al hardware stores (home depot, rona,...), so i remix it.
this version use m4x16mm bolts instead, there is also a m5x20mm version
thingiverse
free

Kerfmaker by kamack0
...ob into the gap and then assemble the thread. when the threads and knobs are assembled, fasten them using ca glue and screwdriver
thingiverse
free

Kerfmaker revisited by chrismolloy
...ut had to trim the ends off them to make them fit. i could fix it in the design i guess, to use std sizes, but mine is made now!
thingiverse
free

Dado Stack Tool - Perfect Dados Kerfmaker by Aot44
...esigned a tool for perfect datos out of wood and i wanted one in plastic.
pask makes: https://www.youtube.com/watch?v=fnzwllpw0hi
thingiverse
free
Kerfmaker by ccrumpacker
...h the design. just be sure to "remix" it from mine.
edit: i've just completed the tenonmaker as well, thing:1354302
thingiverse
free

Kerfmaker for up to 7/8" dado. by Bwolfey
...e in:
2 - m5 bolts, 20mm longhttps://www.mcmaster.com/#91310a124/=1afvdvs
2 - m5 nutshttps://www.mcmaster.com/#98676a300/=1afvg2x
Ultimate
turbosquid
$3
Ultimate Grave
...model ultimate grave for download as blend, obj, stl, and fbx on turbosquid: 3d models for games, architecture, videos. (1636144)
turbosquid
$79

ULTIMATE GIRAFFE
... available on turbo squid, the world's leading provider of digital 3d models for visualization, films, television, and games.
turbosquid
$5
The Ultimate Bowl
... available on turbo squid, the world's leading provider of digital 3d models for visualization, films, television, and games.
turbosquid
$1

Ultimate Revolver
... available on turbo squid, the world's leading provider of digital 3d models for visualization, films, television, and games.
3ddd
$1

Kimera Ultimate DVD System
...kimera ultimate dvd system
3ddd
dvd
schneider kimera ultimate dvd system
cg_studio
$49

The Ultimate Lioness3d model
... model
cgstudio
.max .obj .fbx - the ultimate lioness 3d model, royalty free license available, instant download after purchase.
turbosquid
$5
Ultimate Brick Castle
...yalty free 3d model ultimate brick castle for download as fbx on turbosquid: 3d models for games, architecture, videos. (1335247)
turbosquid
$31

Zombie Ultimate pack
... available on turbo squid, the world's leading provider of digital 3d models for visualization, films, television, and games.
turbosquid
$8
Barrels Ultimate Pack
...ls ultimate pack for download as ma, max, obj, fbx, and blend on turbosquid: 3d models for games, architecture, videos. (1353281)
turbosquid
$25

Ultimate "F" Bomb
... available on turbo squid, the world's leading provider of digital 3d models for visualization, films, television, and games.
Saw
turbosquid
$1

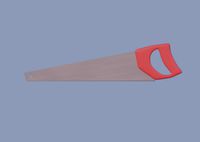
Saw
...d
royalty free 3d model saw for download as ma, obj, and fbx on turbosquid: 3d models for games, architecture, videos. (1390033)
turbosquid
$7
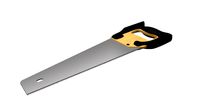
Saw
...alty free 3d model saw for download as obj, fbx, dae, and stl on turbosquid: 3d models for games, architecture, videos. (1481343)
turbosquid
$30

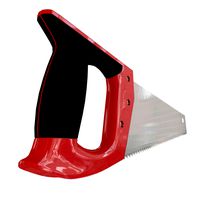
saw
... available on turbo squid, the world's leading provider of digital 3d models for visualization, films, television, and games.
turbosquid
$25

Saw
... available on turbo squid, the world's leading provider of digital 3d models for visualization, films, television, and games.
turbosquid
$20

saw
... available on turbo squid, the world's leading provider of digital 3d models for visualization, films, television, and games.
turbosquid
$20

Saw
... available on turbo squid, the world's leading provider of digital 3d models for visualization, films, television, and games.
turbosquid
$20
saw
... available on turbo squid, the world's leading provider of digital 3d models for visualization, films, television, and games.
turbosquid
$14

Saw
... available on turbo squid, the world's leading provider of digital 3d models for visualization, films, television, and games.
turbosquid
$10

saw
... available on turbo squid, the world's leading provider of digital 3d models for visualization, films, television, and games.
turbosquid
$4
Saw
... available on turbo squid, the world's leading provider of digital 3d models for visualization, films, television, and games.
Table
3ddd
free
Table
...table
3ddd
table
table
archibase_planet
free
Table
...table
archibase planet
table glass-table round table glass table
table n240311 - 3d model (*.3ds) for interior 3d visualization.
archibase_planet
free
Table
...e
archibase planet
table dining-room table dinner table round table
table - 3d model (*.gsm+*.3ds) for interior 3d visualization.
3d_export
$5

table
...table
3dexport
table classic-table
archibase_planet
free
Table
...se planet
table glass table round table glass-table
table tonin habitat n280111 - 3d model (*.3ds) for interior 3d visualization.
archibase_planet
free

Table
...table
archibase planet
table dining-room table dinner table
table - 3d model (*.3ds) for interior 3d visualization.
archibase_planet
free
Table
...table
archibase planet
table coffee table glass table
table - 3d model (*.gsm+*.3ds) for interior 3d visualization.
archibase_planet
free
Table
...table
archibase planet
table glass-table coffee table
table - 3d model (*.gsm+*.3ds) for interior 3d visualization.
archibase_planet
free
Table
...table
archibase planet
table writing table office table
table - 3d model (*.gsm+*.3ds) for interior 3d visualization.
3d_ocean
$5
Table
...table
3docean
dining table furniture home kitchen table
simple wooden table.