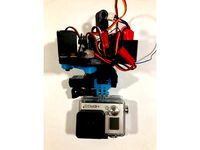
Thingiverse

KAP-RIG - PETG - Konstruktion Version 2018-01-29 by JahnThor
by Thingiverse
Last crawled date: 3 years, 1 month ago
KAP-RIG - Konstruktion
Version 2018-01-29
Dieses KAP-RIG wurde mit PETG-Material auf einen Geeetech Prusa I3 Pro B geruckt.
Düsengröße 0,3 mm
Schichtdicke: 0,1 mm
Linenbreite / Wandliniebreite 0,4 mm
Wanddicke 1,2 mm
Füllung 50% - Gitter mit 25% Überlappung
Druckplattenhaftung - Skirt
Zusätzlich werden folgende Teile benötigt.
M3 Schrauben 10mm (18x)
M3 Schrauben 25mm (1x)
M3 Muttern (19x)
M3 Unterlegscheiben (19x)
M2 Schrauben Kunststoff 20mm (8x)
M2 Muttern 6mm (8x)
M2 Muttern (8x)
Step-Motor Typ 28BYJ-48 (1x)
Step-Motor-Treiber Typ ULN2003 (1x)
Servo-Motor Typ AS-215 BBMG (1x)
Servo-Motor Typ SG-90 (1x)
Stativschraube (1x)
Arduino-Nano (1x)
Lochrasterplatine (1x)
Dip-Schalter 8-fach (1x)
Optokopler Typ TLP621 (2x)
USB-Kabel (1x)
Pfostenleiste (1x)
Ein-Aus-Schalter (1x)
IR-LED (1x)
Powerbank mit 2A Ausgang (1x)
Für die Drehung um die Vertikalachse wird ein Step-Motor (Typ 28BYJ-48) benutzt.
Für die Drehung um die Horizontalachse wird ein Servo-Motor (Typ AS-215BBMG) benutzt.
Für die Kameraauslösung wird ein entweder ein Servo-Motor (Typ SG-90) benutzt oder eine IR-LED.
Das KAP-RIG wird mit einem Arduino-Nano gesteuert.
Das Steuerungsprogramm enthält ausführliche Kommentare.
Mit den Dip-Schaltern kann die Drehung und Neigung des KAP-RIG eingestellt werden.
Drehung: Die Drehung der Kamera kann ueber die DIP-Schalter eingestellt werden.
DIP 1: OFF; DIP 2: OFF = Das RIG wird um 360 Grad gedreht, bei einer Neigung von 90 Grad. Sind andere Winkel aktiviert wird auch hier eine 360 Grad Drehung vollzogen. Es findet keinen Ausloesung der Kamera statt (Videomodus).
DIP 1: OFF; DIP 2: ON = Das RIG wird in 10,019 Grad Winkelschritten gedreht, bei einer Neigung von 90 Grad. Sind andere Winkel aktiviert werden diese angefahren und danach weitergedreht. Die Kamera wird ausgeloest.
DIP 2: ON; DIP 2: OFF = Das RIG wird in 20,039 Grad Winkelschritten gedreht, bei einer Neigung von 90 Grad. Sind andere Winkel aktiviert werden diese angefahren und danach weitergedreht. Die Kamera wird ausgeloest.
DIP 2: ON; DIP 2: ON = Das RIG wird in 30,058 Grad Winkelschritten gedreht, bei einer Neigung von 90 Grad. Sind andere Winkel aktiviert werden diese angefahren und danach weitergedreht. Die Kamera wird ausgeloest.
Neigungswinkel:
DIP 3: OFF; DIP 4: OFF; DIP 5: OFF = (B000) = Die RIG-Neigung faehrt auf 90 Grad.
DIP 3: OFF; DIP 4: OFF; DIP 5: ON = (B001) = Die RIG-Neigung faehrt auf 90 und 68 Grad.
DIP 3: OFF; DIP 4: ON; DIP 5: OFF = (B010) = Die RIG-Neigung faehrt auf 90 und 46 Grad.
DIP 3: OFF; DIP 4: ON; DIP 5: ON = (B011) = Die RIG-Neigung faehrt auf 90 , 68 und 46 Grad.
DIP 3: ON; DIP 4: OFF; DIP 5: OFF = (B100) = Die RIG-Neigung faehrt auf 90 und 24 Grad.
DIP 3: ON; DIP 4: OFF; DIP 5: ON = (B101) = Die RIG-Neigung faehrt auf 90 , 68 und 24 Grad.
DIP 3: ON; DIP 4: ON; DIP 5: OFF = (B110) = Die RIG-Neigung faehrt auf 90 , 46 und 24 Grad.
DIP 3: ON; DIP 4: ON; DIP 5: ON = (B111) = Die RIG-Neigung faehrt auf 90 , 68, 46 und 24 Grad.
Pause: Nach jedem der drei Dreh-Winkelschritte und der RIG-Neigung wird eine Pause gemacht. Bei der fortlaufenden Drehung (360 Grad) wird keine Pause gemacht.
DIP 6: OFF; DIP 7: OFF = Pausenzeit von 3 Sekunden bei IR-LED bzw. Kabelauslösung und 6 Sekunden bei Servoauslösung.
DIP 6: OFF; DIP 7: ON = Pausenzeit von 6 Sekunden bei IR-LED bzw. Kabelauslösung und 12 Sekunden bei Servoauslösung.
DIP 6: ON; DIP 7: OFF = Pausenzeit von 6 Sekunden bei IR-LED bzw. Kabelauslösung und 10 Sekunden bei Servoauslösung.
DIP 6: ON; DIP 7: ON = Pausenzeit von 12 Sekunden bei IR-LED bzw. Kabelauslösung und 20 Sekunden bei Servoauslösung.
Ausloesen:
DIP 8: OFF = Die Kamera wird ueber eine IR-LED bzw. einen Kabelausloeser ausgeloest.
DIP 8: ON = Die Kamera wird ueber einen Servo ausgeloest.
Viel Spaß mit dem KAP-RIG
Thorsten Jahn
KAP-RIG - construction
Version 2018-01-29
This KAP-RIG was printed with PETG material on a Geeetech Prusa I3 Pro B.
Nozzle size 0.3 mm
Layer thickness: 0.1 mm
Line width / wall line width 0.4 mm
Wall thickness 1.2 mm
Filling 50% - grid with 25% overlap
Pressure plate adhesion - Skirt
In addition, the following parts are required.
M3 screws 10mm (18x)
M3 screws 25mm (1x)
M3 nuts (19x)
M3 washers (19x)
M2 screws plastic 20mm (8x)
M2 nuts 6mm (8x)
M2 nuts (8x)
Step motor type 28BYJ-48 (1x)
Step motor driver type ULN2003 (1x)
servo motor type AS-215 BBMG (1x)
Servo motor type SG-90 (1x)
Tripod screw (1x)
Arduino-Nano (1x)
breadboard (1x)
dip-switch 8-fold (1x)
Optocoupler type TLP621 (2x)
USB cable (1x)
Post bar (1x)
On-off switch (1x)
IR LED (1x)
Powerbank with 2A output (1x)
For rotation around the vertical axis, a step motor (type 28BYJ-48) is used.
For rotation around the horizontal axis a servo motor (type AS-215BBMG) is used.
For the camera release, either a servo motor (type SG-90) or an IR LED is used.
The KAP-RIG is controlled by an Arduino-Nano.
The control program contains detailed comments.
With the dip switches the rotation and inclination of the KAP-RIG can be adjusted.
Rotation: The rotation of the camera can be adjusted via the DIP switches.
DIP 1: OFF; DIP 2: OFF = The RIG is rotated 360 degrees at a 90 degree incline. If other angles are activated, a 360 degree turn is made here as well. There is no release of the camera (video mode).
DIP 1: OFF; DIP 2: ON = The RIG is rotated in 10,019 degree increments at a 90 degree incline. If other angles are activated, they are approached and then further rotated. The camera is triggered.
DIP 2: ON; DIP 2: OFF = The RIG is rotated in 20.039 degree increments, at a 90 degree incline. If other angles are activated, they are approached and then further rotated. The camera is triggered.
DIP 2: ON; DIP 2: ON = The RIG is rotated in 30,058 degree increments at a 90 degree incline. If other angles are activated, they are approached and then further rotated. The camera is triggered.
Inclination:
DIP 3: OFF; DIP 4: OFF; DIP 5: OFF = (B000) = RIG tilt is 90 degrees.
DIP 3: OFF; DIP 4: OFF; DIP 5: ON = (B001) = RIG tilt is 90 and 68 degrees.
DIP 3: OFF; DIP 4: ON; DIP 5: OFF = (B010) = RIG tilt is 90 degrees and 46 degrees.
DIP 3: OFF; DIP 4: ON; DIP 5: ON = (B011) = RIG tilt is 90, 68 and 46 degrees.
DIP 3: ON; DIP 4: OFF; DIP 5: OFF = (B100) = The RIG tilt goes to 90 and 24 degrees.
DIP 3: ON; DIP 4: OFF; DIP 5: ON = (B101) = RIG tilt is 90, 68 and 24 degrees.
DIP 3: ON; DIP 4: ON; DIP 5: OFF = (B110) = RIG tilt is 90, 46 and 24 degrees.
DIP 3: ON; DIP 4: ON; DIP 5: ON = (B111) = RIG tilt is 90, 68, 46 and 24 degrees.
Pause: After each of the three rotation-angle steps and the RIG tilt, a break is made. Continuous rotation (360 degrees) will not pause.
DIP 6: OFF; DIP 7: OFF = pause time of 3 seconds with IR LED or cable release and 6 seconds with servo release.
DIP 6: OFF; DIP 7: ON = pause time of 6 seconds with IR LED or cable release and 12 seconds with servo release.
DIP 6: ON; DIP 7: OFF = pause time of 6 seconds with IR-LED or cable release and 10 seconds with servo release.
DIP 6: ON; DIP 7: ON = pause time of 12 seconds with IR-LED or cable release and 20 seconds with servo release.
Trigger:
DIP 8: OFF = The camera is triggered via an IR LED or a cable release.
DIP 8: ON = The camera is triggered by a servo.
Have fun with the KAP-RIG
Thorsten Jahn
Version 2018-01-29
Dieses KAP-RIG wurde mit PETG-Material auf einen Geeetech Prusa I3 Pro B geruckt.
Düsengröße 0,3 mm
Schichtdicke: 0,1 mm
Linenbreite / Wandliniebreite 0,4 mm
Wanddicke 1,2 mm
Füllung 50% - Gitter mit 25% Überlappung
Druckplattenhaftung - Skirt
Zusätzlich werden folgende Teile benötigt.
M3 Schrauben 10mm (18x)
M3 Schrauben 25mm (1x)
M3 Muttern (19x)
M3 Unterlegscheiben (19x)
M2 Schrauben Kunststoff 20mm (8x)
M2 Muttern 6mm (8x)
M2 Muttern (8x)
Step-Motor Typ 28BYJ-48 (1x)
Step-Motor-Treiber Typ ULN2003 (1x)
Servo-Motor Typ AS-215 BBMG (1x)
Servo-Motor Typ SG-90 (1x)
Stativschraube (1x)
Arduino-Nano (1x)
Lochrasterplatine (1x)
Dip-Schalter 8-fach (1x)
Optokopler Typ TLP621 (2x)
USB-Kabel (1x)
Pfostenleiste (1x)
Ein-Aus-Schalter (1x)
IR-LED (1x)
Powerbank mit 2A Ausgang (1x)
Für die Drehung um die Vertikalachse wird ein Step-Motor (Typ 28BYJ-48) benutzt.
Für die Drehung um die Horizontalachse wird ein Servo-Motor (Typ AS-215BBMG) benutzt.
Für die Kameraauslösung wird ein entweder ein Servo-Motor (Typ SG-90) benutzt oder eine IR-LED.
Das KAP-RIG wird mit einem Arduino-Nano gesteuert.
Das Steuerungsprogramm enthält ausführliche Kommentare.
Mit den Dip-Schaltern kann die Drehung und Neigung des KAP-RIG eingestellt werden.
Drehung: Die Drehung der Kamera kann ueber die DIP-Schalter eingestellt werden.
DIP 1: OFF; DIP 2: OFF = Das RIG wird um 360 Grad gedreht, bei einer Neigung von 90 Grad. Sind andere Winkel aktiviert wird auch hier eine 360 Grad Drehung vollzogen. Es findet keinen Ausloesung der Kamera statt (Videomodus).
DIP 1: OFF; DIP 2: ON = Das RIG wird in 10,019 Grad Winkelschritten gedreht, bei einer Neigung von 90 Grad. Sind andere Winkel aktiviert werden diese angefahren und danach weitergedreht. Die Kamera wird ausgeloest.
DIP 2: ON; DIP 2: OFF = Das RIG wird in 20,039 Grad Winkelschritten gedreht, bei einer Neigung von 90 Grad. Sind andere Winkel aktiviert werden diese angefahren und danach weitergedreht. Die Kamera wird ausgeloest.
DIP 2: ON; DIP 2: ON = Das RIG wird in 30,058 Grad Winkelschritten gedreht, bei einer Neigung von 90 Grad. Sind andere Winkel aktiviert werden diese angefahren und danach weitergedreht. Die Kamera wird ausgeloest.
Neigungswinkel:
DIP 3: OFF; DIP 4: OFF; DIP 5: OFF = (B000) = Die RIG-Neigung faehrt auf 90 Grad.
DIP 3: OFF; DIP 4: OFF; DIP 5: ON = (B001) = Die RIG-Neigung faehrt auf 90 und 68 Grad.
DIP 3: OFF; DIP 4: ON; DIP 5: OFF = (B010) = Die RIG-Neigung faehrt auf 90 und 46 Grad.
DIP 3: OFF; DIP 4: ON; DIP 5: ON = (B011) = Die RIG-Neigung faehrt auf 90 , 68 und 46 Grad.
DIP 3: ON; DIP 4: OFF; DIP 5: OFF = (B100) = Die RIG-Neigung faehrt auf 90 und 24 Grad.
DIP 3: ON; DIP 4: OFF; DIP 5: ON = (B101) = Die RIG-Neigung faehrt auf 90 , 68 und 24 Grad.
DIP 3: ON; DIP 4: ON; DIP 5: OFF = (B110) = Die RIG-Neigung faehrt auf 90 , 46 und 24 Grad.
DIP 3: ON; DIP 4: ON; DIP 5: ON = (B111) = Die RIG-Neigung faehrt auf 90 , 68, 46 und 24 Grad.
Pause: Nach jedem der drei Dreh-Winkelschritte und der RIG-Neigung wird eine Pause gemacht. Bei der fortlaufenden Drehung (360 Grad) wird keine Pause gemacht.
DIP 6: OFF; DIP 7: OFF = Pausenzeit von 3 Sekunden bei IR-LED bzw. Kabelauslösung und 6 Sekunden bei Servoauslösung.
DIP 6: OFF; DIP 7: ON = Pausenzeit von 6 Sekunden bei IR-LED bzw. Kabelauslösung und 12 Sekunden bei Servoauslösung.
DIP 6: ON; DIP 7: OFF = Pausenzeit von 6 Sekunden bei IR-LED bzw. Kabelauslösung und 10 Sekunden bei Servoauslösung.
DIP 6: ON; DIP 7: ON = Pausenzeit von 12 Sekunden bei IR-LED bzw. Kabelauslösung und 20 Sekunden bei Servoauslösung.
Ausloesen:
DIP 8: OFF = Die Kamera wird ueber eine IR-LED bzw. einen Kabelausloeser ausgeloest.
DIP 8: ON = Die Kamera wird ueber einen Servo ausgeloest.
Viel Spaß mit dem KAP-RIG
Thorsten Jahn
KAP-RIG - construction
Version 2018-01-29
This KAP-RIG was printed with PETG material on a Geeetech Prusa I3 Pro B.
Nozzle size 0.3 mm
Layer thickness: 0.1 mm
Line width / wall line width 0.4 mm
Wall thickness 1.2 mm
Filling 50% - grid with 25% overlap
Pressure plate adhesion - Skirt
In addition, the following parts are required.
M3 screws 10mm (18x)
M3 screws 25mm (1x)
M3 nuts (19x)
M3 washers (19x)
M2 screws plastic 20mm (8x)
M2 nuts 6mm (8x)
M2 nuts (8x)
Step motor type 28BYJ-48 (1x)
Step motor driver type ULN2003 (1x)
servo motor type AS-215 BBMG (1x)
Servo motor type SG-90 (1x)
Tripod screw (1x)
Arduino-Nano (1x)
breadboard (1x)
dip-switch 8-fold (1x)
Optocoupler type TLP621 (2x)
USB cable (1x)
Post bar (1x)
On-off switch (1x)
IR LED (1x)
Powerbank with 2A output (1x)
For rotation around the vertical axis, a step motor (type 28BYJ-48) is used.
For rotation around the horizontal axis a servo motor (type AS-215BBMG) is used.
For the camera release, either a servo motor (type SG-90) or an IR LED is used.
The KAP-RIG is controlled by an Arduino-Nano.
The control program contains detailed comments.
With the dip switches the rotation and inclination of the KAP-RIG can be adjusted.
Rotation: The rotation of the camera can be adjusted via the DIP switches.
DIP 1: OFF; DIP 2: OFF = The RIG is rotated 360 degrees at a 90 degree incline. If other angles are activated, a 360 degree turn is made here as well. There is no release of the camera (video mode).
DIP 1: OFF; DIP 2: ON = The RIG is rotated in 10,019 degree increments at a 90 degree incline. If other angles are activated, they are approached and then further rotated. The camera is triggered.
DIP 2: ON; DIP 2: OFF = The RIG is rotated in 20.039 degree increments, at a 90 degree incline. If other angles are activated, they are approached and then further rotated. The camera is triggered.
DIP 2: ON; DIP 2: ON = The RIG is rotated in 30,058 degree increments at a 90 degree incline. If other angles are activated, they are approached and then further rotated. The camera is triggered.
Inclination:
DIP 3: OFF; DIP 4: OFF; DIP 5: OFF = (B000) = RIG tilt is 90 degrees.
DIP 3: OFF; DIP 4: OFF; DIP 5: ON = (B001) = RIG tilt is 90 and 68 degrees.
DIP 3: OFF; DIP 4: ON; DIP 5: OFF = (B010) = RIG tilt is 90 degrees and 46 degrees.
DIP 3: OFF; DIP 4: ON; DIP 5: ON = (B011) = RIG tilt is 90, 68 and 46 degrees.
DIP 3: ON; DIP 4: OFF; DIP 5: OFF = (B100) = The RIG tilt goes to 90 and 24 degrees.
DIP 3: ON; DIP 4: OFF; DIP 5: ON = (B101) = RIG tilt is 90, 68 and 24 degrees.
DIP 3: ON; DIP 4: ON; DIP 5: OFF = (B110) = RIG tilt is 90, 46 and 24 degrees.
DIP 3: ON; DIP 4: ON; DIP 5: ON = (B111) = RIG tilt is 90, 68, 46 and 24 degrees.
Pause: After each of the three rotation-angle steps and the RIG tilt, a break is made. Continuous rotation (360 degrees) will not pause.
DIP 6: OFF; DIP 7: OFF = pause time of 3 seconds with IR LED or cable release and 6 seconds with servo release.
DIP 6: OFF; DIP 7: ON = pause time of 6 seconds with IR LED or cable release and 12 seconds with servo release.
DIP 6: ON; DIP 7: OFF = pause time of 6 seconds with IR-LED or cable release and 10 seconds with servo release.
DIP 6: ON; DIP 7: ON = pause time of 12 seconds with IR-LED or cable release and 20 seconds with servo release.
Trigger:
DIP 8: OFF = The camera is triggered via an IR LED or a cable release.
DIP 8: ON = The camera is triggered by a servo.
Have fun with the KAP-RIG
Thorsten Jahn
Similar models
thingiverse
free

Bauhilfe für Heling by Paratwa66
...hoben. das teil wird in den halter eingeschoben werden und ermöglicht die drehung um 9 grad, der rumpf wird immer sicher fixiert.
thingiverse
free

Trapezgewinde TR 12 x 3 by frederik12
... ein und drehen sie einschliesslich die mutter auf den spindel und lassen sie die mutter abkühlen.dann wirds alles ok.viel spass.
thingiverse
free

Trapezgewinde TR 10 x 2 by frederik12
... ein und drehen sie einschliesslich die mutter auf den spindel und lassen sie die mutter abkühlen.dann wirds alles ok.viel spass.
thingiverse
free

Fenster Sicherung by Sn1per1200
... und rahmen geklemmt.
bei der v2 wird die sicherung auf das fenster geklemmt, damit man sie auch in dem kippmodus verwenden kann.
grabcad
free

Hovercraft ACV 5 Zoll Zubehör und Schubvariationen
...beim einlenken und senkt etwas die belastung auf schürze, ist aber geschmacksache von eigenen bedürfnissen und brauch zwei servos
thingiverse
free

Vaccum Cleaner Nozzle 90 Degree, Staubsauger Düse 90 Grad by mattmeisel
...rige ecken (z.b. auf bücherregalen oder schränken) 90 grad. kann auf einem prusa mini mit support nur auf platte gedruckt werden.
thingiverse
free

Queue Drehmaschine by as281017
...giverse gefunden und etwas modifiziert.
hinweis: bei dauerbetrieb könnte der motor zu warm werden und die lagerschalen verformen.
thingiverse
free

ZMR250 Xiaomi GoPro Mount 15 DEG by dergutehirte
...nd den halter noch mit kabelbindern zu fixieren.
das teil hat 15 grad neigung, wodurch es wohl für die meisten ausreichen sollte.
thingiverse
free

Pan-Tilt for Fatshark camera 600TVL by Guenter
...recht drucken, die flanken der kameraaufnahme brechen sonst ab, sie sin so nicht flexibel.
(übersetzung durch google-translate)
thingiverse
free

ENDER 5 LED Leiste mit Schalter LED Bar by DEICHDRUCKER
...t passend für einen 20mm runden schalter und einen stepdown-modul um die spannung von 24v auf 12v für die led's zu begrenzen.
Jahnthor
thingiverse
free

Filament-Rollenständer - PLA - Konstruktion 2018-03-12 by JahnThor
...ess 0.8 mm
filling 20% - grid with 25% overlap
pressure plate adhesion - brim
have fun with the filament roll stand
thorsten jahn
thingiverse
free

SJCAM5000 Halter auf DSLR - Konstruktion 2018-03-27 by JahnThor
...kness 1.2 mm
filling 50% - grid with 25% overlap
pressure plate adhesion - brim
have fun with the sjcam5000-holders
thorsten jahn
thingiverse
free

Picavet - PETG - Konstruktion Version 2018-01-29 by JahnThor
...end caps are connected to the cross.
the rubber band is guided by 6mm carbon fiber tubes.
have fun with the picavet
thorsten jahn
thingiverse
free

NodalpunktAdapter-DSLR - PETG - Konstruktion Version 2018-03-02 by JahnThor
...m with 3-way cross cw25 head with integrated mx445 camera quick release.
have fun with the nodal point adapter dslr
thorsten jahn
Konstruktion
thingiverse
free
Filament-Rollenständer - PLA - Konstruktion 2018-03-12 by JahnThor
...ess 0.8 mm
filling 20% - grid with 25% overlap
pressure plate adhesion - brim
have fun with the filament roll stand
thorsten jahn
thingiverse
free
SJCAM5000 Halter auf DSLR - Konstruktion 2018-03-27 by JahnThor
...kness 1.2 mm
filling 50% - grid with 25% overlap
pressure plate adhesion - brim
have fun with the sjcam5000-holders
thorsten jahn
thingiverse
free

FDM Sailplane Rumpfdeckel ohne Schrauben by Efeu
...fdm sailplane rumpfdeckel ohne schrauben by efeu thingiverse konstruktion von meinem freund...
thingiverse
free
Picavet - PETG - Konstruktion Version 2018-01-29 by JahnThor
...end caps are connected to the cross.
the rubber band is guided by 6mm carbon fiber tubes.
have fun with the picavet
thorsten jahn
thingiverse
free
NodalpunktAdapter-DSLR - PETG - Konstruktion Version 2018-03-02 by JahnThor
...m with 3-way cross cw25 head with integrated mx445 camera quick release.
have fun with the nodal point adapter dslr
thorsten jahn
thingiverse
free

Spulenadapter / spool adaptor by Steffen_Kautz
...können: spule innenduchmesser:38.5mm spule aussendurchmesser:190mm (ohne relevanz für diese konstruktion spulenbreite:85mm (ohne relevanz für diese konstruktion) durchmesser der spulenachse...
thingiverse
free

T-28 Carbon Z Fahrwerksklappen Anlenkung Reparatur by rucky2511
...mir ist die anlenkung vom fahrwerksbein gebrochen. deshalb diese konstruktion ...
thingiverse
free

EchoSpot Halter/Holder für/for Regalsystem
...echospot halter/holder für/for regalsystem thingiverse diese konstruktion dient dazu um einen echo spot an einem regal...
thingiverse
free

Dachrinnenablauf (Gutter drain) by FrankWL
...zusätzlich benötigt schraube m5 gewindeeinsatz m5 stützen in der konstruktion integriert. nachher nur noch heraustrennen und...
Kap
3d_export
$5

Kap door
...kap door
3dexport
3d_export
$10
Door glass kap
...door glass kap
3dexport
3d_export
$5
Queen Door 3D Model
...queen door 3d model 3dexport queen door krali?e kap? kaps? queen door 3d model sercancetin 81204...
3d_export
$5
Door 3D Model
...door 3d model 3dexport kap door door 3d model ua06 77212...
3d_export
$5
Modern Door Handles Set 5 in 1 3D Model
...in 1 3d model 3dexport modern door handle handles kap kolu kollar? modern door handles set 5 in 1...
3ddd
$1
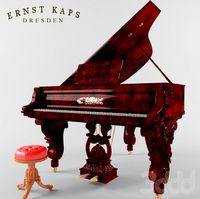
Рояль в стиле барокко
...рояль , пианино , барокко модель антикварного рояля ernst kap (1878) в стиле барокко для классического и современного интерьера....
3dfindit
free

KAP
...kap
3dfind.it
catalog: a.s.t. angewandte system technik
thingiverse
free
KAP by Clem_golgoth
...kap by clem_golgoth
thingiverse
light weight kite photography servo-controled cradle
thingiverse
free

Simple Picavet for KAP
...simple picavet for kap
thingiverse
simple picavet
thingiverse
free
KAP Camera Servo Holder by JBijnens
...kap camera servo holder by jbijnens
thingiverse
servo holder for kap rig.
29
3d_export
$15

rocks 29
...rocks 29
3dexport
rocks 3d model 29
3d_ocean
$45

B-29 Superfortress
...b-29 superfortress
3docean
b-29 b-29 2k b-29 superfortress boeing b-29
b-29 superfortress texture 2k
3ddd
$1

MobilFresno MF.BD.EG.29
...bilfresno mf.bd.eg.29
3ddd
mobilfresno mf.bd.eg.29 , mobilfresno
mobilfresno mf.bd.eg.29
3ddd
$1

Bed 29
...bed 29
3ddd
постельное белье
bed 29 . i hope you like it
thank you
turbosquid
$39

Building 29
...osquid
royalty free 3d model building 29 for download as max on turbosquid: 3d models for games, architecture, videos. (1486645)
turbosquid
$20

Curtains 29
...osquid
royalty free 3d model curtains 29 for download as max on turbosquid: 3d models for games, architecture, videos. (1333833)
turbosquid
$13

building 29
...osquid
royalty free 3d model building 29 for download as max on turbosquid: 3d models for games, architecture, videos. (1362470)
turbosquid
$10

Decor 29
...urbosquid
royalty free 3d model decor 29 for download as stl on turbosquid: 3d models for games, architecture, videos. (1678255)
turbosquid
$6

Bedcloth 29
...osquid
royalty free 3d model bedcloth 29 for download as max on turbosquid: 3d models for games, architecture, videos. (1522759)
turbosquid
$14

Mushroom 29
...royalty free 3d model mushroom 29 for download as max and obj on turbosquid: 3d models for games, architecture, videos. (1199477)
Petg
turbosquid
$9

Chandra rugs T-PETG
... available on turbo squid, the world's leading provider of digital 3d models for visualization, films, television, and games.
3d_export
$6

Makita lawn mower motor cover
...makita lawn mower motor cover for print . plastic petg carbon or...
3d_export
$5

snorkel connector snorkel bracket snorkel holder
...free to comment or cantact me via dm. pla, petg and abs should be fine for printing although i...
3d_export
$8

mounting of a front wing of the bicycle for a fork rockshox
...20 mm. 3d printing settings plastic - nylon / petg rafts - yes. supports - yes. resolution - 0.16...
3d_export
$15

E30 tweeter pods speaker mounts
...plastic, interlayer adhesion is poor, i want to try petg ...
3d_export
free

danish lunch
...made in thindercad and printed on ender3 max,<br>i used petg filament and have painted with vajjejo model paint.<br>this is...
3d_export
$21

stock adapter grand power stribog
...from cyma zhukov and install stock on new adapter. petg settings 0,10 - 0,15, infill 100%, supports everywhere, brim....
3d_export
$7

shimano xt-slx brake level piston guide right top
...with printed parts: i recommend: plastic - nylon / petg rafts - yes. supports - yes. resolution - 0.16....
3d_export
$7

shimano xt-slx brake level piston guide left top
...with printed parts: i recommend: plastic - nylon / petg rafts - yes. supports - yes. resolution - 0.16....
3d_export
$29

cup holder b m w e90-91-92-93
...cup holder b m w e90-91-92-93 3dexport printed with petglt;br>infil 20-40%<br>speed: 50mm/s<br>i make this design for people who don't...
2018
turbosquid
$15

Human-2018
...turbosquid
royalty free 3d model human-2018 for download as on turbosquid: 3d models for games, architecture, videos. (1175109)
3d_export
$20

dodgechallenger srt 2018
...dodgechallenger srt 2018
3dexport
dodge_challenger srt 2018
3d_export
$20

mustang shelby 2018
...mustang shelby 2018
3dexport
mustang shelby 2018
3d_export
$20

lexus ls 2018
...lexus ls 2018
3dexport
lexus ls 2018
turbosquid
$50

CBR250RR 2018
...quid
royalty free 3d model cbr250rr 2018 for download as max on turbosquid: 3d models for games, architecture, videos. (1631746)
turbosquid
$19

Bitcoin 2018
...squid
royalty free 3d model bitcoin 2018 for download as obj on turbosquid: 3d models for games, architecture, videos. (1266554)
turbosquid
$3

chair001A-2018
...uid
royalty free 3d model chair001a-2018 for download as max on turbosquid: 3d models for games, architecture, videos. (1663170)
turbosquid
$25

Pumpkin 2018
... 3d model pumpkin 2018 for download as max, lwo, obj, and c4d on turbosquid: 3d models for games, architecture, videos. (1336084)
3d_export
$20

gt 2018
...gt 2018
3dexport
car model with rig for animation
turbosquid
$39

A8 2018
...a8 2018 for download as 3ds, obj, wrl, c4d, fbx, dae, and stl on turbosquid: 3d models for games, architecture, videos. (1345349)
01
3d_export
$5

cup 01
...cup 01
3dexport
cup 01
3ddd
$1

01
...01
3ddd
kartina
turbosquid
$6

Dry Stone Wall 01 01
... model dry stone wall 01 01 for download as max, fbx, and obj on turbosquid: 3d models for games, architecture, videos. (1713793)
design_connected
free

Stool 01
...stool 01
designconnected
free 3d model of stool 01
turbosquid
$10

New York skyscraper #01-01
... available on turbo squid, the world's leading provider of digital 3d models for visualization, films, television, and games.
turbosquid
$8

dustbin 01 trash can 01
... available on turbo squid, the world's leading provider of digital 3d models for visualization, films, television, and games.
turbosquid
$10

01
... available on turbo squid, the world's leading provider of digital 3d models for visualization, films, television, and games.
design_connected
$13

Barstool 01
...barstool 01
designconnected
barstool 01 computer generated 3d model.
design_connected
$11

Vases 01
...vases 01
designconnected
vases 01 computer generated 3d model.
evermotion
$20

Male 01 3dpeople vol 01
... poses highly detailed and shadered model of human body. every model is shadered and ready to render.. evermotion 3d models shop.
Rig
3d_export
$25

rigged chimpanzee
...rigged chimpanzee
3dexport
rigged chimpanzee
3d_export
$25

rigged wolf
...rigged wolf
3dexport
rigged wolf
3d_export
$25

rigged cicada
...rigged cicada
3dexport
rigged cicada
3d_export
$20

triceratops rigged
...triceratops rigged
3dexport
triceratops rigged
3d_export
$20

rigged horse
...rigged horse
3dexport
rigged horse
3d_export
$15

rigged cheetah
...rigged cheetah
3dexport
rigged cheetah
3d_ocean
$16

Rigged Mannequinn
...es .this rig contains two textures.however it is not uv mapped. the parts and the rig controls are named with proper naming co...
3d_ocean
$35

Rigged Bicycle
...rigged bicycle
3docean
bicycle cycle rigged bicycle slim tire
rigged bicycle ready for animation..
turbosquid
$40

knight-rigged RIGGED
...ree 3d model knight-skeleton for download as ma, fbx, and obj on turbosquid: 3d models for games, architecture, videos. (1576606)
turbosquid
$2

rig
... available on turbo squid, the world's leading provider of digital 3d models for visualization, films, television, and games.
Version
3ddd
$1
Diamond version
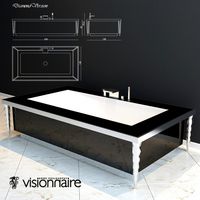
...nd , version , ванна
visionnaire - diamond bath
turbosquid
$50
LibraryMini Version
...free 3d model librarymini version for download as max and jpg on turbosquid: 3d models for games, architecture, videos. (1617724)
design_connected
$34
Barocco Version 01
...barocco version 01
designconnected
zanotta barocco version 01 computer generated 3d model. designed by progetti, emaf.
design_connected
$27
Barocco Version 02
...barocco version 02
designconnected
zanotta barocco version 02 computer generated 3d model. designed by progetti, emaf.
turbosquid
free
![Door [2 versions]](/t/13243146.jpg)
Door [2 versions]
...rbosquid
free 3d model door [2 versions] for download as fbx on turbosquid: 3d models for games, architecture, videos. (1223985)
turbosquid
$2
seat version 0.1
...
royalty free 3d model seat version 0.1 for download as blend on turbosquid: 3d models for games, architecture, videos. (1432653)
turbosquid
$12
Chip Version 03
...lty free 3d model chip version 03 for download as c4d and fbx on turbosquid: 3d models for games, architecture, videos. (1241145)
3d_export
$10

magnolia grandiflora mature version
...magnolia grandiflora mature version
3dexport
magnolia grandiflora mature version
3d_export
$8
room assets and voxel version
...room assets and voxel version
3dexport
room assets and voxel version
turbosquid
$35
Zil Civilian version
... model zil civilian version for download as cgf, fbx, and obj on turbosquid: 3d models for games, architecture, videos. (1639420)