Thingiverse
Joystick Hat Switch by ThatOtherGuy
by Thingiverse
Last crawled date: 4 years, 6 months ago
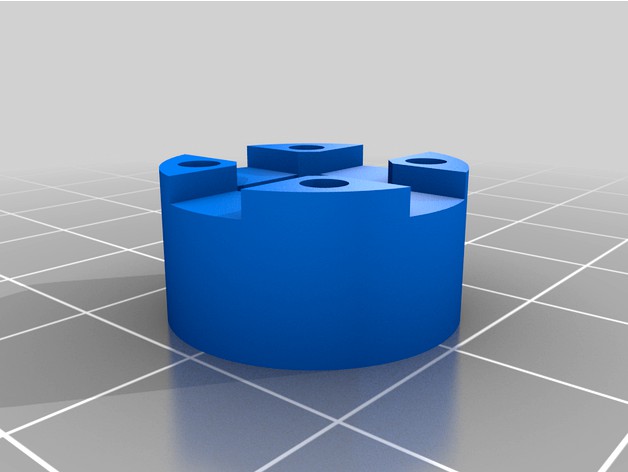
This is a basic 4 way hat switch intended to be used with custom controllers, while working around the limitations of small scale prints on FDM printers. I've printed all of mine in PETG but there's no reason PLA or ABS shouldn't work.
4x M2x8mm screws are used to attach the cap to the stalk, the stalk to the LowerBody (losely, so it can still move/flex to actuate buttons), and the upper body to the housing/shell of your controller. 2x M2x16mm screws are used to attach the lower body to the upper body.
UpperBody could also be integrated into the shell of your controller, but depends on your print orientation - the spacing and surfaces have to be pretty good, since that is what holds the buttons themselves from flexing too much.
The shell needs a 7.8mm (or larger) clearance hole for the stalk, and two countersunk holes for countersunk M2x8mm bolts into the UpperBody, on a 13.5mm diameter bolt circle.
The bottom of the cap has a 5.65mm square hole set 2mm deep to capture the top of the stalk, with a hole for a M2x8 screw to fix to the stalk. The included is 20mm in diameter, which covers the external facing screws for the shell/body/Upper.
I've used the APEM MJTP1230 switches, but it should be completely compatible with the Omron B3F-1000 series switches - or, likely, random ebay/Amazon ‘6mm tactile’ switches. The connector for wiring is 1.5mm pitch, intended for JST ZH connectors, but could be direct solder or any other 1.5mm pitch connector as well.
Break off two of the legs of the switch, bend the others so it mounts vertically on the PCB, align with the UpperBody piece and solder in.
Gerbers are generated with a single drill file, suitable for JLPCB (PTH and NPTH combined).