Thingiverse
JoyCon style Pro Controller - Remix by Hedgehog0091
by Thingiverse
Last crawled date: 4 years, 6 months ago
Original summary (with parts irrelevant to this remix removed):
A fix for the dpad miss inputs. Example: https://www.youtube.com/watch?v=Ny59RKSGcuY&ab_channel=startoss (not my video just an example I found clearly showcasing the issue)
Print slowly with maximum detail possible, and supports on. This reduces the ghosting and jitter artifacts that can cause the buttons to get stuck. For one controller you need 4 button pieces and 1 retention plate. I recommend going in after and very lightly sanding the edges of the buttons and the edges of the openings on the retention plate to reduce friction and chances of the buttons getting stuck depressed.
Known issues:
Elephants Foot on the buttons will cause issues and require sanding.
The connecting skin is 1 layer thick and cannot be strengthened due to tolerance issues. So use caution when removing supports.
Remix summary:
Honestly, this is a pretty crude remix. But it definitely fixes the issue I was having with the buttons being wobbly. I remixed this entirely in Blender with my grand total of near zero knowledge, so take that as you will. The files marked as "_orig" are the files before I remeshed (full of errors because I don't know what I'm doing) and the "_REMESH" files are, well, remeshed. You should use those.
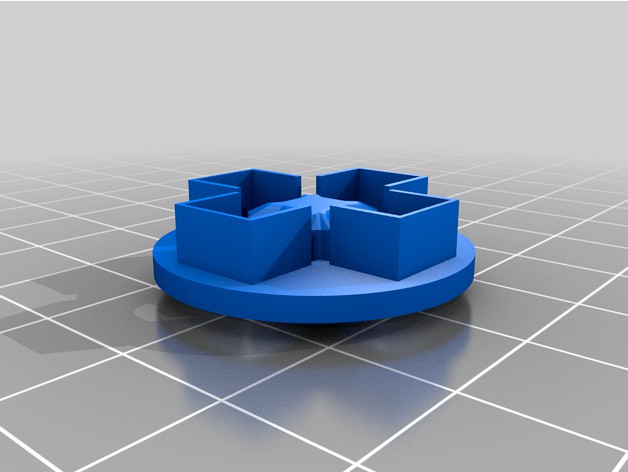
The plate marked "angle" has a bit of an angle applied to it to try and accomodate the fact that the controller face is not flat. It mostly succeeds too! The other one is flat. You only need one of these bases, but four dpad buttons (as mentioned in the original summary).
The "dpadbutt" (BUTTON, mind you) is a slightly modified version of the dpad button from the original, but angled inwards slightly. The walls are also not perfectly vertical due to my aforementioned lack of Blender knowledge. It works fine for me though. The button from the source I'm remixing from should work just fine too though, so if slightly angled buttons aren't your thing then grab the original.
Tip for printing: if you print the buttons on their side (orientation doesn't really matter) so the layer lines are parallel to the direction the button gets pressed in, it saves you some trouble when smoothing out the sides of the buttons to move properly in the retention plate.
Note during installation: Be sure to test button fit after installing the retention plate in the controller shell! The walls seem to get squished in a tiny bit, which is enough to produce friction on the buttons.
Guide to disassembling your controller and replacing the dpad: https://www.ifixit.com/Guide/Nintendo+Switch+Pro+Controller+Buttons+-+D-Pad+Replacement/127790
A fix for the dpad miss inputs. Example: https://www.youtube.com/watch?v=Ny59RKSGcuY&ab_channel=startoss (not my video just an example I found clearly showcasing the issue)
Print slowly with maximum detail possible, and supports on. This reduces the ghosting and jitter artifacts that can cause the buttons to get stuck. For one controller you need 4 button pieces and 1 retention plate. I recommend going in after and very lightly sanding the edges of the buttons and the edges of the openings on the retention plate to reduce friction and chances of the buttons getting stuck depressed.
Known issues:
Elephants Foot on the buttons will cause issues and require sanding.
The connecting skin is 1 layer thick and cannot be strengthened due to tolerance issues. So use caution when removing supports.
Remix summary:
Honestly, this is a pretty crude remix. But it definitely fixes the issue I was having with the buttons being wobbly. I remixed this entirely in Blender with my grand total of near zero knowledge, so take that as you will. The files marked as "_orig" are the files before I remeshed (full of errors because I don't know what I'm doing) and the "_REMESH" files are, well, remeshed. You should use those.
The plate marked "angle" has a bit of an angle applied to it to try and accomodate the fact that the controller face is not flat. It mostly succeeds too! The other one is flat. You only need one of these bases, but four dpad buttons (as mentioned in the original summary).
The "dpadbutt" (BUTTON, mind you) is a slightly modified version of the dpad button from the original, but angled inwards slightly. The walls are also not perfectly vertical due to my aforementioned lack of Blender knowledge. It works fine for me though. The button from the source I'm remixing from should work just fine too though, so if slightly angled buttons aren't your thing then grab the original.
Tip for printing: if you print the buttons on their side (orientation doesn't really matter) so the layer lines are parallel to the direction the button gets pressed in, it saves you some trouble when smoothing out the sides of the buttons to move properly in the retention plate.
Note during installation: Be sure to test button fit after installing the retention plate in the controller shell! The walls seem to get squished in a tiny bit, which is enough to produce friction on the buttons.
Guide to disassembling your controller and replacing the dpad: https://www.ifixit.com/Guide/Nintendo+Switch+Pro+Controller+Buttons+-+D-Pad+Replacement/127790