GrabCAD

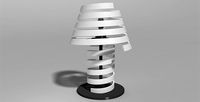
James Webb telescope Lamp
by GrabCAD
Last crawled date: 1 year, 2 months ago
This lamp requires LEVITON no.4155 light sockets and can have up to 7 installed on it. I cannot guaranty that other light sockets will fit.
To assemble this lamp correctly follow the assembly picture to know which arm length goes where.
The small arms have the file name (Clip.stl) which are red in the assembly picture and the longer ones are called (LongClip.stl) and are cyan, the long one is 2mm longer than the regular ones and are to account for the distortion of the parabolic shape. Otherwise, the assembly would be flatter.
1. To assemble the lamp you must first print the Hex.stl part and the InHex.stl while making sure the taper of the part is facing towards the bed, this can be ensured by seeing that there are more layer lines at the bottom than the top for the contour.
2. When the Hex parts are printed, they can be assembled over a sheet of thermal blankets, because they both are tapered slightly they will seize.
3. When you have completed two Hex with the thermal blankets you can now link them together with the Clips.stl parts, i recommend using an elevated surface like a small book to protect your table. Using an elevated surface will be unavoidable towards the end as you will need to press the last clips with the fully formed parabolic shape.
4. To insert the clips I recommend using the handle of a screwdriver as the fit is quite tight (the hole and peg have the same dimension in cad) or a small hammer to lightly tap it.
5. The center hexagon has a hole that require treads made with a 1/4-20 tap and therefore this lamp can be used with standard camera arms. BE EXTRA CAREFULL WHEN SCREWING IT ONTO AN ARM AS THE HOLE COMUNICATE WITH WHERE THE POWER OF THE LIGHT SOCKET IS, MAKE SURE YOUR 1/4-20 SCREW IS NOT TO LONG. also I do not recommend using support inside this hole as it will be hard really hard to removing it.
Side note: The final result in the pictures is all PETG printed 0.4mm nozzle with 20% infill and 4 wall parameter and 4 top & bottom wall. the final assembly weight about 500g. I am unable to confirm if PLA will be a suitable plastic for this project as it is more brittle and might break the holes of the hexagon while pressing them in.
Similar models
thingiverse
free

Caravan Lamp Socket by Lucsch
...sed to screw the part to the wall. on the backside the cables can be stored in the small channel between the lamp and the switch.
thingiverse
free

1/4" square to hexagon socket (7-20 mm) by Otter3D
...
i only tried pla, maybe other materials are stronger. this can not replace a full metal hex kit.
slicer: cura
printer: ender 3v2
thingiverse
free

Converter socket to bit screw driver & Bit driver by JobSmolders
...nting.
i don’t recommend that you use the plastic converter peace for removing hot nozzles :-)
printed in pet-g, resolution 0.2mm
thingiverse
free

3 Jaw Drill Chuck 1/4 Inch by BManx2000
...ly.
the chuck has a tapered socket for press fitting to a shaft. the included shaft should fit a 1/4 inch hex screwdriver socket.
grabcad
free

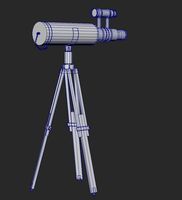
Telescope Parabolic Mirror (In action !)
...arabolic curve.
note: due to the size of the assembly, it is recommended to zoom on particular parts or use the camera viewpoint.
cults
free

Converter socket to bit screw driver & Bit driver
...ing.
i don’t recommend that you use the plastic converter peace for removing hot nozzles :-)
printed in pet-g, resolution 0.2mm
grabcad
free

TAPERED PIPE REAMERS
...tapered pipe reamers
grabcad
these are models that i use for reaming hole before tapping with tapered taps
thingiverse
free

Hexagon Nozzle Socket by kcchen_00
...o hex adapter to convert to hex driver.
socket to hex adapter may need to be printed with a little over-extrusion to fit tighter.
thingiverse
free

Phone Tripod Mount by SteveGlenner
... if you go carefully. i recommend printing both parts on their sides (long edge) for maximum strength and printing with supports.
thingiverse
free

M3-M4-M5 Tap Guide - Laser Cut Acrylic by sonnylowe
...he largest of the three and required the most stability when tapping.
i have attached both dxf and pdf files.
have fun,
makersl
Webb
3ddd
free

Collier Webb - Enterprise
...llier webb - enterprise
3ddd
collier webb
модель бра collier webb - enterprise wall light
- мультисаб-материал
- fbx + obj + 3ds
3ddd
$1

Collier webb - Jack floor light
...collier webb - jack floor light
3ddd
collier webb , jack
collier webb - jack floor light
turbosquid
free

Collier Webb Console
... model collier webb console for download as max, obj, and fbx on turbosquid: 3d models for games, architecture, videos. (1498243)
3ddd
$1

Collier Webb, Coco Chandelier
... coco chandelier
http://www.collierwebb.com/products/lighting/ceiling-lights/coco-chandelier/
3d_export
$25

James Webb Telescope
...xt generation space telescope will be launched on an ariane 5 rocket from french guiana in spring 2019.<br>full 3d modeling
cg_studio
$165

James Webb Space Telescope3d model
...udio
.3ds .fbx .max .obj - james webb space telescope 3d model, royalty free license available, instant download after purchase.
3ddd
free

"Collier Webb", Bespoke, "Task Light"
...-lighting/task-light/ http://www.whatwilsonwants.com/2011/12/beautiful-light-by-collier-webb.html#.vbfghfl_s6u
3ddd
$1

Rossin Bob
...rossin bob 3ddd rossin производитель rossin дизайн roger webb коллекция...
3ddd
$1

Rossin by BOB
...rossin by bob 3ddd rossin , roger webb боб компактный, и удобный, рассчитан на установку в целом...
3d_sky
free

Collier Webb - Enterprise
...lier webb - enterprise
3dsky
collier webb
model sconces collier webb - enterprise wall light - multisab content - fbx + obj + 3ds
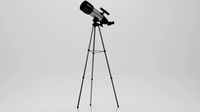
Telescope
archibase_planet
free
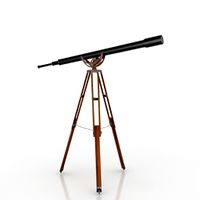
Telescope
...telescope
archibase planet
telescope spyglass
telescope n220408 - 3d model (*.gsm+*.3ds) for interior 3d visualization.
3d_export
free

telescope
...telescope
3dexport
telescope 3d model, more files here:
3d_export
free
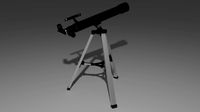
telescope
...telescope
3dexport
telescope refractor on a tripod. can be used as part of the interior.
3d_ocean
$8

Telescope
...antique binocular glass magnify monocular naval optic optical pirate spy spyglass telescope viewer vision
nice model of telescope
turbosquid
free
telescope
...scope
turbosquid
free 3d model telescope for download as obj on turbosquid: 3d models for games, architecture, videos. (1638257)
turbosquid
$35
Telescope
...rbosquid
royalty free 3d model telescope for download as fbx on turbosquid: 3d models for games, architecture, videos. (1515061)
turbosquid
$6
Telescope
...rbosquid
royalty free 3d model telescope for download as max on turbosquid: 3d models for games, architecture, videos. (1665123)
turbosquid
$5
Telescope
...osquid
royalty free 3d model telescope for download as blend on turbosquid: 3d models for games, architecture, videos. (1603403)
turbosquid
$99

Telescope
...y free 3d model telescope for download as blend, fbx, and obj on turbosquid: 3d models for games, architecture, videos. (1609065)
turbosquid
$30

telescope
...lty free 3d model telescope for download as max, obj, and fbx on turbosquid: 3d models for games, architecture, videos. (1367619)
James
design_connected
$13

James Di
...james di
designconnected
vincent sheppard james di computer generated 3d model. designed by sheppard, vincent.
3ddd
$1

The Sofa And Chair JAMES
...the sofa and chair james
3ddd
james
http://www.thesofaandchair.co.uk/collection/dining-chairs/110-james
3ddd
$1

Bonaldo / James
...onaldo , обеденный
bonaldo james mdern table.
smoked glass.
dimension:75x100x220-320 cm
3ddd
$1

James-F
...james-f
3ddd
james-f , ottostelle
размеры: ш-740mm x г-710mm x в-1030mm
3ddd
$1

постеры Yellena James
... yellena james
коллекция современных постеров художницы yellena james. текстуры в комплекте.
3ddd
$1

Кофейный столик James
... james
дизайнеры норвежской студии gridy представили многофункциональный предмет мебели james.
turbosquid
$10

Armchair James
...alty free 3d model armchair james for download as max and obj on turbosquid: 3d models for games, architecture, videos. (1695509)
3ddd
$1

St. James Bed
...st. james bed
3ddd
restoration hardware
restorationhardware st. james bed
3ddd
$1

St James Middel Table
...es , журнальный , круглый
st james middel table
turbosquid
$40

James Franco
... available on turbo squid, the world's leading provider of digital 3d models for visualization, films, television, and games.
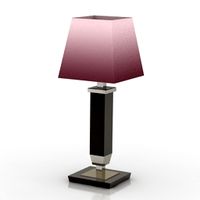
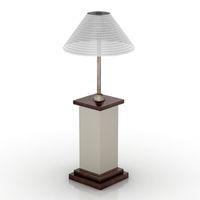
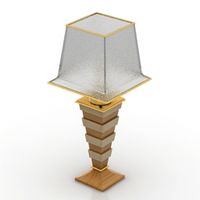
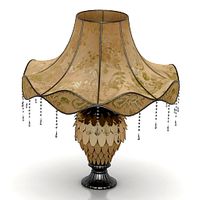
Lamp
archibase_planet
free
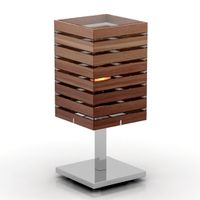
Lamp
...lamp
archibase planet
lamp reading lamp table lamp
lamp - 3d model (*.gsm+*.3ds) for interior 3d visualization.
archibase_planet
free
Lamp
...lamp
archibase planet
lamp reading lamp table lamp
lamp - 3d model (*.gsm+*.3ds) for interior 3d visualization.
archibase_planet
free

Lamp
...lamp
archibase planet
lamp table lamp reading lamp
lamp - 3d model (*.gsm+*.3ds) for interior 3d visualization.
archibase_planet
free

Lamp
...lamp
archibase planet
lamp table lamp reading lamp
lamp - 3d model (*.gsm+*.3ds) for interior 3d visualization.
archibase_planet
free

Lamp
...lamp
archibase planet
lamp reading lamp table lamp
lamp - 3d model (*.gsm+*.3ds) for interior 3d visualization.
archibase_planet
free
Lamp
...lamp
archibase planet
lamp reading lamp table lamp
lamp - 3d model (*.gsm+*.3ds) for interior 3d visualization.
archibase_planet
free
Lamp
...lamp
archibase planet
lamp table lamp reading lamp
lamp - 3d model (*.gsm+*.3ds) for interior 3d visualization.
archibase_planet
free

Lamp
...lamp
archibase planet
lamp table lamp reading lamp
lamp - 3d model (*.gsm+*.3ds) for interior 3d visualization.
archibase_planet
free
Lamp
...lamp
archibase planet
lamp reading lamp table lamp lantern
lamp - 3d model (*.3ds) for interior 3d visualization.
3d_ocean
$6
Lamp
...lamp
3docean
lamp
a high quality lamp.