Thingiverse
ITX_CR10-ONE by CrashySmashy
by Thingiverse
Last crawled date: 3 years, 3 months ago
ITX_CR10-ONE - UPDATED
Thank You - for all the comments and downloads are nearly 1000, if you can make a donation that would be great (even £1 each would add up please) so I can carry on devloping,
UPDATED: This ideally needs a large format printer for the case but I have now added a split case so it can be printed in 2 parts and joined i.e. it now should fit on an Ender 3 although I have not tested this.
Please consider donating for coffee so i can carry on, Thanks https://www.paypal.com/paypalme/CrashySmashy
This is not a production tested design so following any of this information is entirely at your own risk
Only attempt this build if you are competent, understand the risks and you are experienced with electrical or electronic systems or really just like to live life on the edge - just don't come back to me
PC Parts contain high voltages so there is a risk of electrocution
PC Parts generate significant heat and there is a fire risk if the PC is not correctly designed
There is no external mains isolation switch on the case, this is similar to microwave ovens, sandwich toasters etc. so the wall plug should be accessible
My selection of parts is not a recommendation either and parts may not all fit easily and may need adjusting
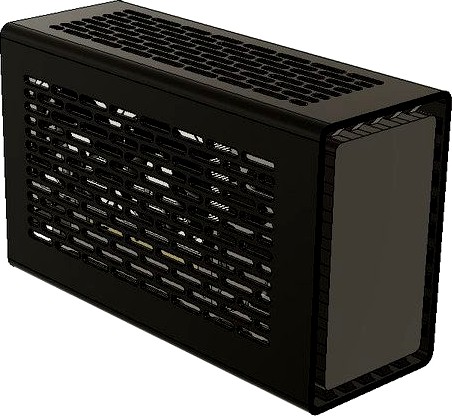
This case is 8.2 litres 345 x 212 x 131mm (13.6 x 8.4 5.2 inches) that fits a standard size ITX Motherboard, full length GPU and SFX PSU.
There is also space for 2x 2.5" SSD/HDD's though I'm using an M.2 drive
A capacitive touch switch can be mounted behind the front panel to tun the PC on and off.
The external styling is inspired by the Thor Zone MJOLNIR and this design has been shared on a non-commercial basis with their agreement - https://thor-zone.com/mini-itx/
All 3D Printable items have been produced on a non-commercial basis by Andrew Benjamin and are offered for others to use freely
If you like the design and want to support more work on the PC chassis I would welcome contributions to allow me to buy more printer filament!
Notes on the TTP233 Capacitive Switch
The switch has a 5mm range so the PC can be turned on by brushing your hand over the right spot on the front cover
The switch sensitivity auto adjusts but may be affected by choice of filament. Mine works well through a 1mm layer of PETG Carbon fibre
To prevent accidental shut down (I put my hand on the sensor while moving the case!) disable the switch 'Power Off' function in Win 10 control panel
TTP233 needs +5v permanent live to work as an 'On Switch', which should be available from the PSU
TTP233 I/O pin provides a Pull-Up or Pull-Down, Momentary or Latching, signal based on the settings on the A and B jumpers
AB=00 : No-lock High TTL level output;
AB=01 : Self-lock High TTL level output;
AB=10 : No-lock Low TTL level output; (this worked for my motherboard)
AB=11 : Self-lock Low TTL level output;
Components
ITX Motherboard, CPU, low profile memory etc.
Cooler - low profile on CPU to suit your components and cooling loads e.g. Noctua L9-I
GPU - 2 slots and up to full length but watch the height! Some GPU's have protruding heat pipes.
SFX PSU - suggest modular or cut back and insulate spare connectors to keep the wiring neat!
PCI Express 16x Flexible Riser - needs to be at least 235mm end to end including connectors, check the position of mounting holes on at the end of the ribbon
IEC Cable with 90 deg connector or IEC C14 Chassis to IEC 90 Degree C13 Extension (Optionally construct this form parts at your own risk)
Capacitive Touch switch e.g. TTP223 and mini-connectors or use a push switch mounted through the back panel
Fixings - see list below
Parts to Print
All parts print without supports
You might just get all the prints from a 1kg roll
Use thicker walls for strength, 0.45 line with 0.4 nozzle and increase flow on inner walls to get better layer adhesion
PLA not recommended due to low temperature stability
The shell is the largest item is 345mm high x 212mm x 131mm, ~700 g and 4 days
PC Case Shell.stl - Works well in PETG Carbon Fibre, 0.4 nozzle, 0.2 layers, print on 6-inch-wide painters tape to get textured front finish
PC Chassis for ITX and GPU.stl - Check printing tolerances for embedded nuts
PC Chassis for SFX PSU.stl - Check printing tolerances for spigots that join to ITX Chassis
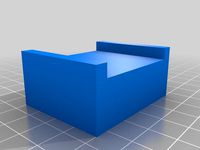
SSD and Capacitive Touch Switch bracket.stl - Hot Glue TTP223 flush in locator on front of bracket
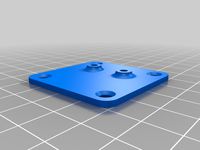
PC Case thumb nut head.stl - Glue to 4mm Socket Head Cap Screw (SHCS) to make thumb turn cover screw, the head on the SHCS may need filing down on diameter due to close tolerances
IEC Cover boot.stl - Provides a cover if using an IEC chassis connector - NOTE: This is not designed as an insulator. The IEC connector should be properly insulated as per manufacturers instruction
IEC Hole Cover Plate.stl - Provides a cover if using a pass-through cable.
Screws (recommend Socket Head Cap Screws)
M4 x 10mm Screw - 1 off for Case cover retention NOTE: the SHCS head diameter may need filing (or turning) down to fit the optional screw cap
M4 x 10mm Screw - 2 off for GPU Mounting
M3 x 10mm Screws - 4 off for ITX Motherboard
M3 x 10mm Screws - 2 off for GPU Extension Cable header bracket
M3 x 10mm Screws - 4 off for SSD/HDD mounting bracket
Mounting screws for SSD/HDD to suit device(s)
Mounting screws for SFX to suit device
Embedded Knurled Nuts
M4 x 4 long x 6 dia - 1 off for Case cover retaining
M4 x 4 long x 6 dia - 2 off for GPU back plate mounting
M3 x 6 long x 5 dia - 4 off for ITX mounting
M3 x 6 long x 5 dia - 2 off for retaining GPU extension header cable bracket
M3 x 6 long x 5 dia - 4 off for SSD/HDD mounting bracket
Thank You - for all the comments and downloads are nearly 1000, if you can make a donation that would be great (even £1 each would add up please) so I can carry on devloping,
UPDATED: This ideally needs a large format printer for the case but I have now added a split case so it can be printed in 2 parts and joined i.e. it now should fit on an Ender 3 although I have not tested this.
Please consider donating for coffee so i can carry on, Thanks https://www.paypal.com/paypalme/CrashySmashy
This is not a production tested design so following any of this information is entirely at your own risk
Only attempt this build if you are competent, understand the risks and you are experienced with electrical or electronic systems or really just like to live life on the edge - just don't come back to me
PC Parts contain high voltages so there is a risk of electrocution
PC Parts generate significant heat and there is a fire risk if the PC is not correctly designed
There is no external mains isolation switch on the case, this is similar to microwave ovens, sandwich toasters etc. so the wall plug should be accessible
My selection of parts is not a recommendation either and parts may not all fit easily and may need adjusting
This case is 8.2 litres 345 x 212 x 131mm (13.6 x 8.4 5.2 inches) that fits a standard size ITX Motherboard, full length GPU and SFX PSU.
There is also space for 2x 2.5" SSD/HDD's though I'm using an M.2 drive
A capacitive touch switch can be mounted behind the front panel to tun the PC on and off.
The external styling is inspired by the Thor Zone MJOLNIR and this design has been shared on a non-commercial basis with their agreement - https://thor-zone.com/mini-itx/
All 3D Printable items have been produced on a non-commercial basis by Andrew Benjamin and are offered for others to use freely
If you like the design and want to support more work on the PC chassis I would welcome contributions to allow me to buy more printer filament!
Notes on the TTP233 Capacitive Switch
The switch has a 5mm range so the PC can be turned on by brushing your hand over the right spot on the front cover
The switch sensitivity auto adjusts but may be affected by choice of filament. Mine works well through a 1mm layer of PETG Carbon fibre
To prevent accidental shut down (I put my hand on the sensor while moving the case!) disable the switch 'Power Off' function in Win 10 control panel
TTP233 needs +5v permanent live to work as an 'On Switch', which should be available from the PSU
TTP233 I/O pin provides a Pull-Up or Pull-Down, Momentary or Latching, signal based on the settings on the A and B jumpers
AB=00 : No-lock High TTL level output;
AB=01 : Self-lock High TTL level output;
AB=10 : No-lock Low TTL level output; (this worked for my motherboard)
AB=11 : Self-lock Low TTL level output;
Components
ITX Motherboard, CPU, low profile memory etc.
Cooler - low profile on CPU to suit your components and cooling loads e.g. Noctua L9-I
GPU - 2 slots and up to full length but watch the height! Some GPU's have protruding heat pipes.
SFX PSU - suggest modular or cut back and insulate spare connectors to keep the wiring neat!
PCI Express 16x Flexible Riser - needs to be at least 235mm end to end including connectors, check the position of mounting holes on at the end of the ribbon
IEC Cable with 90 deg connector or IEC C14 Chassis to IEC 90 Degree C13 Extension (Optionally construct this form parts at your own risk)
Capacitive Touch switch e.g. TTP223 and mini-connectors or use a push switch mounted through the back panel
Fixings - see list below
Parts to Print
All parts print without supports
You might just get all the prints from a 1kg roll
Use thicker walls for strength, 0.45 line with 0.4 nozzle and increase flow on inner walls to get better layer adhesion
PLA not recommended due to low temperature stability
The shell is the largest item is 345mm high x 212mm x 131mm, ~700 g and 4 days
PC Case Shell.stl - Works well in PETG Carbon Fibre, 0.4 nozzle, 0.2 layers, print on 6-inch-wide painters tape to get textured front finish
PC Chassis for ITX and GPU.stl - Check printing tolerances for embedded nuts
PC Chassis for SFX PSU.stl - Check printing tolerances for spigots that join to ITX Chassis
SSD and Capacitive Touch Switch bracket.stl - Hot Glue TTP223 flush in locator on front of bracket
PC Case thumb nut head.stl - Glue to 4mm Socket Head Cap Screw (SHCS) to make thumb turn cover screw, the head on the SHCS may need filing down on diameter due to close tolerances
IEC Cover boot.stl - Provides a cover if using an IEC chassis connector - NOTE: This is not designed as an insulator. The IEC connector should be properly insulated as per manufacturers instruction
IEC Hole Cover Plate.stl - Provides a cover if using a pass-through cable.
Screws (recommend Socket Head Cap Screws)
M4 x 10mm Screw - 1 off for Case cover retention NOTE: the SHCS head diameter may need filing (or turning) down to fit the optional screw cap
M4 x 10mm Screw - 2 off for GPU Mounting
M3 x 10mm Screws - 4 off for ITX Motherboard
M3 x 10mm Screws - 2 off for GPU Extension Cable header bracket
M3 x 10mm Screws - 4 off for SSD/HDD mounting bracket
Mounting screws for SSD/HDD to suit device(s)
Mounting screws for SFX to suit device
Embedded Knurled Nuts
M4 x 4 long x 6 dia - 1 off for Case cover retaining
M4 x 4 long x 6 dia - 2 off for GPU back plate mounting
M3 x 6 long x 5 dia - 4 off for ITX mounting
M3 x 6 long x 5 dia - 2 off for retaining GPU extension header cable bracket
M3 x 6 long x 5 dia - 4 off for SSD/HDD mounting bracket
Similar models
thingiverse
free

Mini ITX Case
...n added for nas usage in back case using 2 trays holding 3 hard drives each.
items that still need work:
working on gpu support
thingiverse
free

ITX Open Air chassis by MadBiker
...chassis by madbiker
thingiverse
just a stand to hold things together. xd
itx motherboard, gpu, ssd and custom watercooling loop.
3dwarehouse
free

SSD Bracket and Pico-ITX Motherboard tray
... note that the ssd model and itx board are not my work and are included only for reference. #mobo #motherboard_tray #picoitx #ssd
3dwarehouse
free

DIY Mining RIG 18 GPU Wooden stackable case with fans
...upports (in black) for the cards has to be checked on the moment with the measurements of your gpu, motherboard and power supply.
thingiverse
free

Mini ITX Case - Super Compact! by TheBasedDoge
...w more room for half-height gpu and 2-3 ssds or 2.5" drives.
top panel can be used either with a glass window or mesh panel.
thingiverse
free

Mini ITX PCI and SSD Mount by adamj12b
...otherboard mounting stud and is designed so that it is sandwiched down by screwing down the motherboard in the right hand corner.
thingiverse
free

Matx Case by mg141441
...a case build to fit mini-itx and micro-atx motherboards, with room for a 1-or-2 slot gpu, sfx power supply, and a 120mm radiator.
3dwarehouse
free

Mini ITX DIY case and structure
...070 mini (resized from other gpu), mini itx motherboard, noctua cooler nh c14s and a 200mm fan. the case is a prototype. :) enjoy
grabcad
free

Air Box ITX Concept PC Case
...seblocker-nb-eloop-120mm-fan-1
https://grabcad.com/library/kingston-hyperx-3k-ssd-1
https://grabcad.com/library/asus-x99-itx-ws-1
thingiverse
free

sff pc case (velka 3 / k39 hybrd) by Nanobotical_31
... casing
-2 40 mm fans on top
-2 usb ports in front .
-2.5 inch ssd
you need screws , washers , nuts and a hot glue gun (optional)
Crashysmashy
thingiverse
free

Christmas Elf in Carbonite by CrashySmashy
...christmas elf in carbonite by crashysmashy
thingiverse
this is a remix of carbonite to include a christmas elf
thingiverse
free

54mm diameter reel boss by CrashySmashy
...thingiverse
a boss to reduce the diameter of filament reels so they sit more centrally on the spool holder and turn more easily.
thingiverse
free

CR10v2 Default test files Dog Cat Pig by CrashySmashy
...cr10v2 default test files dog cat pig by crashysmashy
thingiverse
cr10v2 default test files dog cat pig
thingiverse
free

CR10v2 Aero Fan Shroud by CrashySmashy
...sted although it does work with 0.6 nozzle but the finish looks rough.
i am planning to try abs and smoothing for top gloss look.
Itx
3d_export
$56

teenage engineering computer 1 mini itx pc chassis
... get the best results in blender. no extra plugins are required for this model. lights and cameras are not included in the scene.
cg_studio
$9

Mini Computer3d model
...hardware harddisk desktop peripheral component leopard tiger snow small mini-itx pc design .3ds .xsi .obj .max .ma .lxo .lwo...
3d_export
$9

Mini Computer 3D Model
...hardware harddisk desktop peripheral component leopard tiger snow small mini-itx pc design maya supply 3ds max mini computer 3d...
thingiverse
free

ITX by irr1449
...itx by irr1449
thingiverse
itx case
thingiverse
free

Mini-ITX to Nano ITX adapter
...mini-itx to nano itx adapter
thingiverse
this is an adapter to put a nanoitx board in a miniitx case.
3dfindit
free

PICO-ITX
...pico-itx
3dfind.it
catalog: winsystems
3dfindit
free

NANO-ITX
...nano-itx
3dfind.it
catalog: winsystems
thingiverse
free

ITX computer case by hlmjjj1994
...itx computer case by hlmjjj1994
thingiverse
for itx mb only
thingiverse
free

Xbox-ITX
...originally went, mount the mini-itx motherboard on the original xbox mounting holes, and use the original power hole on the case.
thingiverse
free

thin ITX model by Goatee
...thin itx model by goatee
thingiverse
thin itx boards rough model
Cr10
3d_export
$21

Hall tree and Clothing Rack CR10
... real object. 3. lights and cameras are included in the scenes renders using vray * renders are made in 3ds max 2018 using vray 5
thingiverse
free

Clips for Ender 3, CR10, CR10S
.... maybe others, but only been tested with these.
these clips makes a tight fit, so that the cable and bowden tube stays in place.
thingiverse
free
X-axis endstop offset for cr10 cr10s Ender 3
...x-axis endstop offset for cr10 cr10s ender 3
thingiverse
x-axis endstop offset for cr10 cr10s ender 3
thingiverse
free

Filament Sensor CR10
...or cr10
thingiverse
remix of the sensor with fixation in order to face directly the extruder and ptfe tube
cr10, cr10s ender3...
thingiverse
free

Fan V4 CR10/CR10S Ender3 Versione 4 by creativesolutions-lab
...fan v4 cr10/cr10s ender3 versione 4 by creativesolutions-lab
thingiverse
fan v4 cr10/cr10s versione 4
thingiverse
free
CR10 Feet by Leighton417
...cr10 feet by leighton417
thingiverse
this is a cr10 feet for people who have short table width.
thingiverse
free

Dremel Attachment for CR10, Ender 3, Cr10s by Conn22_43
...verse
a bracket to hold a dremel onto any ender 3, cr10 bracket. i printed it in petg, but it can be made in any rigid material.
thingiverse
free

CR10S-Plus Hotend by scorpio_man30ro
...cr10s-plus hotend by scorpio_man30ro
thingiverse
cr10s-plus hotend
thingiverse
free
Leveling knob CR10 by JMJacques
...leveling knob cr10 by jmjacques
thingiverse
leveling knob cr10
thingiverse
free

Soporte Superior sensor filamento CR10 v2 - CR10 v3 by Guimir
...3 by guimir
thingiverse
soporte sensor de filamento guia superiror tipo cr10 v3 para convertir la cr10 v2 en extrusión directa.
One
turbosquid
$2
one plus one
... available on turbo squid, the world's leading provider of digital 3d models for visualization, films, television, and games.
3ddd
$1
One
...one
3ddd
стул
офисный стул one
3ddd
free

one
...
palazetti one ,http://palazzetti.ca/index.php/component/virtuemart/seating/armchairs-lounges/one-chair-detail?itemid=0
turbosquid
$35

One A
... available on turbo squid, the world's leading provider of digital 3d models for visualization, films, television, and games.
turbosquid
free

One
... available on turbo squid, the world's leading provider of digital 3d models for visualization, films, television, and games.
3ddd
$1
Стул One
...стул one
3ddd
one , magis
кресло magis s.p.a , one
3ddd
$1
Стул One
...стул one
3ddd
one , magis
кресло one chair (4star), magis s.p.a.
3d_export
$20
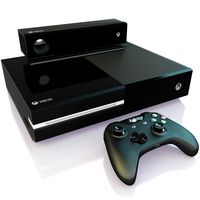
xbox one
...xbox one
3dexport
xbox one
3ddd
$1
xbox one
... консоль , джойстик
xbox one + kinect + gamepad
3ddd
free
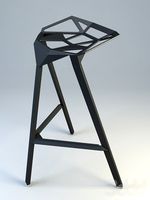
One
...nstantin grcic
артикул ct-284 (cosmorelax.ru)
размер l36xw41xh82.5, sh 77cm
цвет черный, красный
материал алюминий
вес 2,5 кг