Thingiverse

Isolating Printer Feet (D-Bot / V-Slot / Aluminium Extrusion) using Springs by beepbeep
by Thingiverse
Last crawled date: 3 years ago
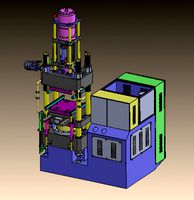
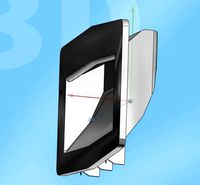
I never knew what vibration was until I completed my D-Bot CoreXY machine. The structural integrity of my domicile was threatened when I initially ran it sat on the floor, so I designed some dampening feet that would be low cost to produce.
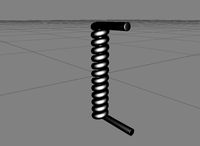
Note: I found these feet caused some issues with high speed/acceleration/jerk settings and am redesigning to include 7 springs each currently.
This is now my final complete design which I have printed, tested and have them installed and working well on my printer. I have changed the springs I am using (link below has been updated). These ones are slightly smaller and a bit firmer - they work great and I would be confident putting upto 10kg load on per foot, maybe more.
Each foot consists of:
1 x Printed 'Spring Feet Top.stl'
1 x Printed 'Spring Feet Bottom.stl'
4 x Springs (http://www.aliexpress.com/item/3D-printer-accessories-Ultimaker-2-UM2-spring-fine-print-platform-edging-1-2-15mm-for-UM2/32606455778.html?spm=2114.13010608.0.108.bIz7v1) - buy 1 pack and you can make 7.5 feet)
1 x 3M 'Bumpon' adhesive rubber foot circular/flat 20mm x 2mm (or cut your own from cork, etc.)
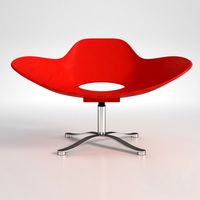
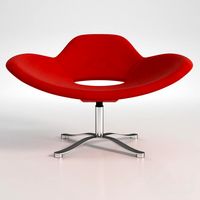
Assembly should be pretty self explanatory from the renders...
Prepare the bottom part by placing 4x springs in the holes. Springs should fit relatively snugly on their own and the assembled foot will easily hold together without additional adhesive.
Put M5 cap head bolt into the hole in the top of the top part (you may need to drill out the hole depending how accurately your print turned out - but with a bit of force you should get the thread through and head in the recess without this). If printing ABS scale up to allow for shrinkage.
Line up springs with top piece and push everything together.
Attach to bottom of printer/equipment using an allen key through the hole in the bottom of the bottom part.
Place 3M bumpon foot into recess on the very bottom.
Done
Note: I found these feet caused some issues with high speed/acceleration/jerk settings and am redesigning to include 7 springs each currently.
This is now my final complete design which I have printed, tested and have them installed and working well on my printer. I have changed the springs I am using (link below has been updated). These ones are slightly smaller and a bit firmer - they work great and I would be confident putting upto 10kg load on per foot, maybe more.
Each foot consists of:
1 x Printed 'Spring Feet Top.stl'
1 x Printed 'Spring Feet Bottom.stl'
4 x Springs (http://www.aliexpress.com/item/3D-printer-accessories-Ultimaker-2-UM2-spring-fine-print-platform-edging-1-2-15mm-for-UM2/32606455778.html?spm=2114.13010608.0.108.bIz7v1) - buy 1 pack and you can make 7.5 feet)
1 x 3M 'Bumpon' adhesive rubber foot circular/flat 20mm x 2mm (or cut your own from cork, etc.)
Assembly should be pretty self explanatory from the renders...
Prepare the bottom part by placing 4x springs in the holes. Springs should fit relatively snugly on their own and the assembled foot will easily hold together without additional adhesive.
Put M5 cap head bolt into the hole in the top of the top part (you may need to drill out the hole depending how accurately your print turned out - but with a bit of force you should get the thread through and head in the recess without this). If printing ABS scale up to allow for shrinkage.
Line up springs with top piece and push everything together.
Attach to bottom of printer/equipment using an allen key through the hole in the bottom of the bottom part.
Place 3M bumpon foot into recess on the very bottom.
Done
Similar models
thingiverse
free

Nail and Gear Coaster (Hello Internet) by getsome001
...n.com/3m-bumpon-sj5008-bumper-spacer/dp/b00804087i/ref=sr_1_3?ie=utf8&qid=1532918317&sr=8-3&keywords=3m+bumpons+black
thingiverse
free

OneUp Printer Foot by bdub_24
...esk, so i created these feet so that i could insulate it a bit.
i also attached 20mm x 20mm stick-on rubber feet on the bottom.
grabcad
free

Case feet
...use adhesive on top of the foot/feet. hole is 5mm, so should be easily mountable on computer cases or other items that need feet.
thingiverse
free

Printer Foot by LordFly
...ut out a foam circle from any material you like. i used an interlocking foam mat available from walmart or any other type store.
thingiverse
free

D-Bot Add-On 40mm Sorbothane Vibration Dampener Foot Mount by Somnovox
...nter, i suspect, is the 84oz-in torque stepper motors i'm using.
as a solution, i'll be getting some firmer feet to test.
thingiverse
free

Spring Foot by AbuMaia
...et in the front and back only caused the y axis to flex a little bit, and that's what made the print messy, not the bouncing.
cg_trader
$3

Moon Rocket Chandelier | 3D
... 300mm bed printer, i included a file with them all together arranged. after all pieces printed you can mount and glue all parts.
thingiverse
free

OpenBeam Feet by OpenBeamUSA
...g indentation is also sized correct for a 3m bumpon adhesive feet.
http://blog.openbeamusa.com/2012/05/29/in-depth-openbeam-feet/
thingiverse
free

M5 foot (designed for D-Bot printer) by ThePhilStrongProject
...for my printer locally, so i printed some myself. printed using a flexible sample from 3dfilaments.ie, it's worked perfectly.
thingiverse
free

Anti Vibration Rubber Feet for Anet A8 (Using 3M Bumpon 22.3mm Feet) by Marcnico
...r frame, one under each z-motor and two for the front frame. this way the body doesn't bend and it's standing rock solid.
Beepbeep
thingiverse
free

Poop by beepbeep
...poop by beepbeep
thingiverse
art.
thingiverse
free

Decorative Vintage Knob by beepbeep
...decorative vintage knob by beepbeep
thingiverse
a decorative knob.
thingiverse
free

Calculator Wall Bracket by beepbeep
...eep
thingiverse
a wall bracket i made for the canon ls-120pc. sure it will fit many desk calculators with a bit of modification.
thingiverse
free

IEC Power Cable Holder / Organizer by beepbeep
...iec power cable holder / organizer by beepbeep
thingiverse
a remix of ajitam's usb cable holder to hold iec power cables.
thingiverse
free

Daft Punk Wall Planter - Thomas Bangalter Helmet by beepbeep
...punk wall planter - thomas bangalter helmet by beepbeep
thingiverse
andyways' bangalter helmet reimagined as a wall planter!
thingiverse
free

Caliper Wall Mount - Easier Print Remix by beepbeep
...access caliper mount (horizontal) by maximsachs which allows printing with no support and keeps the bulk of the parts on the bed.
thingiverse
free

Jig for 8*8*8 LED Cube Assembly - 5mm LED Remix by beepbeep
...jig for 8*8*8 led cube assembly - 5mm led remix by beepbeep
thingiverse
a remix of slepp's jig, adapted for 5mm leds.
thingiverse
free

Wall Mounting Bracket for Nitecore i4 Battery Charger by beepbeep
... the wall.
brackets are different in that the top one has a hole in for the figure-8 power cable, otherwise they are symmetrical.
thingiverse
free

GEPRC GEP-TX / VX / RX Series Buzzer Mount by beepbeep
...he aperture in the rear led board on various geprc frames.
print as oriented in the stl with a bit of support around the channel.
thingiverse
free

Microsoft Lifecam Mount Infinitely Adjustable by beepbeep
... of the two sources:
http://www.thingiverse.com/thing:1693987 by taylorificationhttp://www.thingiverse.com/thing:889439 by jonasd
Bot
turbosquid
$19

Bot
... available on turbo squid, the world's leading provider of digital 3d models for visualization, films, television, and games.
turbosquid
$1
bot
... available on turbo squid, the world's leading provider of digital 3d models for visualization, films, television, and games.
turbosquid
free

Bot
... available on turbo squid, the world's leading provider of digital 3d models for visualization, films, television, and games.
3d_export
$10
scanner bot
...scanner bot
3dexport
cool scanner bot who scans for fixing things...
3d_ocean
$9
Apc Bot
...n bot games toys
an all-purpose-constructo-bot. for cartoon purposes. the model is not rigged. please use vray adv for rendering.
3d_export
$75
Bot 3D Model
...bot 3d model
3dexport
robot bot man kiborg character
bot 3d model evgen 19504 3dexport
turbosquid
free

Eye Bot
...eye bot
turbosquid
free 3d model eye bot for download as fbx on turbosquid: 3d models for games, architecture, videos. (1514059)
turbosquid
$29
Gorill-bot
...bosquid
royalty free 3d model gorill-bot for download as fbx on turbosquid: 3d models for games, architecture, videos. (1239456)
turbosquid
$25

Lamp Bot
...bosquid
royalty free 3d model lamp bot for download as blend on turbosquid: 3d models for games, architecture, videos. (1230121)
turbosquid
$10
Spectre Bot
...osquid
royalty free 3d model spectre bot for download as fbx on turbosquid: 3d models for games, architecture, videos. (1616378)
Isolating
turbosquid
$5

isolator
... available on turbo squid, the world's leading provider of digital 3d models for visualization, films, television, and games.
3ddd
$1

BOSA / ISOLE
...bosa / isole
3ddd
bosa
пять ваз от bosa, коллекция isole. 120,000 полигонов.
3ddd
free

Isole by bosa
...isole by bosa
3ddd
bosa
isole
manufacturer bosa
designer sam baron
launched in 2013
2011 max included
3d_export
$11

Electric isolator 3D Model
...electric isolator 3d model
3dexport
electric equipment isolator station
electric isolator 3d model mindcraft 15061 3dexport
3d_export
$5

Sunflower flower plant isolated
...sunflower flower plant isolated
3dexport
sunflower plant isolated, 3d model
turbosquid
$30

Gas mask protection isolated
...gas mask protection isolated for download as ma, fbx, and obj on turbosquid: 3d models for games, architecture, videos. (1553330)
turbosquid
$24

Gas mask protection isolated
...gas mask protection isolated for download as ma, obj, and fbx on turbosquid: 3d models for games, architecture, videos. (1577415)
turbosquid
$24

Mask helmet safety isolated
...sk helmet 3d safety isolated for download as ma, obj, and fbx on turbosquid: 3d models for games, architecture, videos. (1581778)
turbosquid
$27

Gas mask protection futuristic isolated
...ask protection futuristic isolated for download as ma and fbx on turbosquid: 3d models for games, architecture, videos. (1562190)
turbosquid
$32

Gas mask protection isolated plastic
... protection isolated plastic for download as ma, fbx, and obj on turbosquid: 3d models for games, architecture, videos. (1545786)
Extrusion
turbosquid
free
aluminum extrusion profiles
...free 3d model aluminum extrusion profiles for download as max on turbosquid: 3d models for games, architecture, videos. (1381707)
turbosquid
$5
Cable Cover Extrusion
... available on turbo squid, the world's leading provider of digital 3d models for visualization, films, television, and games.
3d_export
free

30 x 30 extrusion
... x 30 x 40.sldprt<br>30 x 30 x 50.sldprt<br>30 x 30 x 606.sldprt<br>the sketch.sldprt<br>30 x 30 x 40.stl
3d_export
$300
melt-blown fabric extrusion molding machine
...an email to me.<br>designed with solidworks 2017, render with photoview 360<br>**************************************
3d_export
$5
Spaceship - Galaxy Crusher
...with a more ominous twist. it has lots of extrusion and cubes and comes with a whopping 4k texture,...
3d_export
$20
1600 Meltblown cloth production line set drawing CAD
...width of 1600mm. the steel structure frame, feeding host, extrusion screw, heating system, screen changer, metering pump, melting it...
3d_export
$5

one-eyed scary virus
...cinema, the body relief is formed by the standard extrusion noise. the eye texture is...
3d_export
$20
GE TF34 Fan Blade and Nose Cone
...and appropriately sized fillet features are provided.<br>also, a threaded extrusion profile is provided on the fan blade component and...
3d_export
$10
glue injection machine
...injection technology. the ordinary glue injection machine is screw extrusion type, and its instantaneous pressure can reach more than...
3d_export
$1000
bead triangle adhesive laminating machine
...a triangular rubber head with the shape required for extrusion the rear end of the extruder is also provided...
Aluminium
3d_ocean
$3
Vray Aluminium
...vray aluminium
3docean
3d max aluminium material metal vray
vray aluminium material for 3dmax
design_connected
$13

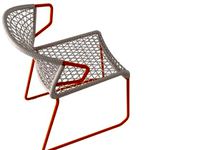
Aluminium Chair
...aluminium chair
designconnected
sebastian scherer aluminium chair computer generated 3d model. designed by scherer, sebastian.
3ddd
$1
Baxter Sellerina Aluminium
... baxter , sellerina aluminium
итальянское кресло sellerina aluminium фабрики baxter
turbosquid
free
Aluminium Foil
...
turbosquid
free 3d model aluminium foil for download as dae on turbosquid: 3d models for games, architecture, videos. (1175978)
3ddd
$1
Hafele handles - Aluminium
...hafele handles - aluminium
3ddd
фурнитура
hafele handles - aluminium
turbosquid
$29
aluminium can
...quid
royalty free 3d model aluminium can for download as max on turbosquid: 3d models for games, architecture, videos. (1632245)
turbosquid
$4

Aluminium Chair
...id
free 3d model aluminium chair for download as max and fbx on turbosquid: 3d models for games, architecture, videos. (1318406)
turbosquid
free
Aluminium Chair
...ee 3d model aluminium chair for download as max, skp, and 3ds on turbosquid: 3d models for games, architecture, videos. (1694764)
3d_ocean
$10

Aluminium Keyboard
...keyboard. ready to render with included scene and textures (c4d only). • fast renders • lights and cameras included • textures...
turbosquid
$9
Aluminium Stool
...ee 3d model aluminium stool for download as max, skp, and 3ds on turbosquid: 3d models for games, architecture, videos. (1694695)
Feet
3d_export
$30
Legs and feet High feet 3D Model
...t high feet 3d model
3dexport
feet shoes sandal barefoot leg women
legs and feet high feet 3d model adrianaamerina 96817 3dexport
3ddd
$1
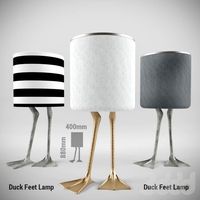
DUCK FEET LAMP
...duck feet lamp
3ddd
утка
duck feet lamp
turbosquid
$19
Feets 01
...3d model feets 01 for download as max, max, max, fbx, and obj on turbosquid: 3d models for games, architecture, videos. (1624047)
turbosquid
$2
Robo3D Feet
... available on turbo squid, the world's leading provider of digital 3d models for visualization, films, television, and games.
turbosquid
free

Feet study
... available on turbo squid, the world's leading provider of digital 3d models for visualization, films, television, and games.
turbosquid
free

Hands and Feet
... available on turbo squid, the world's leading provider of digital 3d models for visualization, films, television, and games.
turbosquid
$9

Female Feet 01
...oyalty free 3d model feet 01 for download as ma, obj, and fbx on turbosquid: 3d models for games, architecture, videos. (1446069)
turbosquid
$19

The feet of Hercules trainer
... feet of hercules trainer for download as , stl, fbx, and obj on turbosquid: 3d models for games, architecture, videos. (1684923)
turbosquid
$79
Hand and Feet (Rigged)
... available on turbo squid, the world's leading provider of digital 3d models for visualization, films, television, and games.
turbosquid
$15

Viabizzuno Big Feet
... available on turbo squid, the world's leading provider of digital 3d models for visualization, films, television, and games.
Springs
3d_export
free

spring
...spring
3dexport
spring
3ddd
$1
Spring
... , spring
кресло spring фабрики potocco (италия)
длина 84
ширина 79
высота 100
design_connected
$16
Spring
...spring
designconnected
cappellini spring chairs computer generated 3d model. designed by erwan bouroullec.
3ddd
$1
Еmmemobili Spring
...еmmemobili spring
3ddd
еmmemobili , spring
кресло еmmemobili spring
design_connected
$11

Spring
...spring
designconnected
de padova spring chairs computer generated 3d model. designed by damian williamson.
turbosquid
$5

Spring
...
turbosquid
royalty free 3d model spring for download as skp on turbosquid: 3d models for games, architecture, videos. (1148583)
turbosquid
$1
Spring
...
turbosquid
royalty free 3d model spring for download as fbx on turbosquid: 3d models for games, architecture, videos. (1351471)
3ddd
$1
Еmmemobili Spring
...mobili spring
3ddd
emmemobili , spring
кресло еmmemobili spring, вариант в мягкой обивке
3d_export
$5

Ball spring
...ball spring
3dexport
ball spring
3ddd
$1
Смеситель SPRING
... fir italia , смеситель
смеситель spring, две модели, производитель fir italia!
Slot
3d_export
$5
slot handle
...slot handle
3dexport
slot handle
archibase_planet
free
Slot machine
...ase planet
slot machine slot-machine playing machine
slot machine n260311 - 3d model (*.gsm+*.3ds) for interior 3d visualization.
archibase_planet
free
Slot machine
... machine slot-machine one-armed bandit
slot machine novomatic gaminator n240911 - 3d model (*.3ds) for interior 3d visualization.
3d_export
$5

narrow slot handle
...narrow slot handle
3dexport
narrow slot handle
turbosquid
$15

Slot Machine
...oyalty free 3d model slot machine for download as max and fbx on turbosquid: 3d models for games, architecture, videos. (1710861)
turbosquid
$25

Slot Machine
... free 3d model slot machine for download as max, obj, and fbx on turbosquid: 3d models for games, architecture, videos. (1649555)
turbosquid
$25

Coin Slots
... available on turbo squid, the world's leading provider of digital 3d models for visualization, films, television, and games.
turbosquid
$11
Slotted spoon
... available on turbo squid, the world's leading provider of digital 3d models for visualization, films, television, and games.
turbosquid
$5

Slot Sofa
... available on turbo squid, the world's leading provider of digital 3d models for visualization, films, television, and games.
turbosquid
$3
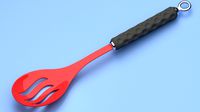
slotted spoon
... available on turbo squid, the world's leading provider of digital 3d models for visualization, films, television, and games.
Printer
archibase_planet
free

Printer
...inter
archibase planet
printer laser printer pc equipment
printer n120614 - 3d model (*.gsm+*.3ds) for interior 3d visualization.
archibase_planet
free

Printer
...rchibase planet
laser printer office equipment computer equipment
printer - 3d model (*.gsm+*.3ds) for interior 3d visualization.
turbosquid
$100

Printer
...er
turbosquid
royalty free 3d model printer for download as on turbosquid: 3d models for games, architecture, videos. (1487819)
turbosquid
$3

Printer
...turbosquid
royalty free 3d model printer for download as max on turbosquid: 3d models for games, architecture, videos. (1670230)
turbosquid
$1

printer
...turbosquid
royalty free 3d model printer for download as max on turbosquid: 3d models for games, architecture, videos. (1595546)
turbosquid
$1

printer
...turbosquid
royalty free 3d model printer for download as max on turbosquid: 3d models for games, architecture, videos. (1595105)
turbosquid
$10

Printer
...id
royalty free 3d model printer for download as max and 3dm on turbosquid: 3d models for games, architecture, videos. (1607146)
turbosquid
$7

Printer
...royalty free 3d model printer for download as ma, ma, and obj on turbosquid: 3d models for games, architecture, videos. (1644580)
turbosquid
$30

Printer
... available on turbo squid, the world's leading provider of digital 3d models for visualization, films, television, and games.
turbosquid
$20

Printer
... available on turbo squid, the world's leading provider of digital 3d models for visualization, films, television, and games.
V
design_connected
$16
V Chair
...v chair
designconnected
v chair computer generated 3d model.
design_connected
$11
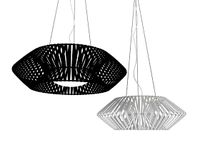
V Hanglamp
...v hanglamp
designconnected
arturo alvarez v hanglamp computer generated 3d model. designed by alvarez, arturo .
turbosquid
$25

Borbet V
...v
turbosquid
royalty free 3d model borbet v for download as on turbosquid: 3d models for games, architecture, videos. (1381618)
turbosquid
free
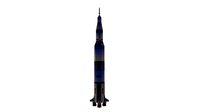
Saturn V
...rn v
turbosquid
free 3d model saturn v for download as blend on turbosquid: 3d models for games, architecture, videos. (1651098)
turbosquid
$40

V motor
...turbosquid
royalty free 3d model v motor for download as max on turbosquid: 3d models for games, architecture, videos. (1379483)
turbosquid
$7
V for Van
...rbosquid
royalty free 3d model v for van for download as max on turbosquid: 3d models for games, architecture, videos. (1695889)
turbosquid
$5
Letter v
...urbosquid
royalty free 3d model letter v for download as max on turbosquid: 3d models for games, architecture, videos. (1408535)
turbosquid
$5

Letter v
...urbosquid
royalty free 3d model letter v for download as max on turbosquid: 3d models for games, architecture, videos. (1408534)
turbosquid
$15

BonePile V
...oyalty free 3d model bonepile v for download as blend and obj on turbosquid: 3d models for games, architecture, videos. (1546310)
turbosquid
$2

FONT V
...quid
royalty free 3d model font v for download as ma and obj on turbosquid: 3d models for games, architecture, videos. (1549450)
Using
3ddd
$1

US flag
...us flag
3ddd
флаг
us flag
3d_export
free
Among us
...among us
3dexport
among us red
3d_export
free

Among Us
...among us
3dexport
this 3d-model of a character from the game "among us". it can be used as a toy or decoration.
3d_export
$6
among us
...among us
3dexport
doll from among us in red
3d_export
$5
amoung us
...amoung us
3dexport
amoung us character. was created by cinema 4d 19
3d_export
$5
Humvee us
...humvee us
3dexport
humvee us 3d model good quality for animation
3d_export
$15

among us
...among us
3dexport
turbosmooth modifier can be used to increase mesh resolution if necessary
3d_export
$25
mailbox us
...mailbox us
3dexport
low poly model mailbox us. modeling in the blender, texturing in substance painter
design_connected
$13
Use Me
...use me
designconnected
sitland use me computer generated 3d model. designed by paolo scagnellato.
3d_export
$5

Among Us
...rt
the among us model comes in a variety of colors that can be customized by anyone, and even works with little in the animation