Thingiverse

investigation of salt annealing of transparent pla parts chapter III by Dr_Froggy_rD
by Thingiverse
Last crawled date: 3 years, 4 months ago
Hi everybody,
This is chapter III of this investigation. Getting 100%infill or close to this parts made of transparent pla which is indeed transparent !!! Getting 3d printed lenses made of pla is not impossible anymore and can be achieved! With a better printer It would have been my next trial but I need to stop here.
I further improved my remelting process in salt to get transparency using a sacrificial coating made of wood glue once completely dried. Coating which is watersoluble and avoid the frost pattern due to interaction witn salt particles.
For letting the coating dry I fuse a spare filament 2-3 cm long to one edge of the dice. Which was perfect for an overall coating
I did at 165°C for about 2 hours. The container is taken out of the oven then and need to cool rapidely (However I am not sure that it is very important . I think pla needs to stay amorph)
For that I take the hot salt away with a spoon or alike.
Maybe blowing little air with a metal tube willl do the job...nevertheless, I retrieve the pla transparent part rapidely, let set in cold water for 5 minutes brush them gently and then into pure ethanol.
The surface is sticky. Let it dry.
So to prove the transparency I printed a further dice:the hollow skull dice.
An hollow part will colapse...so I used a trick.
I filled the hollow part during printing with a 2 component Polyuretane coating mixed with littlevwater and a blue dye. As one can see on one of the picture.
I let an air oulet on one side.
I waited for 3 days and put it overnight at 60°C to cure completely the pu part inside
Then I reworked it, and BAM! See for yourself. We see a distinguishable blue mass inside the dice! Yes! A nice transparent part with no frost!
Still a long road to get a perfect shape retained after the sintering- but it is impossible with the printer I have. Which is ok for most things I do but too much air trapped still. Also when changing the Flow value to 120%...
Nevertheless I hope someone will continue this if he has access on a decent 3d printer with settings that can avoid air trapping! Not alike the micro3d printer.
I believe this would work with PET or MABS but you need a coating which sustains the hotter heat treatment for PET...not trivial...and secondly the cooling. If cooling is too slow it may form a non transparent body (amorphous vs crystalline phase of the polymer).
Let me know if you start something alike!
Best Regards
Froggy.
NOTA: Part I below
After having see the video from Stefan CNC Kitchen
Here belowhttps://www.cnckitchen.com/blog/testing-the-strength-of-3d-prints-re-melted-in-salt
Also he did a re sintering in plaster in an early attempt, another did a previous work with salt and a clear filamenthttps://hackaday.com/2020/09/23/reforming-3d-prints-with-salt-and-heat/
Both works are great.
I tried to get transparent pla 3d printed parts from a m3d printer and a poor quality pla filament.
But nevertheless for the trial a good way to go.
I exchanged some mails with stefan from cnc kitchen which push me to keep on.
Thanks a lot to both of them for pioneering and showing me the way.
So first I tried to print a calibration dice with a high infill as 100 pct was not possible... I found a way afterwards: setting skin number sothat it cannot print any infill. So i put 20 skin counts... just in case if somebody is struggling with this too.
Once printed, I used salt and a kitchen shredder to get finer salt particles, used a sieve to select only the smallest particles portion. Then I use a glass container, filled a bit with salt about 1 cm pressed with a part just little smaller than the container, then layed down the dice and filled from the middle in order to recover the dice with 1 cm of salt. Then pressed the salt again with the dice inside.
I put this at 200C. For 2 hours then take out the oven let it cool for 15 min then take the salt away...
And I got the frosty wall effect as mentioned already.
And look at the dice ... they did not maintain shape (here it was really bad but later much better)
From there I thought ok what can be done to get transparency? Salt particles are kind of stamped on the surface leaving this look...
But is it really only a mold effect or does it react with the pla?
I have not the answer yet.
I worked on some solutions watch chapter II which comes at some point.
NOTA first scorchcad android I made as dummy stl for the fun ... as nothing can be published without a stl...
Similar models
thingiverse
free

investigation of salt annealing of transparent pla parts chapter I by Dr_Froggy_rD
...omes at some point.
nota first scorchcad android i made as dummy stl for the fun ... as nothing can be published without a stl...
thingiverse
free

investigation of salt annealing of transparent pla parts chapter II by Dr_Froggy_rD
...t it must be easily removable.
remelted pla is prone to colouration.
nota: a dummy object is included to be able to publish this!
thingiverse
free

Salty Dice
...enter, and when a 1 pip is rolled, the salt auto-dispenses from the 6 pips! print for yourself, or your salty dice-blamer friend!
thingiverse
free

Sheep Salt/Pepper Shaker by Gnietschow
...;t work on my printer due too low resolution, so i decided to make a tight cork, which needs some sanding after the print to fit.
thingiverse
free

Another Dual Material Dice by peetas
...aterial dice with hollow body and dots filling the inside. the idea is to use transparent material for a nice effect on the dots
thingiverse
free

Particle Internet Button by math85360
...any better printer will print it correctly.
bottom part doesn't close perfectly the case
warning : not yet a finished product
thingiverse
free

Felix Felicis potion by acorderob
...equired (see print settings)
all pieces have the same origin so they can be printed in one piece or with a multimaterial printer.
thingiverse
free

transparent vase by mahesh_bhoir
...t pla on makerbot replicator 2.
should work on other 3d printers too!!
(stop the printer once it starts to fill the opening :) )
thingiverse
free

Polyblob by cheetahspots
...es, but it's a great way to get to know meshmixer. if it was hollowed out and printed transparent, it might make a cool lamp.
3dwarehouse
free

Glass Die
...glass die
3dwarehouse
a complex transparent die (single dice) #glass #dice #hollow
Froggy
turbosquid
$25

Froggy
...id
royalty free 3d model froggy for download as fbx and gltf on turbosquid: 3d models for games, architecture, videos. (1691687)
3d_export
free

Froggy
...froggy
3dexport
3ddd
$1

Lucide FROGGY 77272-03-85
...roggy
артикул - 77272/03/85
цвет - зеленый
цоколь - e14
длина см - 71
ширина см - 21
высота см - 15,5
арматура - металл, зеленый
3ddd
$1

Горшок детский Fisher-Price Froggy Potty
...fisher-price froggy potty
3ddd
горшок , лягушка
горшок детский fisher-price froggy potty
turbosquid
$15

Lucide Froggy 77272-03-85
... available on turbo squid, the world's leading provider of digital 3d models for visualization, films, television, and games.
archive3d
free

Sconce 3D Model
...sconce 3d model archive3d sconce lamp-bracket lantern sconce lucide froggy n150217 - 3d model (*.gsm+*.3ds) for interior 3d...
thingiverse
free

froggy by caractere
...froggy by caractere
thingiverse
froggy
thingiverse
free

Froggy by Gustafson_k
...froggy by gustafson_k
thingiverse
rainforest cafe frog
unity_asset_store
$5

Froggy Chairs
... your workflow with the froggy chairs asset from meowvorty. find this & other furniture options on the unity asset store.
thingiverse
free

Froggy Chair by ZachHanze
...froggy chair by zachhanze
thingiverse
the froggiest chair.
Annealing
3d_export
$10

automatic enameled wire conveyor line
...g, labeling, weighing, scanning, palletizing, conveying, etc. enameled wire scheme, please use solidworks 2012 and above to open!
3d_export
$49

drawing of 3x2x15m full fiber trolley resistance furnace
...resistance furnace. it is a special equipment for quenching, annealing normalizing and tempering of metal products in natural atmosphere,...
thingiverse
free

Induction Annealer by Russ10
...n annealer by russ10
thingiverse
these are the 3d printed parts used in making an auto feeding induction annealer. more info at:
thingiverse
free

Case Annealer Heat Sink Prototype by bigblack
...case annealer heat sink prototype by bigblack
thingiverse
the last picture is of the final product turned on a lathe
thingiverse
free
Dimensional thermal test jig (for annealing) by punkgeek
...hat was easy to test in my oven (and i only needed my parts to survive in a super hot car - which the internet says is about 75c)
3dfindit
free

DIN 315 - annealed cast iron, zinc-plated (A2K), blue passivated
...din 315 - annealed cast iron, zinc-plated (a2k), blue passivated
3dfind.it
catalog: wuerth
thingiverse
free

Annealing Tube Clip for Charmilles 290F/330F by cudakid03
...old our larger tubes in the retracted position and added a counterbore on the back side to clear the nutsert on the 330f machine.
thingiverse
free

Brass Annealing Station by msgbean
...ation dimensions to bend the cartridge holder and added a misc. parts list.
updated 1/21/21: added a drum drawing for dimensions.
thingiverse
free

prototype planoconvex lens with a customisable lens curvature for being processee by the sacrificial coat & annealing salt method by Dr_Froggy_rD
...free of salt frost effect but the bubbles inside affects the lens...
maybe some will be more successful
best regards
dr_froggy_rd
thingiverse
free

Nema 17 driven cartridge case feeder for an induction annealer by wombatordnance
...r and a way to drive it. (you could fit another motor using an adapter with a nema 17 flange, i might draw one up and upload it.)
Investigation
3d_ocean
$4

Magnum Bullet
...magnum bullet 3docean ammunition bullets fire firearm gun hunting investigation magnum model pellet projectile shooting weapon model of...
3d_export
$7

research station kristalise
...station kristalise 3dexport big scientific spacestation, for deep space investigation which is a homeworld for a lot of staff...
3d_export
$90

London City Hall 3D Model
...hall uk police landmark united kingdom vacation holiday britain investigation administrative building law british london city hall 3d model...
3d_export
$70

New Scotland Yard 3D Model
...city uk police landmark united kingdom vacation holiday britain investigation administrative building law british new scotland yard 3d model...
3d_ocean
$5

DeerStalker Cap
...onal headgear of budding investigators! 3d model was made in blender and includes dae file, obj file, uv map, ao map and norma...
3d_export
$200

London building collection 3D Model
...city uk police landmark united kingdom vacation holiday britain investigation administrative building law british london building collection 3d model...
3d_export
$10
Magnifying glass 3D Model
...pe magnification magnifier magnifying object optical research search tool zoom
magnifying glass 3d model vitamares 29221 3dexport
3d_ocean
$16

Bullets
...crime damage death element engrave explosives fight firearm gun investigation metal model penetration pistol powder primer reflection rifle robbery...
3d_export
$10

spacecraft stork
...small spacecraft; • research of problems of microgravity; • investigation of the behavior of high-speed mechanical particles of natural...
3d_export
$5

Knoll High Sticking Chair
...was set up and, fueled by mutual optimism, the investigation began.<br>“everything i’ve always done has been a reaction against...
Chapter
3d_export
$5

elm tree
...elm tree 3dexport name: magnolia tree -** 4 chapter** ...
3ddd
$1

Sicis ANASTASE
...3ddd sicis кресло sicis anastase из коллекции next art chapter ...
3ddd
$1

Sicis JULIEN L'ARGENTIER
...sicis julien l'argentier 3ddd sicis sicis next art chapter 220 x 100 x 82...
3d_export
$150

6 location fitting machines production auto-loading chapter 6 circulating film labeling machine 3d
... structures, and mechanism novelty. currently, the six-station cycle fitting machine is producing stable products in the factory.
3d_export
$14

medieval glaive
...i saw it for the first time in a chapter of friends, i was interested in the type of...
3d_export
$15

jebediah springfield tongue
...springfield language. it is the same from the simpsons chapter it is made in blender 2.90, rendered in cycles....
cg_studio
$99

Arthurian Environmental Set3d model
...set3d model cgstudio perspectx arthurian environment set fantasy salisbury chapter house historical .obj .max .mb .lwo .fbx .c4d .3ds...
3d_ocean
$19

Gothic Church
...gothic church 3docean architectural building cathedral chapel chapter church exterior god gothic historic house medieval religion lowpoly...
3d_ocean
$2

Islamic Calligraphy Wooden Frame
...pattern of arabic/islamic art, fitting the 15 words of chapter 112 of the quran (al-ikhlas) perfectly in a square...
3d_export
$6

ocean jet 8
...jet 8 3dexport a model made for the corresponding chapter of the maritime accidents series, which includes the report...
Rd
design_connected
free

RDS 1
...rds 1
designconnected
free 3d model of rds 1 by bonacina pierantonio designed by dordoni, rodolfo.
turbosquid
$10

RD Binoculars
... available on turbo squid, the world's leading provider of digital 3d models for visualization, films, television, and games.
turbosquid
$5

Chairs Rd
... available on turbo squid, the world's leading provider of digital 3d models for visualization, films, television, and games.
cg_studio
$30

Bass Gibson RD Custom3d model
...son rd custom instruments
.max - bass gibson rd custom 3d model, royalty free license available, instant download after purchase.
turbosquid
$26

RZR RD Concept Phone
...
royalty free 3d model rzr rd concept phone for download as on turbosquid: 3d models for games, architecture, videos. (1322227)
turbosquid
$10

Atomic Bomb RDS-1
...uid
royalty free 3d model atomic bomb rds-1 for download as on turbosquid: 3d models for games, architecture, videos. (1270251)
3d_export
$5

revers rds radio plug
...revers rds radio. for cars e30 e34 e36 radio. printed abs layer 0.06 on the left - a standard plug, on the right - a printed one.
turbosquid
$20

Bass Gibson RD Custom
... available on turbo squid, the world's leading provider of digital 3d models for visualization, films, television, and games.
turbosquid
$33

Temsa Safari RD tourist bus
...model temsa safari rd tourist bus for download as max and obj on turbosquid: 3d models for games, architecture, videos. (1423776)
3ddd
$1

Faber. BIOS EG6 RD/XS F32
...6 rd/xs f32.
5840 полигонов.
wall mounted range hood faber bios eg6 rd/xs f32.
5840 polygons.
file: max 2010, 2012; fbx; obj.
Salt
3d_export
$5

salt lamp
...salt lamp
3dexport
salt lamp
turbosquid
$20

Salt
...lt
turbosquid
royalty free 3d model salt for download as 3ds on turbosquid: 3d models for games, architecture, videos. (1635134)
turbosquid
$16

Salt
...lt
turbosquid
royalty free 3d model salt for download as max on turbosquid: 3d models for games, architecture, videos. (1187289)
turbosquid
$12

Salt
...
royalty free 3d model salt for download as max, fbx, and obj on turbosquid: 3d models for games, architecture, videos. (1559506)
turbosquid
free

Salt
... available on turbo squid, the world's leading provider of digital 3d models for visualization, films, television, and games.
3d_ocean
$8

Salt and pepper cellar
...salt and pepper cellar
3docean
castor cellar pepper pepper box salt salt and pepper cellar
high poly salt and pepper cellar.
3ddd
$1

Bretz SALT A125
...bretz salt a125
3ddd
bretz , salt
bretz salt a125 w93 d93 h90
3d_ocean
$6

Salt and Pepper Shakers
...and pepper shakers
3docean
condiments pepper restaurant salt shakers spices tableware
typical restaurant salt and pepper shakers.
turbosquid
free

Salt shaker
...bosquid
free 3d model salt shaker for download as lwo and obj on turbosquid: 3d models for games, architecture, videos. (737770)
turbosquid
$15

Croissant salt
...alty free 3d model croissant salt for download as lwo and obj on turbosquid: 3d models for games, architecture, videos. (1268493)
Dr
design_connected
$16

Dr. Yes
...dr. yes
designconnected
kartell dr. yes computer generated 3d model. designed by starck, philippe.
3ddd
$1
kartell dr. glob
...kartell dr. glob
3ddd
kartell
kartell dr. glob
3d_export
$10
Dr Fate
...dr fate
3dexport
stl for print
turbosquid
$30

Dr. Feelgood
... available on turbo squid, the world's leading provider of digital 3d models for visualization, films, television, and games.
turbosquid
$24

Dr Spark
... available on turbo squid, the world's leading provider of digital 3d models for visualization, films, television, and games.
turbosquid
$1
Dr No Octofuzz
... available on turbo squid, the world's leading provider of digital 3d models for visualization, films, television, and games.
turbosquid
$1
Dr No MadFly
... available on turbo squid, the world's leading provider of digital 3d models for visualization, films, television, and games.
turbosquid
$1

Dr No Kafuzz
... available on turbo squid, the world's leading provider of digital 3d models for visualization, films, television, and games.
cg_studio
$18
Dr Sonderbar3d model
...design chair designer dr sonderbar
.max - dr sonderbar 3d model, royalty free license available, instant download after purchase.
3ddd
$1
agape dr
...agape dr
3ddd
agape , ванна
agape bionic models
Iii
3d_export
$17

JetRanger III
...jetranger iii
3dexport
jetranger iii
3ddd
$1
Jarron III
...jarron iii
3ddd
jarron iii
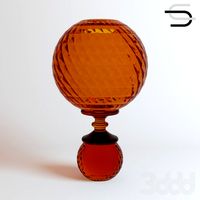
decorative glass vase
cg_studio
$139
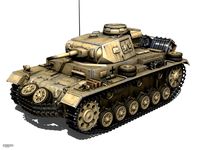
Panzer III - PzKpfw III - Ausf.G3d model
....3ds .c4d .lwo .obj - panzer iii - pzkpfw iii - ausf.g 3d model, royalty free license available, instant download after purchase.
cg_studio
$139
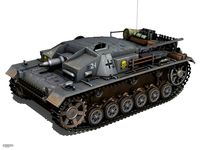
StuG III - Sturmgeschutz III - Ausf.D3d model
....c4d .lwo .obj - stug iii - sturmgeschutz iii - ausf.d 3d model, royalty free license available, instant download after purchase.
3ddd
free

Velashape III
... syneron , candela
velashape iii — аппарат для лечения целлюлита
3d_ocean
$8
Inoplanet III
...inoplanet iii
3docean
3ds arman3dg games inoplanet low max poly trees
inoplanet iii
design_connected
$16
Richard III
...richard iii
designconnected
baleri italia richard iii armchairs computer generated 3d model. designed by philippe starck.
3d_export
$199

cinderella iii
...cinderella iii
3dexport
3d_export
$119

lara iii
...lara iii
3dexport
3ddd
$1
Towel Collection III
...towel collection iii
3ddd
полотенце
towel collection iii
Transparent
3ddd
$1

Citco Transparence
... transparence , панель
итальянские стеновые панели citco коллекция transparence
design_connected
$13

Transparent chair
...transparent chair
designconnected
transparent chair computer generated 3d model.
design_connected
$13

Transparent Barstools
...transparent barstools
designconnected
transparent barstools computer generated 3d model.
3d_ocean
$5

Transparent Bottle
...-cancer bottle cap container eating full glass healthy isolated liquid oil olive seasoning transparent white
a transparent bottle
design_connected
$13

Small Transparent Speaker
...small transparent speaker
designconnected
transparent sound small transparent speaker computer generated 3d model.
turbosquid
$19

Transparent curtains
...oyalty free 3d model transparent curtains for download as max on turbosquid: 3d models for games, architecture, videos. (1459924)
3d_export
$5

transparent mug
...transparent mug
3dexport
turbosquid
$20

Transparent Lock
...e 3d model transparent lock for download as max, fbx, and obj on turbosquid: 3d models for games, architecture, videos. (1672714)
turbosquid
$15

Transparent Chair
... available on turbo squid, the world's leading provider of digital 3d models for visualization, films, television, and games.
turbosquid
$10

Silo Transparent
... available on turbo squid, the world's leading provider of digital 3d models for visualization, films, television, and games.
Pla
turbosquid
$20

'Plas" Table Lamp
... 'plas" table lamp for download as max, obj, and fbx on turbosquid: 3d models for games, architecture, videos. (1277537)
turbosquid
$400

PLA Chinese Soldier artillerymen
...3d model pla chinese soldier artillerymen for download as max on turbosquid: 3d models for games, architecture, videos. (1668792)
turbosquid
$400

PLA Chinese Soldier navy
...ty free 3d model pla chinese soldier navy for download as max on turbosquid: 3d models for games, architecture, videos. (1668787)
turbosquid
$250

PLA Chinese Soldier 01
...alty free 3d model pla chinese soldier 01 for download as max on turbosquid: 3d models for games, architecture, videos. (1668799)
turbosquid
$250

PLA Chinese Soldier 06
...alty free 3d model pla chinese soldier 06 for download as max on turbosquid: 3d models for games, architecture, videos. (1668809)
turbosquid
$250

PLA Chinese Soldier 05
...alty free 3d model pla chinese soldier 05 for download as max on turbosquid: 3d models for games, architecture, videos. (1668807)
turbosquid
$250

PLA Chinese Soldier 03
...alty free 3d model pla chinese soldier 03 for download as max on turbosquid: 3d models for games, architecture, videos. (1668804)
turbosquid
$200

PLA Chinese Soldier 02
...alty free 3d model pla chinese soldier 02 for download as max on turbosquid: 3d models for games, architecture, videos. (1668803)
turbosquid
$100

PLA Chinese Soldier 74
...alty free 3d model pla chinese soldier 74 for download as max on turbosquid: 3d models for games, architecture, videos. (1668839)
turbosquid
$100

PLA Chinese Soldier 71
...alty free 3d model pla chinese soldier 71 for download as max on turbosquid: 3d models for games, architecture, videos. (1668829)
Parts
3d_export
$5
Parts
...parts
3dexport
parts
3d_export
$5
Part
...part
3dexport
part
3d_export
$5

Part
...part
3dexport
machine part
3d_export
$65
Part
...part
3dexport
simple rendering of the scene file
3d_export
$65

Part
...part
3dexport
simple rendering of the scene file
3d_export
$30

fan part
...fan part
3dexport
this is a part of fan of pedastal
3d_export
$10
machine parts
...machine parts
3dexport
3d part modeling work ,contact for 3d work
turbosquid
$59

Mechanical Part
...id
royalty free 3d model mechanical part for download as c4d on turbosquid: 3d models for games, architecture, videos. (1410833)
turbosquid
$17
Road parts
...bosquid
royalty free 3d model road parts for download as 3ds on turbosquid: 3d models for games, architecture, videos. (1192967)
turbosquid
$9

Cutter Parts
...squid
royalty free 3d model cutter parts for download as stl on turbosquid: 3d models for games, architecture, videos. (1220010)