Thingiverse
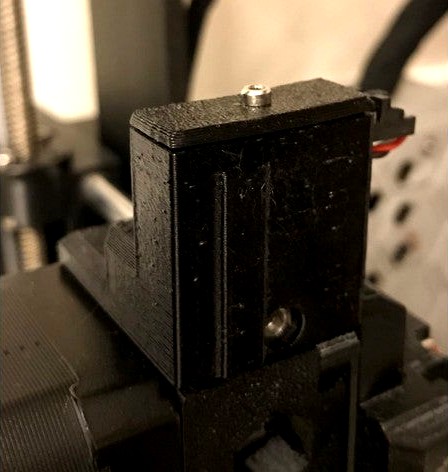
Improved Prusa Mk3S MMU2S filament sensor mount by 01chevyguy
by Thingiverse
Last crawled date: 3 years, 3 months ago
This is an improved mount for the Prusa Mk3S MMU2S extruder filament sensor that allows for more precise adjustment. It replaces the ir-sensor-holder-mmu2s, the fs-cover-mmu2s, and the adapter-printer-mmu2s with only two parts.
I struggled with getting the filament sensor adjusted to work reliably with both PLA and TPU filament. With the original design, you loosen a screw and nudge the sensor mount to adjust but there is no way to make fine and controlled adjustments. This improved design uses a setscrew to precisely adjust the filament sensor position and has greatly improved MMU2 loading reliability for me. Hope it works for you too.
To create the set screw, I used a square nut (M3nS, spare that came with the Prusa kit) drilled out to let a 2.5mm allen key pass through smoothly, and a M3x18 screw (also spare with kit). After printing the two parts, assemble them and insert the screw, then insert the nut from underneath to retain the screw. Now by inserting an allen key through the nut, you can finely adjust the position of the filament sensor by turning the allen screw.
I found that in order to remove the original fs-adapter from the extruder, I had to loosen, but not completely disassemble, the two halves of the extruder body. Once loosened, the fs-adapter came out easily and I inserted the new assembled part and then retightened all the extruder body screws. Finally, insert the screw in the top of the fs-cover, but do not tighten.
Adjust the filament sensor following the procedure in the Prusa manual, except move the sensor precisely by inserting an allen key through the drilled out nut and turning the screw. Once the adjustment is correct, tighten the fs-cover mounting screw on top.
Edit: Added photographs of assembly.
Similar models
thingiverse
free

Prusa MMU2S Bondtech Extruder Adapter by schneian
...nt sensor upside down and mount the adapter on top of it.
you will also need a m3x30 screw and a steel spring of a ballpoint pen.
thingiverse
free

Easy IR sensor ajustment MMU2s
...ie=utf8&linkcode=gs4&tag=thingivers086-21
it is assembled with a m3x20 allen bolt, a m3 square nut plus a m3 locking nut.
thingiverse
free
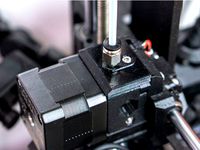
Prusa i3 MK3S Bowden Fitting Filament Sensor Cover by Yoonpyo
...k3s that you can screw in a pc4-m5/6/10 fitting. i use this to guide filament from the dry box to the extruder through ptfe tube.
thingiverse
free

Prusa MK3S+ fs-cover with adapter-printer cutout by yvr76
...he adapter-printer so it sits and screws in better.
see step 35:https://help.prusa3d.com/en/guide/3b-mk3s-extruder-upgrade_186842
thingiverse
free

Prusa FS-Cover MK3S+ (reworked) by Trierscheid
...or appropriate once you unload the filament. do not let it as it is once it comes out. you will run into troubles, if you do not.
thingiverse
free

Bondtech Prusa MMU2 Sensor and Filament Input
...nt(filing) needed.
update
v2 lever still had a little dragging in the sensor. v3 lever does not have any dragging at this point.
thingiverse
free

Prusa i3 MK3S FS Cover Tapered Filament Feed Chamber by Daxtasyfpv
...prusa i3 mk3s fs cover tapered filament feed chamber by daxtasyfpv
thingiverse
i# mk3s tapered fs cover
thingiverse
free

Bondtech prusa diy mmu2+1s mount by andersstou1
...e sensor housing so there is the possibillity to screw it to the sensor housing with the v2 sensor cover.
the screws is m3 sized
thingiverse
free

Prusa MK3S+MMU2S Extruder Cooler - With Filament cooler!
...the back to loss of weight, and i would let my extruder motor visualizer ;)
this extruder cooler is designed for noctua 40x40x20.
grabcad
free

Prusa MK3S filament sensor cover
...prusa mk3s filament sensor cover
grabcad
prusa mk3s filament sensor cover bowden m8
Mmu2S
thingiverse
free

MMU2S Adapter Printer
...mmu2s adapter printer
thingiverse
proper piece to upgrade an mk3 mmu2 to an mk3s mmu2s
thingiverse
free
mmu2s extension by mumg
...mmu2s extension by mumg
thingiverse
added support of endstop for mmu2 idler
thingiverse
free

MMU2 Buffer horizontal stand
...mmu2 buffer horizontal stand
thingiverse
the mmu2 stand is designed for the ikea lack housing and two stacked samla dryboxes.
thingiverse
free

MMU2S M10 Passthrough Selector
...assthrough selector
thingiverse
designed for a better path from mmu2s selector to printer with m10 passthrough bowden connector.
thingiverse
free

Spiral tree MMU2
...spiral tree mmu2
thingiverse
not suitable for printing in vase mode
thingiverse
free

Prusa MMU2 Light Bar
...prusa mmu2 light bar
thingiverse
simple remix of mr_tantrum's prusa mk3/mk3s light bar in order to accommodate for the mmu2
thingiverse
free

Prusa MMU2 tube holder for filament
...prusa mmu2 tube holder for filament
thingiverse
wall tubes 6pcs holder between filament and mmu2 unit
thingiverse
free

Sonicare Toothbrush Holder for MMU2/S
...e toothbrush holder for mmu2/s
thingiverse
added color rings on the top of the toothbrush stands, to print it with prusa mmu2/s.
thingiverse
free

MMU2s Quick Test by MrPUSH
...thingiverse
i made this mmu2s quick test because i wanted something that would switch colors quickly. i usually add a 10mm brim.
thingiverse
free

Idles MMU2 Beermat
...d this at 95mm x 95mm x 2mm with 100% infill.
for more beermats, see my group:
https://www.thingiverse.com/groups/beermats/things
Mk3S
turbosquid
$50

cention mk3
...ty free 3d model cention mk3 for download as ma, obj, and fbx on turbosquid: 3d models for games, architecture, videos. (1454148)
turbosquid
$129
MK3 Tank
... available on turbo squid, the world's leading provider of digital 3d models for visualization, films, television, and games.
turbosquid
$100

Toyota Supra MK3
... available on turbo squid, the world's leading provider of digital 3d models for visualization, films, television, and games.
turbosquid
$44
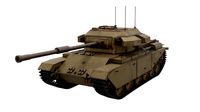
cention mk3 low poly
...d model cention mk3 low poly for download as ma, obj, and fbx on turbosquid: 3d models for games, architecture, videos. (1454666)
turbosquid
$30

Challenger I Mk3 Falcon
... available on turbo squid, the world's leading provider of digital 3d models for visualization, films, television, and games.
turbosquid
$10
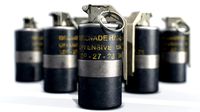
American Frag hand grenade MK3
...free 3d model american frag hand grenade mk3 for download as on turbosquid: 3d models for games, architecture, videos. (1393624)
turbosquid
$20

Mk3 US Navy Combat Knife
...ty free 3d model mk3 us navy combat knife for download as fbx on turbosquid: 3d models for games, architecture, videos. (1172791)
3d_export
$29

Ford Fiesta MK3 Modified 3D Model
...7 tumerfx mtumer mehmet t?mer 1993 1995 1996 wrc special modifed modifiye
ford fiesta mk3 modified 3d model mtumer 30698 3dexport
3d_export
$99

Toyota Supra Mk3 19861993 3D Model
...ort fast coupe japan 1986 1987 1988 1989 1990 1991 1992 1993 tuning turbo
toyota supra mk3 19861993 3d model squir 62530 3dexport
turbosquid
$5
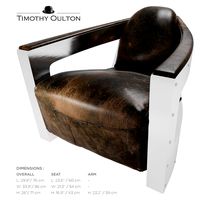
Timothy Oulton Mars Chair MK3
...on mars chair mk3 for download as 3ds, max, obj, fbx, and dae on turbosquid: 3d models for games, architecture, videos. (1209782)
Prusa
turbosquid
$2
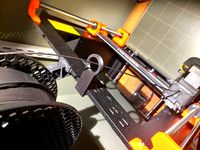
Frame Filament Guide Clip-On for Prusa Mk3
...rame filament guide clip-on for prusa mk3 for download as stl on turbosquid: 3d models for games, architecture, videos. (1634730)
3d_export
free
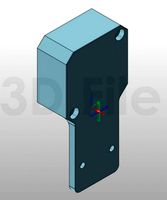
prusa i3 mk3s laser mount for opt lasers
...to learn more about the blue laser technology that conceived the cutting and engraving laser heads from opt lasers, please visit:
turbosquid
free
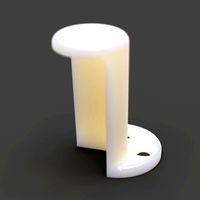
Prusa small printer adapter holder
...er for download as ipt, skp, dwg, dxf, fbx, ige, obj, and stl on turbosquid: 3d models for games, architecture, videos. (1642936)
3d_export
$30

geisha by jonathan adler
...** i did a 3d printing test in the prusa software, you can find it among the attached images.<br>exchange:<br>.blend...
thingiverse
free

Prusa without Prusa (rc2) by madless
...prusa without prusa (rc2) by madless
thingiverse
just the main part of prusa rc2 faceshield, without writing.
enjoy :)
thingiverse
free
Prusa by acejbc
...prusa by acejbc
thingiverse
prusa knob info
m3 8mm screw
thingiverse
free
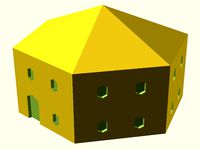
Prusa house
...prusa house
thingiverse
how prusa house could look like...
thingiverse
free

Prusa Mk2 "Fake Prusa" LCD cover by anraf1001
...r by anraf1001
thingiverse
version of prusa's lcd cover with "fake prusa" instead of "original prusa"
thingiverse
free
Prusa stabilizator by gutiueugen
...prusa stabilizator by gutiueugen
thingiverse
prusa stabilizator
thingiverse
free
Keychain Prusa by rbarbalho
...keychain prusa by rbarbalho
thingiverse
keychain with text prusa.
Sensor
3d_export
free

parking sensor
...parking sensor
3dexport
car parking sensor
turbosquid
$1
Sensor
... available on turbo squid, the world's leading provider of digital 3d models for visualization, films, television, and games.
3d_export
$5
Smoke sensor
...port
smoke sensor, can be an impressive element for your projects. easy to use, realistic image, low polygon, quality materials.
3d_export
$5
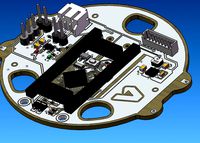
Air Quality Sensor v1
...air quality sensor v1
3dexport
air quality sensor v1
3d_export
$15
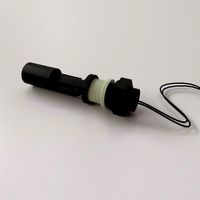
float sensor
...e up render. - all parts and materials are logically named. other formats ================= - collada (.dae) - autodesk fbx - obj
turbosquid
$26
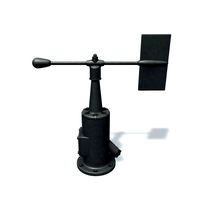
Wind sensor C
...free 3d model wind sensor c for download as 3ds, obj, and fbx on turbosquid: 3d models for games, architecture, videos. (1328943)
turbosquid
$26
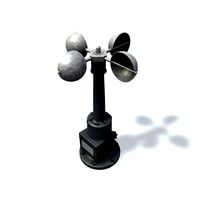
Wind sensor B
...free 3d model wind sensor b for download as 3ds, obj, and fbx on turbosquid: 3d models for games, architecture, videos. (1328168)
3d_export
$5
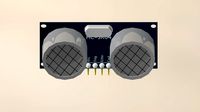
ultrasound sensor
...ivers convert ultrasound into electrical signals, and transceivers can both transmit and receive ultrasound. export in: -obj -fbx
3ddd
free
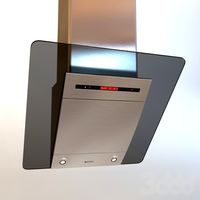
Вытяжка Shindo pallada sensor
... вытяжка
вытяжка shindo pallada sensor. в двух размерах - 600 и 900. текстуры в комплекте.
turbosquid
$52
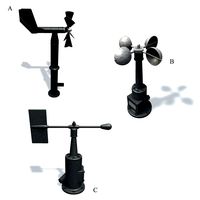
Wind sensor A B C
...
royalty free 3d model wind sensor a b c for download as fbx on turbosquid: 3d models for games, architecture, videos. (1408406)
Improved
cg_studio
$49

Robot Z300 (improved version)3d model
...o
.3ds .fbx .max .obj - robot z300 (improved version) 3d model, royalty free license available, instant download after purchase.
3d_export
$39

Robot Z300 improved version 3D Model
...fantasy sci-fi robots bot humanoid droid sci fi materials character
robot z300 improved version 3d model alekrazum 55067 3dexport
3d_export
$75

CV-90 Improved
...nnon. export versions are fitted with hägglunds e-series turrets, armed with either a 30 mm mk44 or a 35 mm bushmaster autocannon
turbosquid
$55

(Important textures coming back soon after improvements)Cuboid gazebo bench area
... available on turbo squid, the world's leading provider of digital 3d models for visualization, films, television, and games.
3d_export
$15

COMPLETE AUDI 80-100 SHIFT LEVER REPAIR KIT WITH IMPROVED BUSHING
...dexport
• sleeve - 1 pc. • elastic band - 1 pc. • hinge - 1 pc. audi 100c3 audi 100 c4 audi 80 b3 (checked) audi 80 b4 (checked)
3d_export
$7

REPAIR KIT FOR GEARSHIFT LEVER AUDI 80-100 IMPROVED
...ar of the gum is excluded. - rusk - 1 pc. - elastic band - 1 pc. audi 100c3 audi 100 c4 audi 80 b3 (checked) audi 80 b4 (checked)
3d_export
$30

cup mask machine front section stereo mask manufacturing machine improved version
...ing rack cad outsourcing list. the drawings are mature drawings that have been produced.<br>drawing version solidworks 2018
3d_export
free

oven - forno
...oven - forno
3dexport
gradually i'm trying to improve my 3d.
3d_export
$75

T-55
...nally, but these improvements made the tank more efficient and lethal. the t-55 was officially adopted by the soviet army in 1958
3d_export
$5

civil registration authorities
...civil registration authorities
3dexport
city wedding square. the model can be used for projects, to improve the project, etc.
Filament
3ddd
$1
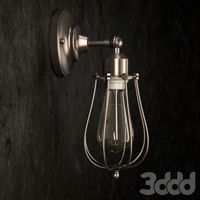
Filament Cage
...filament cage
3ddd
лофт , filament cage
модель бра, делалась по фото!
turbosquid
$3
FILAMENT COUNTER
...d
royalty free 3d model filament counter for download as stl on turbosquid: 3d models for games, architecture, videos. (1563049)
3d_export
$5

Filament lamp 3D Model
...filament lamp 3d model
3dexport
filament lamp 3d model kevin 54161 3dexport
3d_export
$5

Filament bulb candle 3D Model
...filament bulb candle 3d model
3dexport
filament bulb-candle
filament bulb candle 3d model kevin 54163 3dexport
3d_export
$5

Filament led light bulb
...filament led light bulb
3dexport
realistic 3d model of filament light bulb with v-ray materials.
3d_export
$5

Filament led light bulb
...filament led light bulb
3dexport
realistic 3d model of filament light bulb with v-ray materials.
3d_export
$5

Filament led light bulb
...filament led light bulb
3dexport
realistic 3d model of filament light bulb with v-ray materials.
3d_export
$5
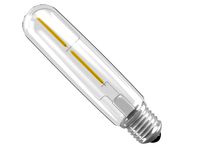
Filament led light bulb
...filament led light bulb
3dexport
realistic 3d model of filament light bulb with v-ray materials.
3d_export
$5

Filament led light bulb
...filament led light bulb
3dexport
realistic 3d model of filament light bulb with v-ray materials.
3ddd
$1
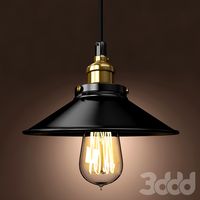
Factory filament metal shade
...factory filament metal shade
3ddd
restoration hardware
restoration hardware. 20th c. factory filament metal shade.
Mount
3d_export
free

mounting bracket
...mounting plate is the portion of a hinge that attaches to the wood. mounting plates can be used indoors, cabinetry and furniture.
turbosquid
$2

MOUNTING
... available on turbo squid, the world's leading provider of digital 3d models for visualization, films, television, and games.
turbosquid
free

Mounts
... available on turbo squid, the world's leading provider of digital 3d models for visualization, films, television, and games.
turbosquid
free

Mount Fuji
...fuji
turbosquid
free 3d model mount fuji for download as obj on turbosquid: 3d models for games, architecture, videos. (1579977)
3d_export
$5

Headphone mount LR
...headphone mount lr
3dexport
headphone mount l+r
turbosquid
$39

Mount rainier
...quid
royalty free 3d model mount rainier for download as fbx on turbosquid: 3d models for games, architecture, videos. (1492586)
turbosquid
$5

pipe mounting
...quid
royalty free 3d model pipe mounting for download as obj on turbosquid: 3d models for games, architecture, videos. (1293744)
turbosquid
$3

Mounting Tires
...uid
royalty free 3d model mounting tires for download as fbx on turbosquid: 3d models for games, architecture, videos. (1708511)
3d_export
$5

Magnetic GoPro Mount
...pro mount
3dexport
cool magnetic mount for gopro. allows you to mount the camera on flat metal surfaces and get exclusive shots.
turbosquid
$5

Stone Mount
...ty free 3d model stone mount for download as ma, obj, and fbx on turbosquid: 3d models for games, architecture, videos. (1370306)
