Thingiverse
Improved Case for DIY "Talking Clock" Kit by mmotley
by Thingiverse
Last crawled date: 4 years, 9 months ago
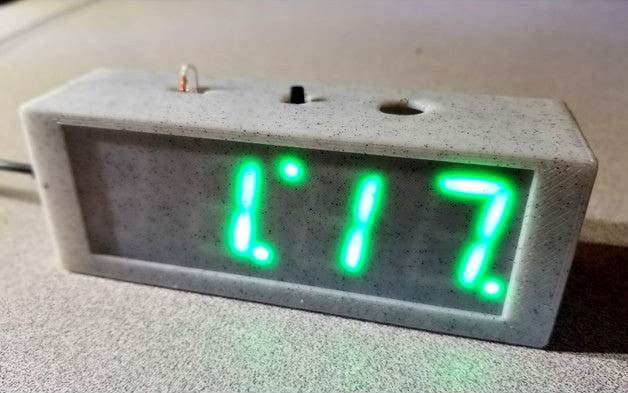
This is a fully 3D printed case/enclosure for the inexpensive "talking clock" DIY soldering kits available on Amazon from several vendors (currently KKmoon and Gearwoo, search "DIY talking clock kit"). I've put together a few of these in different colors: https://www.amazon.com/dp/B089CXV236.
These kits are based on the STC microprocessor with a DS1302 time keeping chip, thermistor, and light sensor. They provide great soldering practice and are generally quite fun to put together.... and hack, see "aFewBits/stc-led-clock" on GitHub for vastly improved firmware.
I created this because these clocks typically come with one of two cases designs:
1) A laser-cut acrylic "puzzle" case. A real challenge to put together, and I found that the power input jack didn't align properly. Looks great once complete, but ugh.
2) A two-part clamshell clear plastic case, which will come to you a) scratched up, and b) with the plastic wrap used for the speaker stuck to the front lens and all sides of it, which is impossible to remove.
This design is actually based on the case in #2. I also added a small tilt in the base to point the clock face upwards a few degrees.
To assemble: print Front and Rear, along with a Diffuser. Drop the diffuser in to Front, slide the clock in, snap in the speaker in the rear cutout, then use the screws that came with the clock to attach the two halves.
Print the diffuser at 0.2mm layer height (it is designed to be 3 layers, or 0.6mm, high). PLA or PETG works well. Experiment! The diffuser is a super fast print.