Thingiverse

IMac Flatscreen Conversion Bezel Retro RPI4 Project
by Thingiverse
Last crawled date: 4 years, 4 months ago
This is a bezel to convert an old IMac to a flatscreen display since the old display is a CRT monitor there needs to be a round bezel on the flatscreen to fill the gap.
This started as a project of mine to run a raspberry pi 4 in a IMac case. I wanted to upgrade the monitor to a flatscreen so I took a screen 14.1 inch from an old macbook(see parts list)
First I stripped the IMac of its internals, keeping just the case (see pictures). I added some kapton antistatic tape inside the IMac case to insulate the interior metals from the exposed controller board. I printed the laptop screen bezel and glued it in place to the Laptop screen metal bezels using epoxy. I then glued the 3d printed bezel to the IMac case at the corners using quick set epoxy. Lastly I attached the Raspberry Pi to the Laptop screen controller board and the screen. Fires up running Raspian.
PARTS LIST:
Laptop screen model # LTN141P4-L04 (ebay about $17)
Laptop screen controller board for #LTN141P4-L04 (ebay about $25) - This is the small controller board that connects between the raspberry pi and the laptop screen via HDMI
Controller board power brick (ebay $8)
Old IMac (found via craigslist)
Raspberry Pi-4
Printing Instructions:
Print in black to hide imperfections, I used .2 layer height and 20% infill. Print two of file labeled laptop_screen_sides.stl and four of the laptop_screen_top_half.stl. Glue these together into a single frame and then glue it to the metal bezel of the screen using epoxy or superglue (I suggest epoxy).
Similar models
grabcad
free

Raspberry Pi Monitor Stand with Bezel
...raspberry pi monitor stand with bezel
grabcad
monitor stand and bezel for 7 in touch screen monitor.
thingiverse
free

Case for 7 inch LCD display by severon10290
...nd that folds up flat. i designed it with the idea of using the display as a second screen for my laptop while i'm on the go.
thingiverse
free

I2C OLED Screen Bezel
...site :https://www.raspberrypi-spy.co.uk/2019/10/pi-hole-oled-status-screen/
animated rotating bezel :https://youtu.be/ygy2p99laky
thingiverse
free

Raspberry Pi (all versions) with Display Case by vanslipon
...ve )
keep in mind that i'm a beginner at 3d modeling and used tinkercad.
maybe someone can make use of the model, have fun :)
thingiverse
free

Slightly taller Raspberry Pi with 3.5 TFT LCD KeDei Touch Screen Case by jacob-danell
...slightly taller for the case and cap.
works with the following raspberry pi models:
raspberry pi 3
raspberry pi 2
raspberry pi b+
thingiverse
free

Raspberry Pie Monitor Enclosure by Mr_Terasaur
...rint it.
as with all my items, it is not required, but a tip through paypal is always appreciated for my work. thanks and enjoy!
thingiverse
free

laptop lcd controller case by WojPie
...ecad project file for corrections (although the design is not very careful)
top parts needs rotate 180 to print without support.
thingiverse
free

Recycled Laptop Display Mount / Monitor (LTN154X3) by WillsWay
...lp support my maker habit; buy it here:https://pinshape.com/items/50018-3d-printed-recycled-laptop-display-mount-monitor-ltn154x3
thingiverse
free
![Raspberry Pi 2&3 800x480 5" XPT2046 display case [Version 2] by XylenC4](/t/8554084.jpg)
Raspberry Pi 2&3 800x480 5" XPT2046 display case [Version 2] by XylenC4
... old one.
items used:raspberry pi model 3 b5" lcd hdmi touch screen 800*480 for raspberry pi 2/3repetier server prooctopring
thingiverse
free

Laptop Notebook Monitor + Controller Board Stand & Case FINALna by Astro2000
...p; case finalna by astro2000
thingiverse
created for 15" notebook display and monitor controller board with vga dvi outputs
Rpi4
thingiverse
free

RPI4 custom case #1
...rpi4 custom case #1
thingiverse
first attempt to a custom hnk rpi4 case
thingiverse
free

RPI4 FAN case addon for armor case by mobicek
...ith armor case mounted to rpi4. case is for 40x40x10mm fan. i am using noctua nf-a4x10 5 v pwm fan 4pin direct connected to rpi4.
thingiverse
free

Badges to use with RPi4 AjSTer Remix by nilly667
...th rpi4 ajster remix by nilly667
thingiverse
badges for the rpi4 remix of the ajster case, choose one, print, and glue in place!
thingiverse
free

Arcade Controller with RPI4 holder by shaman2525
...or gamecontroller set with 10 buttons
you can use rpi4 as retro game console and joypad as arcade controller to get retro feeling
thingiverse
free

RPI4 Base and Camera Holder
...ts on part 1. part 2 has screw holes to attach a camera module.
part 1 can be zip-tied to the top of the raspberry pi 4 kit case.
thingiverse
free

RPi4 case radiator - Home Assistant by Qboll
...is designed for rpi4 equipped with big aluminum radiator. both parts of case can be fixed together with 1.2mm wire or thin screw.
thingiverse
free

RPi4 + Pican-M case for OpenPlotter by MarkusLund
...gps-modules. all placed inside a box for a clean installation.
also a made a place for a 30x30mm cooling fan in one of the sides.
thingiverse
free

MMDVM Duplex RPI4 Case by crperryjr
...pi4 case by crperryjr
thingiverse
changed top and added a fan box for 30mm fan. modified from the original design in tinkercad.
thingiverse
free

HomeAssistant RPI4 case by do_3dprint
...77 (thanks vykarius).
changed the size of the fan, it is now from 30x30
changed the front part, now customized for home assistant
thingiverse
free

rpi4 desktop case by jaewon0087
...se
made in fusion 360
52pi ice tower
raspberry pi model b
bolts
case
c-type cable
micro hdmi to hdmi cabe
monitor
keyboard
mouse
Flatscreen
turbosquid
$35

Flatscreen TV
... available on turbo squid, the world's leading provider of digital 3d models for visualization, films, television, and games.
turbosquid
free

flatscreen tv 1
... available on turbo squid, the world's leading provider of digital 3d models for visualization, films, television, and games.
3d_ocean
$30

CGAxis Flatscreen TV Electronics 03
...on television tv tv
plasma, flatscreen, flat, screen, tv, lcd, television, monitor, modern, hdtv, display, entertainment, cgaxis,
3d_export
$25

Flatscreen monitor Dell 22 3D Model
...onitor dell 22 3d model
3dexport
monitor computer pc tv screen dell
flatscreen monitor dell 22 3d model pixelblock 26060 3dexport
turbosquid
$31

Classical Style Wall with Flatscreen TV
... available on turbo squid, the world's leading provider of digital 3d models for visualization, films, television, and games.
3d_ocean
$30

CGAxis Flatscreen TV Electronics 05
...008 or higher and many others. formats: *.max *.max mentalray *.max vray *.c4d cinema4d *.fbx *.obj materials: yes textures: yes
3d_ocean
$30

CGAxis TV Flatscreen Electronics 04
...008 or higher and many others. formats: *.max *.max mentalray *.max vray *.c4d cinema4d *.fbx *.obj materials: yes textures: yes
3d_ocean
$30

CGAxis TV Flatscreen Electronics 02
...008 or higher and many others. formats: *.max *.max mentalray *.max vray *.c4d cinema4d *.fbx *.obj materials: yes textures: yes
3d_ocean
$30

CGAxis TV Flatscreen Electronics 01
...008 or higher and many others. formats: *.max *.max mentalray *.max vray *.c4d cinema4d *.fbx *.obj materials: yes textures: yes
3d_export
$35

TV Flatscreen CGAXIS electronics 01 3D Model
...nt cgaxis electronics cinema vray mentalray textures materials
tv flatscreen cgaxis electronics 01 3d model cgaxis 27576 3dexport
Imac
3ddd
$1

iMac
... imac , монитор
imac, замечателен для любого офиса, модель не перегружена полигонами
design_connected
$18

iMac
...imac
designconnected
apple imac computer generated 3d model.
3ddd
$1

iMac
...ddd
apple , imac , монитор
диагональ 21,5 дюйма
3ddd
free

Apple iMac
...apple imac
3ddd
apple , imac
imac by apple
3d_ocean
$25

iMac
... production model without any requirement of additional modeling and texturing. - keyboard and mouse included - fully textured...
3d_ocean
$15

Apple iMac
...mac light materials mode modeling pc realistic screen texture
imac 3d model and materials and texture realistic apple imac model.
turbosquid
$5

iMac
... available on turbo squid, the world's leading provider of digital 3d models for visualization, films, television, and games.
3d_ocean
$19

3d Imac Model
...use. high quality model and materials - 3 itens - imac - keyboard - magic mouse - polycount 31.100 (wo/turbosmooth) - created ...
3d_ocean
$19

iMac Set
...etooth computer design desktop imac macintosh magic keyboard magic mouse osx pc screen wireless
imac, magic keyboard, magic mouse
archive3d
free

IMAC 3D Model
...imac 3d model
archive3d
imac mac apple computer
Bezel
turbosquid
$20

Tactical bezel
...uid
royalty free 3d model tactical bezel for download as max on turbosquid: 3d models for games, architecture, videos. (1212612)
turbosquid
$30

Single bezel ring
...
royalty free 3d model single bezel ring for download as 3dm on turbosquid: 3d models for games, architecture, videos. (1327613)
turbosquid
$26

Bezel split shank ring
...alty free 3d model bezel split shank ring for download as 3dm on turbosquid: 3d models for games, architecture, videos. (1202921)
turbosquid
$30

SOLITAIRE BEZEL HALO RING
...d model solitaire bezel halo ring for download as 3dm and stl on turbosquid: 3d models for games, architecture, videos. (1340334)
turbosquid
$9

Heart Pendant w Bezel
...model heart pendant w bezel for download as 3dm, stl, and obj on turbosquid: 3d models for games, architecture, videos. (1678731)
3d_export
$5
basic close volume of bezel door
...rt
this is files for the basic close volume of the bezel door. the close volume of an automotive interior part in catia software
turbosquid
$22

Ring BEZEL Trefoil HB
...l trefoil hb for download as 3ds, max, obj, fbx, stl, and ztl on turbosquid: 3d models for games, architecture, videos. (1349133)
turbosquid
$22

Ring BEZEL Trefoil Band
...il band for download as 3ds, max, obj, fbx, 3dm, stl, and ztl on turbosquid: 3d models for games, architecture, videos. (1349144)
turbosquid
$22

Ring Wave HB-110 BEZEL
...0 bezel for download as 3ds, max, obj, fbx, 3dm, stl, and ztl on turbosquid: 3d models for games, architecture, videos. (1349112)
turbosquid
$22

Ring Wave Band 110 Bezel
...0 bezel for download as 3ds, max, obj, fbx, 3dm, stl, and ztl on turbosquid: 3d models for games, architecture, videos. (1349148)
Conversion
3ddd
$1

Conversation Seat
...шетка
the conversation seat made in englandhttp://www.squintlimited.com/products/the_conversation_seat/gold
+ max 2011
3d_export
$10

Converse 3D Model
...converse 3d model
3dexport
converse shoe pc unix mac
converse 3d model electropainter17075 38067 3dexport
turbosquid
$100

converse-shoe
...quid
royalty free 3d model converse-shoe for download as c4d on turbosquid: 3d models for games, architecture, videos. (1398427)
turbosquid
$10

Conversation Furniture
... available on turbo squid, the world's leading provider of digital 3d models for visualization, films, television, and games.
turbosquid
$7

Converse Allstars
... available on turbo squid, the world's leading provider of digital 3d models for visualization, films, television, and games.
design_connected
$16

Conversation Club Chair
...conversation club chair
designconnected
donghia conversation club chair chairs computer generated 3d model. designed by n/a.
design_connected
$27

Hemicycle Conversation Chair
...rsation chair
designconnected
ligne roset hemicycle conversation chair computer generated 3d model. designed by nigro, philippe.
3d_export
$24

Converse keds 3D Model
...converse keds 3d model
3dexport
converse all star ked shoe clothes sports
converse keds 3d model vermi1ion 26201 3dexport
3ddd
$1

Converse All-Star Shoes
...converse all-star shoes
3ddd
кеды , обувь
converse all-star shoes
design_connected
$18

CONVERSE Jack Purcell Sneakers
...converse jack purcell sneakers
designconnected
converse jack purcell sneakers computer generated 3d model.
Retro
3d_export
$6

billboard-retro
...billboard-retro
3dexport
billboard-retro
3d_export
$5

Retro Bathroom
...retro bathroom
3dexport
retro bathroom
3d_export
$10

billboard retro
...billboard retro
3dexport
billboard retro of the 30s
3d_export
$6

retro tv3ds
...retro tv3ds
3dexport
retro tv.3ds
3d_export
$5

retro lamp
...retro lamp
3dexport
small retro lamp
3ddd
$1

Retro Radio
...retro radio
3ddd
радио
retro radio
3ddd
$1

Retro TV
...retro tv
3ddd
телевизор
retro tv
turbosquid
$5

retro
...ty free 3d model retro for download as max, max, fbx, and obj on turbosquid: 3d models for games, architecture, videos. (1539192)
3d_export
$5

retro sunset
...retro sunset
3dexport
very nice retro sunset selfmade.
3ddd
$1

retro office
...retro office
3ddd
стол
retro office vol.02
Project
3d_export
$7
project
...project
3dexport
project
3d_export
$20
Project
...project
3dexport
design_connected
$16

Project Chair
...project chair
designconnected
rex kralj project chair computer generated 3d model. designed by žitnik, marjan.
3ddd
$1

lectric Project
...настроены. сетка очень плотная.
доступно только для группы "profi"
про группу "profi" можно прочитать в чаво
3d_ocean
$19

Soon project
...kup. made in 3ds max 2013 1- 3dsmax with vray render included material and light 2- obj file 3- fbx file hope you like it plea...
turbosquid
$49

Joint | Project
...squid
royalty free 3d model joint | project for download as on turbosquid: 3d models for games, architecture, videos. (1297983)
turbosquid
$11
house project
...bosquid
royalty free 3d model house project for download as on turbosquid: 3d models for games, architecture, videos. (1672482)
turbosquid
$450
University project
...
royalty free 3d model university project for download as rvt on turbosquid: 3d models for games, architecture, videos. (1463354)
turbosquid
$30
smart projecter
...lty free 3d model smart projecter for download as max and obj on turbosquid: 3d models for games, architecture, videos. (1236214)
3d_export
$5
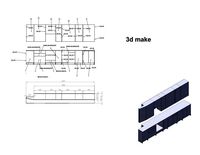
project drawing
...project drawing
3dexport
project drawing and 3d model<br>format jpg sldprt dwg<br>by 3d make