Thingiverse
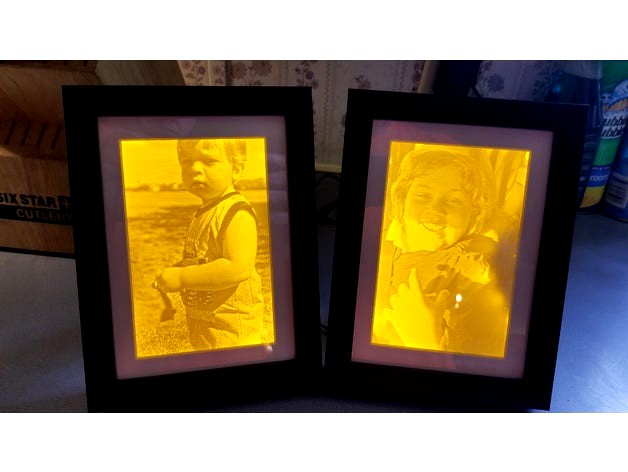
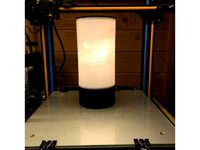
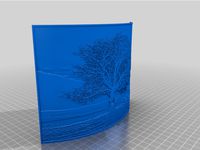
IKEA frame spacer for Lithophane by casedog21
by Thingiverse
Last crawled date: 3 years ago
This is an adapter for this ikea frame.
This is a modified version of this.http://www.instructables.com/id/Photo-Frame-Lithophane-Backlight/
Parts and supplies needed.
https://www.amazon.com/gp/product/B075K2HV1G/ref=oh_aui_detailpage_o07_s00?ie=UTF8&psc=1
https://www.amazon.com/gp/product/B06X9S9T2L/ref=oh_aui_detailpage_o07_s00?ie=UTF8&psc=1
https://www.amazon.com/gp/product/B00RMY8SME/ref=oh_aui_detailpage_o07_s00?ie=UTF8&psc=1
High temp glue gun (important)
Solder and Iron
Rubbing Alcohol
scotch tape
1 paper towel/napkin
1 piece of white paper
knife or razor blade
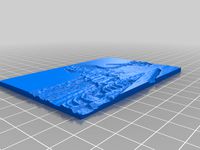
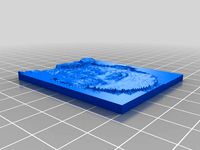
3x5 printed lithophane - (RCLideOn guide to create lithophane https://www.youtube.com/watch?v=y63sVpeViXo&t=)
Take all of the stuff out of the ikea frame.
Take the plastic off plexiglass.
Reinsert it into the frame, put the paper border in the frame if you want it in there.
Insert the lithophane (bumpy side down) and bend the metal tabs down onto the lithophane.
Hold it up to the light to make sure you have it in the right way.
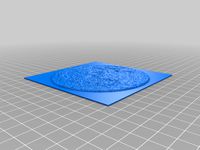
Print the adapter, You may want to scale it up a little if you want a more snug fit. Else it will work as is. There will be a small gap but it gives you room to insert it once the hot glue is on it. Test fit the adapter first to make sure it will go in on top of the lithophane.
Take the LED strip and pull out enough to go around the inside of the adapter with a little overlap. Clean end of the LED strip if it has plastic coating on it. Get a spare piece of wire about an inch long from something laying around and tin the ends. Solder on the two wires to the LED strip. Take note which one is positive and which one is negative. Plug the power adapter into the socket that comes with it. Put the tinned positive wire in the red part of the connector and the tinned negative wire into the black. Plug it into the wall to test that it lit up.
Unplug from the wall once you are sure it is good. Leave the adapter plugged into strip so you can gauge your spacing to start laying the led strip into frame adapter. Heat up your hot glue gun now and set it to the side. Have enough glue sticks available to go around the entire outer edge of the frame adapter.
Lay the socket into the frame adapter so there is enough room for the power supply plug. That will be your starting point for your LED strips and take note. Take the paper towel and use rubbing alcohol and wipe off the inner edge of the frame adapter. The alcohol cleans any oils from your hands or anything else to insure that the strip sticks to it and wont come off.
Peel the backing off of the LED strip and from the outside edge start laying in the strip. See pictures. The last side of the strip you want to start crossing back over to the inside edge. So there will be some overlap by the time you get back to the point where you started. This gives a little more light at the bottom. Score a cross pattern on the bottom of the socket for the LED and do the same on the part of the frame adapter where it will sit on the frame. This makes the hotglue bind better between plastics. Put a decent amount of hotglue on the socket and stick it down to the inner frame with the power adapter plugged into it. Make sure that the adapter is sitting where it wont hit the backing plate when you put it on. Hold it in place until it cools enough that you can let go of the socket.
Plug the adapter back into the wall to make sure that nothing got disconnected during previous work. Unplug once you are sure it is working.
Grab the frame with the lithophane in it and double check the orientation. You will want the plug to sit at the bottom of the lithophane. So test fit the Frame adapter into the frame.
Move quickly for this part because you want to glue to not cool off too much. Once you are aware of the orientation of the part get your hotglue gun and squeeze out a bead of glue on the side that will be glued on to the back of lithophane. Then immediately / carefully drop the inner frame in and center it.
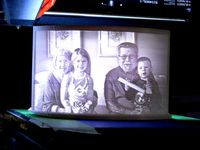
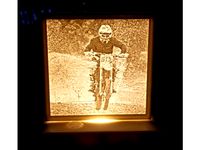
At this point you should be ready to put the back on the frame. Take the white piece of paper and rough cut it a little bit smaller than the backing plate. Put two pieces of tape on it and tape it down to the side facing the lithophane. This serves as a reflector/diffuser and makes the light shining through the lithophane brighter.
Lay the backing plate onto the frame. Make a small loop in the power cord so it it can come out of the frame straight down. Cut a little slit into the backing plate for the cord to come out and test fit it until you are happy with it. (moving quickly again) Once happy run a heavy'ish bead of hotglue around the edge of the frame adapter and stick the backing plate on with the cable aligned in the notch you made. Keep pressure on it until you are sure the glue has cooled enough to make a good tight bond.
Plug in and enjoy!
-Casey
This is a modified version of this.http://www.instructables.com/id/Photo-Frame-Lithophane-Backlight/
Parts and supplies needed.
https://www.amazon.com/gp/product/B075K2HV1G/ref=oh_aui_detailpage_o07_s00?ie=UTF8&psc=1
https://www.amazon.com/gp/product/B06X9S9T2L/ref=oh_aui_detailpage_o07_s00?ie=UTF8&psc=1
https://www.amazon.com/gp/product/B00RMY8SME/ref=oh_aui_detailpage_o07_s00?ie=UTF8&psc=1
High temp glue gun (important)
Solder and Iron
Rubbing Alcohol
scotch tape
1 paper towel/napkin
1 piece of white paper
knife or razor blade
3x5 printed lithophane - (RCLideOn guide to create lithophane https://www.youtube.com/watch?v=y63sVpeViXo&t=)
Take all of the stuff out of the ikea frame.
Take the plastic off plexiglass.
Reinsert it into the frame, put the paper border in the frame if you want it in there.
Insert the lithophane (bumpy side down) and bend the metal tabs down onto the lithophane.
Hold it up to the light to make sure you have it in the right way.
Print the adapter, You may want to scale it up a little if you want a more snug fit. Else it will work as is. There will be a small gap but it gives you room to insert it once the hot glue is on it. Test fit the adapter first to make sure it will go in on top of the lithophane.
Take the LED strip and pull out enough to go around the inside of the adapter with a little overlap. Clean end of the LED strip if it has plastic coating on it. Get a spare piece of wire about an inch long from something laying around and tin the ends. Solder on the two wires to the LED strip. Take note which one is positive and which one is negative. Plug the power adapter into the socket that comes with it. Put the tinned positive wire in the red part of the connector and the tinned negative wire into the black. Plug it into the wall to test that it lit up.
Unplug from the wall once you are sure it is good. Leave the adapter plugged into strip so you can gauge your spacing to start laying the led strip into frame adapter. Heat up your hot glue gun now and set it to the side. Have enough glue sticks available to go around the entire outer edge of the frame adapter.
Lay the socket into the frame adapter so there is enough room for the power supply plug. That will be your starting point for your LED strips and take note. Take the paper towel and use rubbing alcohol and wipe off the inner edge of the frame adapter. The alcohol cleans any oils from your hands or anything else to insure that the strip sticks to it and wont come off.
Peel the backing off of the LED strip and from the outside edge start laying in the strip. See pictures. The last side of the strip you want to start crossing back over to the inside edge. So there will be some overlap by the time you get back to the point where you started. This gives a little more light at the bottom. Score a cross pattern on the bottom of the socket for the LED and do the same on the part of the frame adapter where it will sit on the frame. This makes the hotglue bind better between plastics. Put a decent amount of hotglue on the socket and stick it down to the inner frame with the power adapter plugged into it. Make sure that the adapter is sitting where it wont hit the backing plate when you put it on. Hold it in place until it cools enough that you can let go of the socket.
Plug the adapter back into the wall to make sure that nothing got disconnected during previous work. Unplug once you are sure it is working.
Grab the frame with the lithophane in it and double check the orientation. You will want the plug to sit at the bottom of the lithophane. So test fit the Frame adapter into the frame.
Move quickly for this part because you want to glue to not cool off too much. Once you are aware of the orientation of the part get your hotglue gun and squeeze out a bead of glue on the side that will be glued on to the back of lithophane. Then immediately / carefully drop the inner frame in and center it.
At this point you should be ready to put the back on the frame. Take the white piece of paper and rough cut it a little bit smaller than the backing plate. Put two pieces of tape on it and tape it down to the side facing the lithophane. This serves as a reflector/diffuser and makes the light shining through the lithophane brighter.
Lay the backing plate onto the frame. Make a small loop in the power cord so it it can come out of the frame straight down. Cut a little slit into the backing plate for the cord to come out and test fit it until you are happy with it. (moving quickly again) Once happy run a heavy'ish bead of hotglue around the edge of the frame adapter and stick the backing plate on with the cable aligned in the notch you made. Keep pressure on it until you are sure the glue has cooled enough to make a good tight bond.
Plug in and enjoy!
-Casey
Similar models
thingiverse
free

Lithophane picture frame adapter by beemerlt
...rip lights and stuck around the inside of the printed adapter. i mounted to light controller to the bottom of the frame adapter.
thingiverse
free
Lithophane frame and LED mount by ClydeCoulter
...te a negative (black= thick, white= thin) lithophane with software such as http://3dp.rocks/lithophane/
makes a nice night light.
thingiverse
free

Lithophane Frame - 120 x 160 mm by Modellaner
...(about 1m) 4x m3 countersink screws aluminum foil or similar to use as reflector hotglue to fix the led...
thingiverse
free

Leo Meme Lithophane by Xarkon
...sure you put a light behind it or put on a window sill with enough light.
i used a goose neck led work light.
enough said.
enjoy.
thingiverse
free

LED light strip plug for Lithopanemaker Lithopane Light Box by psikic
...hen glue the lid of the box on. you can then put a dab of glue on the outside of the plug to hold the wire in place if you wish.
thingiverse
free

Lithophane Picture Frame by harpdog84
...rdware inside. just want to make sure it works as planned. feel free to take and change and do what ya wish to suit your needs.
thingiverse
free

Seven Segment LED (NeoPixel/Arduino)
...unter: https://youtu.be/krs2v0t__cs
and here's the source: https://drive.google.com/open?id=14wie2fckgnkawzp10kc_oe4zwcmo0tak
thingiverse
free

Lithophane Hexaleaf LED panel by gubutek
...r.
the instruction to make hexagon lithophane and the assembling process can be found in this video https://youtu.be/mjjva_ewyg8
thingiverse
free
Ikea lithophane by Cipper
...hane or triocrisb.stl if you want glue the lithophane.
after i use cyanoacrylate glue to connect with ikea prossimity sensor led.
thingiverse
free

Bird Plate
...nce you printed the branches, you juste have to remove the support, sand down the bottom and glue them wherever you want.
enjoy.
Casedog21
thingiverse
free

Train Bell by casedog21
...beautiful piece by the way)
i made the frame and the arm for it.
should be able to scale to whichever train you would use it for.
thingiverse
free

Tevo Little Monster Camera Mount for Logitech C270 by casedog21
...uses 2x4mm screws and anchors.
printed at .25 layer, 2 walls, 3 top and 3 bottom, no raft, 18% infill.
it will fit on the tlm bed
thingiverse
free

Tevo Little Monster Spatula Holder by casedog21
...n the mounting holes.
takes 2 m4x12 bolts and t-nuts
print
.25 layer
18% infill
3 top and bottom solid layers.
2 perimeter walls.
thingiverse
free

Tevo Little Monster - Sidecuts holder by casedog21
...unting holes.
takes 2 m4x12 bolts and t-nuts
print
.25 layer
18% infill
3 top and bottom solid layers.
2 perimeter walls.
no raft
thingiverse
free

Canadian National Train Horn model 9000 by casedog21
...ctangles.
the other piece slides over the top and holds the light. i will add a picture of that when my dad finishes mounting it.
thingiverse
free

Tevo Little Monster - Elmer's Large Glue Stick Holder by casedog21
...n the mounting holes.
takes 2 m4x12 bolts and t-nuts
print
.25 layer
18% infill
3 top and bottom solid layers.
2 perimeter walls.
thingiverse
free

Adimlab Gantry Leveling tool for 20x20 Extruded Frame by casedog21
...ld be level.
home and calibrate your bed.
recommend printing 12% or higher infill so the part that sticks out doesn't flex.
thingiverse
free

Model bombs, guns, and rockets for Carbon Z T-28 Trojan. by casedog21
...ts where the rocket tubes mount. same with the arms on the mount itself.
i have no idea if the gun fits yet. i havent printed it.
thingiverse
free

Zoom Room MXL AC404 USB Ceiling mount for four microphones. by casedog21
...rtals in the base and out the top. (you will want to start your wires form the top as it will be a little tight.
link to the mic
Lithophane
3d_export
free

lithophane of elfen lied
...lithophane of elfen lied
3dexport
elfen lied lithophane free
turbosquid
$25
Table Lamp (Bamboo Motif Lithophane Accent - Model 015)
... available on turbo squid, the world's leading provider of digital 3d models for visualization, films, television, and games.
thingiverse
free

at at lithophane by philip3dprinter
...at at lithophane by philip3dprinter
thingiverse
at at lithophane
thingiverse
free
Lithophane universe
...lithophane universe
thingiverse
it is a lithophane if the universe
thingiverse
free
Lithophane Moon
...lithophane moon
thingiverse
lithophane moon
thingiverse
free
Lithophane Sphinx
...lithophane sphinx
thingiverse
lithophane sphinx
thingiverse
free

Lithophane NewYork
...lithophane newyork
thingiverse
lithophane newyork
thingiverse
free
Lithophane by sromanos
...lithophane by sromanos
thingiverse
experimenting with lithophanes
thingiverse
free
Tree Lithophane
...tree lithophane
thingiverse
a lithophane of a tree
thingiverse
free

Toyota Lithophane
...toyota lithophane
thingiverse
toyota lithophane logo print.
Spacer
turbosquid
$55
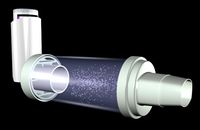
Spacer
... available on turbo squid, the world's leading provider of digital 3d models for visualization, films, television, and games.
turbosquid
$60

grendizer & double spacer
... available on turbo squid, the world's leading provider of digital 3d models for visualization, films, television, and games.
3d_export
$5
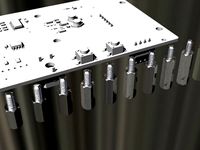
Hex Spacers M3 Male-Female
... spacers m3 male-female
3dexport
hex spacers m3 male-female with length from 5mm to 60mm for printed circuit boards. step files.
3d_export
$5
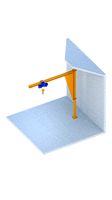
industrial lift - spacer crane
...crane<br>- 500 kg<br>- render 3ds max 2020 and corona renderer.<br>- formats: max 2020, max 2017, obj, fbx, stp
3d_export
$5

spacer hanging light
...lampshades: any total number of lamps: 6 polys: 18 546 verts: 19 045 https://imperiumloft.ru/lyustry-175/ev_a048924-eurosvet.html
3d_export
$7

industrial lift - spacer crane renaissance construction
...ction<br>- 750 kg<br>- render 3ds max 2020 and corona renderer.<br>- formats: max 2020, max 2017, obj, fbx, stp
3d_export
$10

Spacer Sliding Wardrobe 1200 Hanger
...painter available for all software<br>ue4. ue5. blender. maya. 3d max. unity. c4d.<br>formats: .obj .gltf .fbx .blend
3d_export
$5

Hockey puck 3D Model
...hockey puck 3d model 3dexport hockey puck spacer washer disk shim hockey puck 3d model gizmo_fbi 28754...
3d_export
$5

Front 30mm Lift Kit for 1996-2004 Nissan Pathfinder and 1997-2003 Infiniti QX4
...terrano r50, regulus 1997-2003 infiniti qx4 - front strut spacer ...
3ddd
$1

Paola Lenti / So
...resistant expanded polyurethane and down; wooden base with plastic spacer. the removable cover is available in selected fabrics of...
Ikea
3ddd
$1
IKEA
...ikea
3ddd
ikea , стеллаж
ikea
3ddd
$1
IKEA
...ikea
3ddd
ikea
кухня ikea
3ddd
$1
IKEA
...ikea
3ddd
ikea
осторожно, тяжелая модель
ikea
3ddd
$1
IKEA
...ikea
3ddd
ikea
5 зеркал от ikea
3ddd
$1
IKEA
...ikea
3ddd
ikea , бойа
ikea светильник потолочный
3ddd
$1
IKEA
...ikea
3ddd
ikea , барный
bar stool ikea
3ddd
$1

IKEA
...ikea
3ddd
ikea , зубная щетка , косметика
ikea
3ddd
free

IKEA
...ikea
3ddd
ikea , трюмо
дамский столик ikea.
3ddd
$1
IKEA
...3ddd
ps , декоративный набор , ikea
ikea decor
3ddd
$1

Ikea
...ikea
3ddd
ikea , lagra
модель лампы от ikea
Frame
archibase_planet
free

Frame
...frame
archibase planet
frame photo frame
frame n190813 - 3d model (*.gsm+*.3ds) for interior 3d visualization.
archibase_planet
free

Frame
...frame
archibase planet
frame photo frame
frame n071113 - 3d model (*.gsm+*.3ds) for interior 3d visualization.
3ddd
$1

Frame
...frame
3ddd
frame
3ddd
free

Frame
...frame
3ddd
frame
archibase_planet
free

Frame
...frame
archibase planet
frame mirror frame ornament
frame n260113 - 3d model (*.gsm+*.3ds) for interior 3d visualization.
archibase_planet
free

Frame
...frame
archibase planet
frame photo frame
frame photo n190813 - 3d model (*.gsm+*.3ds) for interior 3d visualization.
archibase_planet
free

Frame
...frame
archibase planet
frame window window frame
frame 1 - 3d model (*.gsm+*.3ds) for interior 3d visualization.
archibase_planet
free

Frame
...frame
archibase planet
frame window frame window
frame 3 - 3d model (*.gsm+*.3ds) for interior 3d visualization.
archibase_planet
free

Frame
...frame
archibase planet
frame wall frame decoration
frame 1 - 3d model (*.gsm+*.3ds) for interior 3d visualization.
archibase_planet
free

Frame
...frame
archibase planet
frame window window frame
frame 2 - 3d model (*.gsm+*.3ds) for interior 3d visualization.