Thingiverse
Hybrid Modular Spool Roller by PearlGreyMusic
by Thingiverse
Last crawled date: 3 years, 3 months ago
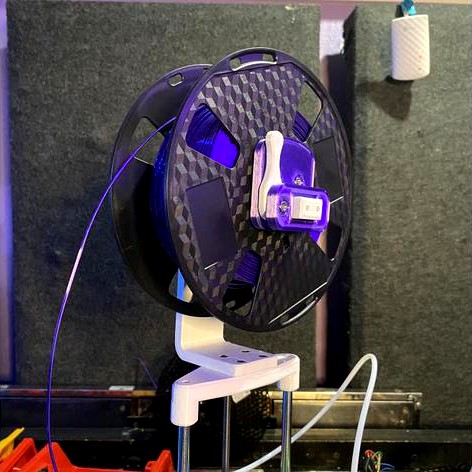
This is my modular filament hybrid roller. It has the smooth rolling benefits of a outer-rim spool roller, but the ability to hold multiple sizes of spools, including spools too skinny to stand on a spool roller. This was designed in mind to fit every roll I own, including several 1kg and a few 500g and a 250g roll. The first version of this, I used for a year, and I made the second version of this to address some issues I had with the first. I am sharing it.
MATERIALS/PRINT INSTRUCTIONS:All models are already oriented for printing
1 x Endplate - Use supports, 3-5 walls/floors/ceilings, ~25% infill
1 x Baseplate - No supports, 3-5 walls/floors/ceilings, ~25% infill
1 x Lever - No supports, 8+ walls/floors/ceilings, 50%+ infill
1 x Bridge - No supports, 8+ walls/floors/ceilings, 50%+ infill
(Pick 1 out of the 3 sizes. I recommend 95mm, it fits all of my rolls up to 1kg)
4 x BearingDouble OR BearingSingle, 8+ walls/floors/ceilings, 50%+ infill
(BearingDouble holds 2 608 bearings. BearingSingle holds 1 608 bearing)
4 x BearingWasher, 8+ walls/floors/ceilings, 50%+ infill (OPTIONAL)
(If you want extra space between the sides of the bearings and the baseplates)
You will also need the following
3 x M4 20mm socket-head screws.
7 x M4 nuts
4 x 608 Bearings + 4x 20mm M4 screws (if using BearingSingle), or 8 x 608 Bearings + 4 x 28mm M4 screws (if using BearingDouble)
1 x Bracket/Adapter/Mount with 34mm x 34mm square array of M4 holes, to attach the roller to. I will supply two designs (one for an i3 clone, one for a Sculpto) as remixes as examples.
Examples of brackets:
i3 clone/Anet A8/alunar m508: https://www.thingiverse.com/thing:4604373
Sculpto Pro 2: https://www.thingiverse.com/thing:4604372
To assemble:
1) Test fit the Bridge into the EndPlate. If it is too tight, you may need to sand it down a bit. You want this to be snug but still movable.
2) Press nuts into the 2 hex holes in BasePlate, 3 hex holes in EndPlate, and 2 hex slots in Bridge
3) Insert the non-rounded end of the Bridge into it's corresponding slot on the BasePlate. Insert 2 screws on the other side of the BasePlate to secure the bridge. (You can actually use longer than 20mm screws for this if you want to)
4) Insert the Lever into the EndPlate. Notice that the hole is off-center. You want the edge of the Lever that has more space between the hole and the edge to be on INSIDE of the EndPlate when the Lever is folded up. Line up the holes and install the M4 screw
5) Insert a BearingDouble/BearingSingle on the M4 nut, with the large-circle end against the screw head. Put 1 or 2 bearings (depending on which you printed) on. Optionally, put a washer on the other side. Screw two into the EndPlate.
6) Mount the BasePlate + Bridge onto your printer (using the appropriate adapter, NOT included in this upload)
7) Screw the other two Bearing assemblies into the BasePlate
Similar models
thingiverse
free

QIDI X-Plus X-Max Adjustable Spool Holder by humebeam
...t have any 608 bearings yet, print these:
external-optional-rod-extender-1(2)-1.0.stl
external-optional-rod-extender-2(2)-1.0.stl
thingiverse
free

Prusa i3 Steel Spool holder by ursus63
...ew.
to assemble you need:
1 x m8x70 hex head cap screw
2 x m8 nuts
1 x m8 washer
2 x 608 ball bearings
1 x m4x12 screw
1 x m4 nut
cults
free

Roller Spool Holder
... of the two rollers and then the pegs should fit into the inner diameter of the bearing after passing through the base side wall
thingiverse
free

Sculpto Pro 2 Mount for Hybrid Modular Spool Roller by PearlGreyMusic
...e hybrid module spool roller is in the parent thinghttps://www.thingiverse.com/thing:4604370
requires 8x m4 screws and 8x m4 nuts
thingiverse
free

Just a spool roller 608Z Larger by Smuk3D
...just a spool roller 608z larger by smuk3d
thingiverse
just a hack for the 608 bearings an m4 screws
:-d
thingiverse
free

Stable Spool holder assembled with M3 Screw and Nut by XboxOldie
...assembly is easy and can be seen in the pictures above.
maybe you will post a make / or provide me a like if you find it usefull.
thingiverse
free

Ender 3 spool holder on a bearing by Dmitry_8266
...threaded inserts.
easy print, no supports. wheel are printed with 100% infill. for the mount it is better to have 4-5 wall count.
thingiverse
free

Suspended Filament Spool Holder by ibgeek
...e screw head can not exceed m8)
1 x m4 x 44mm screw (this provides rolling resistance so your spool doesn't turn too freely.)
thingiverse
free

Adjustable filament spool roller by Cuzi1200
...are for a 10-24 tap.
this was designed in imperial units so either import it accordingly into your slicer or scale it up x 25.4.
thingiverse
free

72mm 608 bearing tube for filament spool by msenese
... for the printrbot play (file: https://www.thingiverse.com/thing:1161647) and it works great. only needs 2 bearings instead of 8.
Pearlgreymusic
thingiverse
free

Printrbot Simple Metal Remix of Hybrid Modular Spool Roller by PearlGreyMusic by FossilFolk
...it works great and i like that it's easy to apply just a bit of pressure to the spool to prevent it from unreeling mid print.
thingiverse
free

Acer AH100 Windows Mixed Reality Headset Wall Mount Hook by PearlGreyMusic
...er ah100 windows mixed reality headset, developed for use in thewavevr office. you'll need to use a single screw to mount it.
thingiverse
free

Windows Mixed Reality Motion Controller Ergonomic Grips by PearlGreyMusic
...p designs to make them more comfortable. hopefully this makes using these for hours at thewavevr's headquarters more comfy :d
thingiverse
free

i3/Clone/M508/A8 Mount for Hybrid Modular Spool Roller by PearlGreyMusic
...ign onto an acrylic-frame i3 or i3 clone printer. this requires drilling holes corresponding to the hole pattern on the brackets.
thingiverse
free

Sculpto Pro 2 Overhead Filament Holder by PearlGreyMusic
...ck in.
sculpto-specific print settings:
base:
no support
strong
fast
raft optional
roller:
full support
strong
fast
raft optional
thingiverse
free

2nd gen Canyon / Colorado useless-hole cover (for switch mounting and such!) by PearlGreyMusic
...ut with 100% infill and mark/drill the holes yourself.
use abs or petg if you live in a hot climate- pla will deform in hot cars.
thingiverse
free

mr stubby (e3d nozzle change tool) by PearlGreyMusic
...to the slottywotty
cheaper than any 7mm socket driver ull find
let know in comments if other 7mm-hex 3/8in-square sockets fit pls
thingiverse
free
Sculpto Pro 2 Mount for Hybrid Modular Spool Roller by PearlGreyMusic
...e hybrid module spool roller is in the parent thinghttps://www.thingiverse.com/thing:4604370
requires 8x m4 screws and 8x m4 nuts
thingiverse
free

40mm Fan x No Sensor remix of Bowden X-Carriage Mount for E3D V6 by PearlGreyMusic
...sign.
only the "main_body" part is included in this upload. get the rest of the required parts from the original upload
thingiverse
free

4 Screen Remover Tools! Spudger, Pry-tool, Splitter, Take-aparter, Jimmy? Idk what they're called by PearlGreyMusic
...at-gun, or it will only last a few uses. i used petg.
use successfully to perform a screen transplant between two surface pro 2s.
Hybrid
3d_export
$10

hybrid watch
...hybrid watch
3dexport
turbosquid
$5

Hybrid Scope
...ree 3d model hybrid scope for download as blend, fbx, and obj on turbosquid: 3d models for games, architecture, videos. (1533651)
turbosquid
$39
Robot Hybrid
... 3d model robot hybrid for download as max, obj, fbx, and dae on turbosquid: 3d models for games, architecture, videos. (1373779)
turbosquid
$199

Hybrid Car
... available on turbo squid, the world's leading provider of digital 3d models for visualization, films, television, and games.
archive3d
free

Hybrid 3D Model
...id 3d model
archive3d
aircraft
hybrid 6 - 3d model (*.gsm+*.3ds) for interior 3d visualization.
3d_export
$25

Honda insight hybrid 3D Model
...t hybrid 3d model
3dexport
honda insight-hybrid car vehicle insight hybrid
honda insight hybrid 3d model artline3d 26442 3dexport
3d_export
$45

Hybrid ce456 3D Model
...hybrid ce456 3d model
3dexport
alien robot 3d hybrid terminator code red flying camera
hybrid ce456 3d model dan3d 84278 3dexport
3ddd
$1

Hybrid Task Floor Light
...ight up your room in style with this contemporary hybrid task floor lamp, a great accessory for adding a fresh touch to the home.
turbosquid
$6

Hybrid drone car
...
royalty free 3d model hybrid drone car for download as blend on turbosquid: 3d models for games, architecture, videos. (1602619)
turbosquid
$5

AK12 with hybrid sight
...alty free 3d model ak12 with hybrid sight for download as skp on turbosquid: 3d models for games, architecture, videos. (1261141)
Roller
turbosquid
$26
Roller A
...urbosquid
royalty free 3d model roller a for download as fbx on turbosquid: 3d models for games, architecture, videos. (1350603)
turbosquid
$3
Roller
...oyalty free 3d model roller for download as 3ds, max, and obj on turbosquid: 3d models for games, architecture, videos. (1460818)
3ddd
$1
edilkamin roller
...edilkamin roller
3ddd
камин
edilkamin roller 360
3ddd
$1

Roller Blinds
...roller blinds
3ddd
рулонная
roller blinds black out finish
turbosquid
$50

Roller
... roller for download as max, max, c4d, max, max, fbx, and obj on turbosquid: 3d models for games, architecture, videos. (1700762)
3d_export
$10
rollers
...lers
3dexport
this is low-poly model of rollers.<br>model:<br>- low-poly<br>- textured<br>- uv unwrapped
3d_export
$28
Roller 3D Model
...roller 3d model
3dexport
roller construction boss evil
roller 3d model adagio15740837 50561 3dexport
3d_export
$6
hopper roller conveyor
...hopper roller conveyor
3dexport
hopper roller conveyor
3d_export
$12

roller skates
...roller skates
3dexport
3d_ocean
$19
roller skate
...can scanned skates skating sport
3d scan of roller skate. the model has been retopologized and made fully compatible with zbrush.
Spool
3ddd
$1

spool c53301
...spool c53301
3ddd
spool
spool c53301 650х350х145
turbosquid
$3

Cable Spool
...royalty free 3d model cable spool for download as max and fbx on turbosquid: 3d models for games, architecture, videos. (1457009)
turbosquid
free

Pallets and Spool
... available on turbo squid, the world's leading provider of digital 3d models for visualization, films, television, and games.
turbosquid
$10

Spool of String
...ol of string pink for download as c4d, 3ds, fbx, obj, and stl on turbosquid: 3d models for games, architecture, videos. (1647892)
3ddd
$1

Подвесные светильники Spool
...ye/podvesnoy_svetilnik_spool_d320/ http://www.cosmorelax.ru/catalog/podvesnyye/podvesnoy_svetilnik_spool_d420/
3ddd
free

Spool 001 sofa
...spool 001 sofa
3ddd
roda
roda
collection spool
design rodolfo dordoni
dimensions:
lenght 90 cm
depth 94 cm
height 79 cm
turbosquid
$15

Roda Spool Sofa
...ee 3d model roda spool sofa for download as max, obj, and fbx on turbosquid: 3d models for games, architecture, videos. (1502650)
turbosquid
$95
wire spools 3ds
... available on turbo squid, the world's leading provider of digital 3d models for visualization, films, television, and games.
turbosquid
$20

spool of TV wire
... available on turbo squid, the world's leading provider of digital 3d models for visualization, films, television, and games.
turbosquid
$3

Simple and Fast Spool Holder
...ree 3d model simple and fast spool holder for download as stl on turbosquid: 3d models for games, architecture, videos. (1548546)
Modular
3ddd
$1
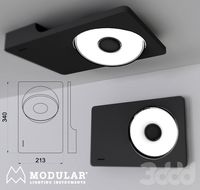
MODULAR
...modular
3ddd
modular , врезной свет
modular потолочные светильники
3ddd
$1
Modular Spock
...modular spock
3ddd
modular
modular spock
3ddd
$1
MODULAR / Spock
...modular / spock
3ddd
modular
modular/spock
design_connected
$7

Modular
...modular
designconnected
emmemobili modular shelves and storage computer generated 3d model. designed by ferruccio laviani.
3ddd
$1
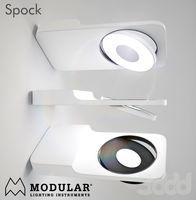
Modular spock
...modular spock
3ddd
modular
spock wall led
turbosquid
$25

Modular sofa Angelo Cappellini Modular
...a angelo cappellini modular for download as max, fbx, and obj on turbosquid: 3d models for games, architecture, videos. (1570923)
turbosquid
$15

Modular sofa Angelo Cappellini Modular
...a angelo cappellini modular for download as max, fbx, and obj on turbosquid: 3d models for games, architecture, videos. (1570304)
3ddd
$1

Modular 2FLAT2C
...modular 2flat2c
3ddd
modular
modularhttp://www.supermodular.com/
3d_export
free
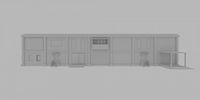
Modular walls
...modular walls
3dexport
modular walls for playing without materials and textures
3ddd
$1

Modular / Lighting Juliette
...modular / lighting juliette
3ddd
modular
modular lighting juliette