Thingiverse
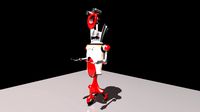
Hull Pixel Bot by RobMiles
by Thingiverse
Last crawled date: 3 years ago
Hull Pixelbot
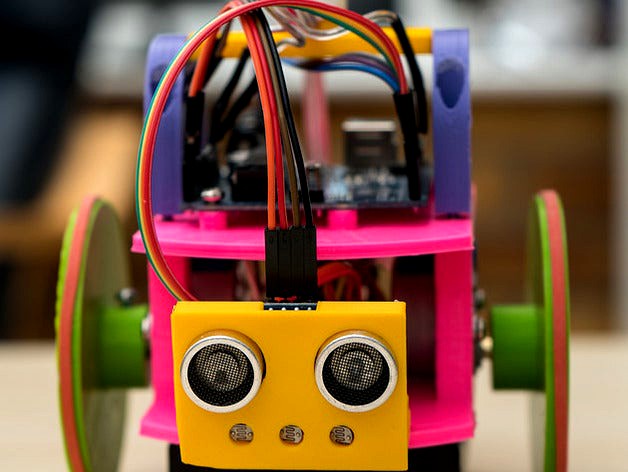
Welcome to Hull PixelBot. A slow moving, easy to make, Arduino powered, tiny robot
.I'm using very cheap stepper motors which seem to work fine. They are a bit slow, but they provide a precision of movement which you just can't get with standard DC motors. I'm also using catapult ammunition (really) for the caster and four AA batteries provide the power.
There are holes you can use to attach sensors and I'm going to work on remixes that can be used to move pens and, eventually, making a moving pixel display (if I can get enough of them together).
More detailed build instructions along with programs will be going up here.
Construction Details
You can make the Hull Pixelbot in stages. The files have been ordered to make this simpler. There are separate files for left, right, front and back elements. At the moment these are identical, but that may change in future.
You can use M3 bolts to hold the robot together. The holes are the right size for the bolts to engage with the filament and hold the robot together. You'll need 6mm, 10mm and 16mm ones. You can find a list of the other components you'll need here.
Basic Chassis
To make the basic chassis you'll need a base, top, motorTowerLeft, motorTowerRight, skidFront, skidBack, wheelLeft and wheelRight. If you fancy adding style, you can use alloyWheel. It's quicker to print too.
If you want to mount a power switch on the rear you can print out powerSwitchHolder. If you want to add a distance sensor and three light sensors to the front you can print out distanceSensorHolder.
Pixels
You can add either a single pixel on the top, or a ring of pixels. Either way you'll need to print out ledSupportLeft and ledSupport right. When you mount them, make sure that the square holes in each face inwards.
If you want to add a single neopixel you can print out the ledCrossSuport and shade elements. If you want to add a ring of neopixels (much more impressive) you can print out ringCrossSupport and ringShade. I've been playing with shades that contain light pipes, you can too if you print out ledPipeShade. The shades should be printed out in white or clear filament. All the shades are push fit.
If you want to add a pixel to the back of your robot, print out shadeBase. The shade will fit on this.
Adding a Breadboard
You can add a breadboard, mounted on top of the Arduino Uno. The breadboardShelf is bolted over the Arduino using the same screws.
Carrying Cheese
If you want to carry cheese, or other small comestables, you can print the cheesePlate. That fits around the large pixel and has a brim to stop your camenbert hitting the carpet.
Version 3 Upgrade
We are now up to version 3.0 which has quite a few improvements and extra bits.
There is a new wheel type (alloy?) which has a specially designed edge profile to hold an elastic band as a tyre. It also has bolt holes each side so that you can tighten against another bolt if required. The size of the slot has also been tweaked to provide a tighter fit on the stepper motor.
We now have fittings for a 12 pixel ring as well as a single led. This looks really good. There are two shades for the large ring. One just covers the entire ring, the other contains 'light pipes' that make it possible to discern individual pixels on the shade surface.
The led supports have been increased in length to make it easier to fit higher circuit boards underneath.
I've added a tray that you can mount on top of the Arduino. This can take a tiny breadboard to make it easier to add additional components.
There's also a cheese tray that fits over the pixel, should you ever want to use your robot to move cheese around.
Thanks for building folks, and keep the comments coming. And pictures. Want pictures.
Update: Made a tiny change to the distance sensor and the rear light supports to stop them from fouling the bolt that holds on the front skid.
Similar models
thingiverse
free

Arduino Robot Platform by andordavoti
...because you can add things like bluetooth, wifi, lazers, rgb leds or any sensor you want to add as you get better at programming.
thingiverse
free

Parametric Sensor supports for robots by gomezlendinez
...red position, the upper part of the support have holes (you can add more o remove holes), to introduce a bolt with tip or pushpin
thingiverse
free

Neopixel Prototyping Board by DaveM
...
let me know if you have any questions and if you do end up making this, send me a message! i'd love to see what you create.
thingiverse
free

IMU Holder BNO055 for FTC Robotics by thomasmgill
...er as shown in the photo. it's probably best to use brass so the magnetic sensor doesn't have iron nearby to confuse it.
thingiverse
free

Arduino Breadboard + Battery Holder by waunaplay
...d fit on more printers)
adding a lip on the left and right for "handles" to hold my creations without pawing the wires.
thingiverse
free

Arduino Breadboard Caddy by mattoyo
...supports.
the arduino press fits into the enclosure using the standoffs - it is a snug fit but you can easily take it in and out.
thingiverse
free

Arduino Uno and Half Size Breadboard Case by TheGreenMachine
...ke sure to clean the surface so the tape sticks better.
dimensions are (mm):
arduino - 59 x 75 x 25
breadboard - 59 x 85.01 x 25.
thingiverse
free

Arduino Base Board by Kiteman
...real" eventually), so a blob of blu tac or similar stops it dropping out when i jump with excitement...
thingiverse
free

Autolevel sensor mount for Anet E12 by remkon
... sanding down or drilling out holes after printing.
haven't tested it myself also as i just finished printing it 5minutes ago
thingiverse
free

Arduino Uno R3 Base by dteck
... on both sides so it can be attached to a breadboard.
i have also included the sketchp file in case you want to change anythng
Robmiles
thingiverse
free

LittleBits Cloudbase by RobMiles
...es
thingiverse
a mounting plate for littlebits so that you can carry a cloudbit configuration around without it falling to bits.
thingiverse
free

Autographer Tripod Mount by RobMiles
... (or a large) tripod with a standard thread.
great for taking time-lapse pictures (something the autographer is very good for).
thingiverse
free

Non-Fun Gibbon Tokens by RobMiles
...le and retains detail - but check with the preview mode first to make sure that none of the lines in the design have been missed.
thingiverse
free

LED Panel 8 inch Picture Frame Corners by RobMiles
...e corners fit around the edges of the frame and you can secure them with a 3mm bolt so that your display is perfectly positioned.
thingiverse
free

Tags of Fun by RobMiles
...l and bluffing abilities to gain victory. each player needs a set of the battle tags design (best if they are different colours).
thingiverse
free

Print head adapters for Ultimaker 2 head on Ultimaker 1 by RobMiles
... both of them and then into the mounting plate.
then you can just bolt the thermistor pcb onto the mounting plate. works for me.
Hull
turbosquid
$22

steamship hull
... available on turbo squid, the world's leading provider of digital 3d models for visualization, films, television, and games.
turbosquid
$1

ship hull
... available on turbo squid, the world's leading provider of digital 3d models for visualization, films, television, and games.
3d_ocean
$15

Airplane Hull
... high quality, low polygonal model, tileable, easy to tile into a bigger model. - poly count: 2580 - formats: max /obj /fbx/3d...
3d_export
$13

armchair hull
...jects, and was originally modeled in 3ds max 2016,2013 and rendered with v-ray. renders have no postprocessing. hope you like it!
turbosquid
free

Ship hull Displacement
...d
free 3d model ship hull displacement for download as blend on turbosquid: 3d models for games, architecture, videos. (1209835)
turbosquid
$25

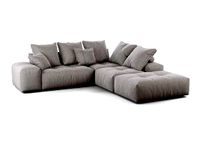
alex-hull-sofa
... available on turbo squid, the world's leading provider of digital 3d models for visualization, films, television, and games.
3d_export
$69

yacht hull clean and ruined
...ean and ruined
3dexport
yacht hull 3d model clean/ruined. lowpoly real-time ready, multiple import formats thank you for reading
3d_ocean
$6

METAL HULL - TEXTURE/MAPS
...ut this great texture. great tileable texture which is ready to use. with this texture you can easily texture: hulls of the sh...
turbosquid
$5

Capital ship carrier hull
... available on turbo squid, the world's leading provider of digital 3d models for visualization, films, television, and games.
3ddd
$1
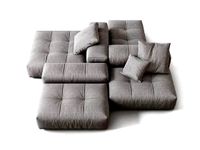
Split Sofa and Chair by Alex Hull
...ординаты текстур развернуты, модель готова к просчету.
общее количество полигонов - 64108.
форматы сцены в fbx и obj прилагаются.
Bot
turbosquid
$19

Bot
... available on turbo squid, the world's leading provider of digital 3d models for visualization, films, television, and games.
turbosquid
free

Bot
... available on turbo squid, the world's leading provider of digital 3d models for visualization, films, television, and games.
3d_export
$10
scanner bot
...scanner bot
3dexport
cool scanner bot who scans for fixing things...
3d_ocean
$9
Apc Bot
...n bot games toys
an all-purpose-constructo-bot. for cartoon purposes. the model is not rigged. please use vray adv for rendering.
3d_export
$75
Bot 3D Model
...bot 3d model
3dexport
robot bot man kiborg character
bot 3d model evgen 19504 3dexport
turbosquid
free
Eye Bot
...eye bot
turbosquid
free 3d model eye bot for download as fbx on turbosquid: 3d models for games, architecture, videos. (1514059)
turbosquid
$29
Gorill-bot
...bosquid
royalty free 3d model gorill-bot for download as fbx on turbosquid: 3d models for games, architecture, videos. (1239456)
turbosquid
$25

Lamp Bot
...bosquid
royalty free 3d model lamp bot for download as blend on turbosquid: 3d models for games, architecture, videos. (1230121)
turbosquid
$10
Spectre Bot
...osquid
royalty free 3d model spectre bot for download as fbx on turbosquid: 3d models for games, architecture, videos. (1616378)
turbosquid
$8
Ultra Bot
...urbosquid
royalty free 3d model ultra bot for download as ma on turbosquid: 3d models for games, architecture, videos. (1330752)
Pixel
3d_ocean
$3

Pixel Heart
...pixel heart
3docean
3d heart love lowpoly old pixel school valentine
3d low poly model of a retro pixel heart
3d_ocean
$6
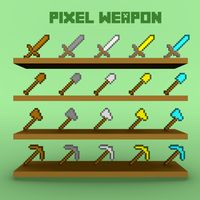
pixel weapon
...el tool weapon
pixel weapon pack available in the obj format. this model is suitable for making games etc. available in 20 models
3ddd
$1
Saba / Pixel
...saba / pixel
3ddd
saba , угловой
http://sabaitalia.it/en/?prodotto=pixel
3ddd
$1
Cabinet Pixel
... pixel фирмы emmemobili, дизайн ferruccio laviani. 240х55х90 дерево, стекло, бронза.
polys: 10068
verts: 8896
obj присутствует
design_connected
$29
Pixel 02
...pixel 02
designconnected
saba italia pixel 02 computer generated 3d model. designed by bicego, sergio.
design_connected
$29
Pixel 03
...pixel 03
designconnected
saba italia pixel 03 computer generated 3d model. designed by bicego, sergio.
design_connected
$29
Pixel 04
...pixel 04
designconnected
saba italia pixel 04 computer generated 3d model. designed by bicego, sergio.
design_connected
$18
Pixel 01
...pixel 01
designconnected
saba italia pixel 01 computer generated 3d model. designed by bicego, sergio.
turbosquid
$2

Pixelated Hammer
...quid
royalty free 3d model pixelated hammer for download as on turbosquid: 3d models for games, architecture, videos. (1518656)
turbosquid
$29

Monster Pixel
...squid
royalty free 3d model monster pixel for download as ma on turbosquid: 3d models for games, architecture, videos. (1387121)