Thingiverse
HOTAS Slide Throttle - Arduino Pro Micro, 12 buttons. by Omega489
by Thingiverse
Last crawled date: 4 years, 5 months ago
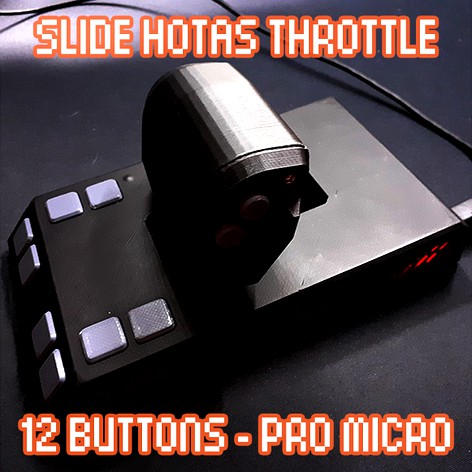
HOTAS Slide Throttle - Arduino Pro Micro, 12 buttons.
A cheap and robust gaming throttle for HOTAS setups.
A throttle unit for your HOTAS setup can be quite expensive, If you already have a flight stick you can print this throttle unit as an excellent companion to your setup.
I wanted to create a HID plug and play throttle for flight simulator gaming. It had to be easy enough for my current electronics (novice) and programming (complete beginner) skill level. I also wanted it to be a very cheap project and to use as much of the components I had on hand already.
The Arduino Pro Micro is an ideal controller board for the scope of the project, it has plenty of pins, very easy to set up and a plug-and-play device, and has a lot of guides out there.
I wanted to keep the vertical height of the unit as small as possible and so used a slide potentiometer for the project. The handle is mounted on two greased aluminum rails with adjustable tensioners to adjust the feel of the throttle.
Parts List:
1 Arduino Pro Micro. (Must be ATmega32U4)
1 Slide potentiometer (74x8x7mm, 60mm travel).
12 6x6mm tactile switches.
Assorted m3 bolts.
6x6mm aluminium rod (enough to make two 103mm pieces).
Soldering station and suitable wire.
Heatshrink, electrical tape, tiny zipties.
Instructions.
Print all pieces. You will need multiples of the following.
2x base_rail_end
2x base_carriage_tensioner
8x base_buttoncap
2x handle_front_buttoncap
2x handle_right_buttoncap
Some pieces require supports. It depends on your printer setup.
Assembly
I have attached some exploded diagrams above.
First, you should attach all of the 6mm tactile switches. The legs should fit into the slots on the button plates and you should bend the legs to keep the buttons in place.
Use the m3 bolts to secure the button plates to their mounting holes. Be sure to seat the button caps before securing them. If your printing tolerances are correct each button should click and unclick easily without rubbing.
Assemble the handle and attach the handle stem.
Cut your 6*6mm aluminum rod to make two 103mm pieces. Sand ends smooth and flat.
Seat the slide potentiometer in the base top.
Use the m3 bolts to assemble the mechanical parts of the sliding carriage. This is quite tricky! Be sure to fit the potentiometer's slide into the recess on the carriage. If the carriage binds up while sliding, adjust the tensioners or add some white lithium grease to the rails.
The Pro Micro should sit in one orientation on the mount in the corner of the base. I suggest securing it by melting the tab behind it or with a bit of hot glue.
The Pro Micro has a quite weak USB connector. I would suggest you reinforce it with a blob of epoxy glue, my first Pro Micro broke.
Soldering
You will need to know a little about how the Pro Micro pins are setup in this section. Perhaps take a look at this if you are unsure.
Each button will need a digital pin and a ground connection. The slide potentiometer will need an analog pin, ground, and a VCC connection.
You can chain the ground connections for the push switches without adding diodes as the ProMicro has an internal pullup resistor.
Use a multistrand core wire for the handle buttons, this should be more resistant to repeated movements. Ensure you have enough slack on the cable for it to slide! Not too much, not too little!
Be sure to add some strain relief to the handle button wires, I used some foam and a zip tie.
Tape any loose wires with electrical tape so that they do not catch on the slide carriage.
Align the base plate and attach it with screws.
Code
Writing the code for the Arduino is fairly straightforward. There are some guides out there. There are two options here:
If you are happy to write your own using MHeironimus' ArduinoJoystickLibrary.
Or if you are not so good at coding, use the fantastic rr_configurator by Jacob Wilkinson
Both will involve loading some libraries onto your Arduino using Arduino IDE. This is very simple and there are plenty of guides to help you out.
Final Thoughts
I've been using this throttle for a couple of days and It works very nicely. The total build cost was around £20. Which is much cheaper than buying a throttle. This is my first project using a ProMicro, really this is my first proper electronics project like this. I feel it pushed me to learn some new skills in design.
This throttle probably doesn't compete with some of the professional cockpit throttles out there. But it works just fine for me, it's small and cheap and I had fun making it.
There's probably room in the handle to add more buttons or hat switches, but I wanted to keep it simple for this one!