Thingiverse
Horse Shoe Fang
by Thingiverse
Last crawled date: 4 years, 2 months ago
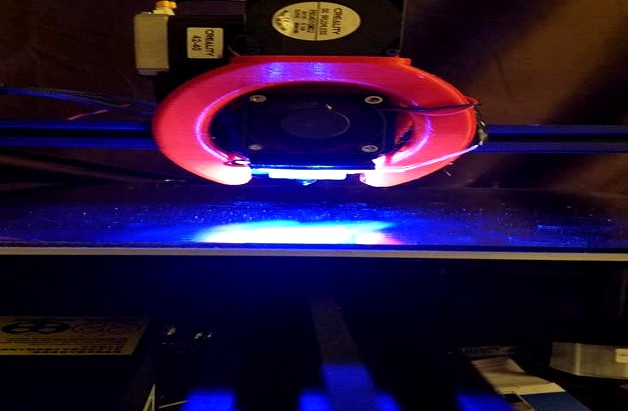
Horse Shoe Fang Direct Drive
sorry for squished pics not sure why it does that
updated on 12/31/19 recommend only using front part of light mount for lights and cutting back light section off it is to close to hot end and will damage led lights.
updated on 11/06/2019 with more instructions and materials list.
Updated on 11/11/2019 for Ender5 one corner of bracket has to be trimmed to fit around belt attachment area.
Updated on 11/12/2019 added Ender5 bracket to files
( Caution using direct drive like this may cut down on max height I have not tried max height as of yet)
This is what I have done to my CR-10 and will be doing to my ender 5 once I have a good spool holder made for it.
PLA will work PETG will be better
uses original parts
original hot end
to build as shown you will need the following
Extension cables for extruder if not a whole set
replacement bolts
(2) M2 x 8 mm these you should have they are the two shorter screws from parts fan
(2) M3 x20 mm
(2) M4 x 8 mm
(4) M4 x 14 mm
5v led light strip like thishttps://www.amazon.com/Renohef-Waterproof-Backlight-Decorative-Lighting/dp/B07PRSP3K3/ref=sr_1_5?crid=2SL4ORO769PS4&keywords=5v+led+strip+lights&qid=1573038072&sprefix=5v+led+strip+lights%2Caps%2C175&sr=8-5
usb wall charger like thishttps://www.amazon.com/gp/slredirect/picassoRedirect.html/ref=pa_sp_atf_aps_sr_pg1_2?ie=UTF8&adId=A003783937HYPH7NX40KT&url=%2FCharger-Taymanso-Adapter-Samsung-Motorola%2Fdp%2FB079NW4KLN%2Fref%3Dsr_1_2_sspa%3Fcrid%3D32501HTLFBMTV%26keywords%3Dusb%2Bwall%2Bcharger%26qid%3D1573038235%26sprefix%3Dusb%2Bwall%252Caps%252C202%26sr%3D8-2-spons%26psc%3D1&qualifier=1573038235&id=5468779276325869&widgetName=sp_atf
wire and soldering skills
Direct drive bracket was not made by me but I have included it with this set up.https://www.thingiverse.com/thing:3546483
Some sanding will be required I am sure.
direct drive will need the hole of stepper motor sanded I used a Dremel and a drum made short work of it
thread all screws in to holes before assembly parts fan screw holes are very delicate thread in and thread out in short spurts till it reaches other side.
test fit all parts for fit sand as needed
I leaft tube in hot end and cut it long to remove for printer then measured 16mm from top of fitting and cut tube with tube cutter
I have included pictures to try and help
I routed my cables on the front side to make for easier clearance.
I removed cover from Y stepper and care fully drilled two holes for a zip tie to help with cable management.
light bar goes behind fan
cut 4 led lights from string then cut last two off. extend wires to needed length solder on jumpers between the two pairs and stick to under side of light mount in the channels for lights. look a pics for reference.
Similar models
thingiverse
free

Direct Drive for Briss Moto Ender 3 Fang duct by wku_wake
....
future updates will include with and without cable chain mount, with and without ptfe tube connection for the filament sensor.
thingiverse
free

LED fan light for Fang coolers (Ender-2, CR-10) by AldiPrinter
...length.
fits 50x10 mm led strips, stick it on with double sided tape.
works with most fang coolers with front facing hotend fan
thingiverse
free

CR-10 Fang by jeeplvr
...direct drive and probably with bowden tube as well.
printed with the fangs straight up to minimize support material in the fangs.
thingiverse
free

Rostock Max Easy LED light ring. by cjdavis618
...trip-light-waterproof-flexible-light/dp/b005ehhld8/ref=sr_1_2?ie=utf8&qid=1387130459&sr=8-2&keywords=led+light+strips
thingiverse
free

DF Goblin Directional Brake Light Bracket by palmettofx
...ke these work better but all that involved was cutting the half-circle and drilling an extra hole before i had the frame painted.
thingiverse
free

Parametric LED Strip Light Bracket by deadsy
...roblem....
the size of the bracket is parameterized, so it can be adjusted to fit any led strip light with a rectangular profile.
thingiverse
free

Ikea Ivar Under Shelf Bracket for LED Light by RolandJuno
..."new" fits shelving i purchased a year ago. the file labeled "old" fits shelving purchased over 10 years ago.
thingiverse
free
CR-10 FANG dual 5015 and BLtouch for MicroSwiss direct drive with Phaetus Dragon hot end by bogdi1988
...m lower than previous hot ends. the duct for the smaller fan also had to be adjusted to fit around the wider body of the hot end.
thingiverse
free

Ender5 MicroSwíss 4020Fan Part Cooler Ring by h3nkGer
...for a 4020fan
designed for an ender5 with microswíss direct drive extruder
fits the upcoming remix of the fan shroud by giulianom
thingiverse
free

IKEA kitchen bracket for LED strip aluminum profile by ayanev
...d1 mini controller.
from user point, i'm using hue essentials app with diyhue instance.
more details - diyhue led light strip
Fang
turbosquid
$4

fang knife
...bosquid
royalty free 3d model fang knife for download as fbx on turbosquid: 3d models for games, architecture, videos. (1331310)
turbosquid
$15

Fanged sword
... available on turbo squid, the world's leading provider of digital 3d models for visualization, films, television, and games.
turbosquid
$5

Sun Fang
... available on turbo squid, the world's leading provider of digital 3d models for visualization, films, television, and games.
3d_ocean
$2

Dodge Viper Fangs Logo
...s) .images previews were rendered with blender internal render(cycles). format:(.3ds)/(.obj)/(.blend) .blender:face(12488)/ver...
3d_export
$10

wild boar with big fangs
...wild boar with big fangs
3dexport
wild boar made in zbrush
3d_export
$9

Dodge viper fangs 2003 logo 3D Model
...am vehicle part of auto transport 3d model logo emblem detailed high
dodge viper fangs 2003 logo 3d model rmodeler 59624 3dexport
3d_ocean
$12

Chair "The Skull with Fangs" (hi-poly model)
...was made as a max 2009 file with vray version 1.5, also included are max, .obj and .fbx exports with vray materials included. ...
3ddd
$1

Giorgetti
...giorgetti 3ddd giorgetti , fang стол для...
3d_export
$5

Brown Spider 3D Model
...brown spider 3d model 3dexport spider brown mustache fang glasses brown spider 3d model mus1232 87864...
3d_export
$30

Vampire Bust 3D Model
...vampire bust 3d model 3dexport vampire bust cape fang monster undead vampire bust 3d model twistedsyndrome 37923...
Horse
3d_ocean
$12

Horse
...horse
3docean
horse
horse. max11. obj. fbx. 761 polys.
archibase_planet
free

Horse
...horse
archibase planet
saw-horse horse dickey
horse n121007 - 3d model (*.gsm+*.3ds) for interior 3d visualization.
3ddd
$1

Horse
...horse
3ddd
horse
люстра
3d_export
$1

horse
...horse
3dexport
horse for game
3d_ocean
$12

horse
...horse
3docean
animal horse pegasus
this model is, unicorn horse, and, in the pc games and cartoons used.
3ddd
$1

Horses
...horses
3ddd
панно
frame of horse
archibase_planet
free

Horse
...horse
archibase planet
horse animal
horse n310308 - 3d model (*.gsm+*.3ds) for interior 3d visualization.
archibase_planet
free

Horse
...horse
archibase planet
animal horse
horse n030708 - 3d model (*.gsm+*.3ds) for interior 3d visualization.
archibase_planet
free

Horse
...horse
archibase planet
horse toy
horse n011011 - 3d model (*.gsm+*.3ds) for exterior 3d visualization.
archibase_planet
free

Horse
...horse
archibase planet
horse animal equine
horse - 3d model (*.gsm+*.3ds) for exterior 3d visualization.
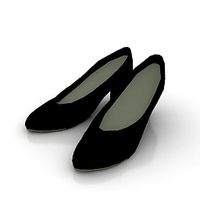
Shoe
3d_ocean
$10
Shoes
...shoes
3docean
adidas colorful shoes nike shoe shoes sports
3d model of sports shoes
3d_ocean
$8
Shoes
...shoes
3docean
cloth shoes
women shoes
archibase_planet
free
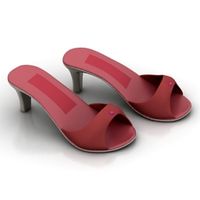
Shoes
...shoes
archibase planet
shoes open shoes open toed shoes
shoes n151112 - 3d model (*.gsm+*.3ds) for interior 3d visualization.
archibase_planet
free
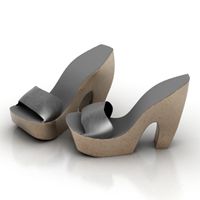
Shoes
...shoes
archibase planet
shoes open shoes open toed shoes
shoes n120513 - 3d model (*.gsm+*.3ds) for interior 3d visualization.
archibase_planet
free
Shoes
...shoes
archibase planet
shoes open shoes open toed shoes
shoes n280614 - 3d model (*.gsm+*.3ds) for interior 3d visualization.
archibase_planet
free

Shoes
...shoes
archibase planet
court shoes footwear shoes
shoes - 3d model for interior 3d visualization.
archibase_planet
free
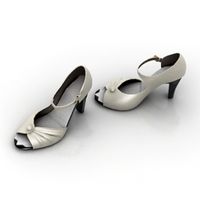
Shoes
...base planet
shoes high heels evening shoes high heels shoes
shoes n140713 - 3d model (*.gsm+*.3ds) for interior 3d visualization.
archibase_planet
free

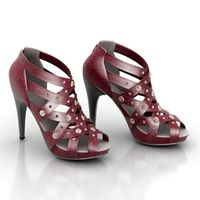
Shoes
...chibase planet
shoes open shoes high heels high heels shoes
shoes n231013 - 3d model (*.gsm+*.3ds) for interior 3d visualization.
archibase_planet
free
Shoes
...shoes
archibase planet
court shoes patent-leather shoes footwear
black shoes n060707 - 3d model for interior 3d visualization.
3d_export
$7

shoes
...shoes
3dexport
shoes man