Thingiverse

Hologram helper - Fringe Viewer by SarahC_
by Thingiverse
Last crawled date: 3 years, 4 months ago
If you've been making DIY holograms, you'll know how hard it is to get a decent laser and a consistent result.
Even when you keep it vibration free, and lots of thermal cooling!
What's going on?
We can learn the problems we have from FRINGES!
Or more accurately the coherence of the laser, the light frequency(color) and the lasers stability. We can see these by viewing the fringes from reflected laser light.
Most of the time our issues are due to :
The laser you're using.
How hard you're powering it.
The temperature. (the temperature of the laser SILICON, NOT your room!)
But making the right kind of fringes can be a challenge.
I've been told to use two microscope slides and place them together, and view the reflected fringes from them... this has NEVER worked for me.
The idea is the backside of the top glass and the top side of the bottom glass are VERY close together, and will produce fringes. It does - but these fringes don't react to anything I do, I can brighten the laser, dim it, heat it up, put a fan on it to cool it down... nothing changes those fringes. I've yet to work out why. I suspect the fringes are from other sides of the glass, but why they'd be so stable I don't know. The glass too far apart?
What I've discovered that works very very well are Microscope Cover Slips - these are little rectangular panes of glass with dimensions usually of 22mm x 22mm x 0.17mm thick. It's that super thinness that's the trick to this glass slide working to make our fringes.
Take the lens off your laser if it has one, point it at the glass slide, and use a bit of bluetac to align the laser tube properly. Wait half an hour for the bluetac to settle, cool down and harden. This prevents the fringes from sliding giving you misleading results.
Change the angle of your little glass slide to point at a nearby wall - the distance means you'll get a light square around 60cmx60cm big....
What do the fringes tell us?
Find a group of fringes that are wide apart - in my example images, that's the part of the image running from top to bottom roughly in the middle of the reflection. This is made by the thickness of the glass slide being nearly the same thickness. Find a glass slide in your own pack that produces something like the same shape.
With fringes visible we can see the following issues:
Temperature changes.
Lost coherence.
Mode/frequency hops.
Temperature changes.
Set up your laser and reflector, and get a good image of the fringes on your wall. Turn it off and let it cool down for 15 minutes.
Now, turn on the laser again and make a note of where the wide fringes are on your wall.
As the laser warms up and the cavity gets warmer - it expands and gets longer making the frequency change.
In my example image I can see this happen by observing the fringes slowly climb/fall over a couple of minutes (the wide ones running from top to bottom). I can see one of the light wide bars gently rise about the thickness of itself. The thin stripes are too narrow to see it.
You may need to push some blue-tac gently on your wall to mark one of the fringes positions, and then you will see the movement much easier. When the movement stops after around 2 to 4 minutes, the laser has reached temperature. Learn how long your laser takes for the fringes to stop moving - no more guesswork! If you try making a hologram while the fringes are sliding like this, you'll get a dim one.
Lost coherence.
This one is a biggie for me. ALL my lasers lost coherence after about 10 minutes of being run at their rated power. What it appears as is the dark stripes of the bars blur and then eventually vanish leaving a fairly even red reflection on the wall. Goodbye ANY attempt at a hologram!
I found a red 200mA laser running at 3.5 volts worked best when I turned it down to 2.9 volts on my power supply. The fringes stayed well past 10 minutes of runtime.
I maybe was left using a 150mA bright laser, but the exposure's still under 2 minutes.
Mode/frequency hops
The fringes in this case will jump suddenly about half a fringe length apart, a fraction of a second later they'd jump back!
I found this one was NASTY. It happened across the minimum to maximum of the voltages I was powering the laser at. From 2.0v to 3.5v.
What I discovered when I was changing my power supply output was that the frequency changes... and the fringes slide up and down a little. At some points the fringes got a little dimmer, and at some they started bouncing. Gently adjusting the power felt like I was tuning an old TV... the fringes would slide, then they'd jump a little, and then they'd get nicely defined and rock still!
At that point I'd let go of the power supply voltage knob, and wait a while to check the laser didn't jump around again.
As you may have realised after reading this - the best results you can get are from using a cheap lab power supply ($40)... and running your red laser diode about 3/4 of the power it can produce at its maximum!
A little bit of "tuning" is required just before you make your hologram to ensure the ambient temperature isn't causing the laser to hop on a previously stable supply voltage.
To make the reflector
Print both parts using an infill around 45% to make it sturdy. Then take a thoroughly cleaned glass slide and use a TINY drop of super glue on opposite sides - place it snugly on the reflector front side. Wipe off excess superglue (away from the center of the glass slide!), and press it flat with some toilet paper and hold it about 10 minutes until it's set.
Then gently sand the cone a little to make it rough - leave the plastic sanded off powder on it! Then do the same to the hole in the base. When the two pieces come together they should fit most of the way - and then lock tight with further pushing.
I've left a little "nub" poking out so you can loosen the panel again and re-angle it.
With a little practice the panel can be pressed in fairly tight, but allowing enough slip to change the angle without pushing it back out of the hole.
Happy hologram making!
Microscope cover slips - 22mm x 22mm x 0.17mm:
https://www.amazon.co.uk/SGerste-Anatomy-Prepared-Microscope-Distortion-Free/dp/B07CZ7B8BR/
https://www.amazon.co.uk/Bresser-5915100-microscope-accessories-glasses/dp/B0017GVSKW/
https://www.amazon.co.uk/Homyl-Anatomy-Prepared-Microscope-Distortion-Free/dp/B07BHL1QM7/
Similar models
thingiverse
free

NEJE Laser Glass Microscope Slide Holder
... will explore the use of a small laser engraving platform for laser ablation technique to enhance for tumor in genomics research.
3dwarehouse
free

Fluoview 300 2-photon
...fluoview 300. uses the chameleon laser from coherent and the olympus fluoview 300 confocal. #2photon #fluoview #laser #microscope
grabcad
free

LBP, laboratory power supply
...some elements. if you have any ideas on how to improve this, you can write to me, i can add you as a member of the fusion project
grabcad
free

transformer 12 pin
... 12 pin
grabcad
transformer 12 pin
high frequency transformer
for power supply
switching power supply
l=34.8mm, w=29.7mm, h=22mm
thingiverse
free

Universal Laptop Power supply Holder WALLMOUNT by JAUYEB
...t my other designs:https://www.thingiverse.com/jauyeb/designs
make my day by push like button if you like it and post your makes!
thingiverse
free

Power Supply Brackets for K8200 printer by mx5
...e your power supply and change the dimensions here in customizer : http://www.thingiverse.com/apps/customizer/run?thing_id=166567
3dwarehouse
free

laser coherent
...laser coherent
3dwarehouse
laser co2 full power
thingiverse
free

Filament Tray V2
...er supply vents clear,
if you have made one i will get around to making a lid for the v1 so you can put the otherside as storage
thingiverse
free

Power supply cover by Kernel770
...can order from china!
if you need help for your specific power supply, maybe we can find a way that you can get an editable file!
thingiverse
free

Cellphone microscope customizable lens holder by mrbenbritton
...one. don't forget to publish it so other people with the same phone can make it. the default setup is for an htc magic phone.
Hologram
3ddd
$1
World Hologram
...world hologram
3ddd
world hologram decoration object
3d_export
$12

sun hologram
...sun hologram
3dexport
3d model sun hologram prop for your starship bridge and other sci-fi needs.
3d_export
$12

alien sun hologram
...alien sun hologram
3dexport
3d model sun hologram prop for your spaceship bridge and other sci-fi needs.
3d_export
$5

Sci Fi Hologram Table 3D Model
...ter interface station
sci fi hologram table 3d model download .c4d .max .obj .fbx .ma .lwo .3ds .3dm .stl gajatix 108689 3dexport
3d_ocean
$5

Cinema 4D Title Preset Holograms Style
...ogram style setup ready to animate and render. fonts are not include it. create great designs instantly. just type and go! no ...
3d_ocean
$5

Cinema 4D Title Preset Holograms Style 2
...ogram style setup ready to animate and render. fonts are not include it. create great designs instantly. just type and go! no ...
3d_export
$5

Hologram Shader
...ects. preview images are rendered in cycles render.<br>i am happy to answer any questions you might have about this shader.
3d_export
$5

Hologram Shader
...ects. preview images are rendered in cycles render.<br>i am happy to answer any questions you might have about this shader.
3d_export
$5

Hologram Shader
...ects. preview images are rendered in cycles render.<br>i am happy to answer any questions you might have about this shader.
3d_ocean
$2

Credit Card
...a material applied that creates the look of a hologram the file works...
Fringe
turbosquid
$14

Curtain with fringe
... available on turbo squid, the world's leading provider of digital 3d models for visualization, films, television, and games.
turbosquid
$19

Realistic Sofa with Carpet and fringes
...stic sofa with carpet and fringes for download as max and obj on turbosquid: 3d models for games, architecture, videos. (1263592)
turbosquid
$12

Vintage rug with fringes-fbx
... fringes-fbx for download as 3ds, max, obj, c4d, fbx, and skp on turbosquid: 3d models for games, architecture, videos. (1404178)
cg_studio
$60

Ornate Armchair with Fringed Pillows3d model
...
.obj .max .3ds - ornate armchair with fringed pillows 3d model, royalty free license available, instant download after purchase.
turbosquid
$8

CarpetVista handloom fringes vol 02
...sta handloom fringes vol 02 for download as max, obj, and fbx on turbosquid: 3d models for games, architecture, videos. (1385150)
turbosquid
$8

CarpetVista handloom fringes vol 01
...sta handloom fringes vol 01 for download as max, obj, and fbx on turbosquid: 3d models for games, architecture, videos. (1384213)
turbosquid
$8

CarpetVista handloom fringes vol 03
...sta handloom fringes vol 03 for download as max, obj, and fbx on turbosquid: 3d models for games, architecture, videos. (1385414)
3d_export
$66

Ornate Armchair with Fringed Pillows 3D Model
...lace pillow upholstery furniture fringe regal max 3ds vray
ornate armchair with fringed pillows 3d model butterfly 31830 3dexport
3ddd
$1

"ОМ" торшер moooi fringe 5
...mp;quot; торшер moooi fringe 5
3ddd
moooi , om
www.moooi.com/торшер h1800 moooi fringe 5
turbosquid
$15

Carnival Game Fringe Activity Stall Booth
...carnival game fringe activity stall booth for download as max on turbosquid: 3d models for games, architecture, videos. (1499412)
Helper
turbosquid
$3
Helper Drone
...del helper drone for download as blend, blend, blend, and fbx on turbosquid: 3d models for games, architecture, videos. (1531142)
turbosquid
$10
Workbench Helper
... workbench helper for download as 3ds, obj, fbx, 3dm, and skp on turbosquid: 3d models for games, architecture, videos. (1411448)
turbosquid
$39
Helper 1 robot
... available on turbo squid, the world's leading provider of digital 3d models for visualization, films, television, and games.
turbosquid
$30
Santa Helper 3d Printable
...er 3d printable for download as max, obj, blend, stl, and ztl on turbosquid: 3d models for games, architecture, videos. (1472944)
turbosquid
free
Folding sticks walking helper
...lper for download as 3ds, obj, fbx, blend, dae, stl, and gltf on turbosquid: 3d models for games, architecture, videos. (1353089)
3d_export
free

Download free UV Tile Placement Helper 2048x2048 3D Model
...s max maya uv map tile checkered checker tools utility texture
uv tile placement helper 2048x2048 3d model timb120 63561 3dexport
turbosquid
$16

(Project) Food packing helper machine with holding clamp and press table driven by an actuator
... available on turbo squid, the world's leading provider of digital 3d models for visualization, films, television, and games.
3d_export
$8

decor-08
...elements, no groups / linked objects no lights, cameras, helper, layers, particle...
3ddd
$1
![Generic Interior Doors [Hinged]](/t/701005.jpg)
Generic Interior Doors [Hinged]
...and then you can wire the door to the helper. ...
3d_export
$5

armchair fast ikea
...totals: objects: 18 shapes: 0 cameras: 0 lights: 1 helper: 0 space warps: 0 total: 19 mesh totals: verts:...
Viewer
3d_ocean
$8

Telescope
...magnify monocular naval optic optical pirate spy spyglass telescope viewer vision nice model of...
3d_ocean
$5
Binocular
...biniculars binocular glass magnify monocular naval optic optical spy viewer vision nice model of binocular. thank you for...
3ddd
$1
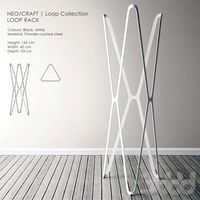
LOOP RACK
...shapes, that vary depending on perspective, often inviting the viewer to look...
3d_ocean
$8

Old Telescope
...old optic optical photoreal pirate spy spyglass telescope textures viewer vintage vision wood nice model of old...
3d_export
$5

Headphone Sample
...headphone sample 3dexport greetings viewer!!<br>the headphone created is created as a sample using solidworks....
cg_studio
$25

Modern Monocular3d model
...modern monocular3d model cgstudio monocular telescope magnifier optic scope viewer modern materials .max .3ds .lwo .obj - modern monocular...
3d_export
$59

Sony HMZT3 3D Model
...sony hmz-t3 hmz t3 t2 t1 personal hd 3d viewer glass wi-fi glasses mobile bluetooth oled video audio virtual...
cg_studio
$59

Sony HMZ-T33d model
...sony hmz-t33d model cgstudio glasses mobile accessories personal 3d viewer sony sony hmz-t3 .max .obj .mb .lwo .fbx .c4d...
3d_ocean
$19

Telescope Scene
...refractor science sky space spy spyglass stars telescope tripod viewer detailed telescope and tripod on white background scene. formats...
3d_export
$10

TAYLOR 195mm
...size is 19.5cm length and with glb online model viewer file also...