Thingiverse
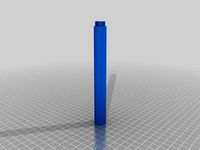
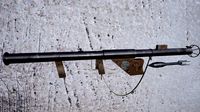
High Power Rocket - 3 inch shipping tube by JRad
by Thingiverse
Last crawled date: 3 years ago
CAUTION You WILL need to add ballast weight to the nose cone tip to make this design stable. I fly a pretty heavy Arduino based flight computer in the front of mine, and I STILL need some ballast weight. I’ve attached the open rocket design I used for simulation so you can adjust and measure and simulate as needed.
All of these parts should print fine without supports (except my custom scaffolding on the fins) although you might have to rotate some of them. I print all my parts at 10% fill with ABS (even the motor mount) and I haven’t had any flight failures up to an H123 motor.
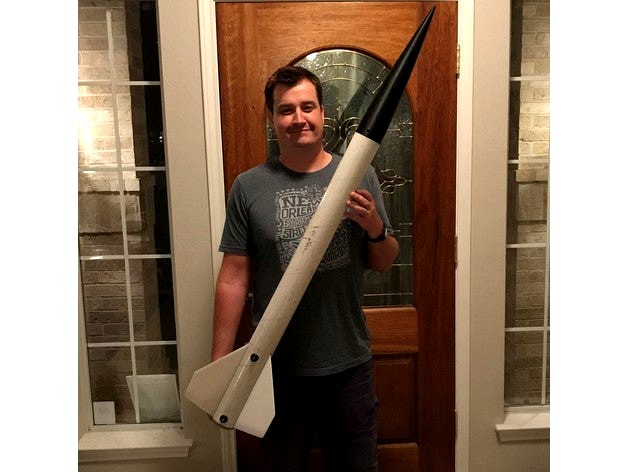
Here are the parts for the rocket I built to get my level 1 high power certification. It’s designed around an Aerotech 38mm RMS motor.
I would recommend dual deployment, but I did my certification flights without it, I just had to do a little more hiking.
Other parts you will need:
3” paper shipping tube for the body tube, preferably 36”.
6-32 countersunk screws x2 – for the rail buttons. I could only find 1/2” length at my HW store so I had to trim mine down.
6-32 t-nut. The kind that’s meant for furniture and brad nails (no teeth). These need to be made of really thin metal in order to fit into the rail buttons. Make sure to test fit the buttons before you go gluing them into place (made that mistake before). I’ve found the t-nuts at Home Depot are too large, but the ones at my local Lowe’s fit great.
Nuber 8 eye bolt for shock cord anchor. There is a hole in the front of the motor mount for it to screw into.
Shock cord – I just use Kevlar kite string from Amazon.
Parachute – Many options. I’ve flown with as small as a 12” ‘choute, but I did get some fin damage.
Quck-link – for quickly changing out parachutes. Make sure your shock cord and chute are both attached to the strong quick-link since the nose cone loop is not very strong.
Epoxy – lots of epoxy. I use 5 min epoxy for everything except laminating the body tube.
CA (superglue)
Ballast weight for nose cone – I like to use BBs and epoxy.
Order of operations:
Before you go printing a bunch of parts that may not fit, print the “3in – Test Fit” part and test it against your tube. There are two diameters for inside components. Loose for Nose cone, and tight for motor mount and ejection baffle. You should be able to scale the parts up or down a bit if need be.
You can slot the body tube with a hobby knife before, or after you glue in the motor mount. I usually do it before so I can keep the epoxy out of the grooves better, just be sure to wrap it in paper and wrap it tight with tape when you glue the motor mount into place so the airframe walls are firm against the mount. Slide the motor mount into the tube while slotting to support the tube so you don’t bend it.
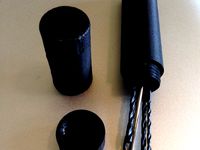
Assemble the ejection baffle outside of the rocket with CA. Glue the baffle into the body tube with Epoxy so it is far enough forward that you can get your motor in w/o bumping it. It’s best if you feed your shock cord through the ejection baffle before installing it, but if you forget you can fish some thread through it w/ a small nut tied to the end and use that to pull your shock cord through.
Bend the 6-32 t-nut flanges so they match the curve of the body tube. Drill holes for the t-nuts. One should be near the end of the motor mount clearance slot, and the other should be somewhere near the front of the fins. First drill a small pilot hole, then put some CA in the hole and let it soak into the paper and dry. This will make the paper brittle so you can drill through it without tearing up the tube. Glue the t-nuts into place with epoxy. Screw the rail buttons on while the epoxy dries so that the t-nuts are pulled tight against the inside wall. Be sure not to glue the buttons on! They only last for a handful of flights before you have to replace them. Only use a little epoxy, you don’t want to block the motor mount from sliding into the airframe.
After the ejection baffle and rail buttons are installed you can epoxy the motor mount into place. Glue it together out of the rocket with some CA (superglue). Use the fins to align the two sections, but make sure there isn’t any glue in the fin grooves so you can get them back out. The #8 eye bolt anchor screws into the front of the mount.
Other assembly notes and hints:
Body tube – It’s just a simple 3 inch paper shipping tube. I pick them up at Office Depot, but any should do. I did my certification flights with nothing more than primer on my body tube. Recently I’ve been
laminating the tube with a good laminating epoxy (meant for fiberglass). The epoxy significantly reduced “zippering” of the body tube, but I still plan to try actual fiberglass laminating soon.
Fins – If they don’t fit into the grooves right off your printer, don’t fear, they usually don’t. The root tabs are designed to be just a little larger than the grooves so they can be sanded down a little for a nice snug fit. I usually just have to sand the bottom of the tab a little, and then clean up the long edges. I had a HELL of a time getting these fins to print without getting separation between a layer or two. I had to add some print bed anchors as well as support scaffolding to get good consistent prints. Using the right ABS makes a world of difference. Filament from Fillament Outlet on Amazon works great for me. I haven’t had a failed fin print since I started using that brand. I like the natural (white) the best.
It is also importand that the fins be printed so that the layer "grain" is parallel with the leading edge of the fin or they will snap right off.
I think the rest is pretty straight forward, but feel free to ask any questions in the comments and I’ll do my best to answer.
I’ve flown this design about 7-8 times now (including my two level 1 high power certification flights). I think it’s pretty well dialed in so that’s why I’m putting it out for other people to use.
ENJOY!
Jared
Video of a launch of this design:https://youtu.be/FuZghXuwPnQ
All of these parts should print fine without supports (except my custom scaffolding on the fins) although you might have to rotate some of them. I print all my parts at 10% fill with ABS (even the motor mount) and I haven’t had any flight failures up to an H123 motor.
Here are the parts for the rocket I built to get my level 1 high power certification. It’s designed around an Aerotech 38mm RMS motor.
I would recommend dual deployment, but I did my certification flights without it, I just had to do a little more hiking.
Other parts you will need:
3” paper shipping tube for the body tube, preferably 36”.
6-32 countersunk screws x2 – for the rail buttons. I could only find 1/2” length at my HW store so I had to trim mine down.
6-32 t-nut. The kind that’s meant for furniture and brad nails (no teeth). These need to be made of really thin metal in order to fit into the rail buttons. Make sure to test fit the buttons before you go gluing them into place (made that mistake before). I’ve found the t-nuts at Home Depot are too large, but the ones at my local Lowe’s fit great.
Nuber 8 eye bolt for shock cord anchor. There is a hole in the front of the motor mount for it to screw into.
Shock cord – I just use Kevlar kite string from Amazon.
Parachute – Many options. I’ve flown with as small as a 12” ‘choute, but I did get some fin damage.
Quck-link – for quickly changing out parachutes. Make sure your shock cord and chute are both attached to the strong quick-link since the nose cone loop is not very strong.
Epoxy – lots of epoxy. I use 5 min epoxy for everything except laminating the body tube.
CA (superglue)
Ballast weight for nose cone – I like to use BBs and epoxy.
Order of operations:
Before you go printing a bunch of parts that may not fit, print the “3in – Test Fit” part and test it against your tube. There are two diameters for inside components. Loose for Nose cone, and tight for motor mount and ejection baffle. You should be able to scale the parts up or down a bit if need be.
You can slot the body tube with a hobby knife before, or after you glue in the motor mount. I usually do it before so I can keep the epoxy out of the grooves better, just be sure to wrap it in paper and wrap it tight with tape when you glue the motor mount into place so the airframe walls are firm against the mount. Slide the motor mount into the tube while slotting to support the tube so you don’t bend it.
Assemble the ejection baffle outside of the rocket with CA. Glue the baffle into the body tube with Epoxy so it is far enough forward that you can get your motor in w/o bumping it. It’s best if you feed your shock cord through the ejection baffle before installing it, but if you forget you can fish some thread through it w/ a small nut tied to the end and use that to pull your shock cord through.
Bend the 6-32 t-nut flanges so they match the curve of the body tube. Drill holes for the t-nuts. One should be near the end of the motor mount clearance slot, and the other should be somewhere near the front of the fins. First drill a small pilot hole, then put some CA in the hole and let it soak into the paper and dry. This will make the paper brittle so you can drill through it without tearing up the tube. Glue the t-nuts into place with epoxy. Screw the rail buttons on while the epoxy dries so that the t-nuts are pulled tight against the inside wall. Be sure not to glue the buttons on! They only last for a handful of flights before you have to replace them. Only use a little epoxy, you don’t want to block the motor mount from sliding into the airframe.
After the ejection baffle and rail buttons are installed you can epoxy the motor mount into place. Glue it together out of the rocket with some CA (superglue). Use the fins to align the two sections, but make sure there isn’t any glue in the fin grooves so you can get them back out. The #8 eye bolt anchor screws into the front of the mount.
Other assembly notes and hints:
Body tube – It’s just a simple 3 inch paper shipping tube. I pick them up at Office Depot, but any should do. I did my certification flights with nothing more than primer on my body tube. Recently I’ve been
laminating the tube with a good laminating epoxy (meant for fiberglass). The epoxy significantly reduced “zippering” of the body tube, but I still plan to try actual fiberglass laminating soon.
Fins – If they don’t fit into the grooves right off your printer, don’t fear, they usually don’t. The root tabs are designed to be just a little larger than the grooves so they can be sanded down a little for a nice snug fit. I usually just have to sand the bottom of the tab a little, and then clean up the long edges. I had a HELL of a time getting these fins to print without getting separation between a layer or two. I had to add some print bed anchors as well as support scaffolding to get good consistent prints. Using the right ABS makes a world of difference. Filament from Fillament Outlet on Amazon works great for me. I haven’t had a failed fin print since I started using that brand. I like the natural (white) the best.
It is also importand that the fins be printed so that the layer "grain" is parallel with the leading edge of the fin or they will snap right off.
I think the rest is pretty straight forward, but feel free to ask any questions in the comments and I’ll do my best to answer.
I’ve flown this design about 7-8 times now (including my two level 1 high power certification flights). I think it’s pretty well dialed in so that’s why I’m putting it out for other people to use.
ENJOY!
Jared
Video of a launch of this design:https://youtu.be/FuZghXuwPnQ
Similar models
thingiverse
free

Rear Eject Bomb Rocket (18mm motors) by Aslansmonkey
...an 18mm design. so here it is. assembly is similar to the 24mm versions so see my things on...
thingiverse
free

Parametric Shock Cord Mount by gravatite
...ayer adhesion is also important, give the loop a good tug to make sure it's going to hold up before you rely on it in flight!
thingiverse
free
Printer Roll Rocket
...which is why i didn't suggest epoxying them together.
i haven't built it yet so build it, edit it, have fun, and be safe!
thingiverse
free

Mini M&M Rocket for 18mm Motors
... launched this on an a8-3 as seen in this video...https://www.youtube.com/watch?v=gjyxiius168
...but it should take up to a c6-7.
thingiverse
free

Model Rocket by ThePyroCreator
...l rolls, these are odd sized tubes but they're all i had lying around, please adapt my project to suit your own requirements.
grabcad
free

F-32 Fins Assembly Glastonbury TARC Team 21-22
..., it does not get deformed. the engine cover is to hold the motor in place. the shock cord is also attached to the fins assembly.
thingiverse
free
18mm rocket Double Fin by BJWilliam
...ck cord mount to the top coupler
wont fly as high as the original due to being heavier
print motor clip, trim to size and glue in
thingiverse
free

Modular 3D Printed Model Rocket by Bluegillbronco2
...hat allows the nosecone to be installed), fsmm-2+( fin section/motor mount with clipped delta fins and 24mm motor compatibility).
thingiverse
free

Model rocket ejection baffle by pbrandt1
...side down, which is the orientation of the stl. the image is top side up like it will look sitting inside your rocket on the pad.
thingiverse
free

Rocket Fin Glue Jig for 18.5mm rocket tube (Standard minimum diameter tube for Estes A-B-C Motors by Tinkerlabs
...hingiverse
this is a jig you can use to glue 3 and 4 fins nice and straight. filets added so you dont glue your fins to the jig.
Jrad
thingiverse
free
Vial by JRad
...work with those files can easily make a vial of any size, juts change the inner diameter and height of the vial body and rebuild.
thingiverse
free

GoPro Hero 5 Lense Cover by JRad
...gopro hero 5 lense cover by jrad
thingiverse
pretty straight forward :-)
thingiverse
free

Simple quadcopter wall hooks by JRad
...simple quadcopter wall hooks by jrad
thingiverse
simple wall hook for larger quadcopeters. made for my 450 quad.
thingiverse
free

Recycle sign by JRad
...ted one that's pictured is scaled down by 50% to make it small and then resized by 200% on the z axis to make it thick again.
thingiverse
free
Vial 10x150mm Remix by JRad
... at request of another user.
inner cavity = 10mm x 150mm
solidworks files are availible via my original "vial" thing.
thingiverse
free

Large Hook for IKEA hanging rod by JRad
...large hook for ikea hanging rod by jrad
thingiverse
not much too it, just a large hook for ikea hanging rods.
thingiverse
free

Orbit sprinkler timer mounting bracket by JRad
...orbit sprinkler timer mounting bracket by jrad
thingiverse
simple bracket to wall mount an orbit brand sprinkler controller.
thingiverse
free

Sonicare head stand by JRad
...or a pair of sonicare toothbrush heads. i made it a tight fit behind my sink, but it stands up fine as a free standing stand too.
thingiverse
free

Helicopter Wall Hanger by JRad
...from their landing skids.
designed around my align trex 550l dominator, but i'm sure it will work on most helis of this type.
thingiverse
free

SD Card & Reader Case by JRad
...ch joint and hinge.
solidworks files are included in case someone wants to adjust it for another usb card reader or something.
Rocket
3d_export
$5
rocket
...rocket
3dexport
rocket 3d model low poly
3d_export
$5

rocket
...rocket
3dexport
rocket low poly 3d model cartoon
archibase_planet
free

Rocket
...rocket
archibase planet
rocket toy
rocket tintin's n290813 - 3d model (*.gsm+*.3ds+*.max) for interior 3d visualization.
3d_export
$5

Rocket
...rocket
3dexport
the rocket is made from a cylinder made in blender 3.0
turbosquid
$15

rocket
...ket
turbosquid
royalty free 3d model rocket for download as on turbosquid: 3d models for games, architecture, videos. (1340796)
turbosquid
$10
Rocket
...ket
turbosquid
royalty free 3d model rocket for download as on turbosquid: 3d models for games, architecture, videos. (1247547)
3d_export
$5

scifi rocket
...scifi rocket
3dexport
scifi rocket
turbosquid
$30
Rocket
...
turbosquid
royalty free 3d model rocket for download as fbx on turbosquid: 3d models for games, architecture, videos. (1290260)
turbosquid
$10

The Rocketeer
...quid
royalty free 3d model the rocketeer for download as stl on turbosquid: 3d models for games, architecture, videos. (1479948)
turbosquid
$10

Rocket
...
turbosquid
royalty free 3d model rocket for download as max on turbosquid: 3d models for games, architecture, videos. (1152532)
Tube
archibase_planet
free

Tube
...tube
archibase planet
paint tube stationery
tube - 3d model (*.gsm+*.3ds) for interior 3d visualization.
turbosquid
free
tube
...tube
turbosquid
free 3d model tube for download as c4d on turbosquid: 3d models for games, architecture, videos. (1378271)
archibase_planet
free
Tube
...tube
archibase planet
mascara cosmetics make-up
tube 1 - 3d model (*.gsm+*.3ds) for interior 3d visualization.
3d_export
$5
Tube pants
...tube pants
3dexport
tube pants
3d_export
free
Tube
...tube
3dexport
turbosquid
free
TUBE
...
free 3d model tube for download as blend, dae, fbx, and obj on turbosquid: 3d models for games, architecture, videos. (1672199)
3ddd
$1

perfume tube
...perfume tube
3ddd
тюбик
perfume tube, тюбик
3ddd
$1
Olivieri Tube
...olivieri tube
3ddd
olivieri
кровать olivieri tube
turbosquid
$22

Tube
... available on turbo squid, the world's leading provider of digital 3d models for visualization, films, television, and games.
turbosquid
$17

Tube
... available on turbo squid, the world's leading provider of digital 3d models for visualization, films, television, and games.
Shipping
3d_export
$5

ship
...ship
3dexport
ship
3d_export
$5
Ship
...ship
3dexport
ship
archibase_planet
free

Ship
...ship
archibase planet
ship
ship n280909 - 3d model (*.gsm+*.3ds) for 3d visualization.
3d_export
$5

ship
...ship
3dexport
the ship is well suited for games.
3d_export
free
ship
...ship
3dexport
a lowpoly ship similar to the titanic...
archibase_planet
free
Ship
...ship
archibase planet
cruiser cruise ship
cruise ship n010807 - 3d model for interior 3d visualization.
archibase_planet
free

Ship
...ship
archibase planet
sailing vessel ship
ship n140110 - 3d model (*.gsm+*.3ds) for interior 3d visualization.
archibase_planet
free
Ship
...ship
archibase planet
cutter launch ship
ship n010710 - 3d model (*.gsm+*.3ds) for exterior 3d visualization.
archibase_planet
free

Ship
...ship
archibase planet
sailing vessel ship vehicle of the sea
ship n010708 - 3d model (*.gsm+*.3ds) for interior 3d visualization.
turbosquid
$15

ship destroyer
...ip,frigate ship,ship,corvette ship for download as ma and fbx on turbosquid: 3d models for games, architecture, videos. (1435217)
Inch
3ddd
$1
Inch chair
...inch chair
3ddd
inch , vitra
vitra inch chair wood vray
3d_export
$7
shoes size from 5 inch size to 11 inch
...shoes size from 5 inch size to 11 inch
3dexport
shoes design women model sizing from 5 inch to 11 inch
turbosquid
free
BAZOOKA 236 INCH
...d
royalty free 3d model bazooka 236 inch for download as fbx on turbosquid: 3d models for games, architecture, videos. (1646746)
3ddd
$1

36 Inch Terrific Trio
...36 inch terrific trio
3ddd
круглый , скатерть
нойной столик - 36 inch terrific trio
turbosquid
$10
30 inch table
... available on turbo squid, the world's leading provider of digital 3d models for visualization, films, television, and games.
turbosquid
$2

Display 22 inch
... available on turbo squid, the world's leading provider of digital 3d models for visualization, films, television, and games.
3ddd
free
currey 30 inches 6767
...currey 30 inches 6767
3ddd
currey&company
светильник настольный currey and company 6767 greta 30 inch table lamp
3d_export
$6
samsung 85 inch uhd tv
...samsung 85 inch uhd tv
3dexport
samsung 85 inch uhd tv with stand and normal both
turbosquid
$49

Hyde Sofa 88-inch
...
royalty free 3d model hyde sofa 88-inch for download as max on turbosquid: 3d models for games, architecture, videos. (1622670)
turbosquid
$44
Corwyn Sofa 85-inch
...royalty free 3d model corwyn sofa 85-inch for download as max on turbosquid: 3d models for games, architecture, videos. (1622689)
Power
turbosquid
$100

power
...ower
turbosquid
royalty free 3d model power for download as on turbosquid: 3d models for games, architecture, videos. (1421990)
3d_export
$5

Power
...power
3dexport
3d_export
$5

power outlets
...power outlets
3dexport
power outlets
3ddd
$1

lion power
...lion power
3ddd
лев , статуя
lion power gold sculpture
3ddd
$1

Sea Power
...
компас , море , часы
часы с компасом sea power
3ddd
free

Meridiani / Power
...power
3ddd
meridiani , круглый
стол power производитель meridiani, диаметр 120,высота 67
3d_export
$5

Power Surge
...power surge
3dexport
the power surge is a all mesh carnival ride to lower in game part count and lag
turbosquid
$8

Airport Ground Power Unit (AXA Power )
... available on turbo squid, the world's leading provider of digital 3d models for visualization, films, television, and games.
turbosquid
$50

Power Houser
...rbosquid
royalty free 3d model power houser for download as on turbosquid: 3d models for games, architecture, videos. (1333800)
3d_export
$5

power outlet
...power outlet
3dexport
power outlet<br>format file maya 2018, 3d max 2017, obj, fbx
High
3d_export
$15

ironman high
...ironman high
3dexport
ironman high poly
turbosquid
$49

High Heel Girl (High Poly)
... available on turbo squid, the world's leading provider of digital 3d models for visualization, films, television, and games.
turbosquid
$49

High Heel Girl (High Poly)
... available on turbo squid, the world's leading provider of digital 3d models for visualization, films, television, and games.
turbosquid
$49

High Heel Girl (High Poly)
... available on turbo squid, the world's leading provider of digital 3d models for visualization, films, television, and games.
turbosquid
$49

High Heel Girl (High Poly)
... available on turbo squid, the world's leading provider of digital 3d models for visualization, films, television, and games.
turbosquid
$49

High heel girl (High Poly)
... available on turbo squid, the world's leading provider of digital 3d models for visualization, films, television, and games.
design_connected
$16

Cantu High
...cantu high
designconnected
linbrasil cantu high computer generated 3d model. designed by rodrigues, sergio.
design_connected
$16

Ribbon High
...ribbon high
designconnected
cappellini ribbon high bar stools computer generated 3d model. designed by nendo.
design_connected
$16

Koja high
...koja high
designconnected
blå station koja high computer generated 3d model. designed by mattson, fredrik.
design_connected
$11

Garry High
...garry high
designconnected
ligne roset garry high computer generated 3d model. designed by jourdan, eric.
3
turbosquid
$10

Mountain Bike 3 -3 of 3
...model mountain bike 3 (#3 of 3) for download as fbx and blend on turbosquid: 3d models for games, architecture, videos. (1438752)
turbosquid
$3

Genesis 3 Clothing 3
... available on turbo squid, the world's leading provider of digital 3d models for visualization, films, television, and games.
3d_export
$5

hinge 3
...hinge 3
3dexport
hinge 3
3ddd
$1

Розетка 3
...розетка 3
3ddd
розетка
розетка 3
turbosquid
$50

is-3
... available on turbo squid, the world's leading provider of digital 3d models for visualization, films, television, and games.
turbosquid
$10

Mountain Bike 3 -2 of 3
...model mountain bike 3 (#2 of 3) for download as fbx and blend on turbosquid: 3d models for games, architecture, videos. (1438750)
turbosquid
$10

Mountain Bike 1 -3 of 3
...model mountain bike 1 (#3 of 3) for download as fbx and blend on turbosquid: 3d models for games, architecture, videos. (1438743)
3d_export
$5

3 CATS
...3 cats
3dexport
3 cats pen holder
3ddd
free
3 Буфета
...3 буфета
3ddd
буфет , кантри
3 буфета
turbosquid
$12

Calligraphic Digit 3 Number 3
...hic digit 3 number 3 for download as max, obj, fbx, and blend on turbosquid: 3d models for games, architecture, videos. (1389329)