GrabCAD
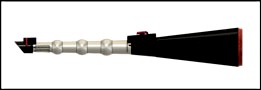
Harry Vader's fully armed and operational Elder Light Saber Wand
by GrabCAD
Last crawled date: 1 year, 11 months ago
This is an iteration of a previous design that is printed with hollow parts to allow the installation of electronics. There is a 9 volt battery, power switch, keyboard key switch (Cherry brand), dual red/blue LED, and an Arduino Pro Mini (5VDC) tucked inside. I posted a video on YouTube on how to safely operate the wand/saber without casting spells on yourself or lopping off your own arm. (see below)
Update : added files for a roomier handle with a threaded pommel - a sturdier seal and more room for the electronic doohickeys.
Attributions :
Adriano Cazzarotto : RGB LED : https://grabcad.com/library/led-rgb-5mm-1
Pamir : Arduino Pro Mini : https://grabcad.com/library/arduino-pro-mini-1
Oliver Darvas : 9 Volt Battery : https://grabcad.com/library/9-volt-battery-2
Kevin Yu : Cherry Switch : https://grabcad.com/library/cherry-mx-switches-mx-1
Mini Switch resized from a McMaster Carr item.
B.O.M. :
Power switch : http://www.microcenter.com/product/465454/miniature-snap-in-nylon-illuminated-rocker---red-switch
Arduino Pro Mini (5VDC logic) : http://www.microcenter.com/product/486546/arduino-pro-mini-board
Dual LED : http://www.microcenter.com/product/390134/led---dual-color-5mm-super-fresh-red-super-blue-3-pack
Cherry switch : https://www.amazon.com/gp/product/B077TK5DL9/ref=oh_aui_detailpage_o00_s00?ie=UTF8&psc=1
Keycaps (not exact match) : https://www.amazon.com/gp/product/B077C287J2/ref=oh_aui_detailpage_o01_s00?ie=UTF8&psc=1
9 Volt Battery Leads : http://www.microcenter.com/product/497120/9v-battery-clip
Super-Duper Glue : https://www.amazon.com/Bob-Smith-Industries-BSI-157H-Insta-Set/dp/B0166FFCHS/ref=sr_1_1_sspa?s=industrial&ie=UTF8&qid=1535459641&sr=1-1-spons&keywords=bob+smith+industries&psc=1
You'll also need one 10K pull down resistor for the push button input on the Pro Mini, and two 1K resistors for the LEDs.
Assembly and Programming :
Started assembly by gluing in the dual LED into the 'silencer' part (prewired with 1K resistors in line with positive leads). Fed the wires through the barrel and glued the barrel to the silencer. Glued the Cherry switch into the trigger part (prewired) and then glued the barrel to the trigger assembly. The little power switch in the handle just snaps in (prewired) and the handle is then glued to the trigger. All the electronics are then wired together and stuffed into the handle (after programming the arduino). The pommel is a snap in fit to finish.
Update : added a new version of the handle and pommel with threads. This handle allows more room for the electronics (yay!).
Update : added code for 3-color LED wand with 6 modes. This program cycles through the six modes each time you press the cherry switch, and the light show is always active - no timeout. I found out that the mini regards high and low states as opposite the voltage being applied to the inputs, which is irritating, but it's not a show-stopper so I left the code as-is. As a result, the wand will wake up in mode 1 instead of mode 0 - no biggie, but there it is.
Update : added basic schematic for 3-color LED version. Note that the 3-color LED has positive 5VDC as the common lead, unlike the dual color LED. You'll have to confirm the polarities on whatever LEDs that you use.
The following arduino code has two flavors - one for a dual-color LED and one for a 3-color LED. Use only one or the other - the code is clearly separated between the two.
Arduino Pro Mini Program for dual-color LED:
//harryVader.ino
// constants won't change. They're used here to set pin numbers:
const int buttonPin = 9; // the number of the pushbutton pin
const int ledPin = 13; // the number of the LED pin
const int blueLed = 6;
const int redLed = 5;
// variables will change:
int buttonState = 0; // variable for reading the pushbutton status
int buttonCount = 0;
int x = 0;
int buttonPressed = 0;
int buttonOff = 0;
int loopCount0 = 0;
int loopCount1 = 0;
int loopCount2 = 0;
int loopCount3 = 0;
// Setup function runs once when you press reset or power the board
void setup()
{
// initialize digital pin LED_BUILTIN as an output.
pinMode(ledPin, OUTPUT);
pinMode(blueLed, OUTPUT);
pinMode(redLed, OUTPUT);
pinMode(buttonPin, INPUT);
Serial.begin(9600);
}
// MAIN LOOP function runs over and over again forever
void loop()
{
// read the state of the pushbutton value:
buttonState = digitalRead(buttonPin);
digitalWrite(ledPin,buttonState);
// check if the pushbutton is pressed. If it is, the buttonState is HIGH:
if ((buttonState == LOW) and (buttonPressed == 0))
{
buttonPressed = 1;
buttonOff = 0;
//buttonCount = buttonCounter(x);
buttonCount++;
if (buttonCount > 3)
{
buttonCount = 0;
Serial.println("Button counter reset!");
}
//Set loopCounters
if (buttonCount == 0)
{
loopCount0 = 255;
loopCount1 = 0;
loopCount2 = 0;
loopCount3 = 0;
}
if (buttonCount == 1)
{
loopCount0 = 0;
loopCount1 = 40;
loopCount2 = 0;
loopCount3 = 0;
}
if (buttonCount == 2)
{
loopCount0 = 0;
loopCount1 = 0;
loopCount2 = 20;
loopCount3 = 0;
}
if (buttonCount == 3)
{
loopCount0 = 0;
loopCount1 = 0;
loopCount2 = 0;
loopCount3 = 60;
}
Serial.println("Button pressed...");
Serial.print("number of button pushes: ");
Serial.println(buttonCount);
delay(60);
}
//Set button-OFF flag when button is released
if ((buttonState == HIGH) and (buttonOff == 0))
{
buttonPressed = 0;
buttonOff = 1;
Serial.println("Button is OFF...");
delay(60);
}
//Reset Loop Counters
if (buttonCount != 0)
{
loopCount0 = 0;
}
if (buttonCount != 1)
{
loopCount1 = 0;
}
if (buttonCount != 2)
{
loopCount2 = 0;
}
if (buttonCount != 3)
{
loopCount3 = 0;
}
//Mode Zero
if (loopCount0 > 0)
{
analogWrite(blueLed, loopCount0);
analogWrite(redLed, (255-loopCount0));
delay(70); // wait for a second
//analogWrite(blueLed, (255-loopCount0));
//analogWrite(redLed, loopCount0);
//delay(10);
loopCount0 = (loopCount0-5);
if (loopCount0 != 0)
{
Serial.print(loopCount0);
Serial.print(" ");
}
else
{
Serial.println(loopCount0);
}
}
//Mode One
if (loopCount1 > 0)
{
digitalWrite(blueLed, HIGH);
digitalWrite(redLed, LOW);
delay(18); // wait for a second
digitalWrite(blueLed, LOW);
digitalWrite(redLed, HIGH);
delay(18);
--loopCount1;
if (loopCount1 != 0)
{
Serial.print(loopCount1);
Serial.print(" ");
}
else
{
Serial.println(loopCount1);
}
}
//Mode Two
if (loopCount2 > 0)
{
digitalWrite(blueLed, HIGH);
digitalWrite(redLed, LOW);
delay(100); // wait for a second
digitalWrite(blueLed, LOW);
digitalWrite(redLed, HIGH);
delay(100);
--loopCount2;
if (loopCount2 != 0)
{
Serial.print(loopCount2);
Serial.print(" ");
}
else
{
Serial.println(loopCount2);
}
}
//Mode Three
if (loopCount3 > 0)
{
digitalWrite(blueLed, HIGH);
digitalWrite(redLed, HIGH);
delay(10); // wait for a second
digitalWrite(blueLed, LOW);
digitalWrite(redLed, LOW);
delay(20);
--loopCount3;
if (loopCount3 != 0)
{
Serial.print(loopCount3);
Serial.print(" ");
}
else
{
Serial.println(loopCount3);
}
}
//Turn OFF LEDs if all loopCounters are zeroed
if ((loopCount1 == 0) and (loopCount2 == 0) and (loopCount3 == 0))
{
//digitalWrite(ledPin, LOW);
digitalWrite(redLed, LOW);
digitalWrite(blueLed, LOW);
//delay(30);
}
// end main loop
}
-----------------------------------------------
Program for 3-color 6-mode wand :
//darthPotter_01.ino
// constants won't change. They're used here to set pin numbers:
const int ledPin = 13; // the number of the LED pin
const int buttonPin = 3; // the number of the pushbutton pin
const int redLed = 11;
const int greenLed = 10;
const int blueLed = 9;
// variables will change:
int x = 0;
int redBrightness = 0; // how bright the red LED is
int greenBrightness = 0; // how bright the green LED is
int blueBrightness = 0; // how bright the blue LED is
int fadeAmount = 3; // how many points to fade the LED by
int buttonState = 0; // variable for reading the pushbutton status
int buttonCount = 0;
int buttonPressed = 0;
int buttonOff = 0;
int loopCount = 0;
//modeLocks are for one-shot code
int modeLock0 = 0;
int modeLock1 = 0;
int modeLock2 = 0;
int modeLock3 = 0;
int modeLock4 = 0;
int modeLock5 = 0;
// Setup function runs once when you press reset or power the board
void setup()
{
// initialize digital pin LED_BUILTIN as an output.
pinMode(ledPin, OUTPUT);
pinMode(blueLed, OUTPUT);
pinMode(redLed, OUTPUT);
pinMode(greenLed, OUTPUT);
pinMode(buttonPin, INPUT);
analogWrite(redLed, 255);
analogWrite(blueLed, 255);
analogWrite(greenLed, 255);
Serial.begin(9600);
delay(1500);
}
// MAIN LOOP function runs over and over again forever
void loop(){
// read the state of the pushbutton value:
buttonState = digitalRead(buttonPin);
// output to on board led
digitalWrite(ledPin,buttonState);
// check if the pushbutton is pressed. If it is, the buttonState is HIGH:
if ((buttonState == LOW) and (buttonPressed == 0))
{
buttonPressed = 1;
buttonOff = 0;
buttonCount++;
loopCount=0;
Serial.println(buttonCount);
if (buttonCount > 5)
{
buttonCount = 0;
Serial.println("Button counter reset!");
}
Serial.println("Button pressed...");
Serial.print("number of button pushes: ");
Serial.println(buttonCount);
delay(60);
}
//Set button-OFF flag when button is released
if ((buttonState == HIGH) and (buttonOff == 0))
{
buttonPressed = 0;
buttonOff = 1;
Serial.println("Button is OFF...");
delay(60);
}
//begin mode 0
//all lights on - zero is full ON
if (buttonCount == 0 && modeLock0 == 0){
//unlock mode 5
if (modeLock5==1){
modeLock5=0;
}
if (redBrightness>0){
redBrightness=0;
}
if (greenBrightness>0){
greenBrightness=0;
}
if (blueBrightness>0){
blueBrightness=0;
}
analogWrite(redLed, redBrightness);
analogWrite(greenLed, greenBrightness);
analogWrite(blueLed, blueBrightness);
modeLock0 = 1;
//delay(60);
}
// begin mode 1
if (buttonCount == 1){
//unlock mode 0
if (modeLock0==1){
modeLock0 = 0;
}
//initialize mode 1
if (modeLock1 == 0){
loopCount = 0;
fadeAmount = 5;
redBrightness = 0;
greenBrightness = 0;
blueBrightness = 0;
modeLock1 = 1;
}
// set the brightness of redLed
analogWrite(redLed, redBrightness);
//Serial.print(redBrightness);
// change the brightness for next time through the loop:
redBrightness = redBrightness + fadeAmount;
// reverse the direction of the fading at the ends of the fade:
if (redBrightness <= 0 || redBrightness >= 255) {
fadeAmount = -fadeAmount;
}
if (redBrightness == 80) {
analogWrite(blueLed, 120);
}
else{
analogWrite(blueLed, 255);
}
if (redBrightness == 180) {
analogWrite(blueLed, 160);
}
else{
analogWrite(blueLed, 255);
}
if (redBrightness == 230) {
analogWrite(greenLed, 120);
}
else{
analogWrite(greenLed, 255);
}
if (redBrightness == 60) {
analogWrite(greenLed, 160);
}
else{
analogWrite(greenLed, 255);
}
// wait for 20 milliseconds to see the dimming effect
delay(20);
}
// end mode 1
// begin mode 2
if (buttonCount == 2){
//unlock mode 1
if (modeLock1 == 1){
modeLock1 = 0;
}
//initialize mode 2
if (modeLock2 == 0){
loopCount = 0;
fadeAmount = 5;
redBrightness = 0;
greenBrightness = 0;
blueBrightness = 0;
modeLock2 = 1;
}
// set the brightness of greenLed
analogWrite(greenLed, greenBrightness);
//Serial.print(redBrightness);
// change the brightness for next time through the loop:
greenBrightness = greenBrightness + fadeAmount;
// reverse the direction of the fading at the ends of the fade:
if (greenBrightness <= 0 || greenBrightness >= 255) {
fadeAmount = -fadeAmount;
}
if (greenBrightness == 80) {
analogWrite(blueLed, 120);
}
else{
analogWrite(blueLed, 255);
}
if (greenBrightness == 180) {
analogWrite(blueLed, 160);
}
else{
analogWrite(blueLed, 255);
}
if (greenBrightness == 230) {
analogWrite(redLed, 125);
}
else{
analogWrite(redLed, 255);
}
if (greenBrightness == 60) {
analogWrite(redLed, 165);
}
else{
analogWrite(redLed, 255);
}
// wait for 20 milliseconds to see the dimming effect
delay(20);
}
// end mode 2
// begin mode 3
if (buttonCount == 3){
//unlock mode 2
if (modeLock2 == 1){
modeLock2 = 0;
}
//initialize mode 3
if (modeLock3 == 0){
loopCount = 0;
fadeAmount = 5;
redBrightness = 0;
greenBrightness = 0;
blueBrightness = 0;
modeLock3 = 1;
}
// set the brightness of blueLed
analogWrite(blueLed, blueBrightness);
// change the brightness for next time through the loop:
blueBrightness = blueBrightness + fadeAmount;
// reverse the direction of the fading at the ends of the fade:
if (blueBrightness <= 0 || blueBrightness >= 255) {
fadeAmount = -fadeAmount;
}
if (blueBrightness == 80) {
analogWrite(redLed, 120);
}
else{
analogWrite(redLed, 255);
}
if (blueBrightness == 180) {
analogWrite(redLed, 160);
}
else{
analogWrite(redLed, 255);
}
if (blueBrightness == 230) {
analogWrite(greenLed, 125);
}
else{
analogWrite(greenLed, 255);
}
if (blueBrightness == 60) {
analogWrite(greenLed, 165);
}
else{
analogWrite(greenLed, 255);
}
// wait for 20 milliseconds to see the dimming effect
delay(20);
}
// end mode 3
// begin mode 4 ramp up and down with overlap
if (buttonCount == 4){
//unlock mode 3
if (modeLock3 == 1){
modeLock3 = 0;
}
//initialize mode 4
if (modeLock4 == 0){
loopCount = 0;
fadeAmount = 5;
redBrightness = 0;
greenBrightness = 0;
blueBrightness = 255;
modeLock4 = 1;
}
loopCount++;
if (loopCount>=307){
loopCount=0;
}
//ramp red up
if (loopCount < 52){
if (redBrightness < 255){
redBrightness = redBrightness + fadeAmount;
}
analogWrite(redLed, redBrightness);
}
//ramp blue down
if (loopCount > 51 && loopCount < 103){
if (blueBrightness>=fadeAmount){
blueBrightness = blueBrightness - fadeAmount;
}
analogWrite(blueLed, blueBrightness);
}
//ramp green up
if (loopCount > 102 && loopCount < 154){
if (greenBrightness<255){
greenBrightness = greenBrightness + fadeAmount;
}
analogWrite(greenLed, greenBrightness);
}
//ramp red down
if (loopCount > 153 && loopCount < 205){
if (redBrightness>=fadeAmount){
redBrightness = redBrightness - fadeAmount;
}
analogWrite(redLed, redBrightness);
}
//ramp blue up
if (loopCount > 203 && loopCount < 256){
if (blueBrightness<255){
blueBrightness = blueBrightness + fadeAmount;
}
analogWrite(blueLed, blueBrightness);
}
//ramp green down
if (loopCount > 254 && loopCount < 307){
if (greenBrightness>=fadeAmount){
greenBrightness = greenBrightness - fadeAmount;
}
analogWrite(greenLed, greenBrightness);
}
delay(20);
}
// end mode 4
// begin mode 5 flash fast in sequence
if (buttonCount == 5){
//unlock mode 4
if (modeLock4 == 1){
modeLock4 = 0;
}
loopCount++;
if (loopCount >= 30){
loopCount = 0;
}
//turn red on
if (loopCount < 15){
analogWrite(redLed, 255);
}
else{
analogWrite(redLed, 0);
}
//turn green on
if (loopCount > 9 && loopCount < 25){
analogWrite(greenLed, 255);
}
else{
analogWrite(greenLed, 0);
}
//turn blue on
if (loopCount > 19 || loopCount < 5){
analogWrite(blueLed, 255);
}
else{
analogWrite(blueLed, 0);
}
delay(5);
}
// end mode 5
}
// end main loop
Similar models
grabcad
free

Easy Pump arduino stepper
...aymicroseconds(300); // wait 1/2 a ms
}
delay(1000); // pause one second
}
else {
digitalwrite(6, high); // set enable low
}
}
grabcad
free

Automatic Slide Gate Maket
...lwrite (dcl,low);
}
if(limitkanan==1 && hasilkiri==1){
digitalwrite (dcr,low);
digitalwrite (dcl,high);
}
}
grabcad
free

case for Digispark Attiny85
...ecommendation:
petg filament
layer height 0.2 mm
nozzle 0.6 or 0.4 mm
15% - 20% filling
without supports
orient the x on the bed
grabcad
free

Metal Push button Switch with ring LED 22mm
...ton switch with ring led 22mm
grabcad
metal pushbutton switch with ring led 22mm
thanks for r.w.a-1
https://grabcad.com/r.w.a-1
grabcad
free

Panel Mount Cycle Delay Timer relay
...eting your most demands
• mounting size: 71 x 40 x 24mm/2.79 x 1.57 x 0.94 inch (l*w), compatible load: ac 250v 10a / dc 30v 10a
grabcad
free

Automatic fish food feeder Arduino based
...oop()
{
switch(i%2)
( case 0:
myservo.write(180);
delay(10000);
break;
case 1:
myservo.write(90);
delay(7200000);
break;
}
i++
}
grabcad
free

0-60Min Delay Timer Timing Infinite Cycle Switch Relay ON OFF Trigger Module
...ge(uc) of resistor. take a 5v 15min module as example. if uc=2v, time=2v/5v*15min=6min.
package included:
1pc*timer relay module
grabcad
free

LUVA ROSCA INT. 1/2"
...luva rosca int. 1/2"
grabcad
luva rosca int. 1/2"
grabcad
free

USB IO card
...80mm / 4.3 x 3.2"
please don't forget to 'like' the model if you download - that is the only payment. enjoy :-)
grabcad
free

Totalizer, 12VDC (Pulse/Switch-0-9999)
.../off) from relay, and the quantity of counter will reset and clear automatically. high-speed ic, bright red led, easy to install.
Elder
grabcad
free

Elder wand
...elder wand
grabcad
elder wand
grabcad
free

Elder Scrolls
...elder scrolls
grabcad
pendant design
grabcad
free

ELDER WAND
...elder wand
grabcad
harry potter wand
grabcad
free

ELDER (Welding Clamp)
...lder is a production aids where helps engineer in welding process, this tool also provides angular and better position at welding
grabcad
free

The Elder Wand
...the elder wand
grabcad
probably not the best but its my first attempt so meh ^-^
grabcad
free

Harry Potter Elder Wand
...harry potter elder wand
grabcad
harry potter elder wand. this model has ready for 3d printer production.
grabcad
free

Bottle Opener for elders
...uct is helpful for persons having weakness due to age or some disability to hold things tightly.
this is still under development.
grabcad
free

The Elder Wand from Harry Potter
...the elder wand from harry potter
grabcad
modeled in solidworks 2016
rendered in keyshot
grabcad
free

Elder Wand - Harry potter
...l hair of a thestral, a potent yet tricky substance to master; only a witch or wizard who is capable of accepting death can do so
grabcad
free

The Elder Scrolls Online Ring - Charm - Emblem
....
the entire model made with t-splines.
render in keyshot.
i think it is a great model to practice your render skills...
enjoy!
Wand
grabcad
free

Wand
...wand
grabcad
one of the wand used in harry potter movie. it is used to summon magic.
grabcad
free

Wand
...wand
grabcad
my own version of a wand from the movie "harry potter"
grabcad
free

PRINCES WAND
...princes wand
grabcad
princes wand
grabcad
free
Elder wand
...elder wand
grabcad
elder wand
grabcad
free

Amazing Bubble Wands!
...e wand
---------------------------------2 new wands--------------------------------
shooting star bubble wand
minion bubble wand
grabcad
free
ELDER WAND
...elder wand
grabcad
harry potter wand
grabcad
free

ENERGY WAND
...energy wand
grabcad
ho
grabcad
free

Shot glass and wand
...shot glass and wand
grabcad
shot glass's with serving wand.
grabcad
free

wand sextoy
...wand sextoy
grabcad
very effective...
grabcad
free

Presentation wand
...presentation wand
grabcad
neues design
Vader
grabcad
free

Darth Vader
...darth vader
grabcad
darth vader wall art
grabcad
free

Darth Vader
...darth vader
grabcad
full body of darth vader
grabcad
free

darth vader
...darth vader
grabcad
darth vader helmet from star wars
grabcad
free

Dart Vader lego
...dart vader lego
grabcad
dart vader lego
grabcad
free

Darth Vader Lightsaber
...darth vader lightsaber
grabcad
star wars
darth vader lightsaber
grabcad
free

Vader Mold V3
...vader mold v3
grabcad
mold (mould) of darth vader’s head
grabcad
free

DARTH VADER
...darth vader
grabcad
helmet
grabcad
free

Darth Vader Lightsaber
...darth vader lightsaber
grabcad
master replica lightsaber from darth vader
grabcad
free

Darth Vader Helmet
...darth vader helmet
grabcad
just darth vader's helmet.
grabcad
free

dark vader
...dark vader
grabcad
its a worm
Saber
grabcad
free

Saber
...saber
grabcad
cossack toy saber)
grabcad
free

Saber
...saber
grabcad
just a saber model
grabcad
free

Saber tooth
...saber tooth
grabcad
saber tooth
grabcad
free

Light Saber
...light saber
grabcad
light saber
grabcad
free

Light Saber
...light saber
grabcad
green light saber
grabcad
free

INIT's Saber
...init's saber
grabcad
light saber
grabcad
free

Saber
...saber
grabcad
star wars weapon.
grabcad
free

Light saber
...light saber
grabcad
luke's light saber
grabcad
free

Dark Saber
...dark saber
grabcad
a model of the infamous mandalorian weapon, the dark saber.
grabcad
free

LIGHT SABER
...light saber
grabcad
light saber make in blender with extend light effect.
Harry
grabcad
free

Harris Loom
...harris loom
grabcad
8 shaft harris loom
grabcad
free

harry potter dxf
...harry potter dxf
grabcad
harry potter dxf
grabcad
free

Tactital Radio Harris
...tactital radio harris
grabcad
harris tactical radio
grabcad
free

Harry potter ball
...harry potter ball
grabcad
harry potter ball
grabcad
free

Harrie Leenders Mats
...rie leenders mats
grabcad
harrie leenders mats
dutch design wood stove, produced by harrie leenders, oirschot, the netherlands.
grabcad
free

harry potter snitch
...harry potter snitch
grabcad
harry potter snitch ball
grabcad
free

Harry Potter Mobile part (Harry)
...s a part of a mobile the was printed on shapeways. check out some of my other models at http://www.shapeways.com/shops/lucysheart
grabcad
free

Harry Potter Snichet
...harry potter snichet
grabcad
harry potter snichet modelled in solidworks 2k17
grabcad
free

Harrie Leenders Lobbe
...harrie leenders lobbe
grabcad
dutch design wood stove, produced by harrie leenders, oirschot, the netherlands.
grabcad
free

Harrie Leenders Cylon
...harrie leenders cylon
grabcad
dutch design wood stove, produced by harrie leenders, oirschot, the netherlands.
Fully
grabcad
free

Mountainbike Fully
...mountainbike fully
grabcad
full suspension mountainbike
grabcad
free

fully packed cube
...fully packed cube
grabcad
fully packed cube
grabcad
free

Fully Assemble Piston
...fully assemble piston
grabcad
fully assemble piston
grabcad
free

a fully solid model
...a fully solid model
grabcad
a fully solid model
grabcad
free

Fully Defined Sketch
...fully defined sketch
grabcad
these were used to learn fully defined sketch.
grabcad
free

Fully Furnished Kitchen
...fully furnished kitchen
grabcad
fully furnished kitchen with back garden. includes appliances (oven, gas cooker, fridge, hob)
grabcad
free

Fully Customizable Stair
...fully customizable stair
grabcad
fully customizable stair
features 61, solids 70, surfaces 0
total rebuild time in seconds: 8.94
grabcad
free

fully constrain shaft
...fully constrain shaft
grabcad
2
grabcad
free

Brake Disc Fully Assemble
...brake disc fully assemble
grabcad
brake disc fully assemble
grabcad
free

Fully Automatic Hospital Bed
...fully automatic hospital bed
grabcad
design of fully automatic hospital bed
Operational
grabcad
free

operator
...operator
grabcad
operator
grabcad
free

Operator
...operator
grabcad
operator
grabcad
free

Operator
...operator
grabcad
operator
grabcad
free

operator
...operator
grabcad
operator
grabcad
free

Operador / operator
...operador / operator
grabcad
operador homem, operador mulher
man operator, woman operator
grabcad
free

operator paneli
...operator paneli
grabcad
operator paneli
grabcad
free

OPERATOR PANEL
...operator panel
grabcad
operator panel
grabcad
free

Operator Board
...operator board
grabcad
operator board
grabcad
free

Operating tool
...operating tool
grabcad
operating tool
grabcad
free

operation table
...operation table
grabcad
operation table
Armed
grabcad
free

arm
...arm
grabcad
arm
grabcad
free

Arm
...arm
grabcad
arm
grabcad
free

Arm
...arm
grabcad
arm
grabcad
free

arm
...arm
grabcad
arm
grabcad
free

arm
...arm
grabcad
arm
grabcad
free

arm
...arm
grabcad
arm
grabcad
free

arm
...arm
grabcad
arm
grabcad
free

Arms
...arms
grabcad
arms
grabcad
free

Arm
...arm
grabcad
arm
grabcad
free

Arm
...arm
grabcad
arm
Light
grabcad
free

Light
...light
grabcad
light
grabcad
free

LIGHT
...light
grabcad
light
grabcad
free

Light
...light
grabcad
light
grabcad
free

light
...light
grabcad
light
grabcad
free

Light
...light
grabcad
light
grabcad
free

light
...light
grabcad
light
grabcad
free

light
...light
grabcad
light
grabcad
free

Light
...light
grabcad
light
grabcad
free

light
...light
grabcad
light
grabcad
free

Light
...light
grabcad
light